
Table of contents:
The updating process becomes straightforward following creating Custom firmware for an IoT device. New firmware versions are delivered over the air. It is enough for the device (in our case, a Wi-Fi relay) to be connected to the Internet.
This allows the developer to add new functionality to the firmware and fix possible bugs at any time. At this stage, we decided to apply both major and minor updates. We will make changes to the firmware code and the mobile application interface.
Device firmware update
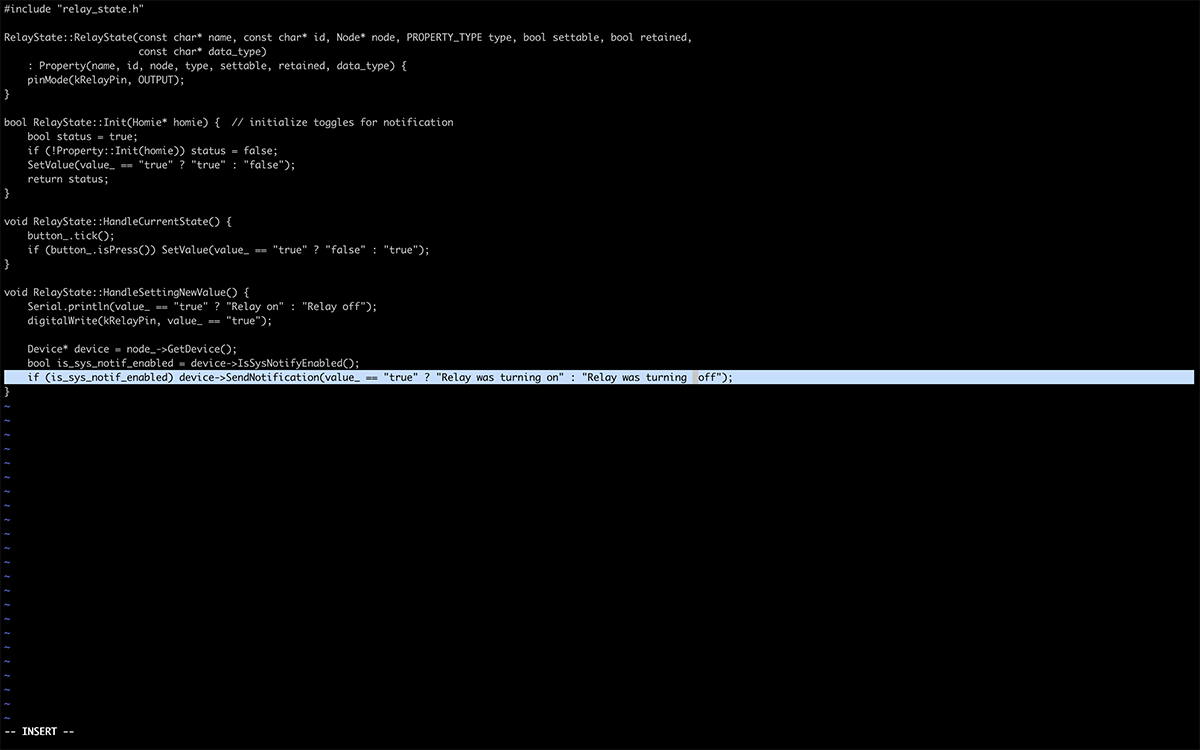
For an example of such an update, let’s use the correction of the notification that the mobile app user receives when the relay is physically turned on and off with a button on the housing. Before the update, the notifications were “Relay on” and “Relay off”. After the update, the text will change to “Relay was turning on” and “Relay was turning off”.
Fixing bugs, adding new functionality, or improving existing functionality – the process for any more significant code update will be similar to the one described below.
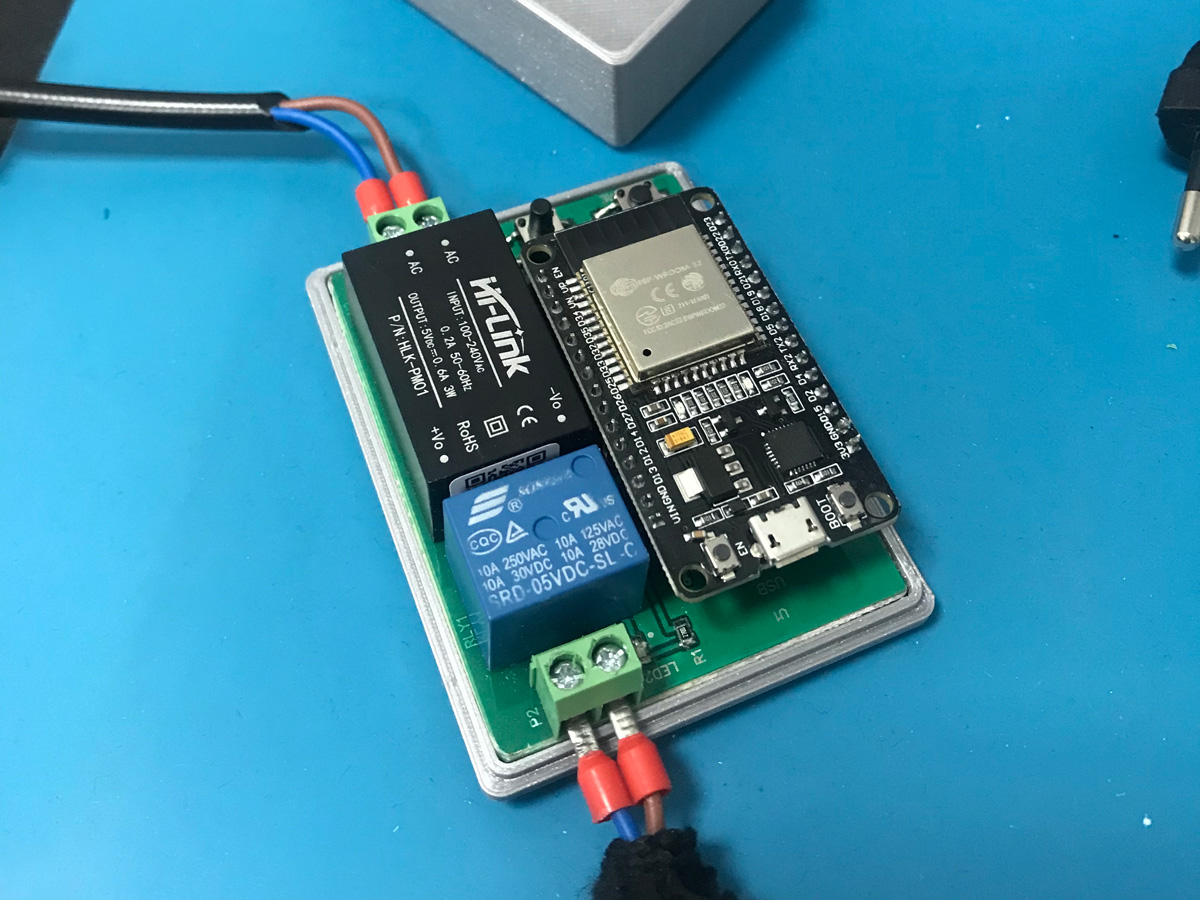
- Prepare a test device (a Wi-Fi relay on a breadboard in our example.) Running devices on printed circuit boards will receive a ready-to-use update after the new firmware version has been published on the platform.

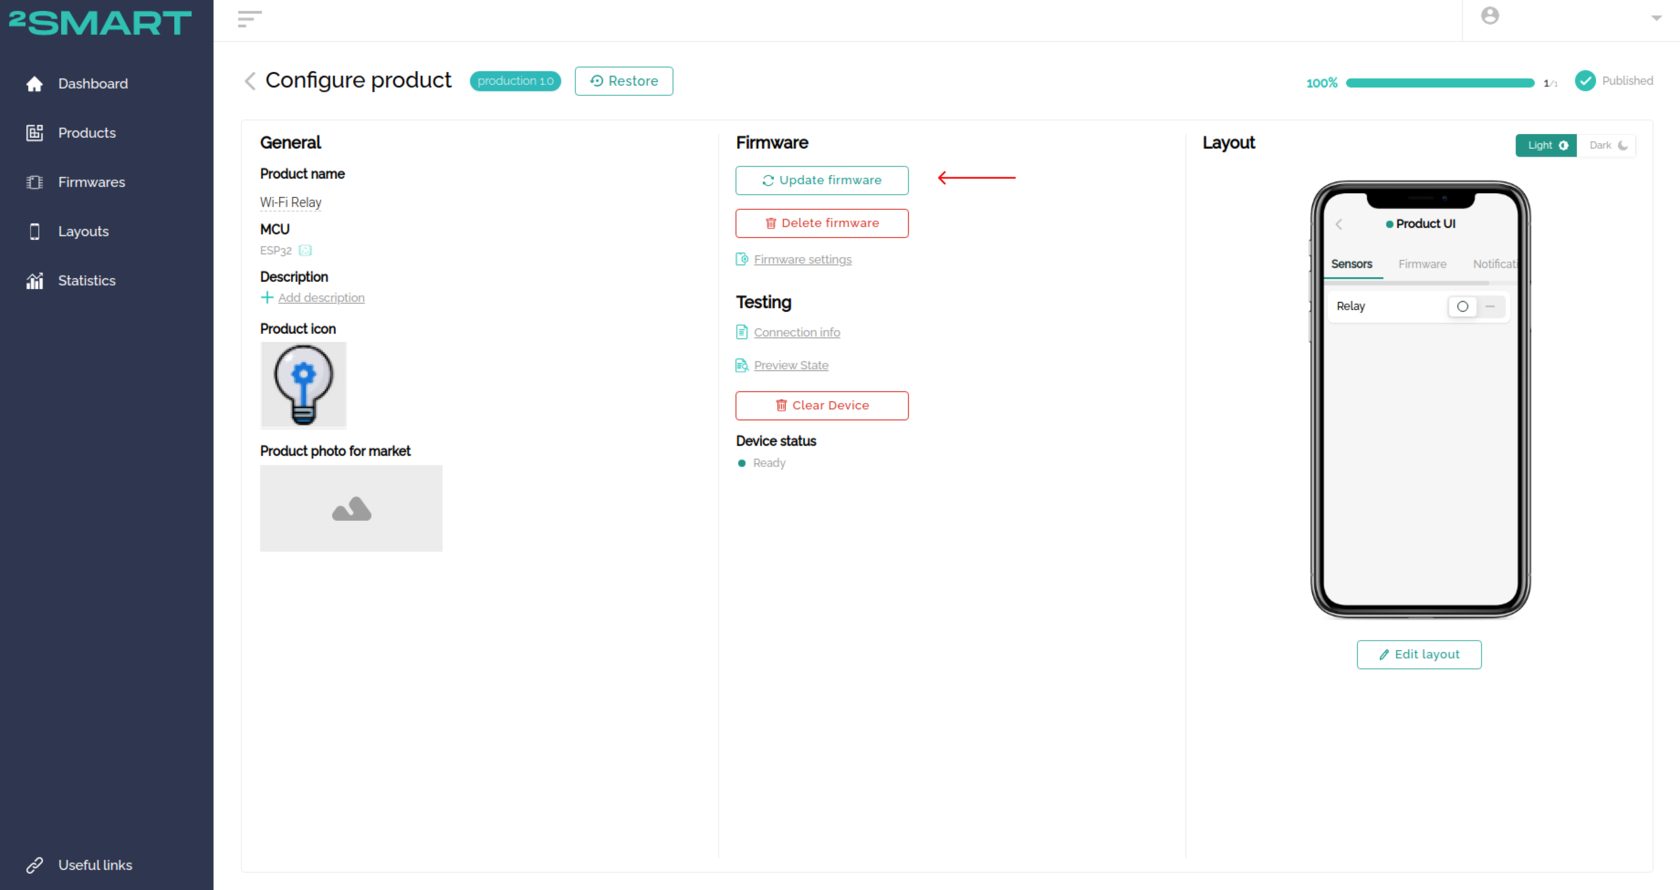
- In the “Products” tab of the developer’s account, select the device which Custom firmware you want to update.

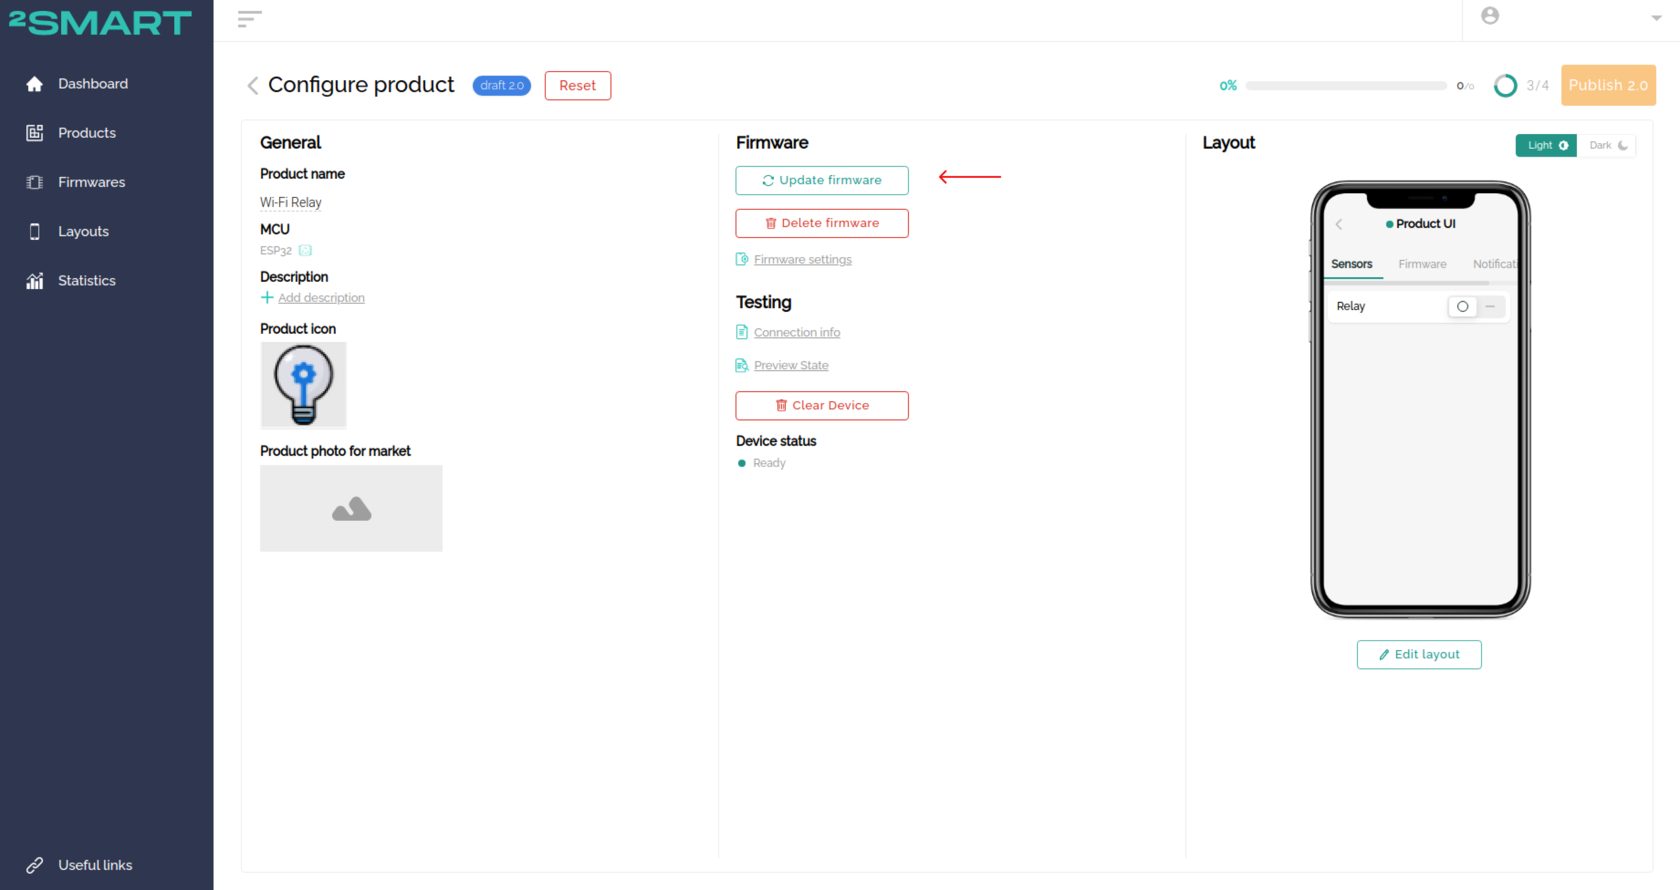
- Click the “Update firmware” link.
- Click “Update firmware”.
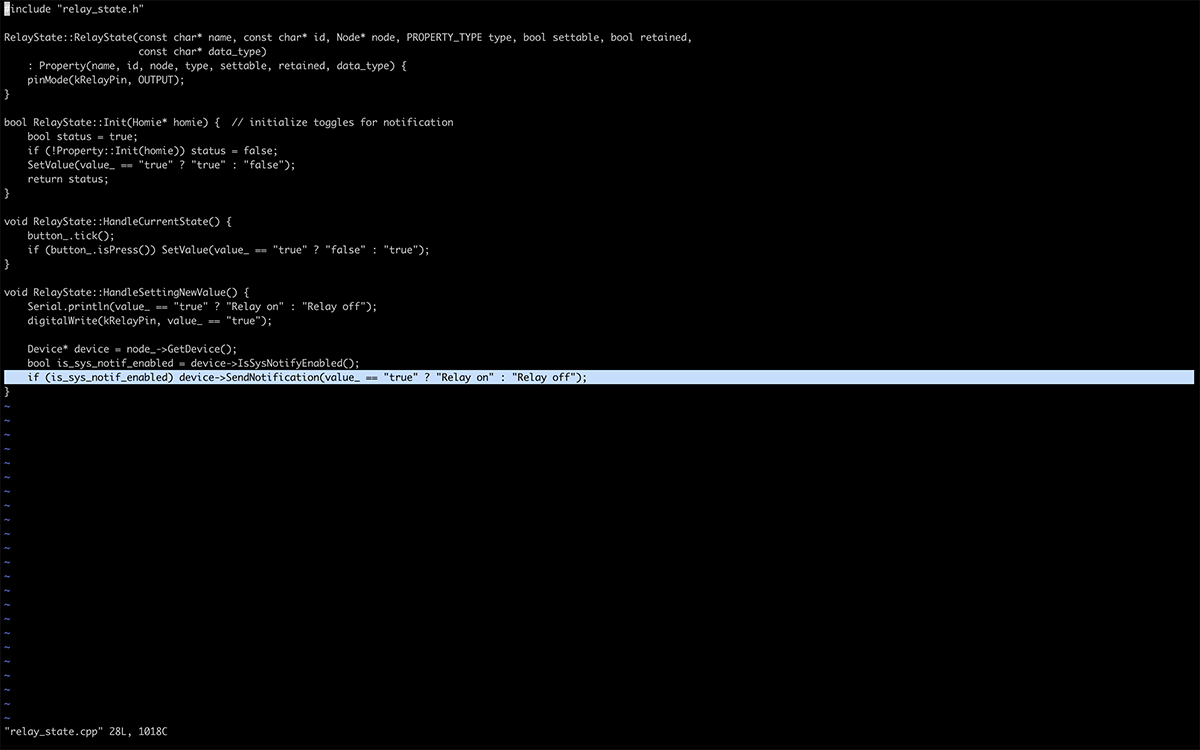
- Find the files that need to be corrected in the firmware sources on your computer and make the necessary changes.
To fix the notification text, we worked with the file located at Firmware/lib/relay_node/property/relay_state.cpp.
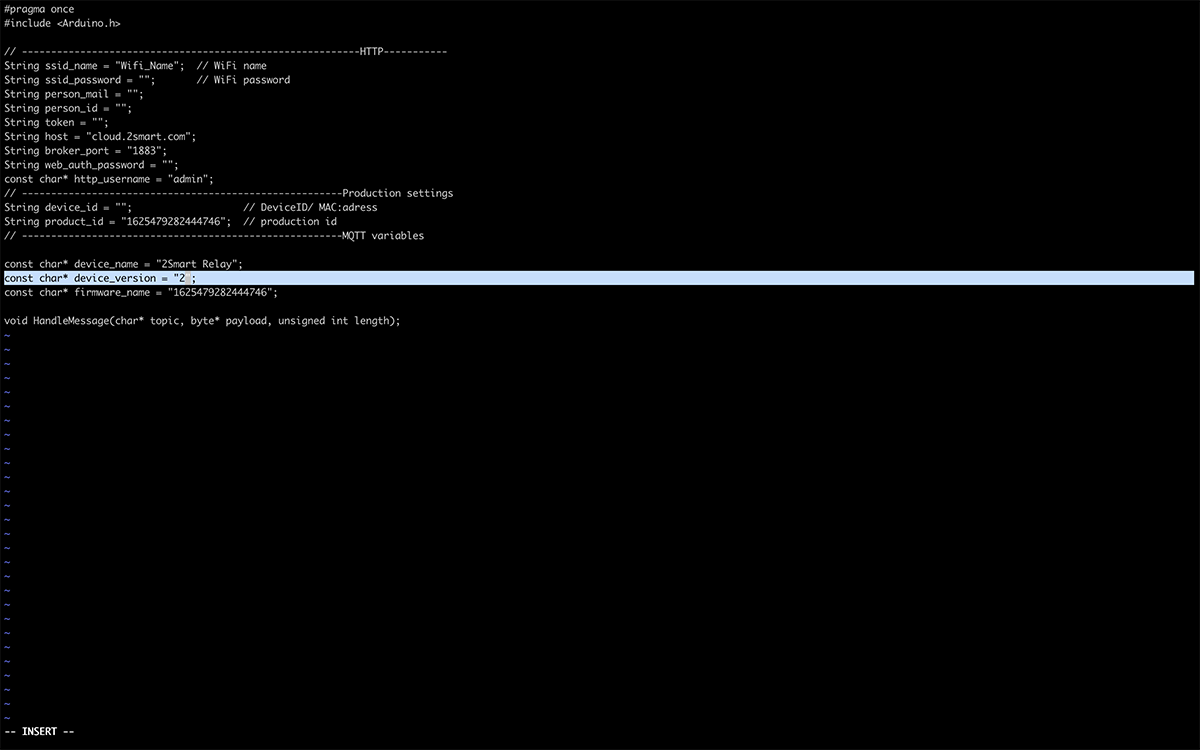
- After fixing the code in the correct files, don’t forget to make changes to /src/main.h. Specify the new version of the device in the “Device Version” field (in our case, correct “1” to “2”).
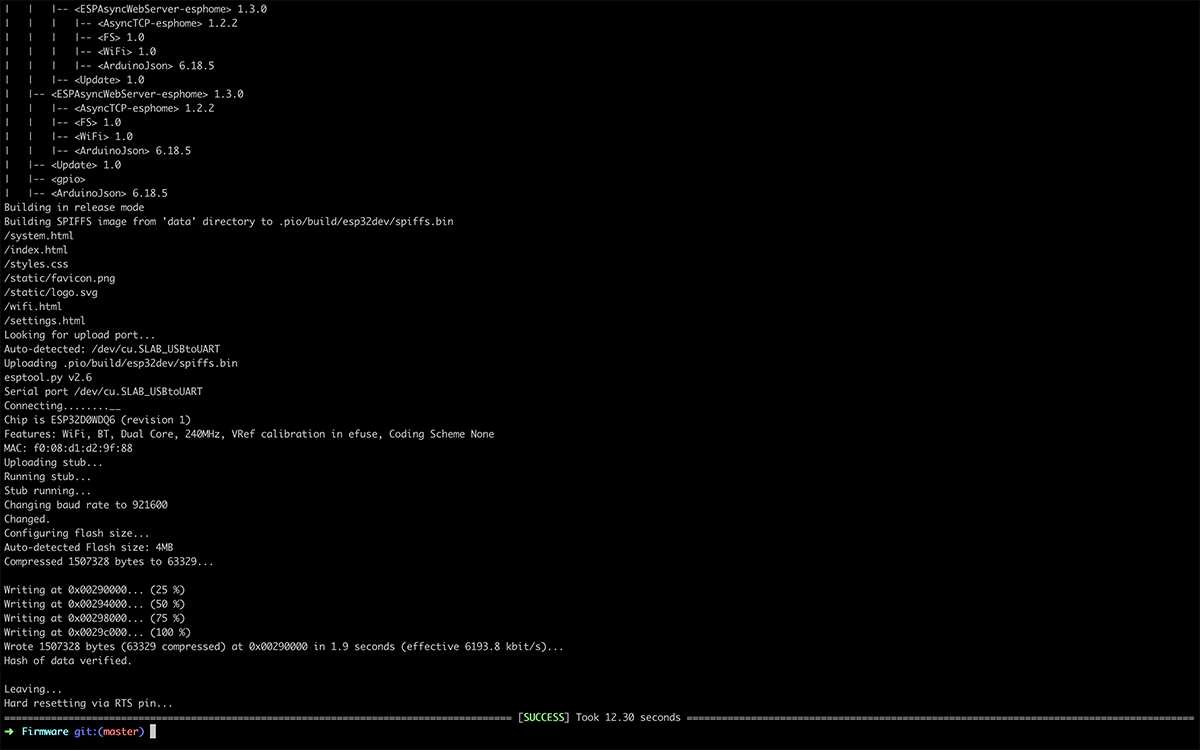
- Flash the test device with the new firmware version via USB cable.
Note! If the firmware has already been installed on the microcontroller, do not forget to remove it according to the documentation. - After completing the flashing process, the device will create a Wi-Fi hotspot with a name that matches that of the device. Connect your computer or smartphone to this Wi-Fi hotspot.

- Follow the link http://192.168.4.1/ to open the web interface of your device.

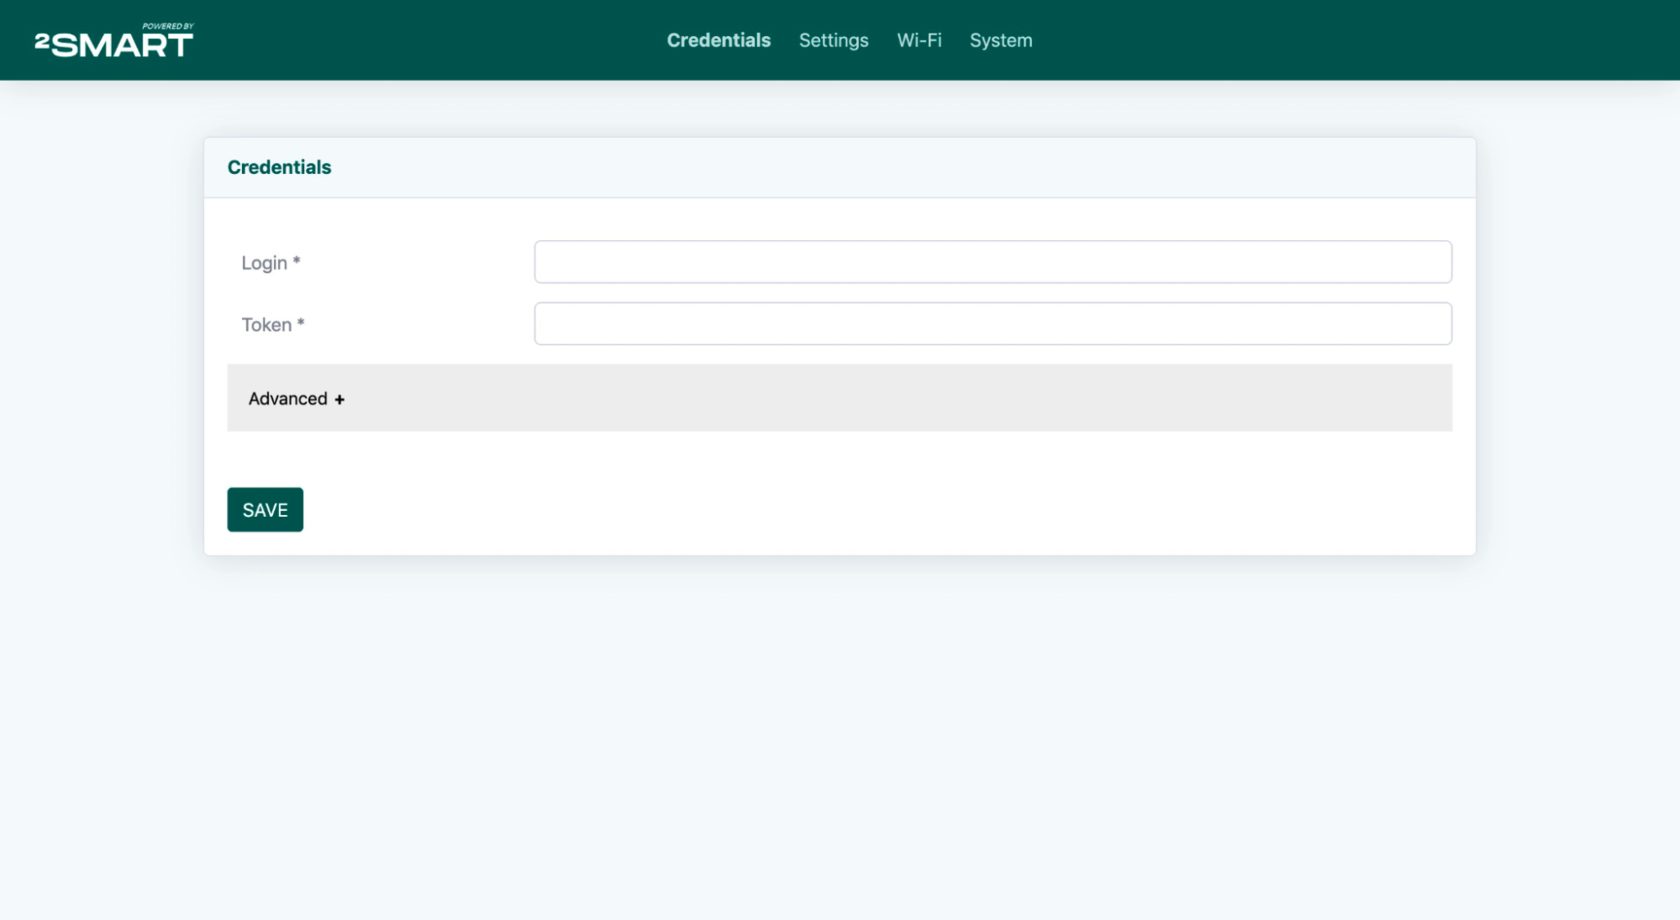
- Copy the values from the “Connection Info” window into the fields on the Credentials tab:
- In the “Login” field – the “User Login” value.
- In the “Token field” – the “Access Token” value.
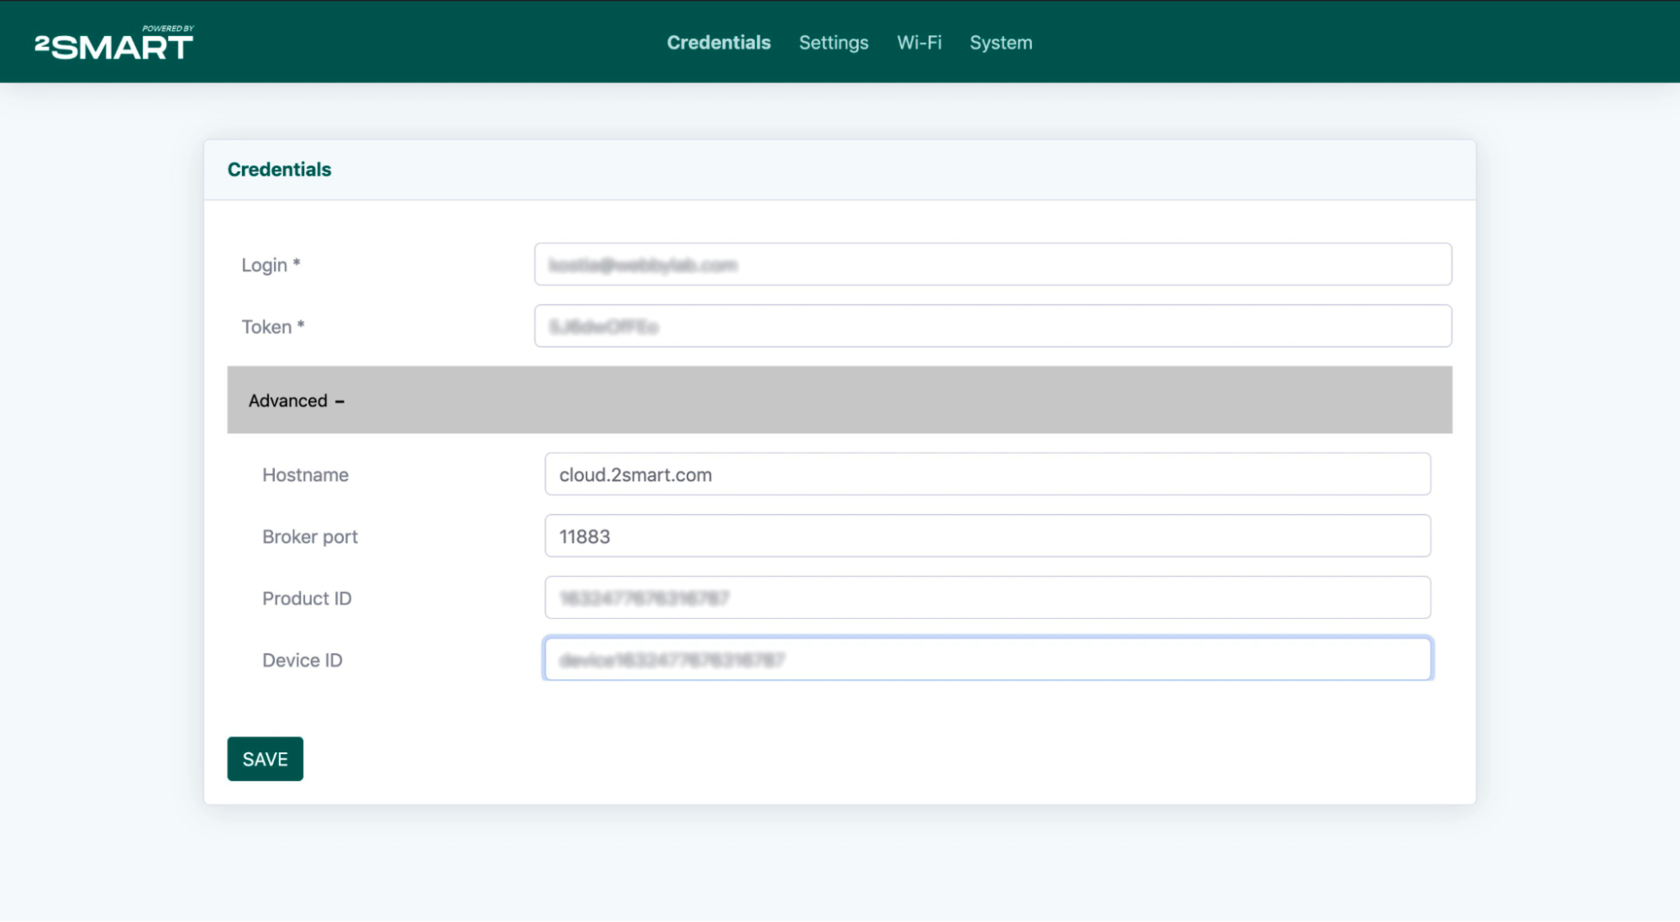
- In the “Hostname” field (under the Advanced spoiler), enter “cloud.2smart.com”.
- In the “Device ID” field, copy the “Test device ID” value.
After filling in all the fields, click Save.

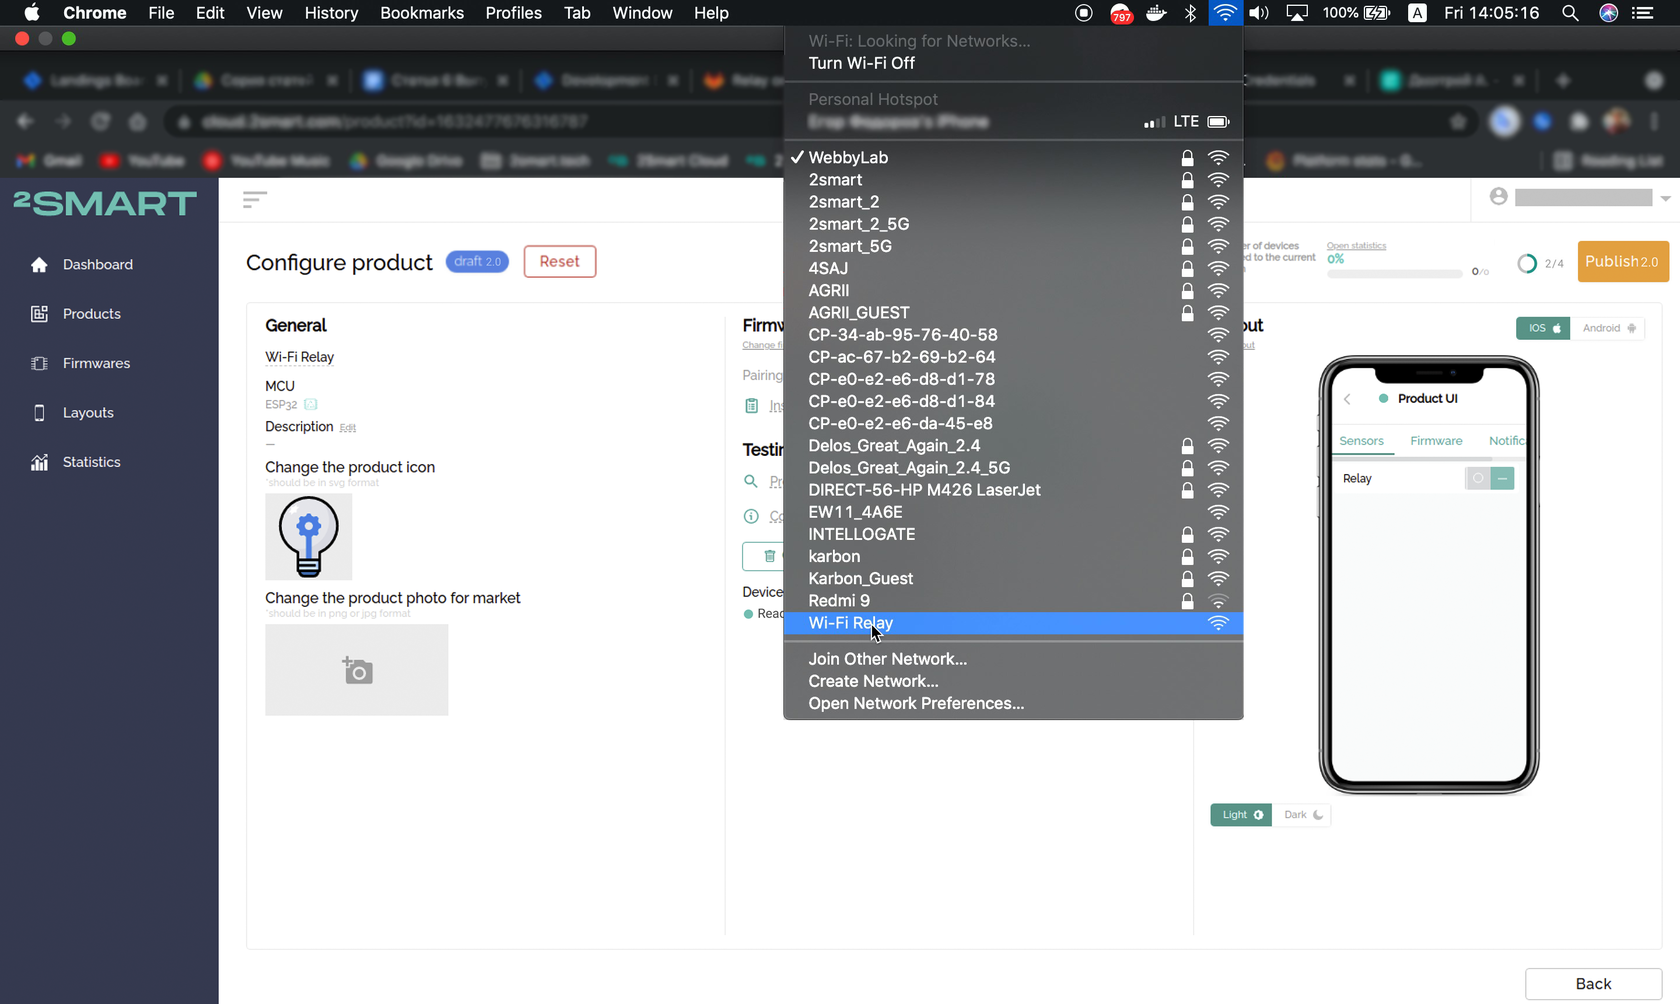
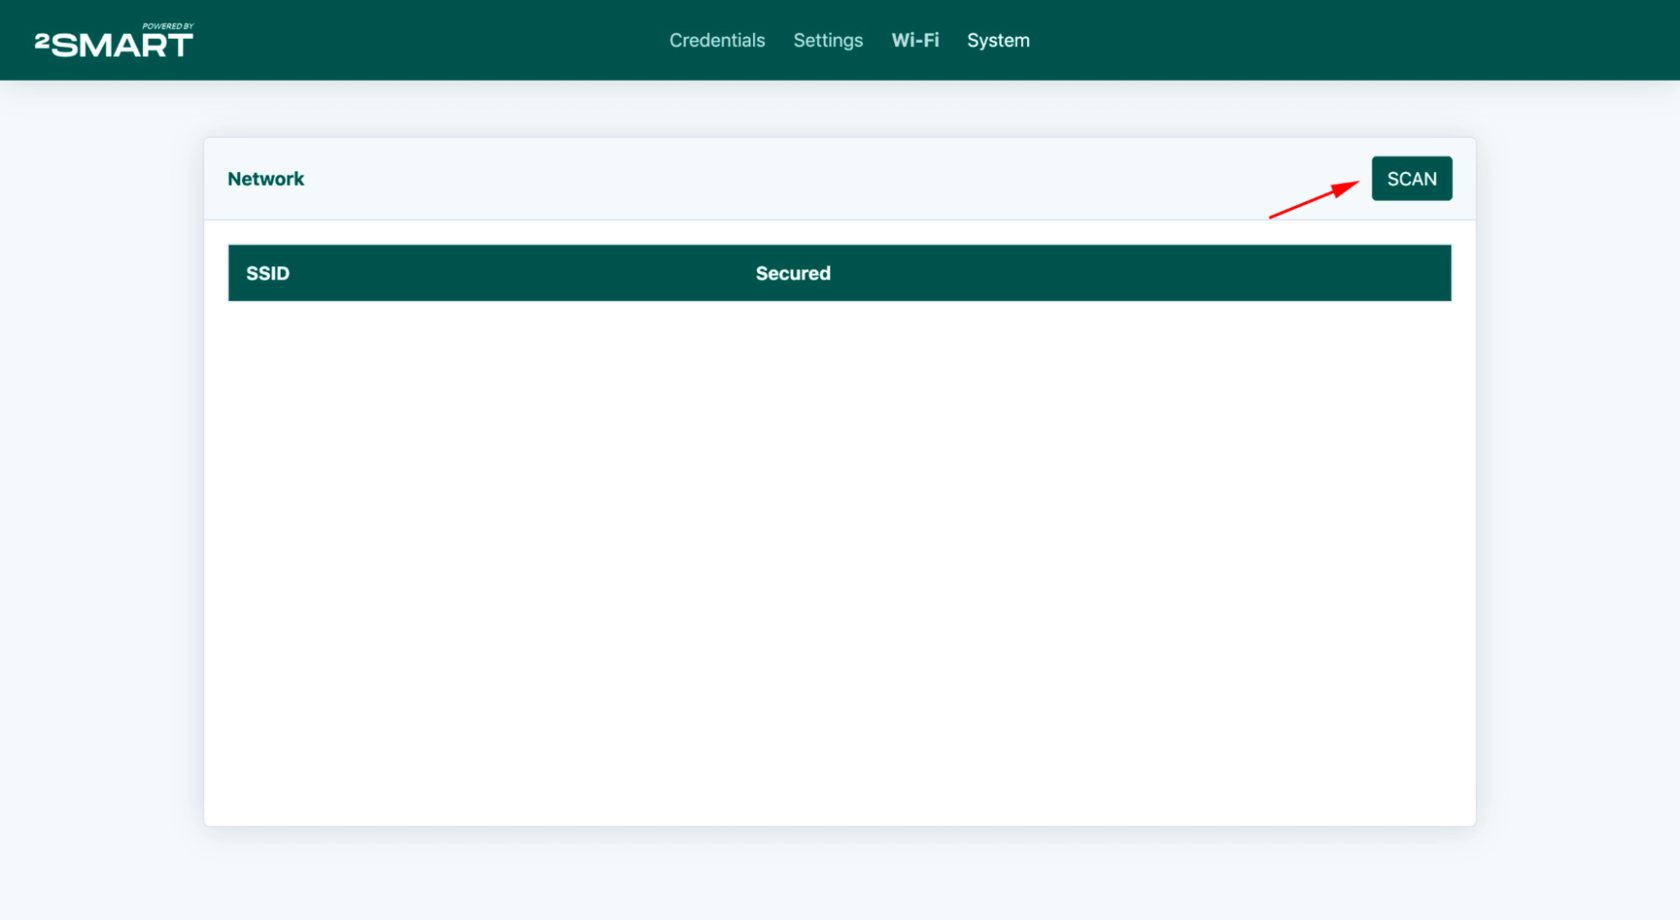
- Assure that your computer is still connected to the device’s Wi-Fi hotspot. Click the “Wi-Fi” tab and then click “Scan”.
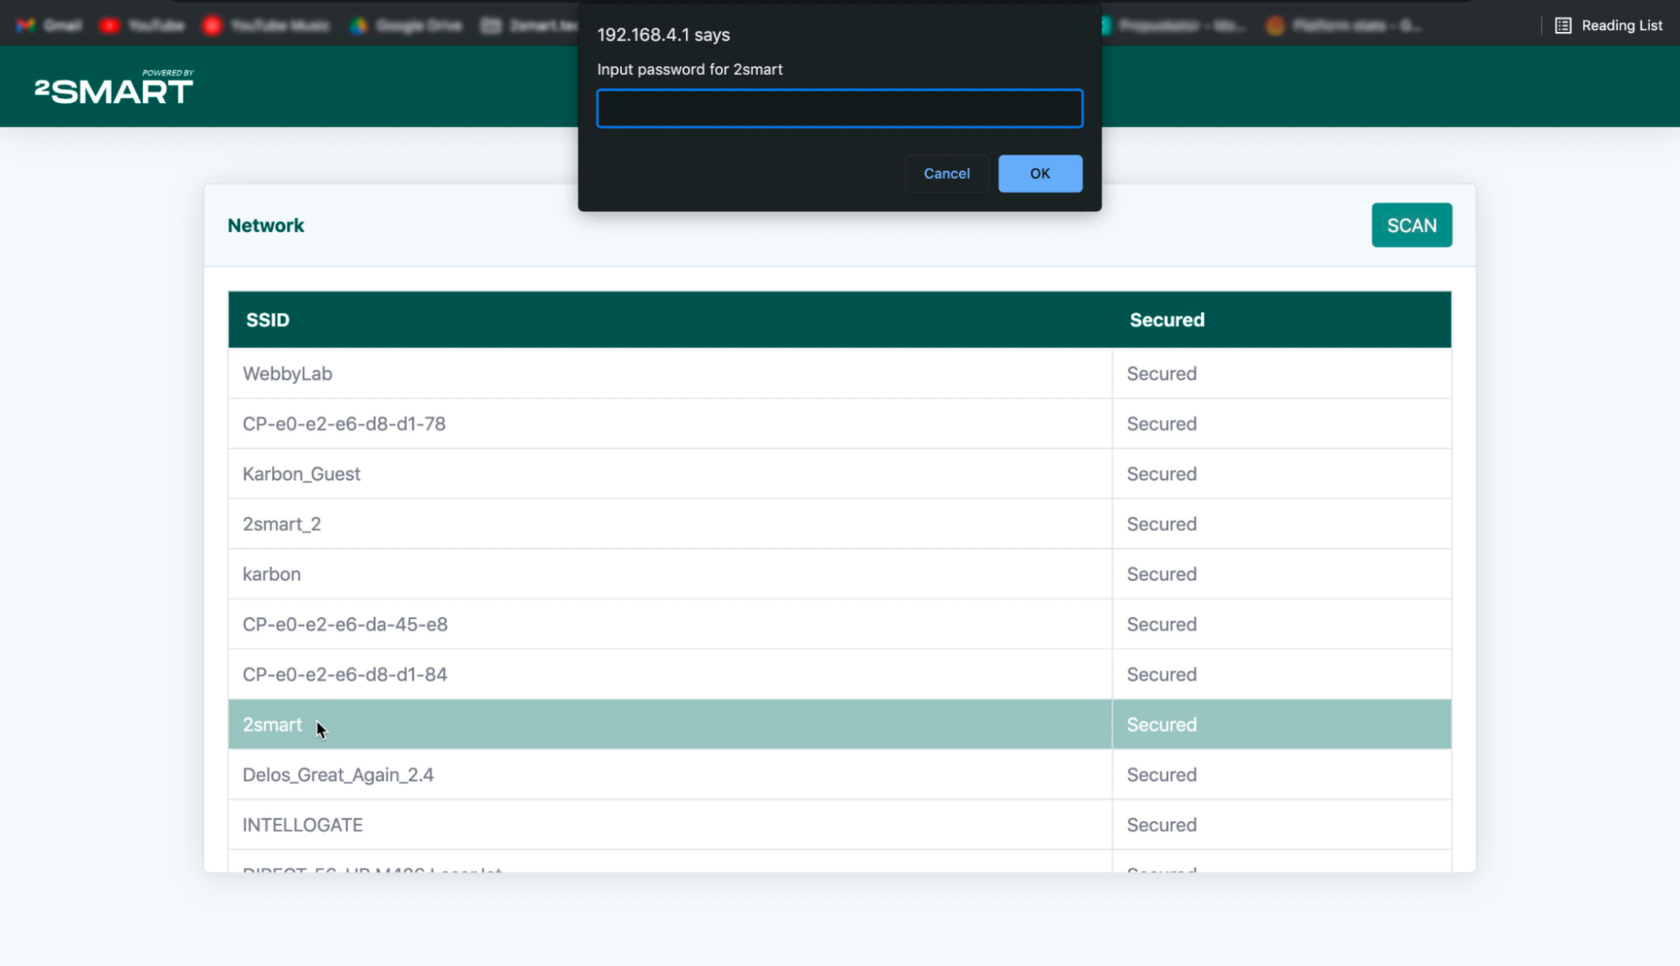
- Select your Wi-Fi network in the list and enter the password to access it. This is necessary, so your Test device can connect to the 2Smart Cloud platform.
Note! Devices based on the ESP32 microcontroller support only Wi-Fi networks with a frequency range of 2.4 GHz!
- Now switch to your Wi-Fi network and open the device page in the developer’s account. After successfully connecting the prototype to the internet, the device status will change to “Ready”.
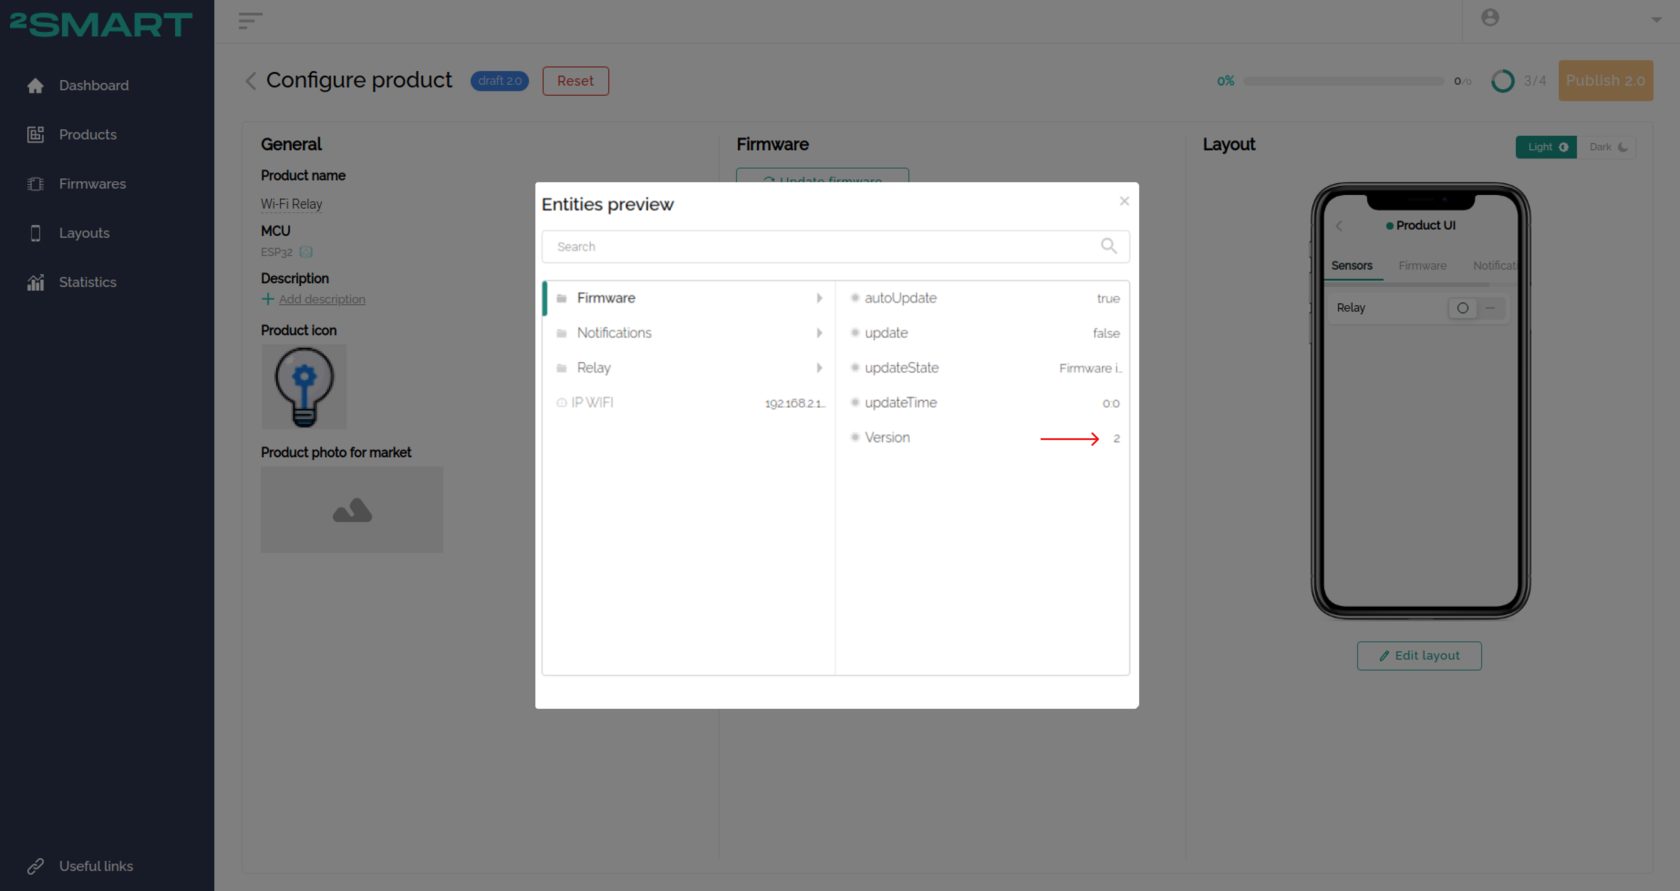
- Click the ” Preview State” link and check that the Firmware Version sensor displays the new firmware version’s value.
- Double-check that the firmware update has given the desired result (notification text has changed). Test the device’s operation similar to the prototype’s initial testing.
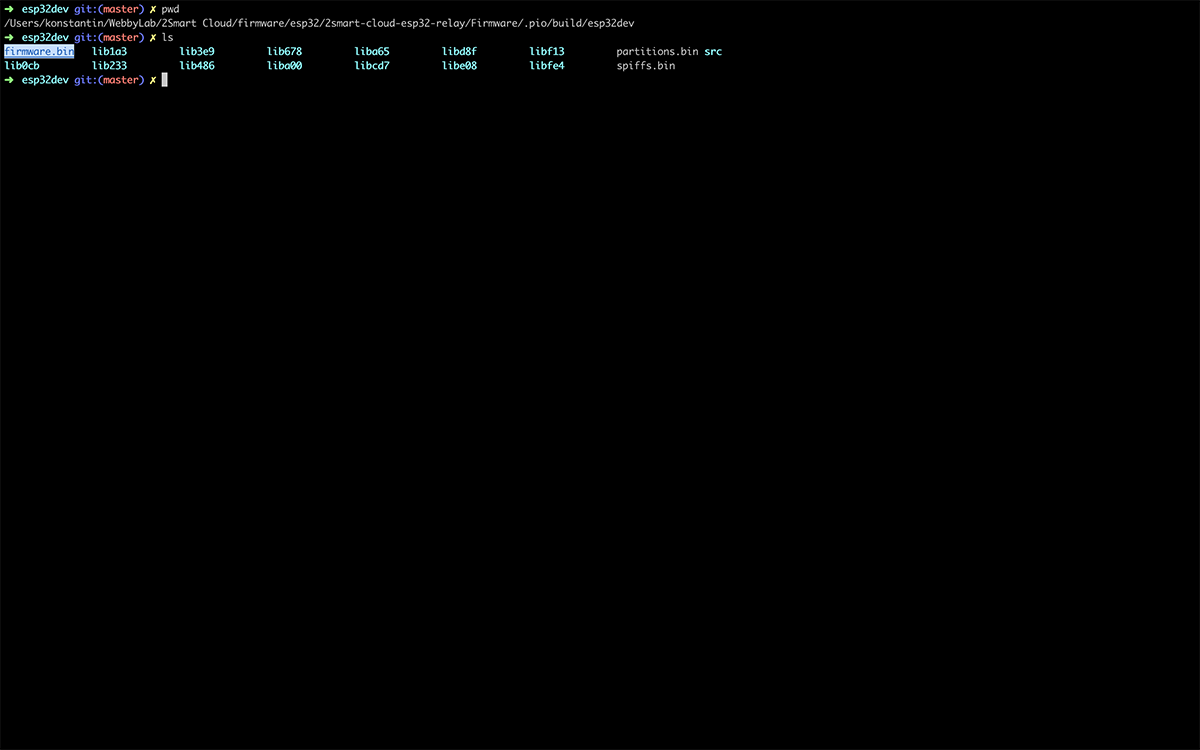
- Build a new version of the firmware on your computer in .bin format.
- If you did not flash the test device with the new firmware, run the pio run command, and the file with the updated firmware will be available in the Firmware/.pio/build/esp32dev/firmware.bin folder.
- If the device flashed according to the standard procedure, the finished file will be in the project folder -> Firmware/.pio/build/esp32dev/firmware.bin.
- Click the “Update Firmware” link and upload the ready-made firmware file to the platform.
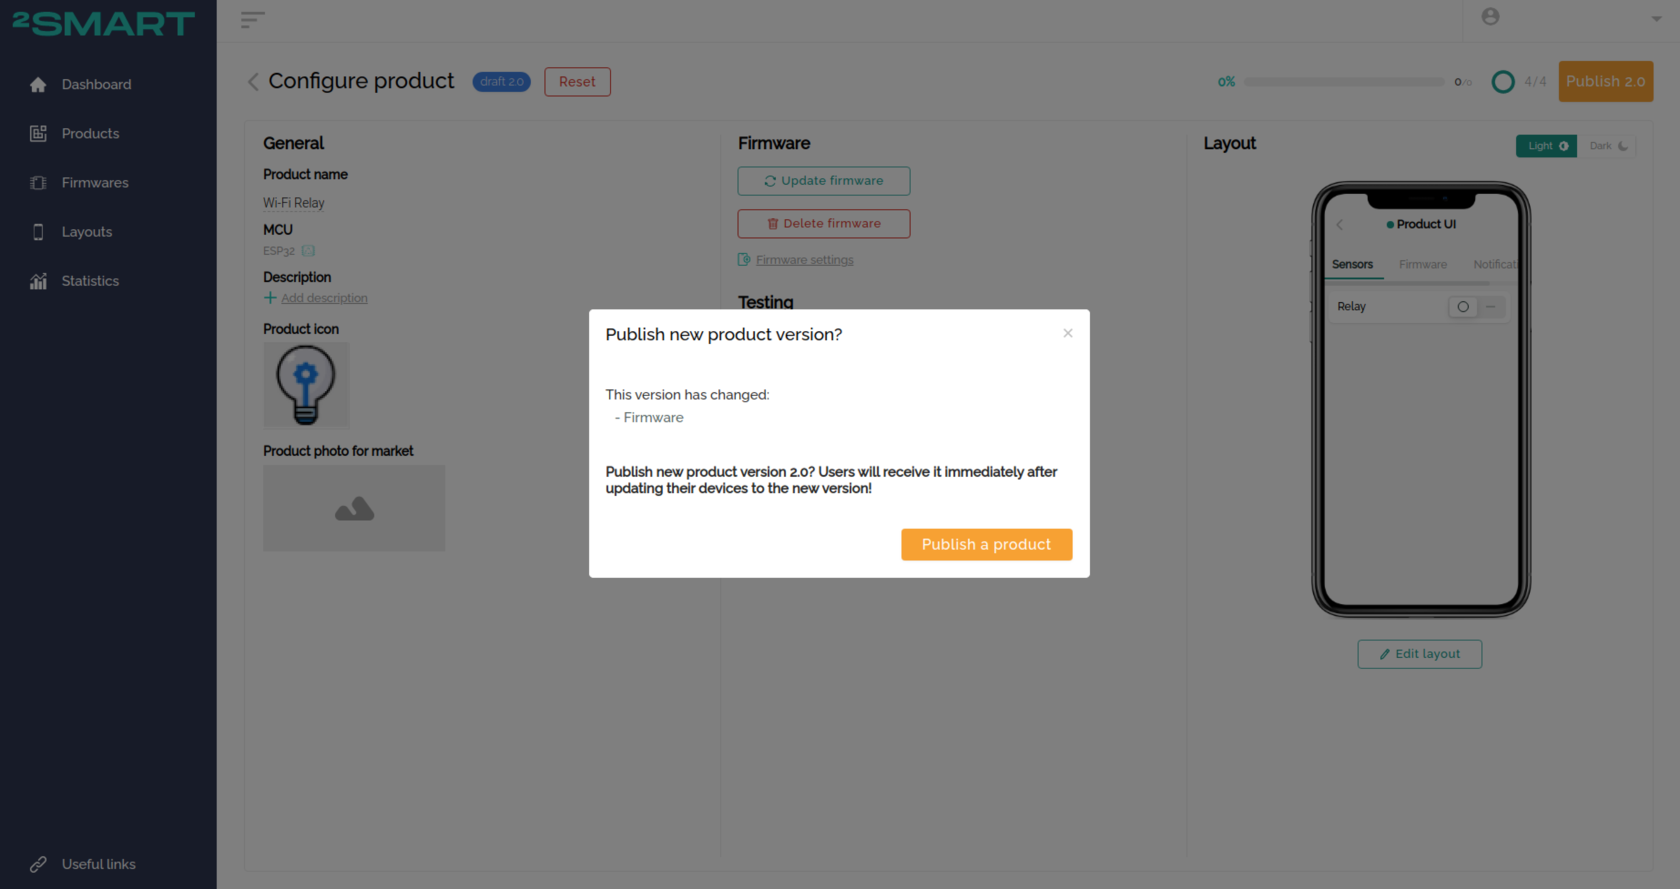
- Click “Publish”.

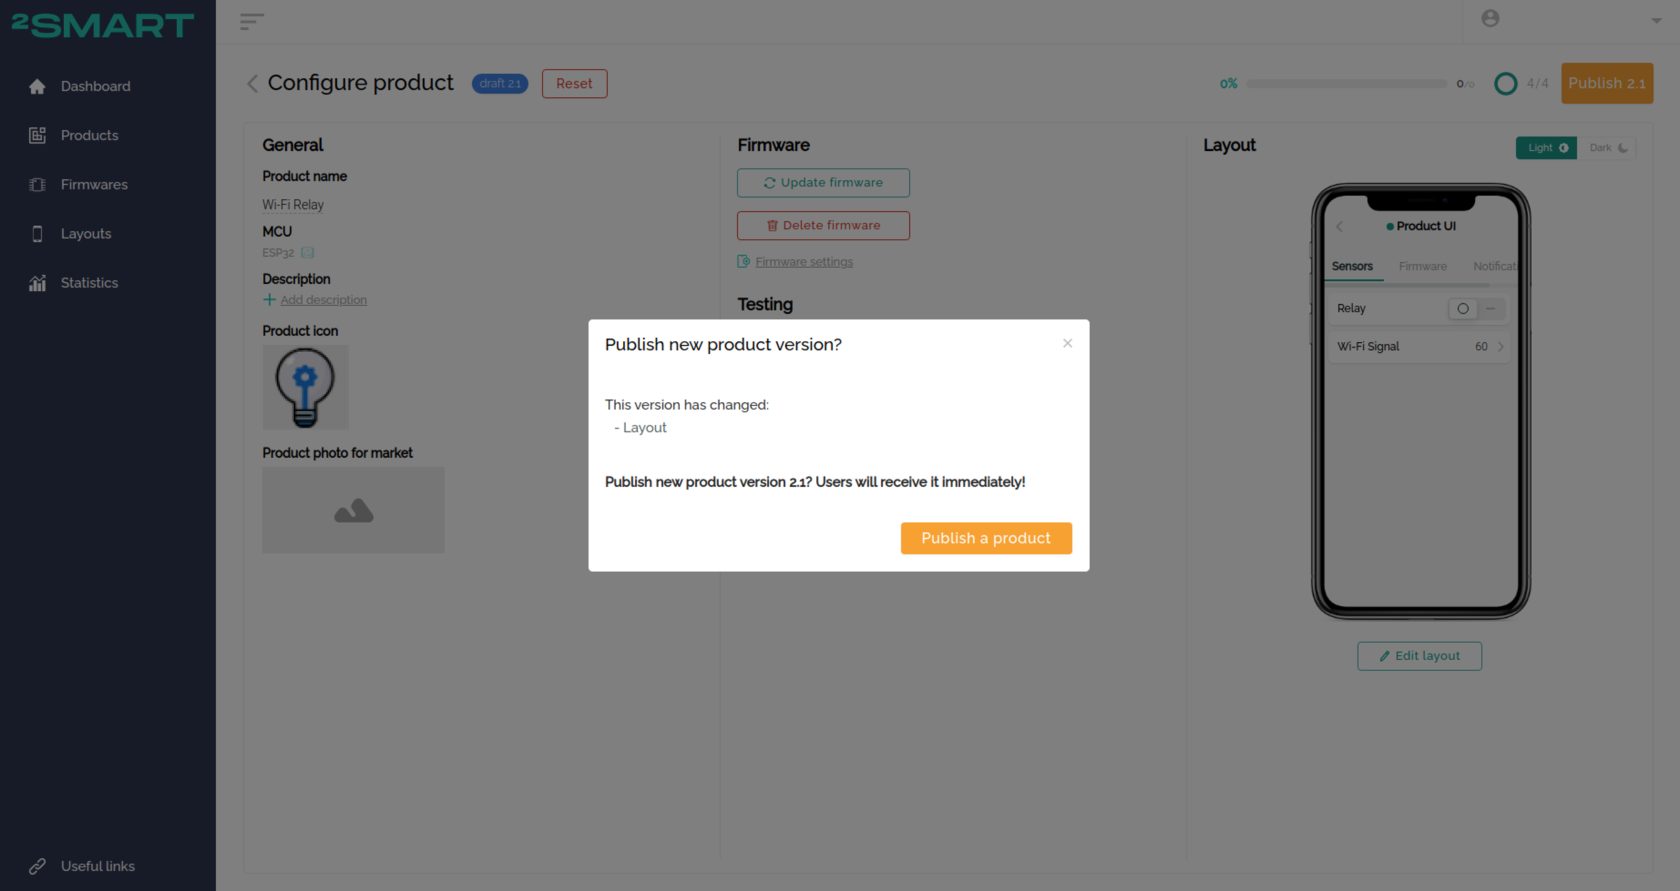
- Confirm your wish to publish a new version of the product.

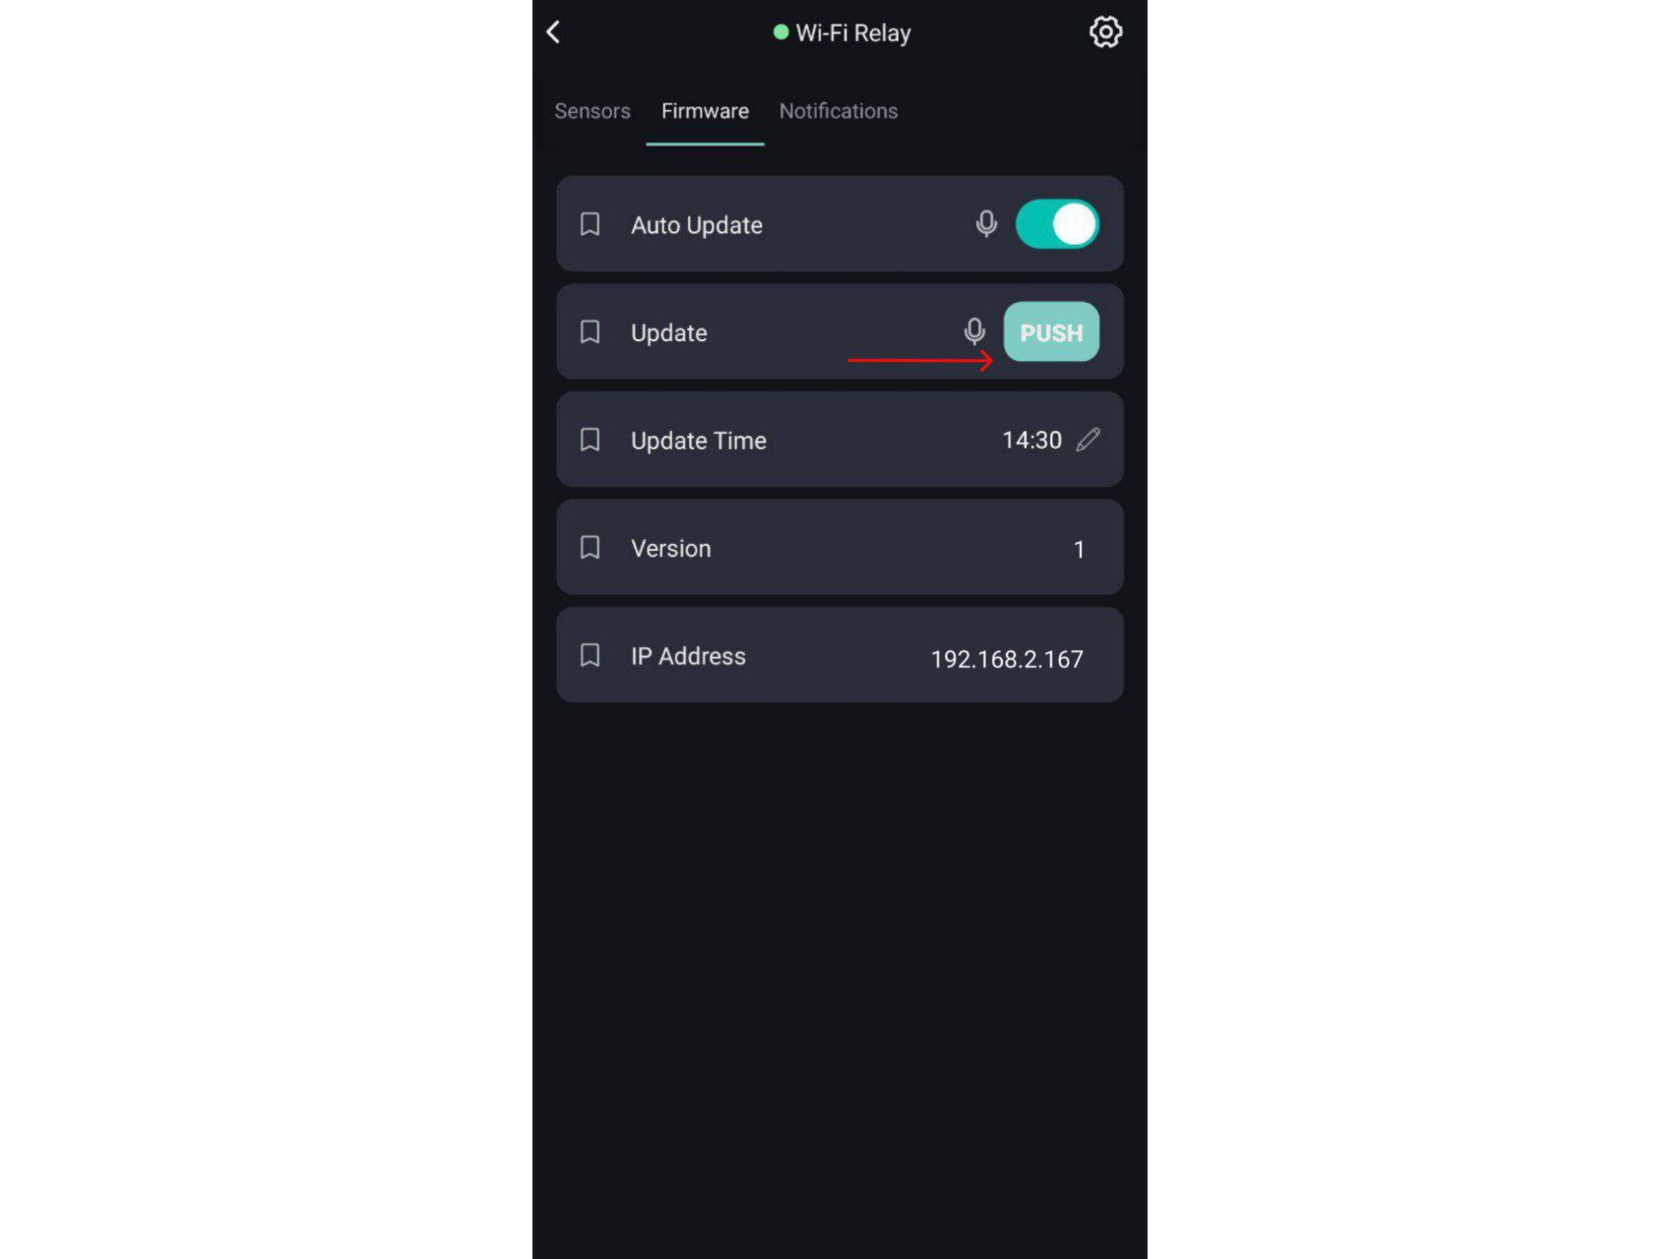
- Devices with older firmware versions will receive the update automatically after checking for updates. The user can also click the “Push” button on the “Firmware” tab of the device interface in the app to get the update immediately.

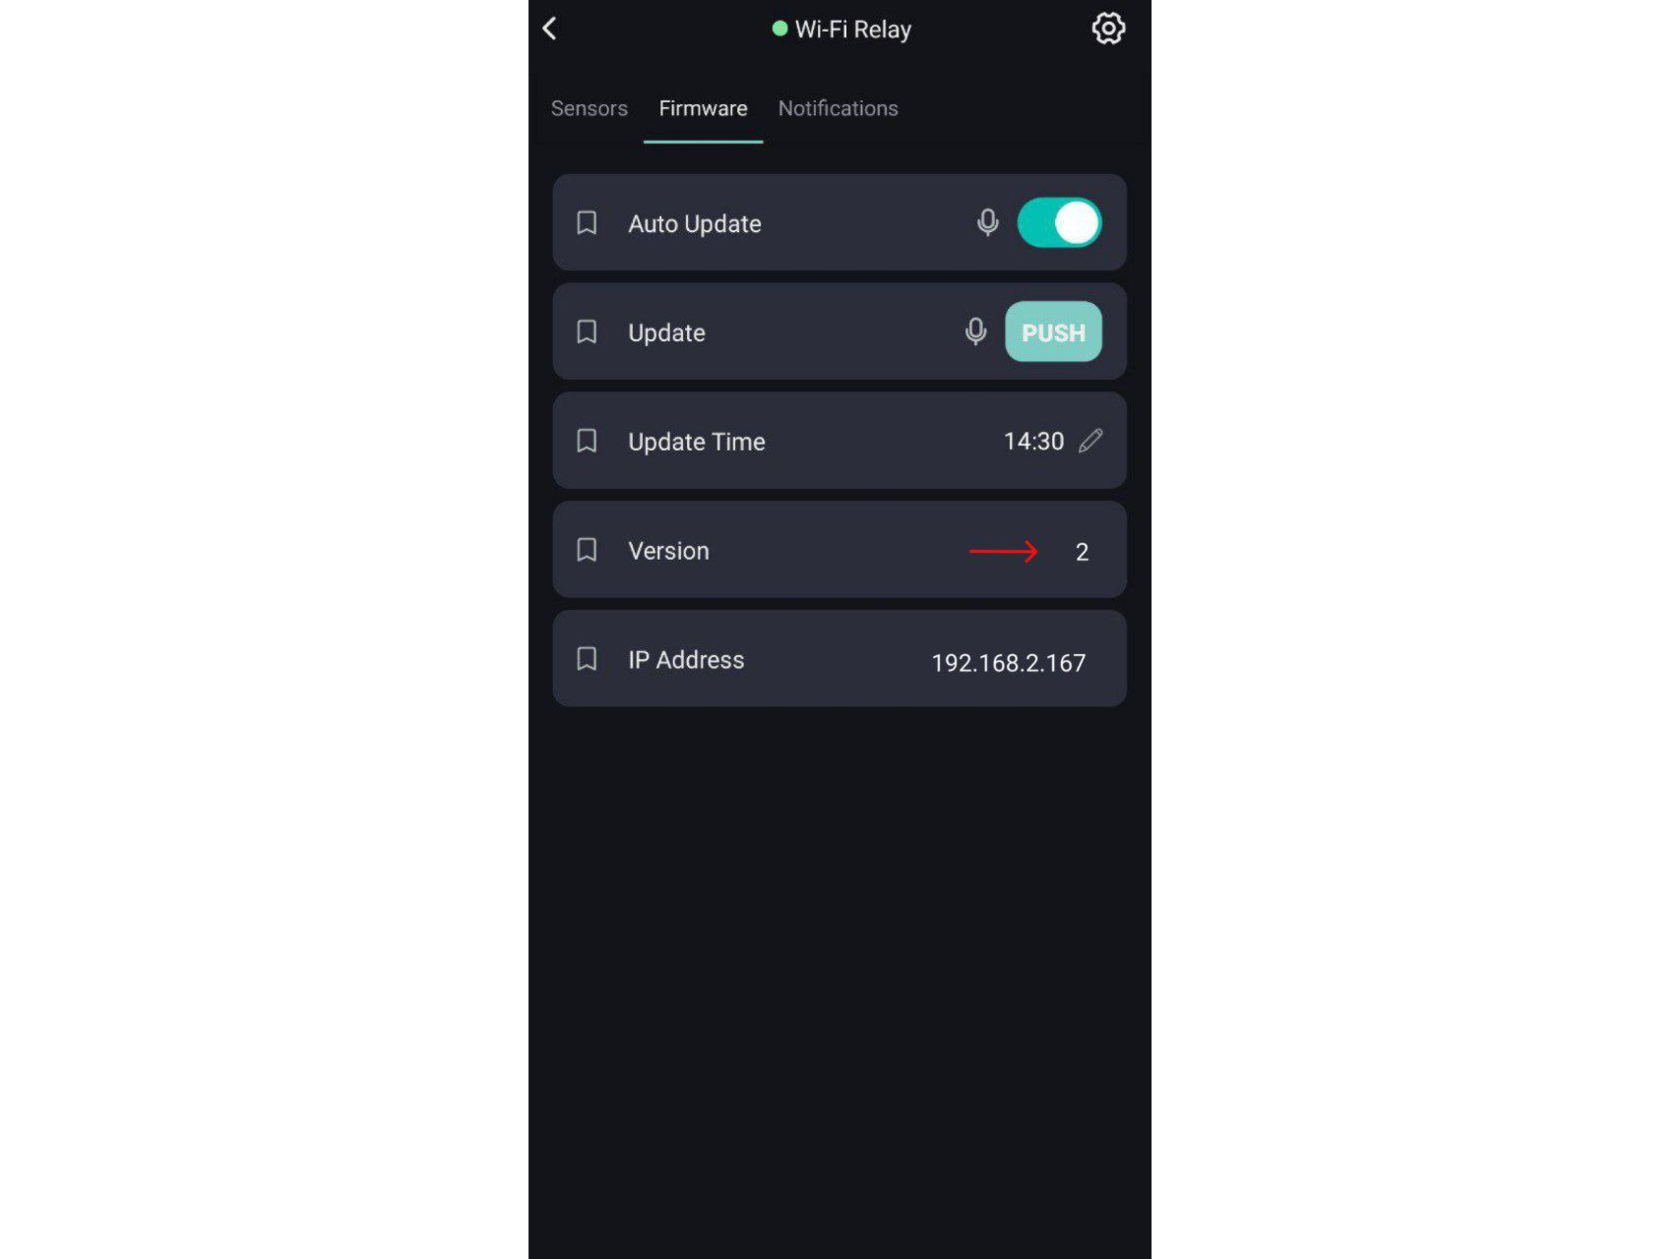
- When the device has been updated, the new firmware version will be displayed in the mobile application interface.
- You can see the changes made to the firmware by entering the notifications section of the mobile app. By pressing the physical “on/off” button on the relay housing.


Colleagues and friends who used the Wi-Fi relay confirmed that the new version of the firmware came automatically within 24 hours.
Let’s collaborate
We’re empower your business with our technology expertise
Mobile app interface update
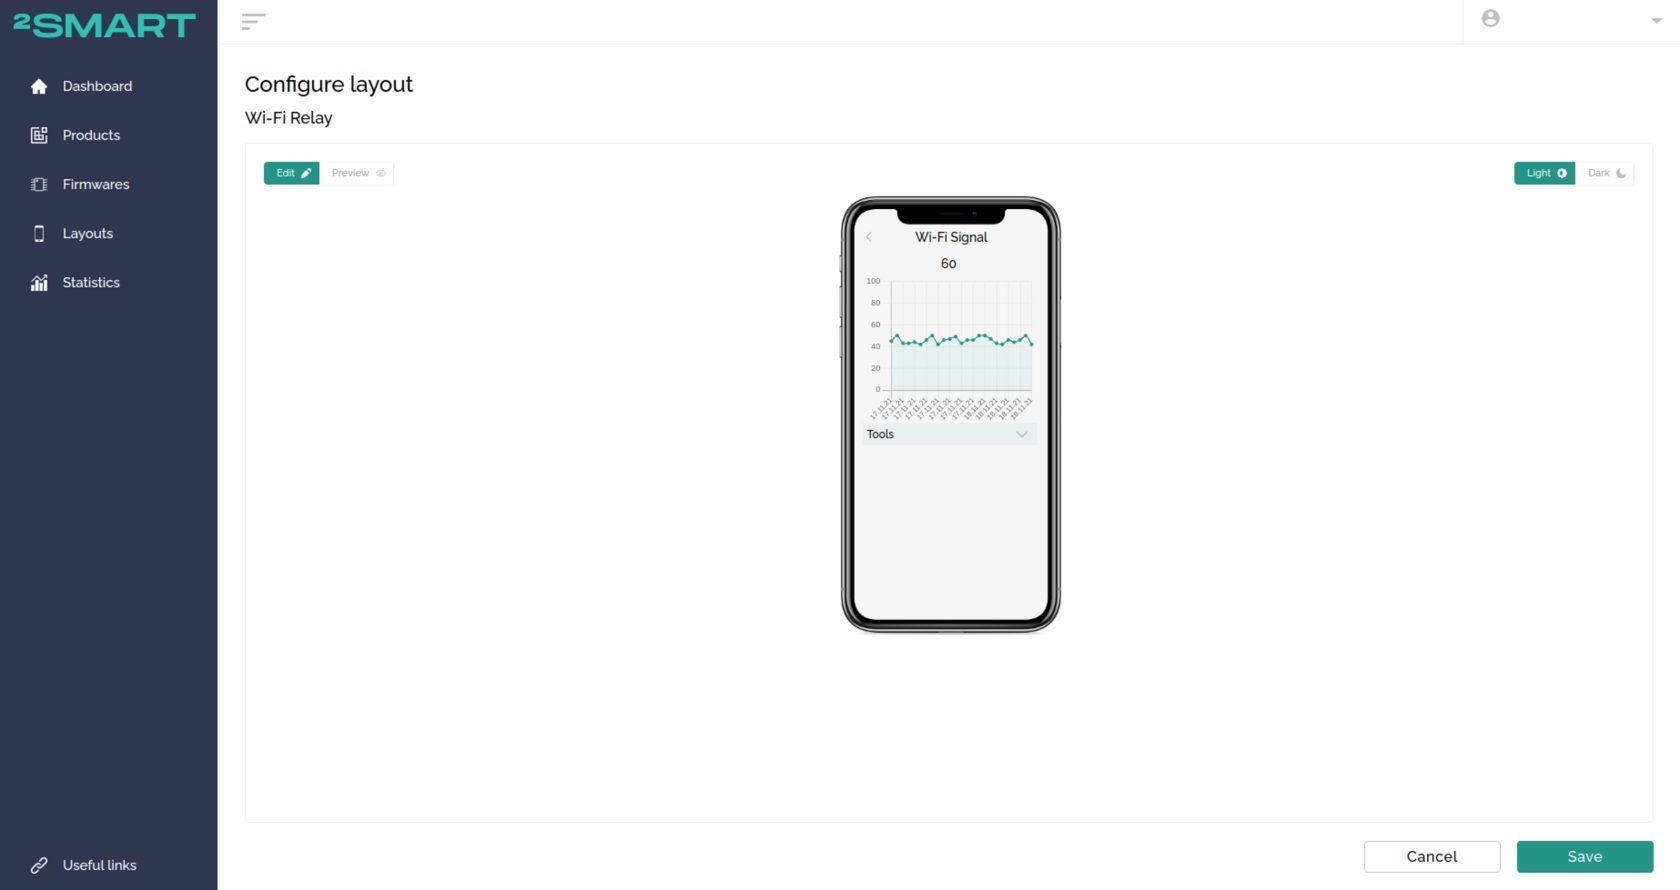
Having discovered that the widget library was updated on the 2Smart Cloud platform, a decision was made to update the mobile application interface for controlling the Wi-Fi relay. By adding a graph widget for the Wi-Fi signal level sensor, we can see statistics on how this level has changed over time.
Editing the application interface is no different from creating it when adding a new product:
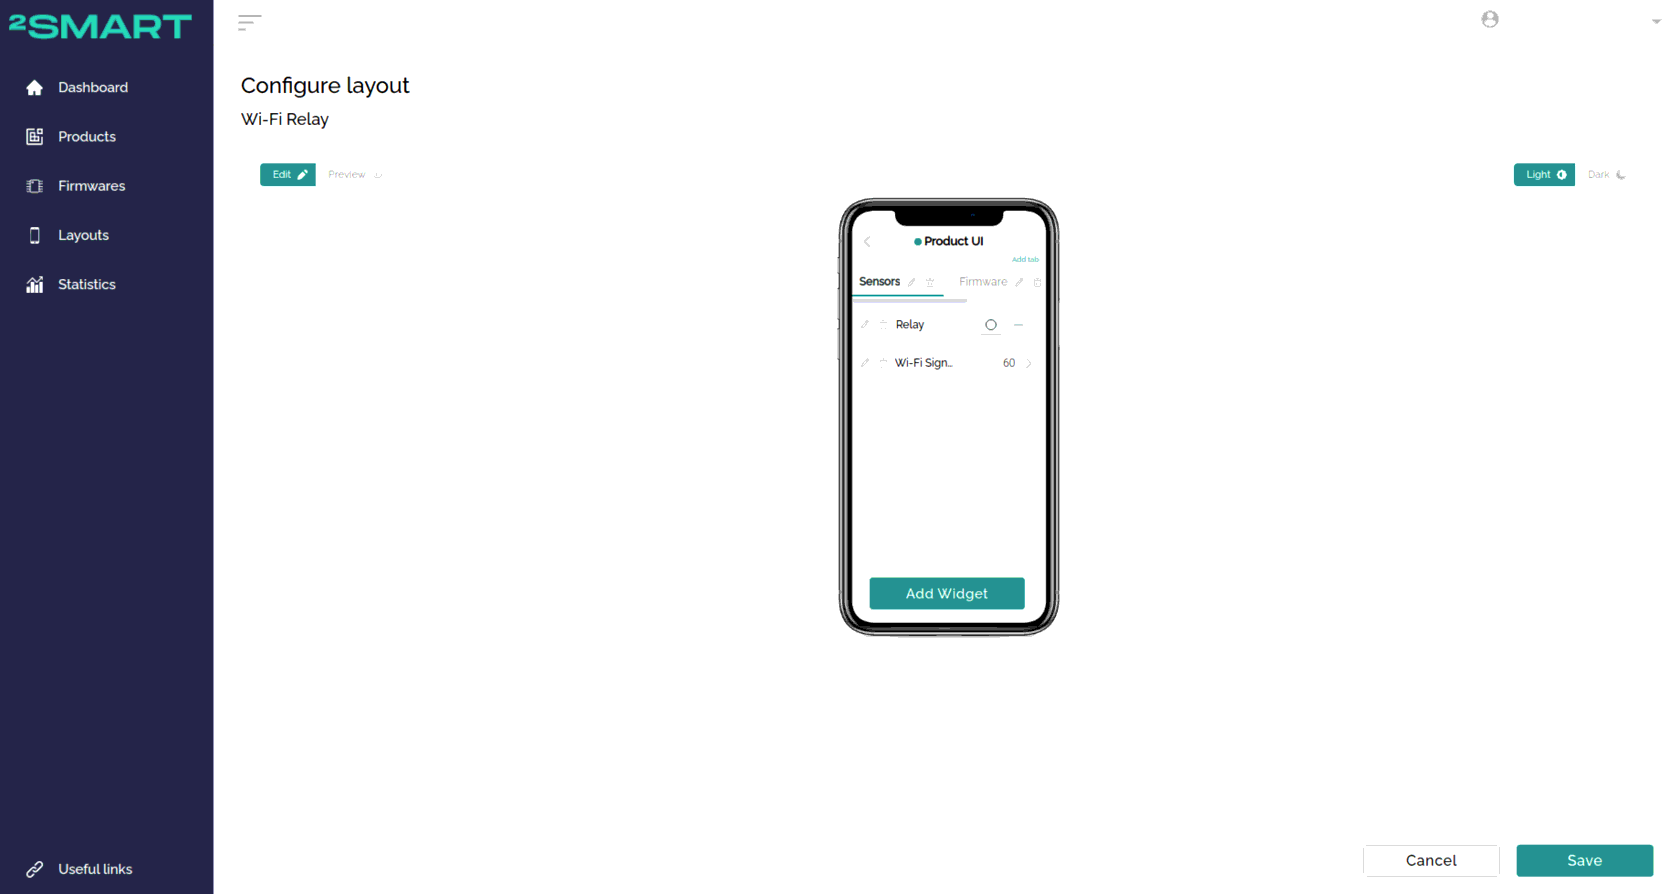
- Click on the “Edit layout” link on the product page in the developer’s account.
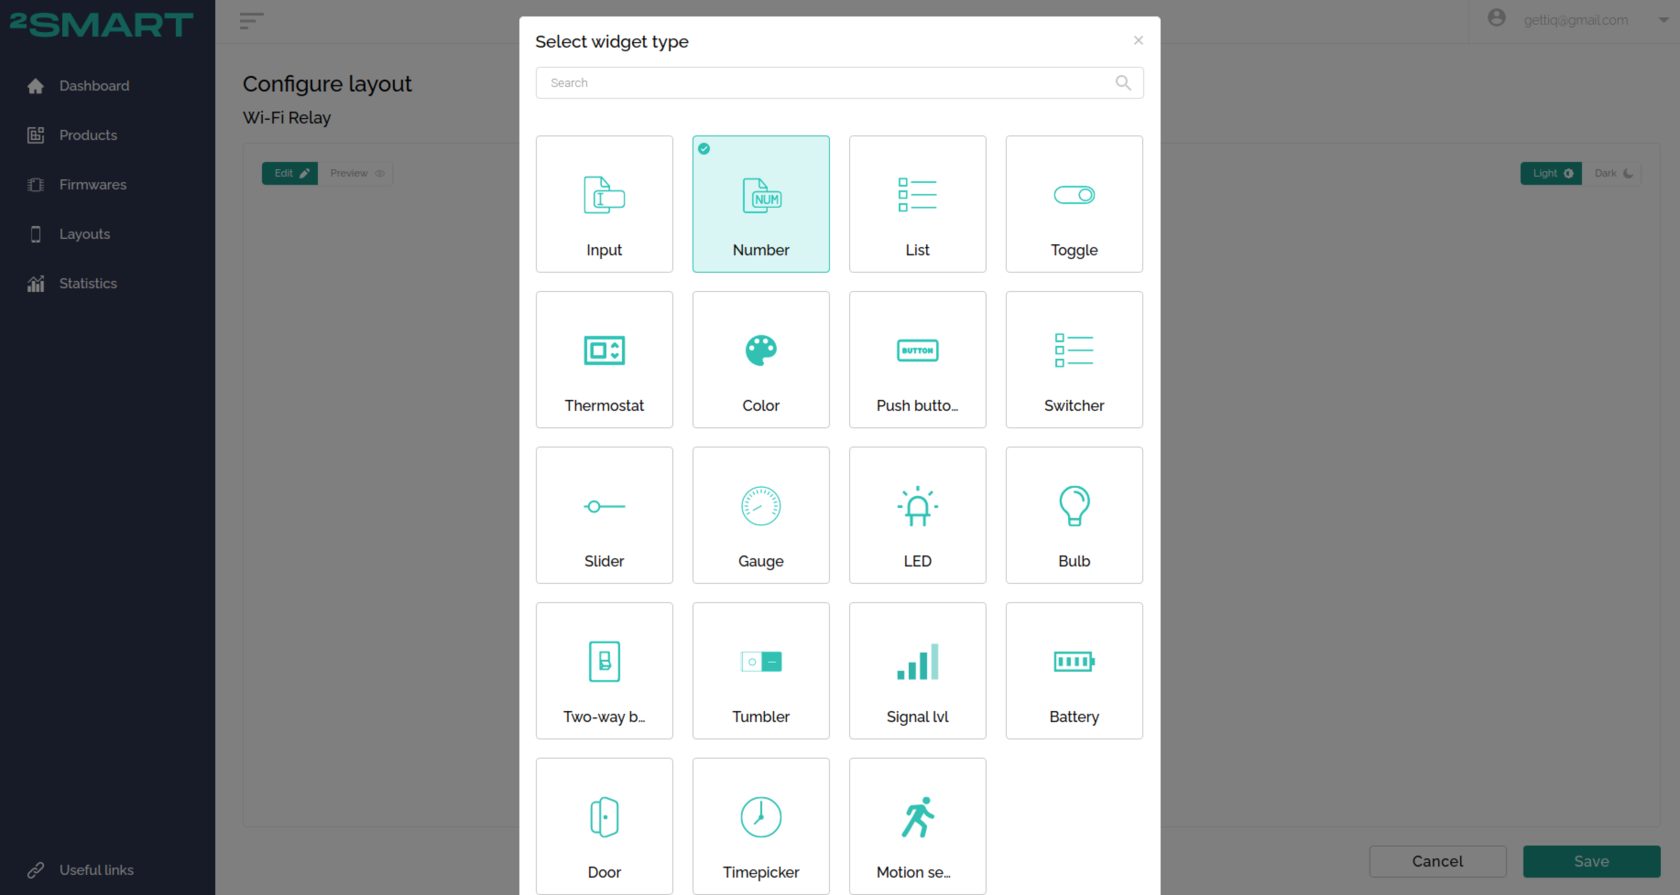
- Click “Add widget”.
- Choose the widget of your liking. (In our case, it was “Number”.)

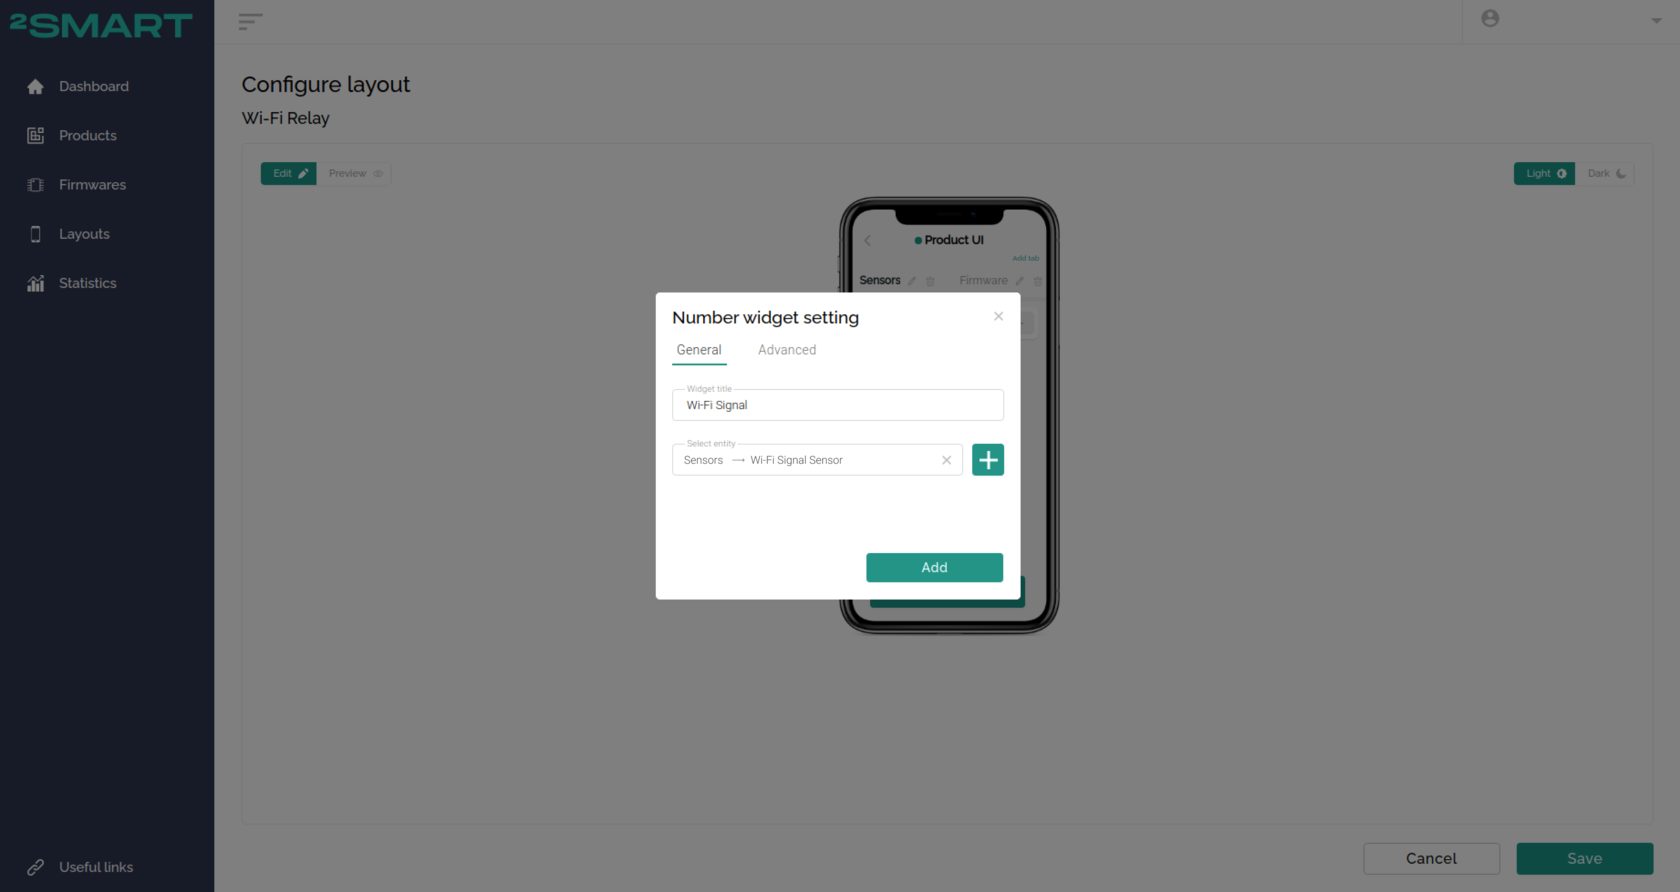
- Configuring the widget. Select the display of sensor data “WiFi Signal”.
- In the mobile app emulator, confirm that you received the desired display of the “history of changes” in the signal strength of the Wi-Fi network on the graph.
- Click “Save”.
- Click “Publish”.

- Agree to the publication of minor product updates.
- The only thing left to do for users is to restart the 2Smart Cloud mobile app on their smartphone to see the changes made to the interface.


Once the firmware has been updated, it might be interesting to monitor how the current devices are updated. In addition to the usual feedback, you can use the statistics section in the developer’s 2Smart Cloud account.
The final article of our series is dedicated to working with statistics.
All articles about IoT device creation and support
- Learn your way around the IoT platform – create your first device and control it from your smartphone without an MCU
- How to create a Wi-Fi switch to control via a mobile app and Telegram bot
- How to build an IoT device using the 2Smart platform?
- How to create an IoT device on a printed circuit board and take it from prototype to finished product
- How to write SDK-based firmware for an IoT device
- How to update the firmware and mobile application of ready-made devices within 5 minutes
- Collection and analysis of statistics – a useful tool for product improvement
Don't forget to share this post!
Read Next


Let’s dive into your case
Share with us your business idea and expectations about the software or additional services.
