
Table of contents:
Teltonika is a Lithuanian high-tech company group, founded in 1998. It covers a diverse range of industries, from vehicle telematics and industrial networking equipment to energy, telemedicine, and electronics assembly. It is a prominent European brand in the IoT market and one of the leading providers of IoT solutions for businesses worldwide. The 2Smart team is proud to cooperate with colleagues from Vilnius, and below, we share our experience in integrating Teltonika equipment with our software, namely the 2Smart Standalone open-source automation platform and the 2Smart Cloud mobile application.
What Teltonika devices we chose for the experiment
Teltonika’s IoT solutions encompass a comprehensive range of network, telematics, and IoT equipment tailored for professional use. Such equipment includes universal sensors that allow monitoring of several parameters where they are installed.
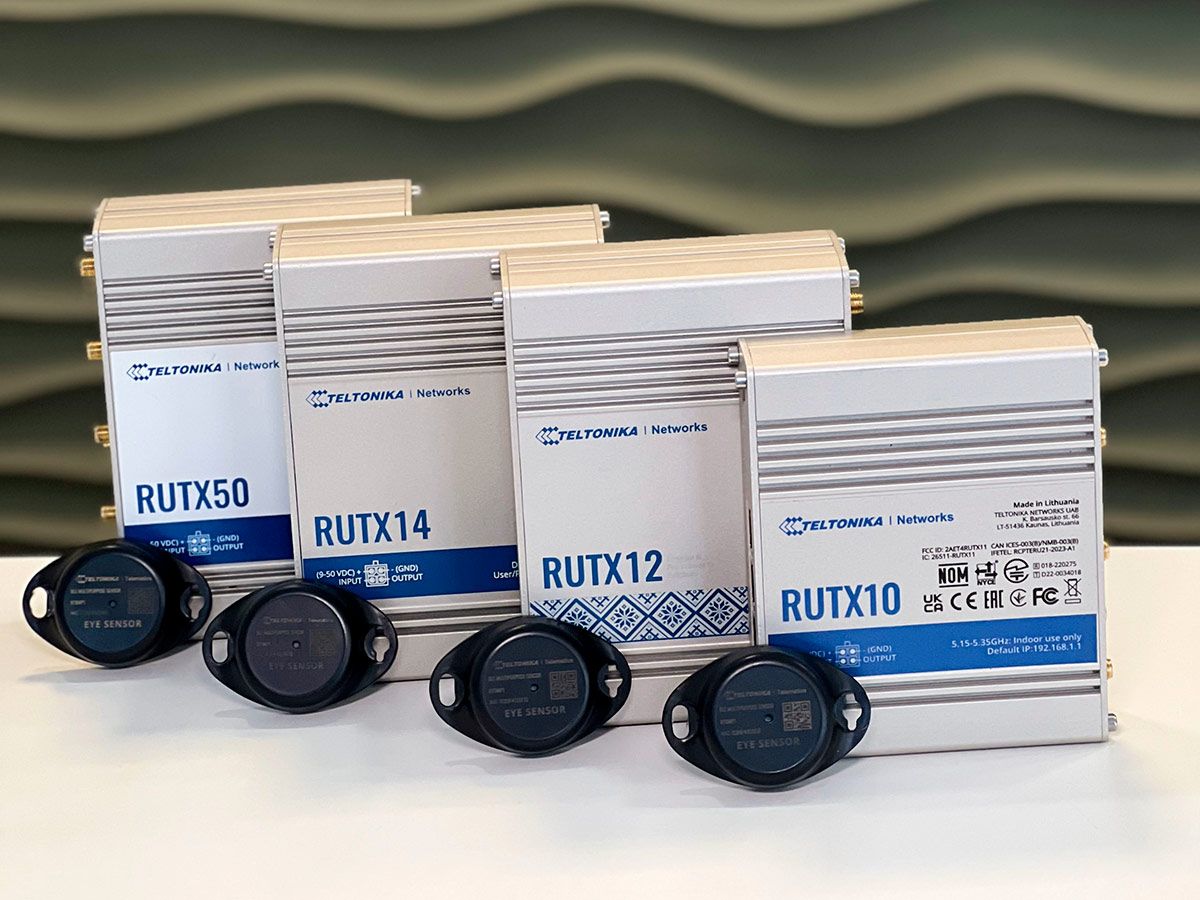
An example of such a universal sensor from Teltonika is the EYE Sensor, which operates autonomously, powered by a battery. EYE Sensor monitors air temperature and humidity, detects movement and magnetic field, and is equipped with an accelerometer. Such sensors are used by businesses in warehouses, landing stages, industrial and other premises, as well as during cargo transportation. They allow not only to control the conditions of storage and transportation of goods but also to track the presence of people in the area they cover.
Since the battery-powered EYE Sensor transmits sensor data via the low-energy Bluetooth LE network protocol, one more device is required to remotely monitor its readings via the Internet, namely a router with the necessary functionality. To solve this problem, Teltonika produces a line of RUTX10/11/12/14/50 routers, each capable of receiving sensor readings from other devices and transmitting them to an external MQTT broker.
The administrator should adhere to the straightforward Teltonika setup instructions for pairing the Bluetooth LE device with the router:
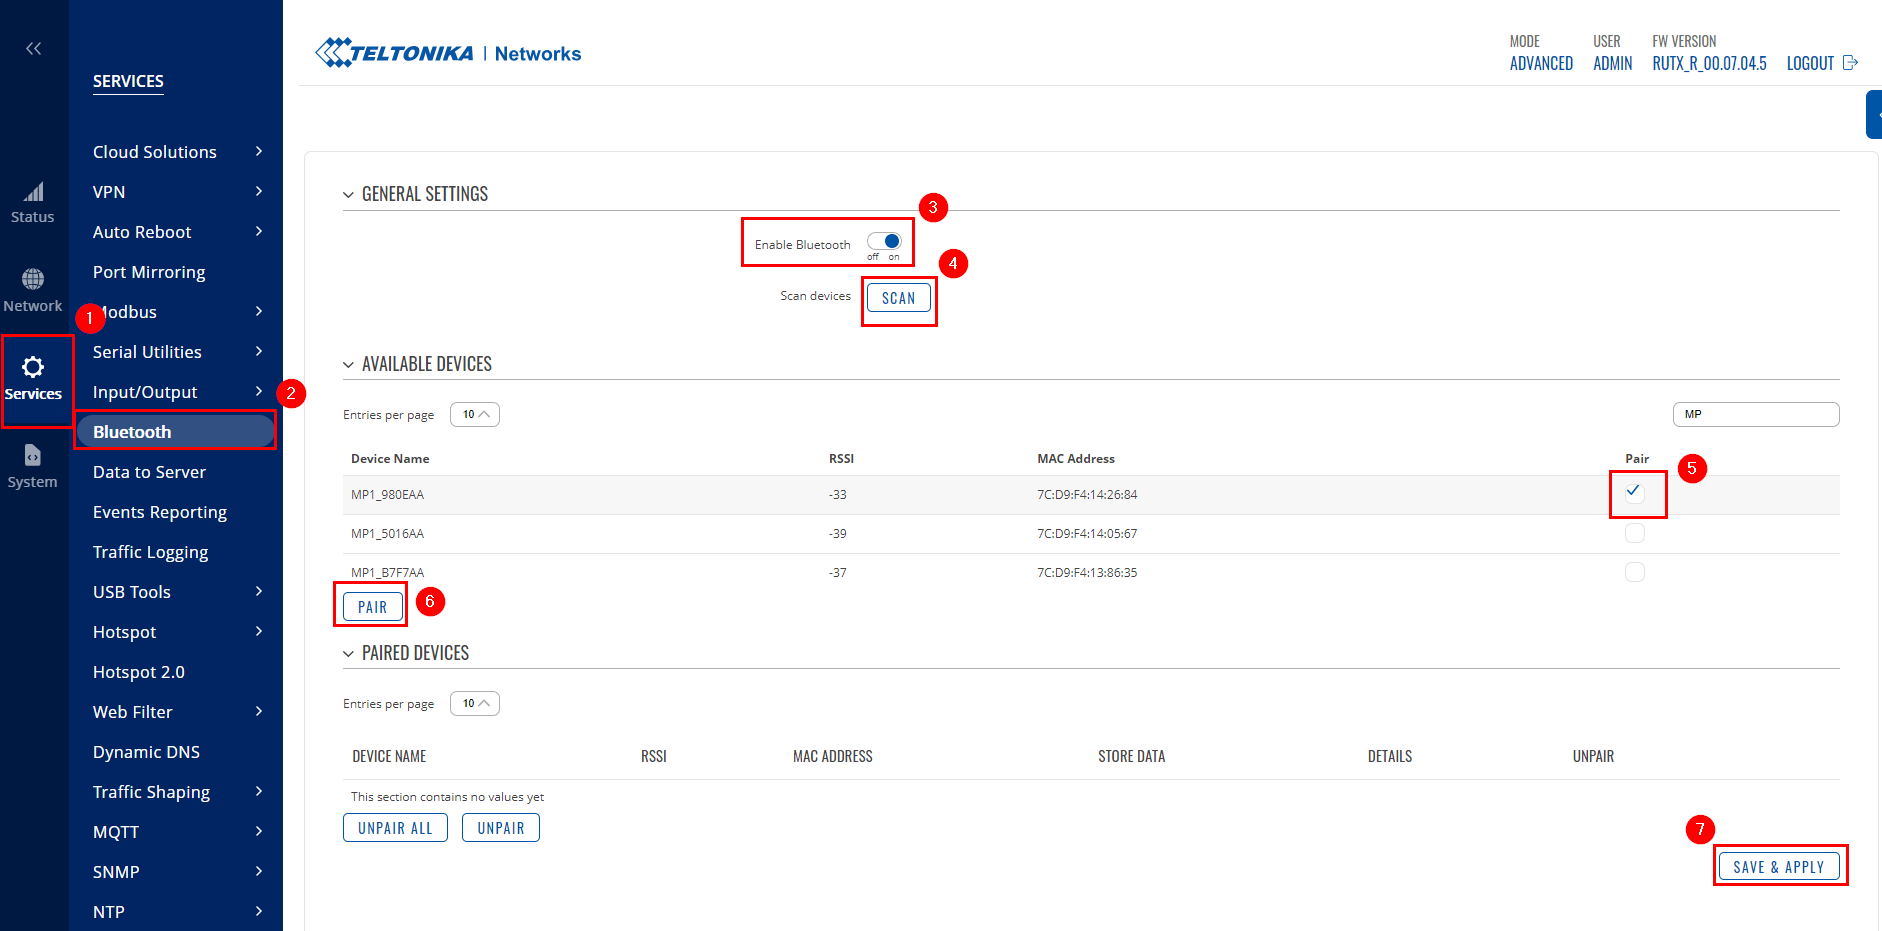
- In the router’s admin panel, select the Services menu item.
- Select the Bluetooth submenu.
- Turn on the Enable Bluetooth switch.
- Click the Scan button to search for devices.
- Check the Pair box next to the devices that must pair with the router.
- Press the Pair button.
- When finished, click the “Save & Apply” button.
While experimenting with integrating Teltonika smart devices with the 2Smart platform, we used two routers: RUTX10 and RUTX12. The first of these models is designed for use in a small office, while the second is equipped with a GPS sensor and two LTE modems, making it suitable for use in vehicles.
We connected one universal EYE Sensor to the RUTX10 router and two such sensors to the RUTX12 router. Thus, we simulated a scenario when one universal sensor controls a warehouse-type room and communicates with the monitoring and automation platform through the RUTX10 router. According to the legend, two more universal sensors are installed in a cargo truck’s compartments and transmit values using a RUTX12 router that uses LTE.
Integration of Teltonika devices with 2Smart Standalone
Since the Teltonika IoT routers mentioned above have the functionality of publishing telemetry to any MQTT broker, the task of integrating them with our monitoring and automation platform is feasible.
To take on this challenge, our team deployed a cloud instance of the open-source platform 2Smart Standalone. To do this, we rented a virtual server, deployed a platform, assigned a domain name to the web application, and connected an SSL certificate using the Certbot addon built into the platform.
2Smart Standalone also supports local deployment. However, we used a virtual server for convenience to make it easier for two teams from different countries to work.
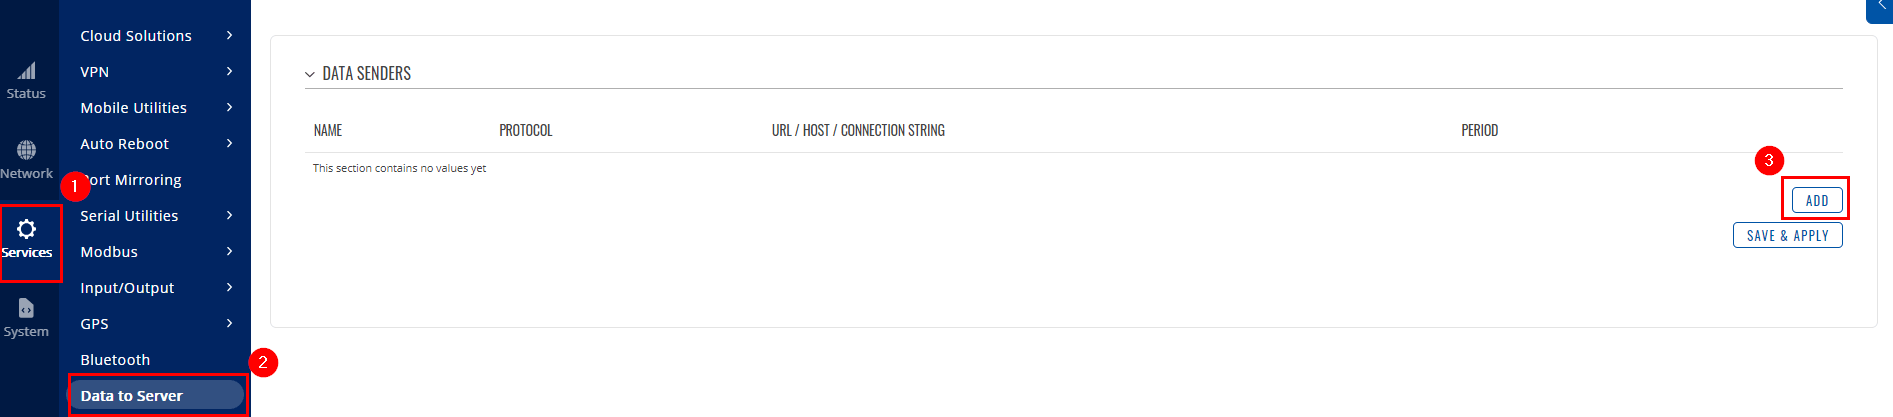
For Teltonika IoT devices to connect to the deployed cloud instance of the 2Smart Standalone platform, we used the “Data to Server” service, which is available in the routers’ admin panel.
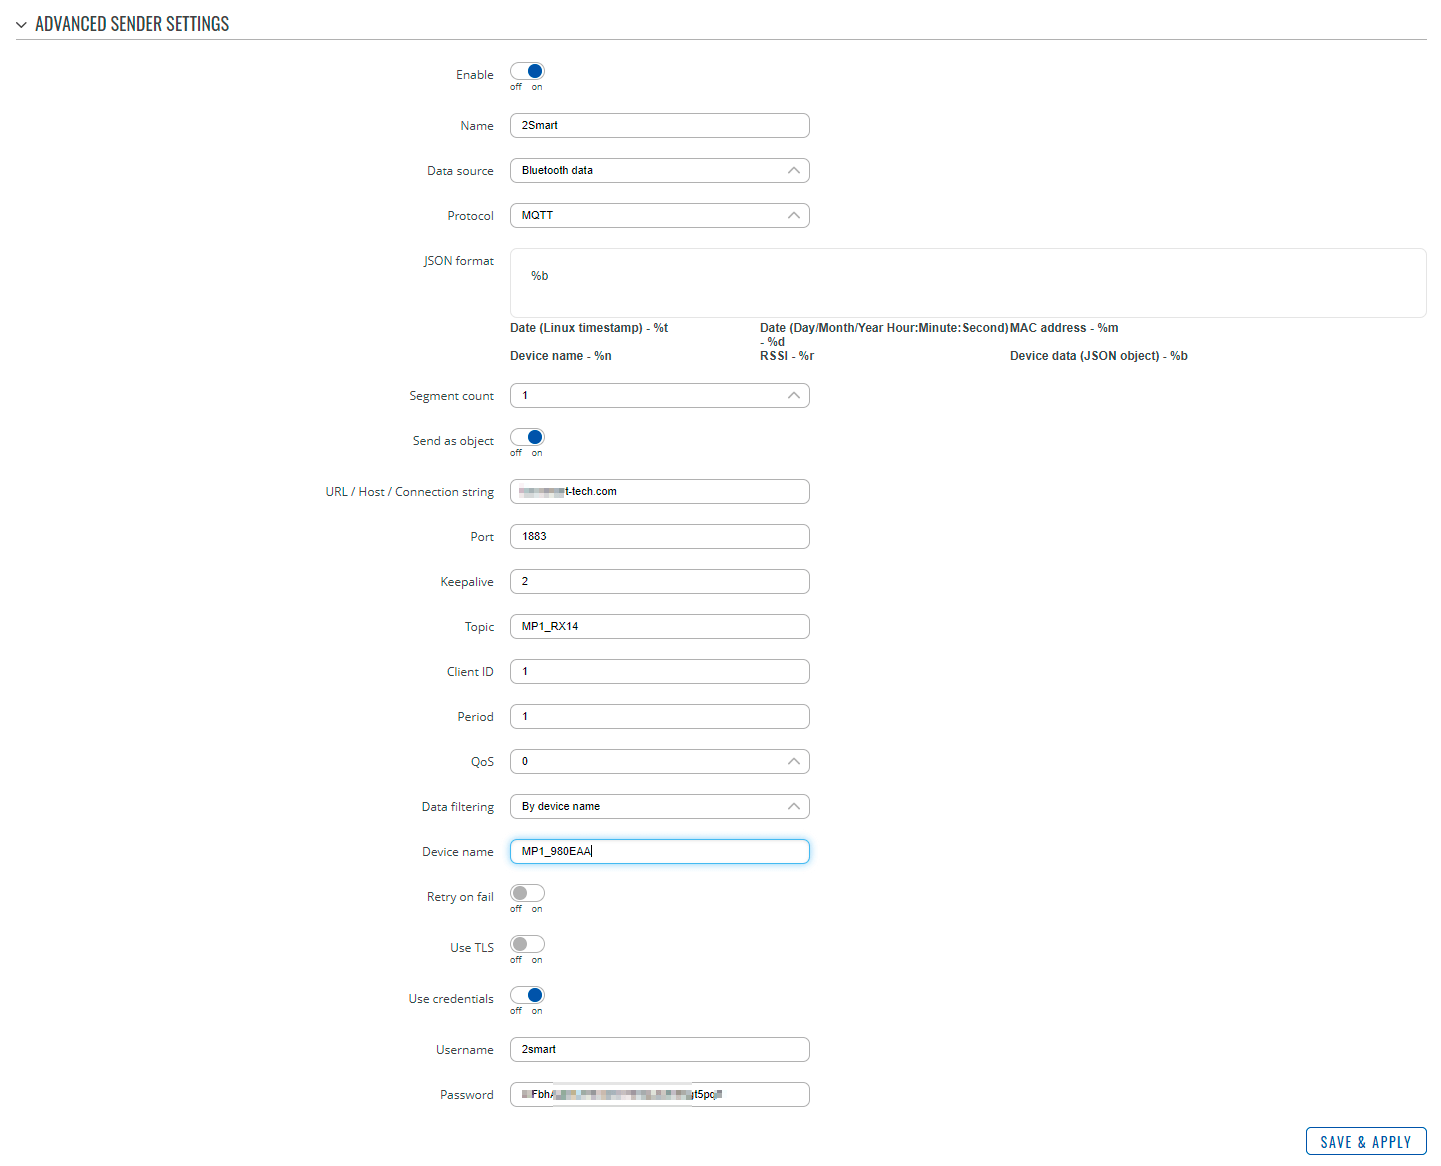
We have specified the required connection parameters: URL, port, login, and password. We also entered a custom topic name and device name:
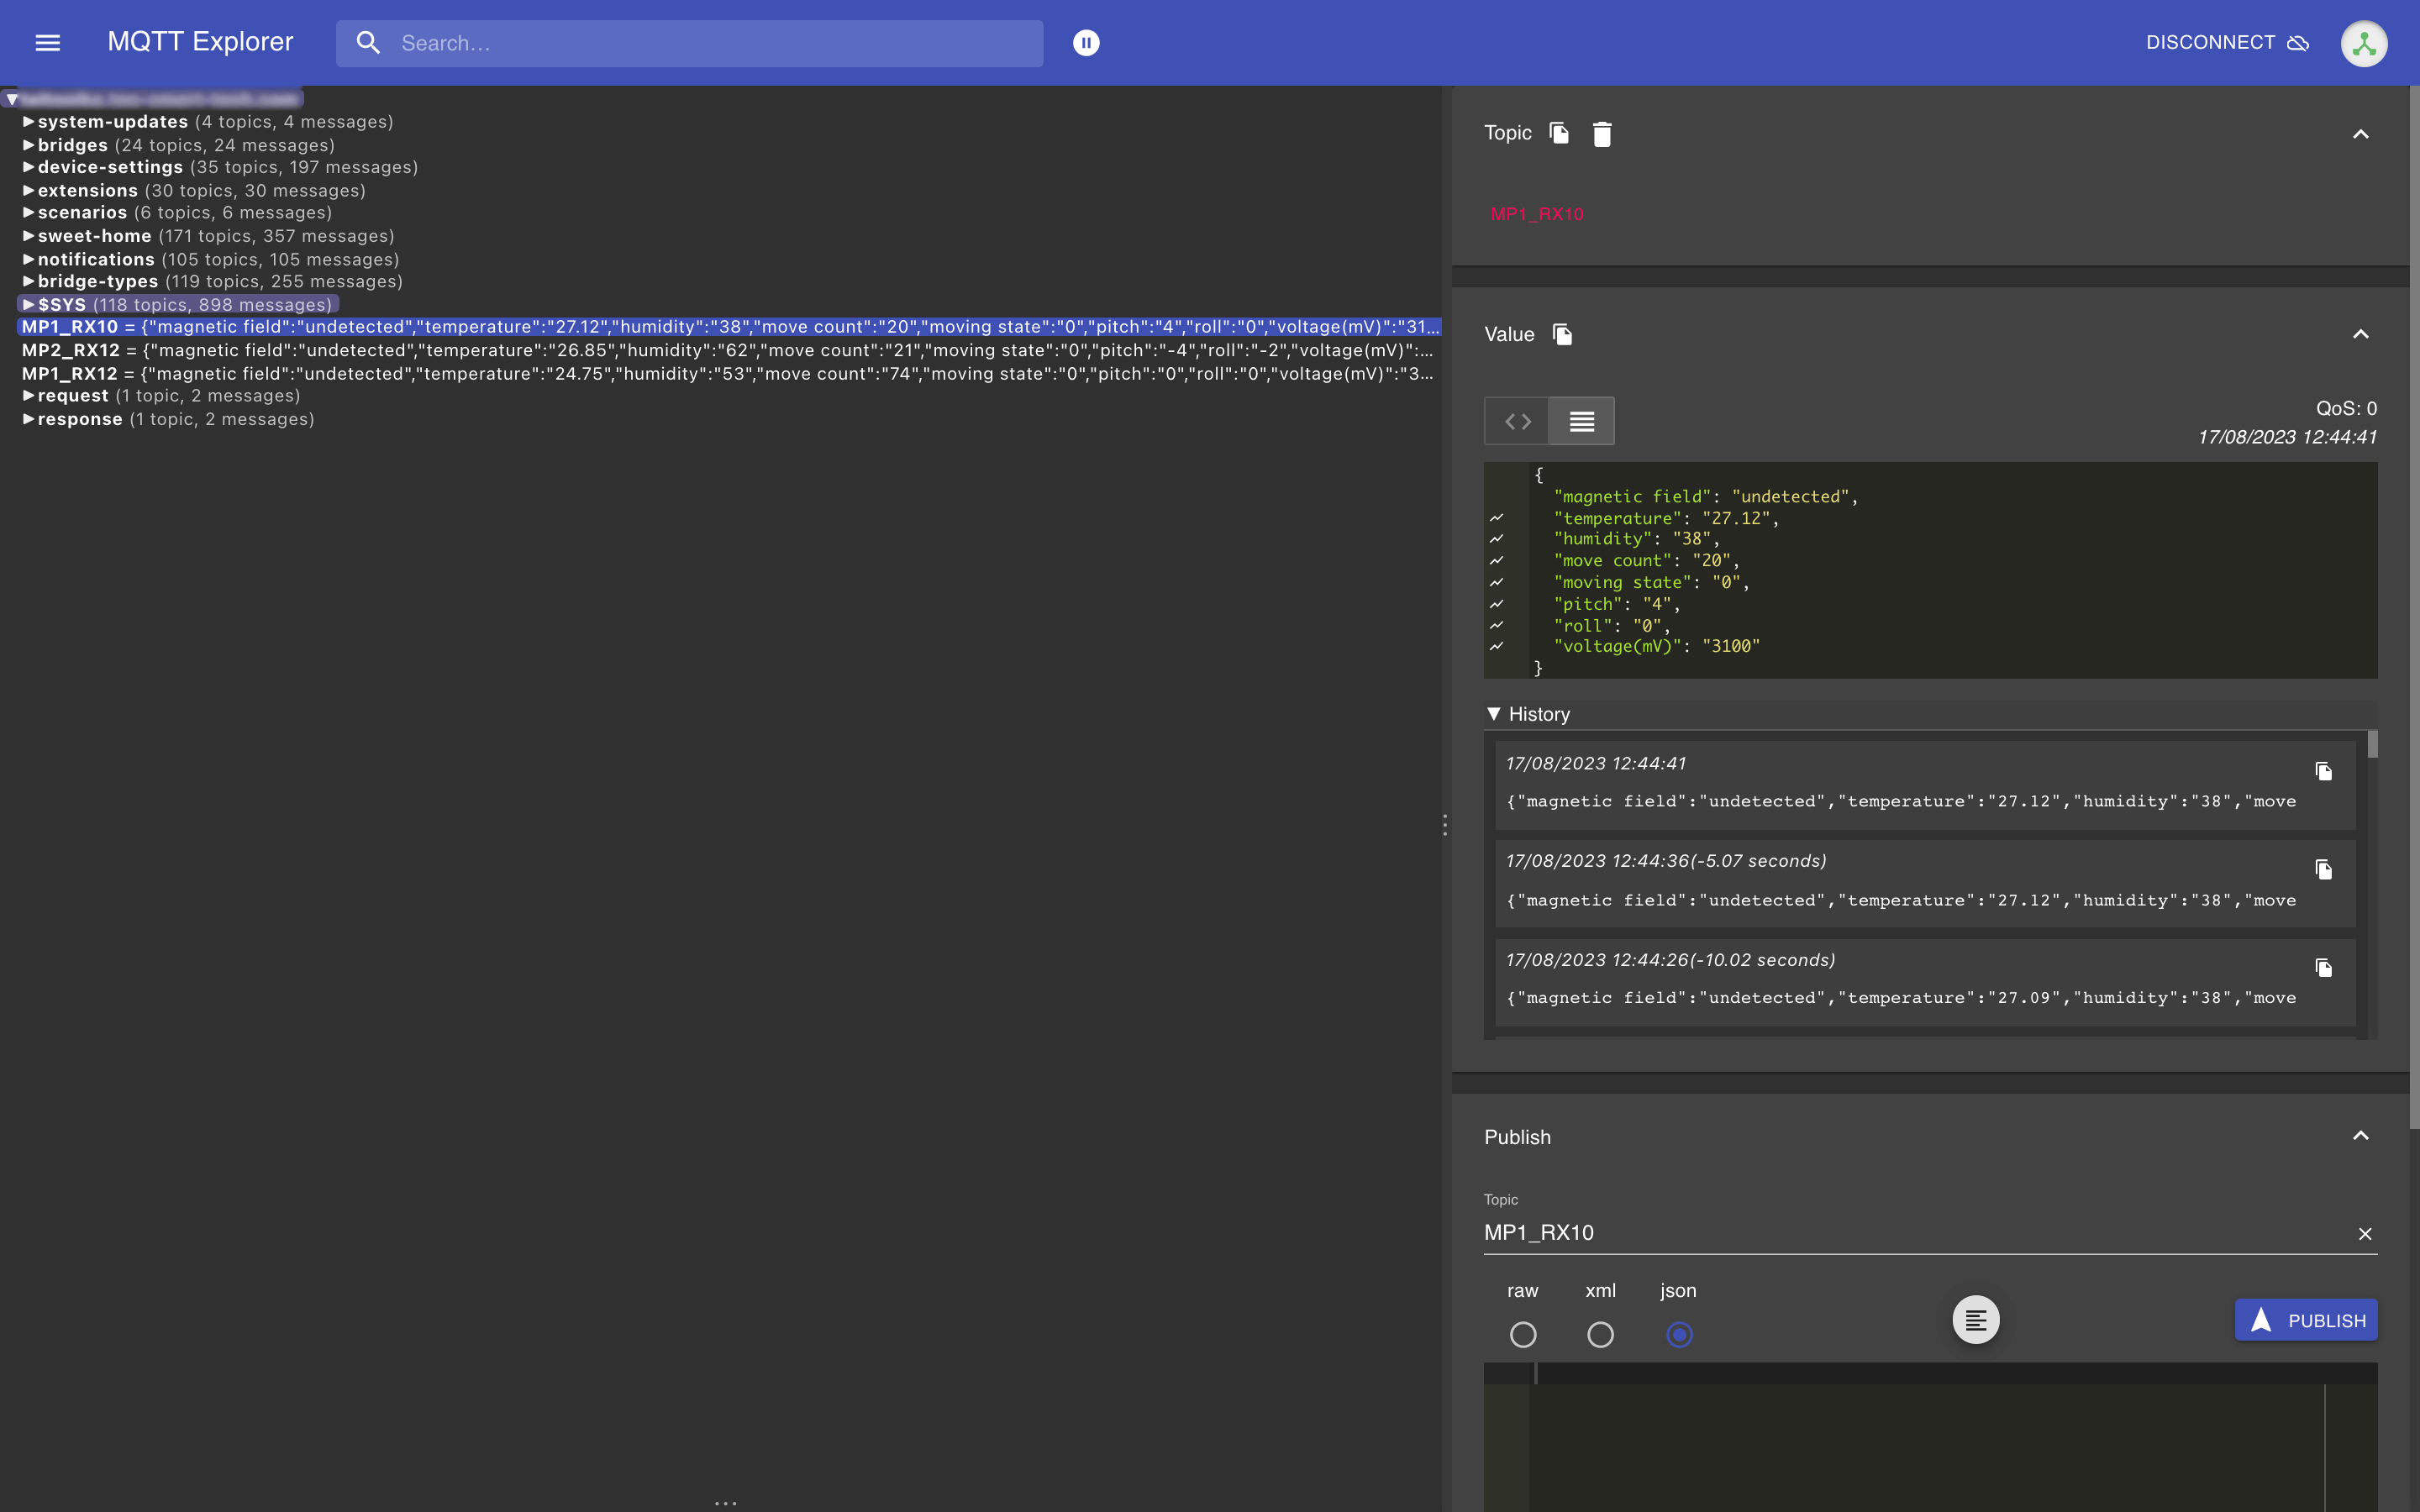
After that, we saw on the side of our platform that the Teltonika software on the router began to transmit the following data from the sensors of the EYE Sensor device:
magnetic_field,temperature,humidity,move_count,moving_state,pitch,roll,voltage (mV).
Each string has a specific value corresponding to the sensor’s current state. However, some of these values do not comply with the 2Smart convention, so before we proceeded to configure the monitoring and automation dashboard, we needed to solve this problem.
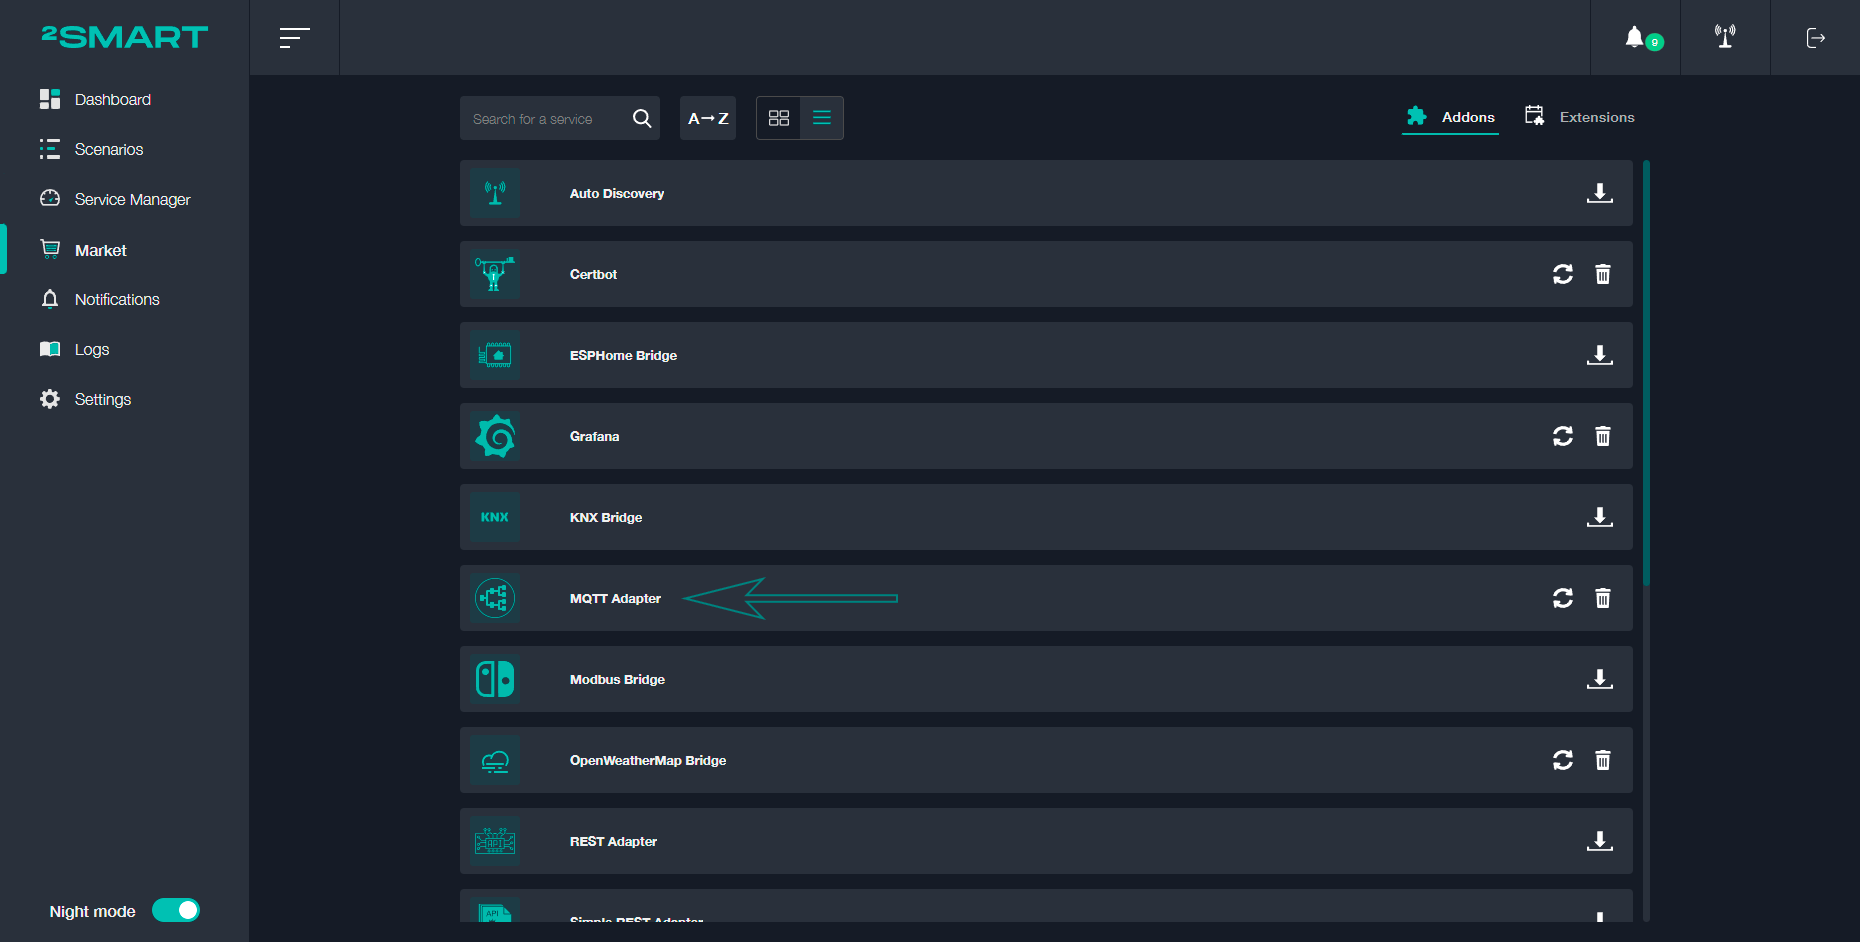
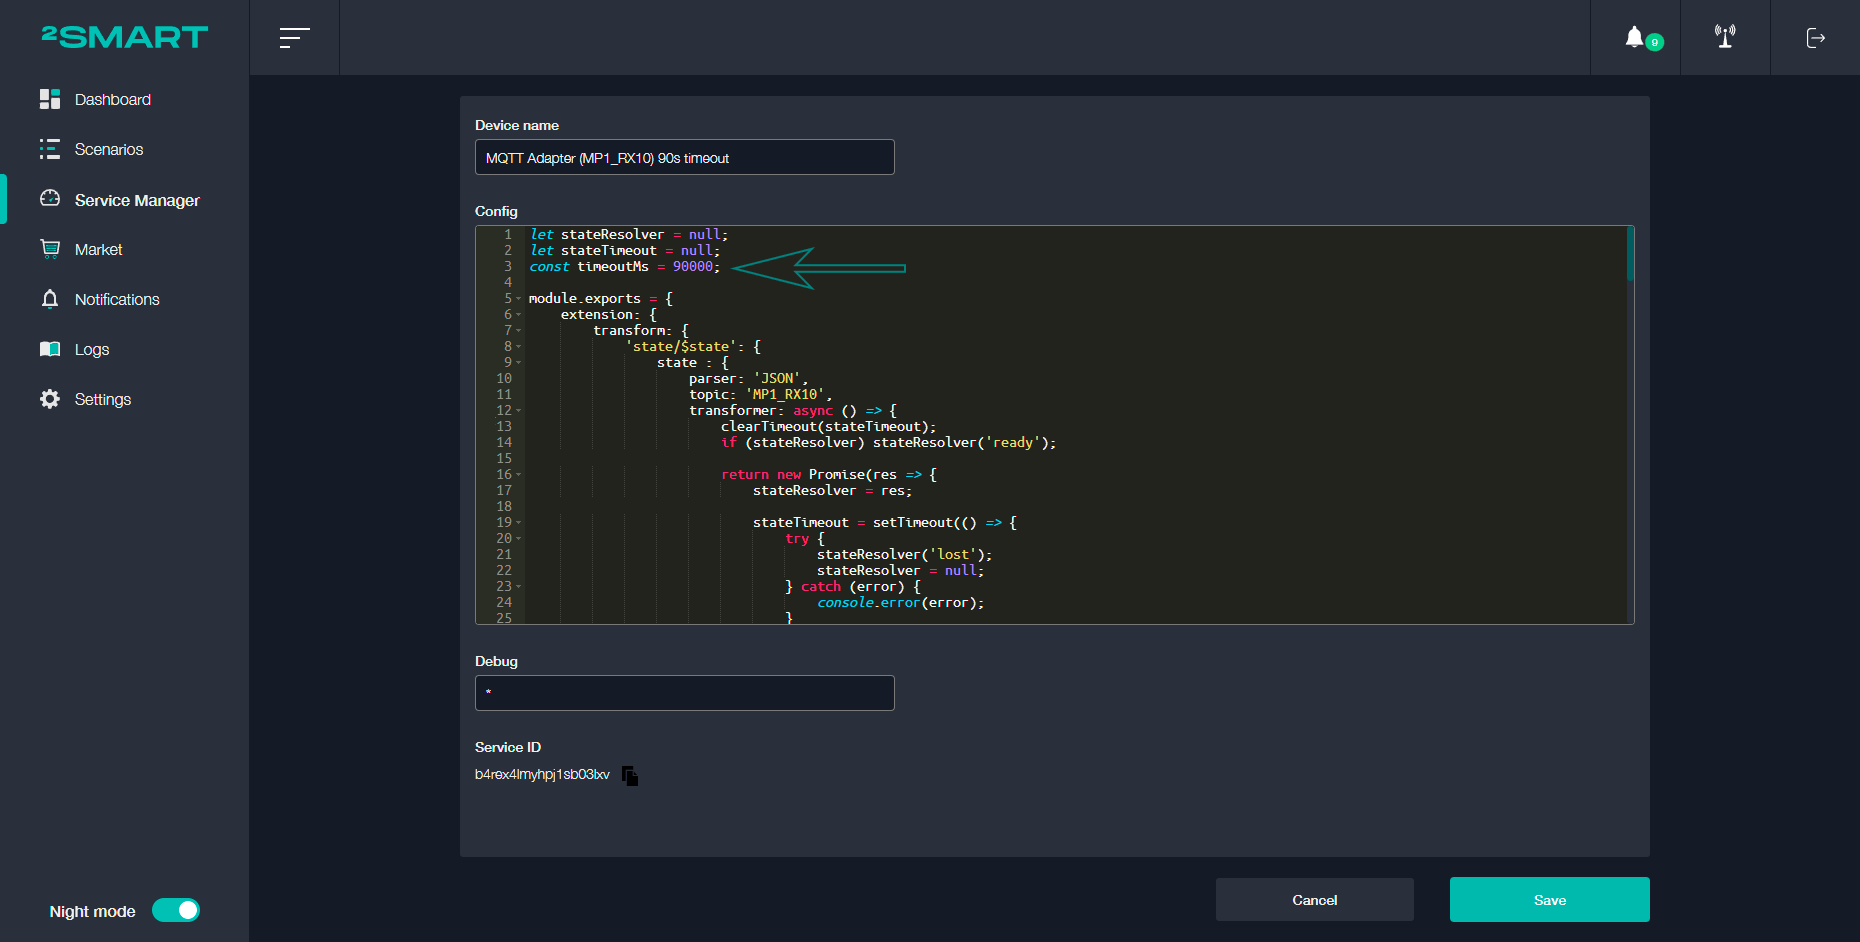
To do this, we used the MQTT Adapter bridge, which is available in the 2Smart Standalone built-in market. This bridge allows you to convert the values of the topics the device transmits that do not comply with the 2Smart convention into a format understandable to the platform.
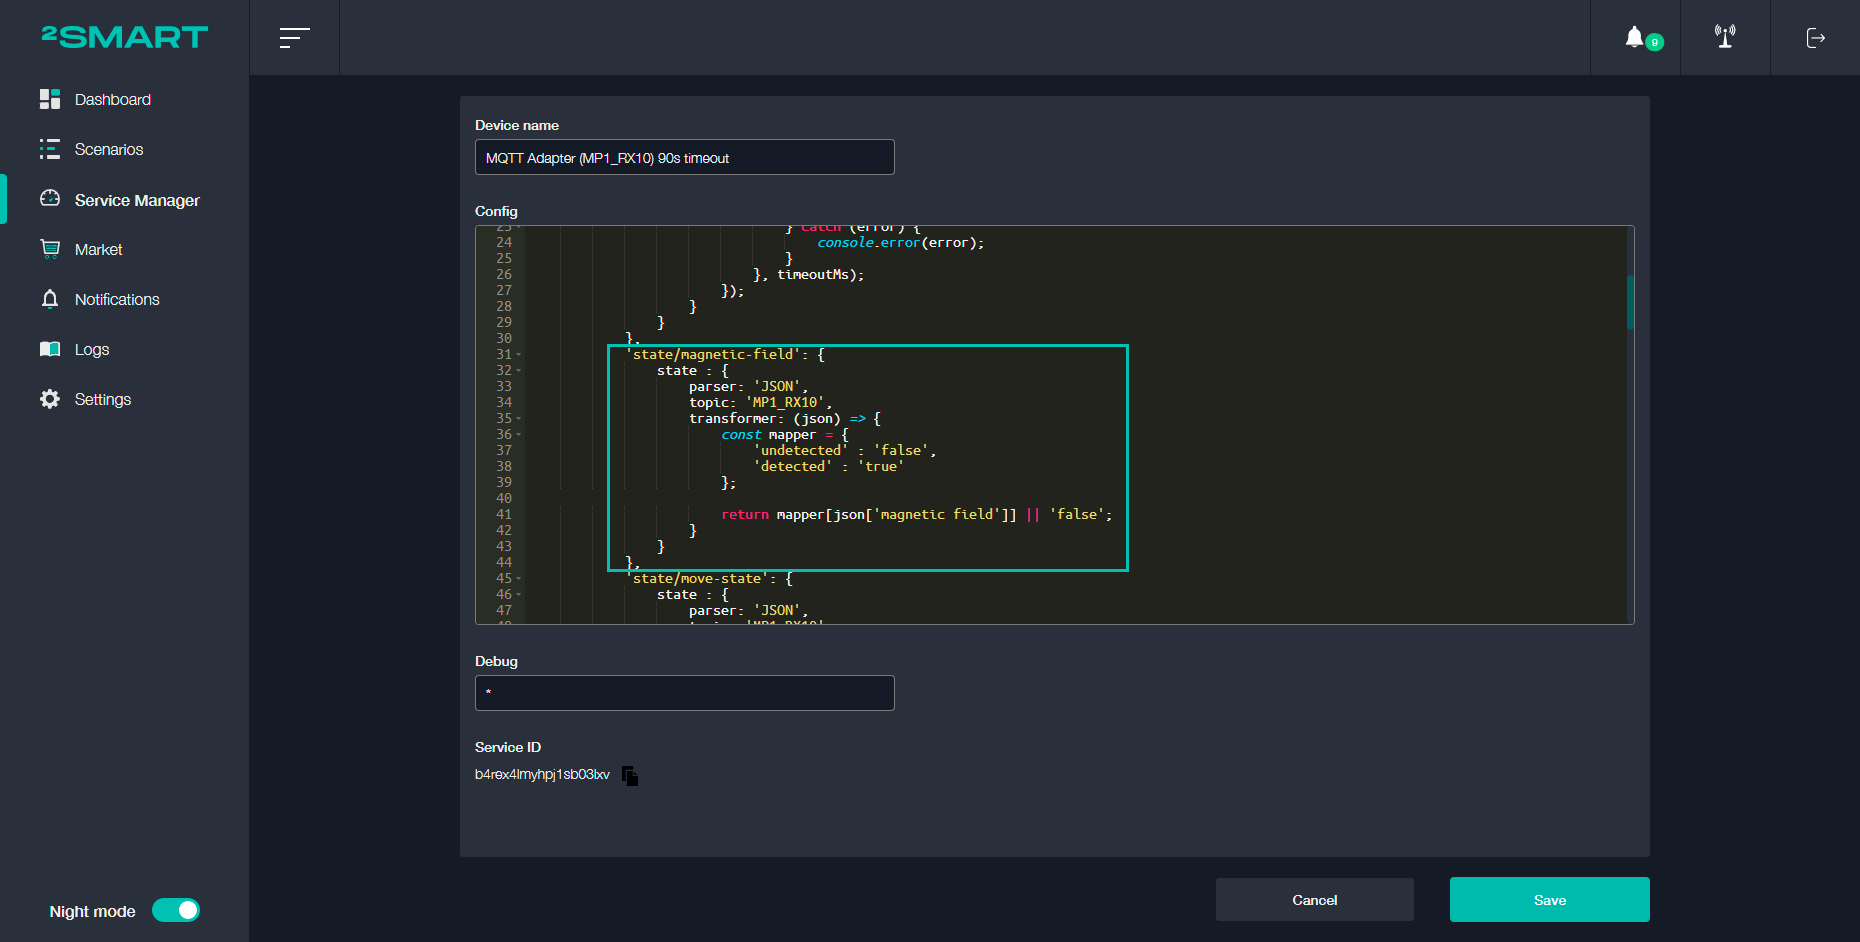
For example, the string “magnetic_field” received from Teltonika IoT software has the values “detected” and “undetected”. According to the 2Smart convention, these values should appear as “true” and “false”, respectively. To convert one message format to another, we added the following code to the adapter settings:
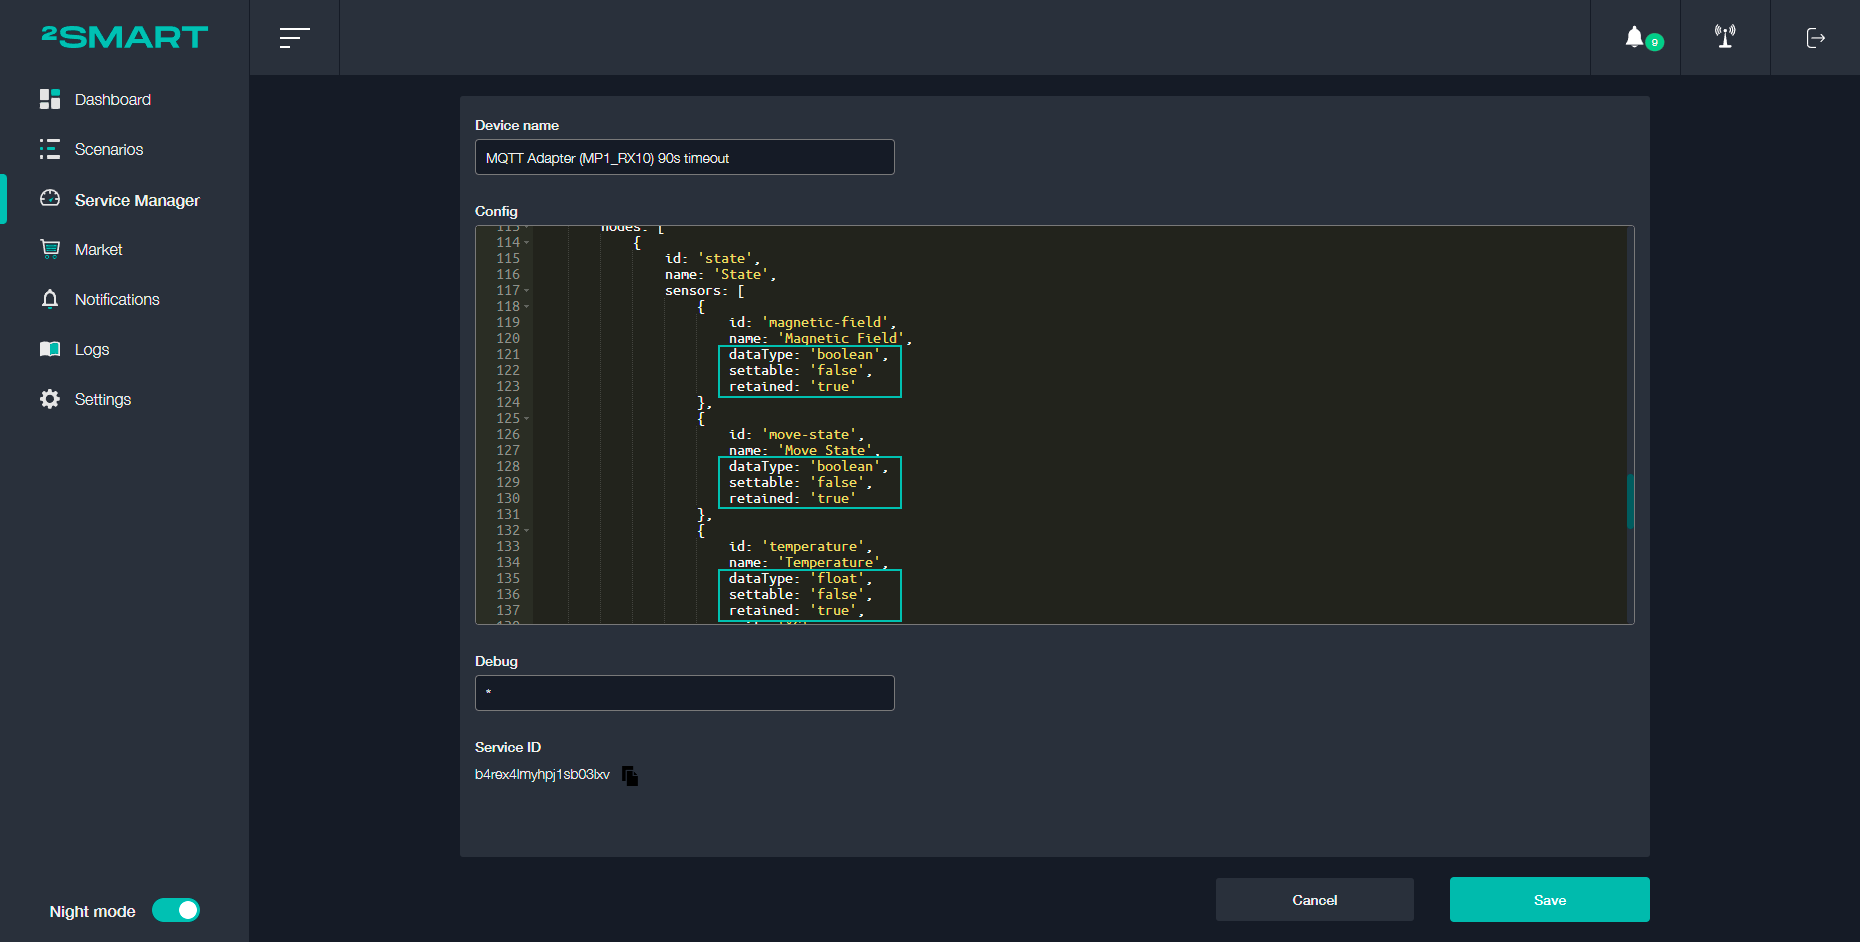
Following the 2Smart convention, we registered the data type for each sensor and indicated whether the data is settable and retained.
Besides converting the message format to the 2Smart convention, the MQTT Adapter bridge includes additional settings. First of all, this is a manually set timeout, after which the device status in the 2Smart Standalone platform changes from Ready to Lost if the value of none of its topics has been updated. This enables sensor readings from a disconnected Teltonika IoT router to be designated irrelevant in the platform interface.
Since we used three Teltonika IoT devices in the experiment, each had its own MQTT Adapter configured.
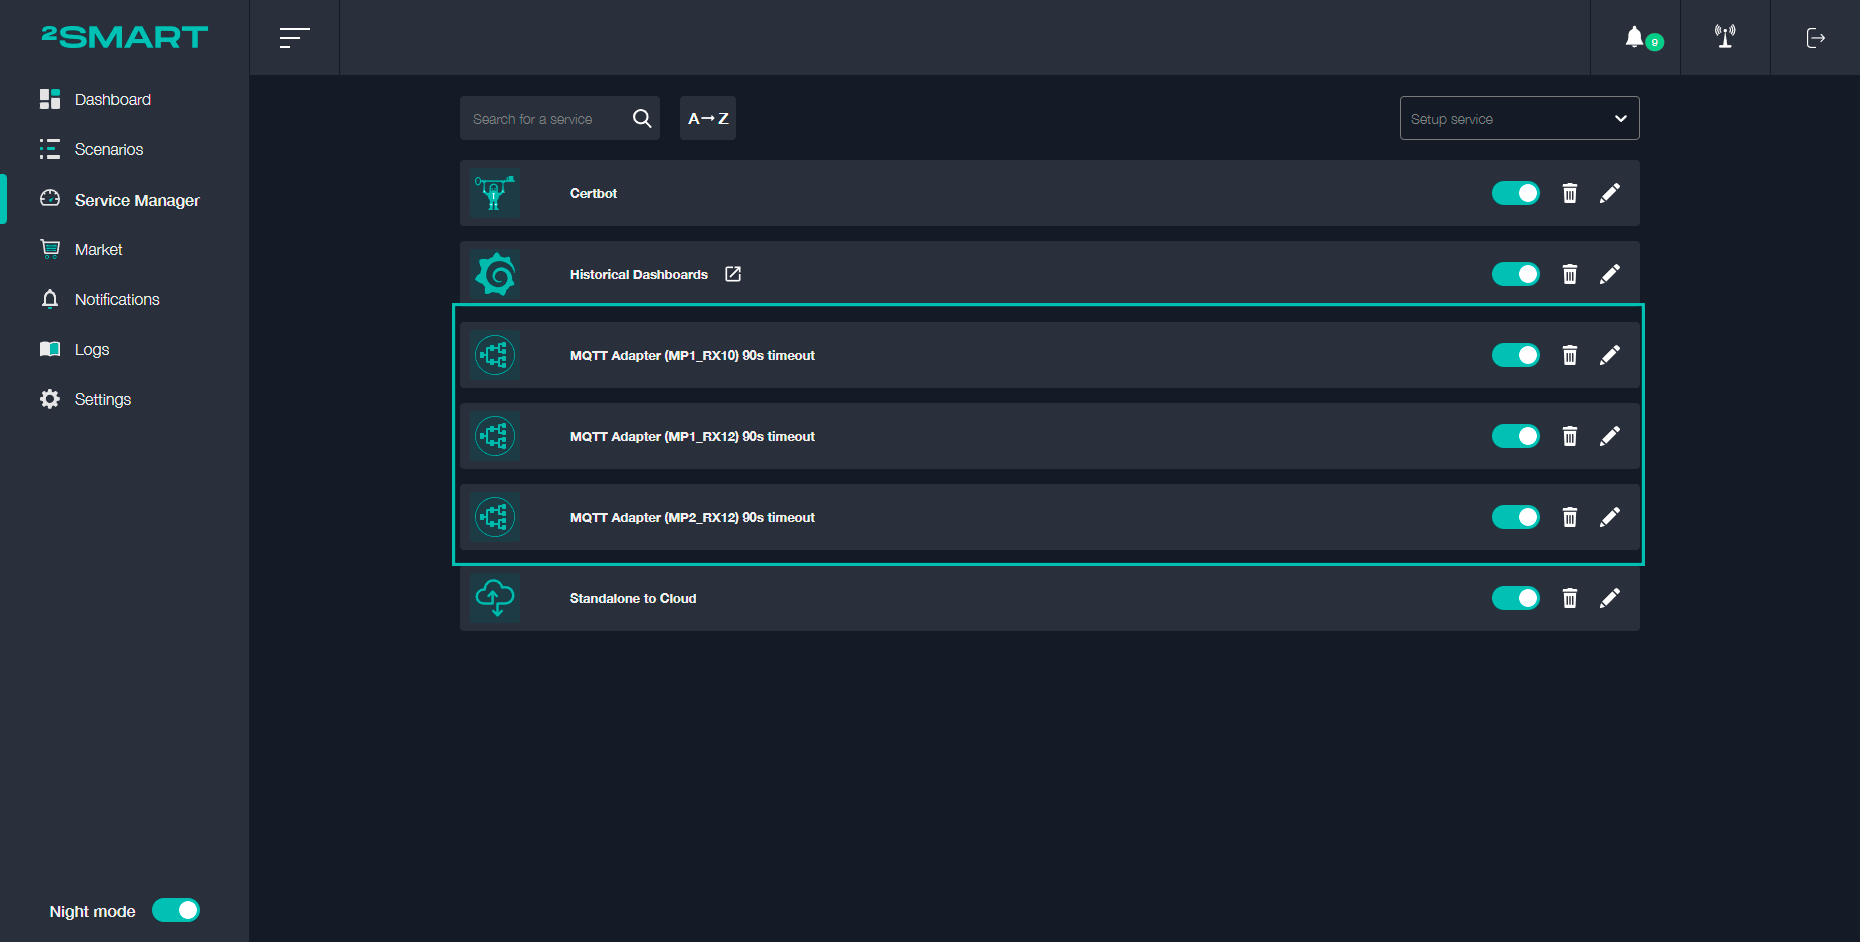
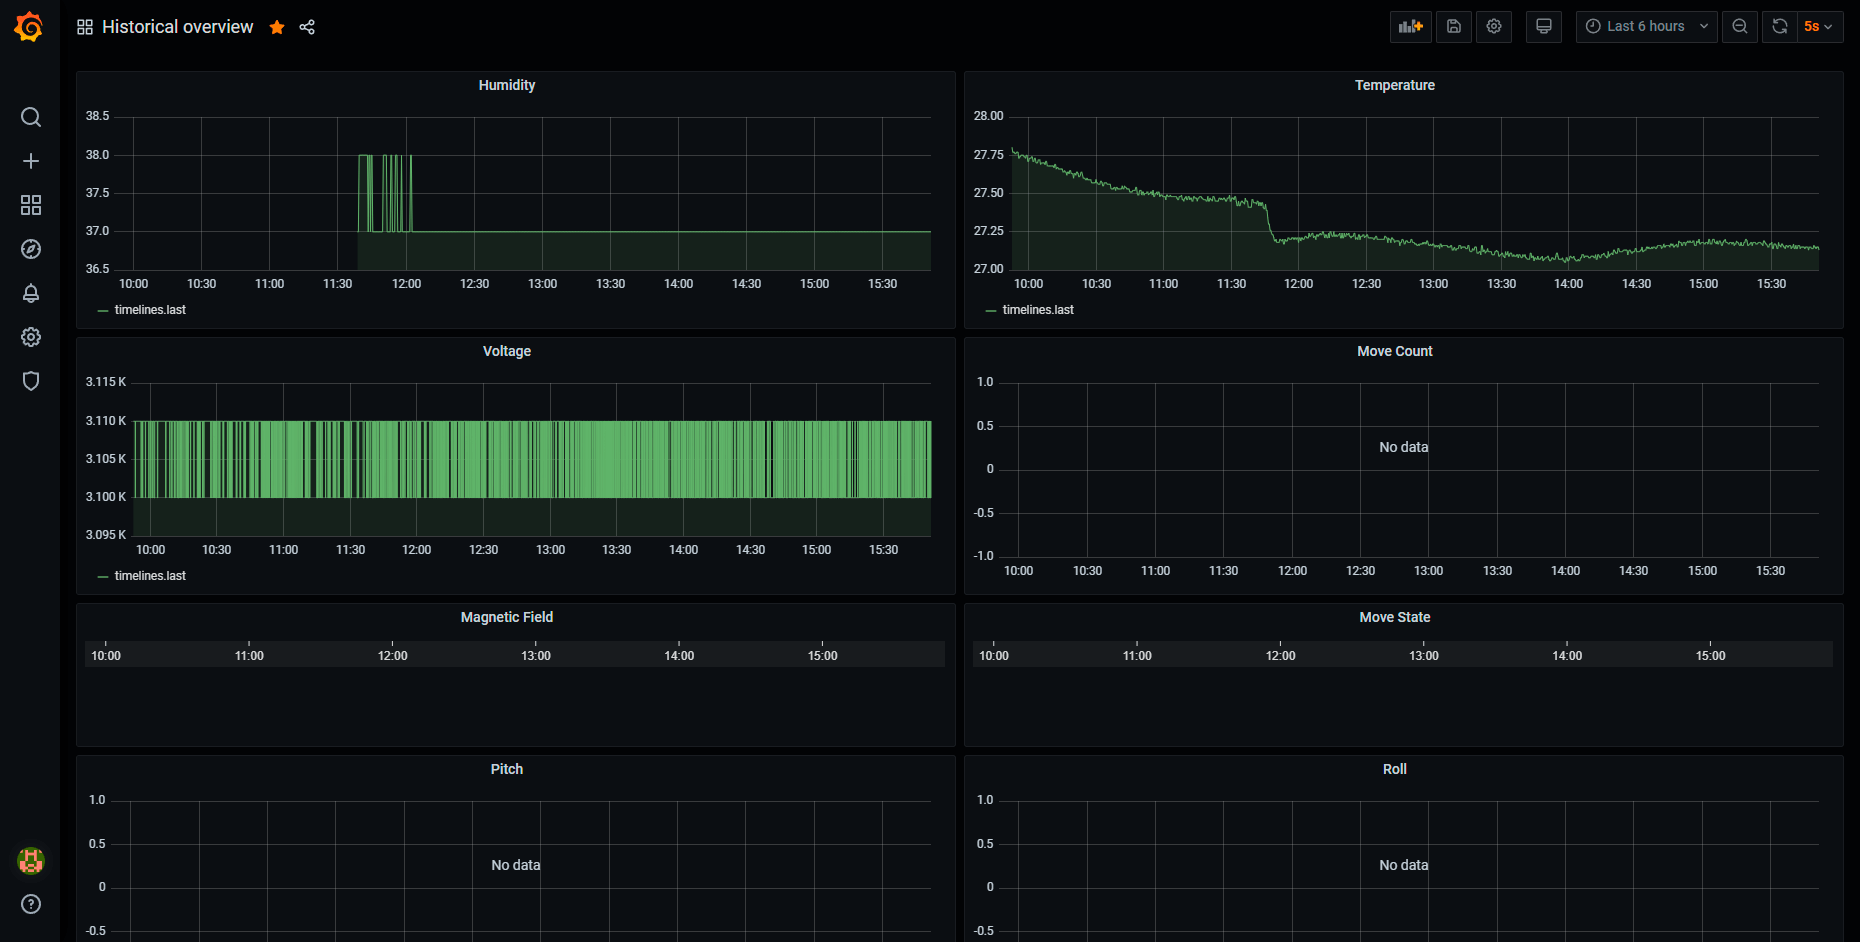
To monitor Teltonika IoT sensor readings using the Grafana web application, we also installed the Historical Dashboards bridge in the 2Smart Standalone addon market. It allowed us to visualize the history of sensor readings for further analysis.
IoT monitoring of Teltonika devices and possible use cases
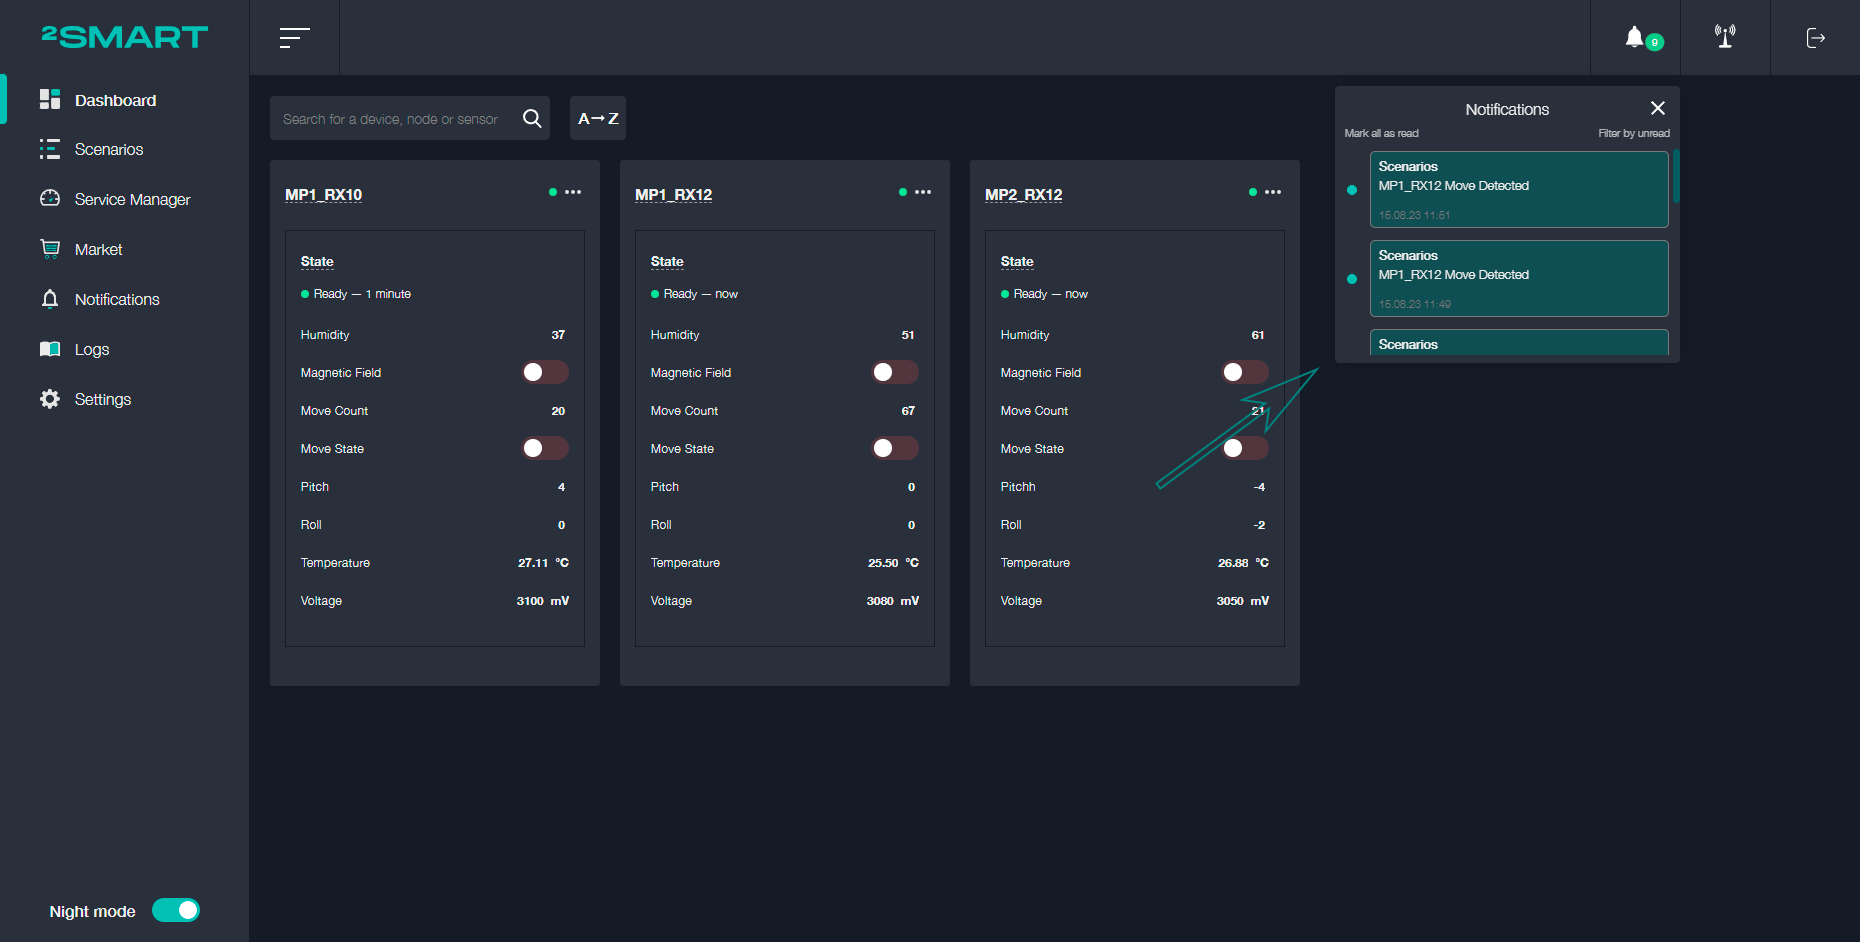
After configuring three MQTT Adapter bridges for three devices, their cards automatically appeared on the 2Smart Standalone admin panel dashboard. The cards display the current readings of all sensors. And if some of the sensors are settable, then the 2Smart Standalone administrator can manage them from the web application.
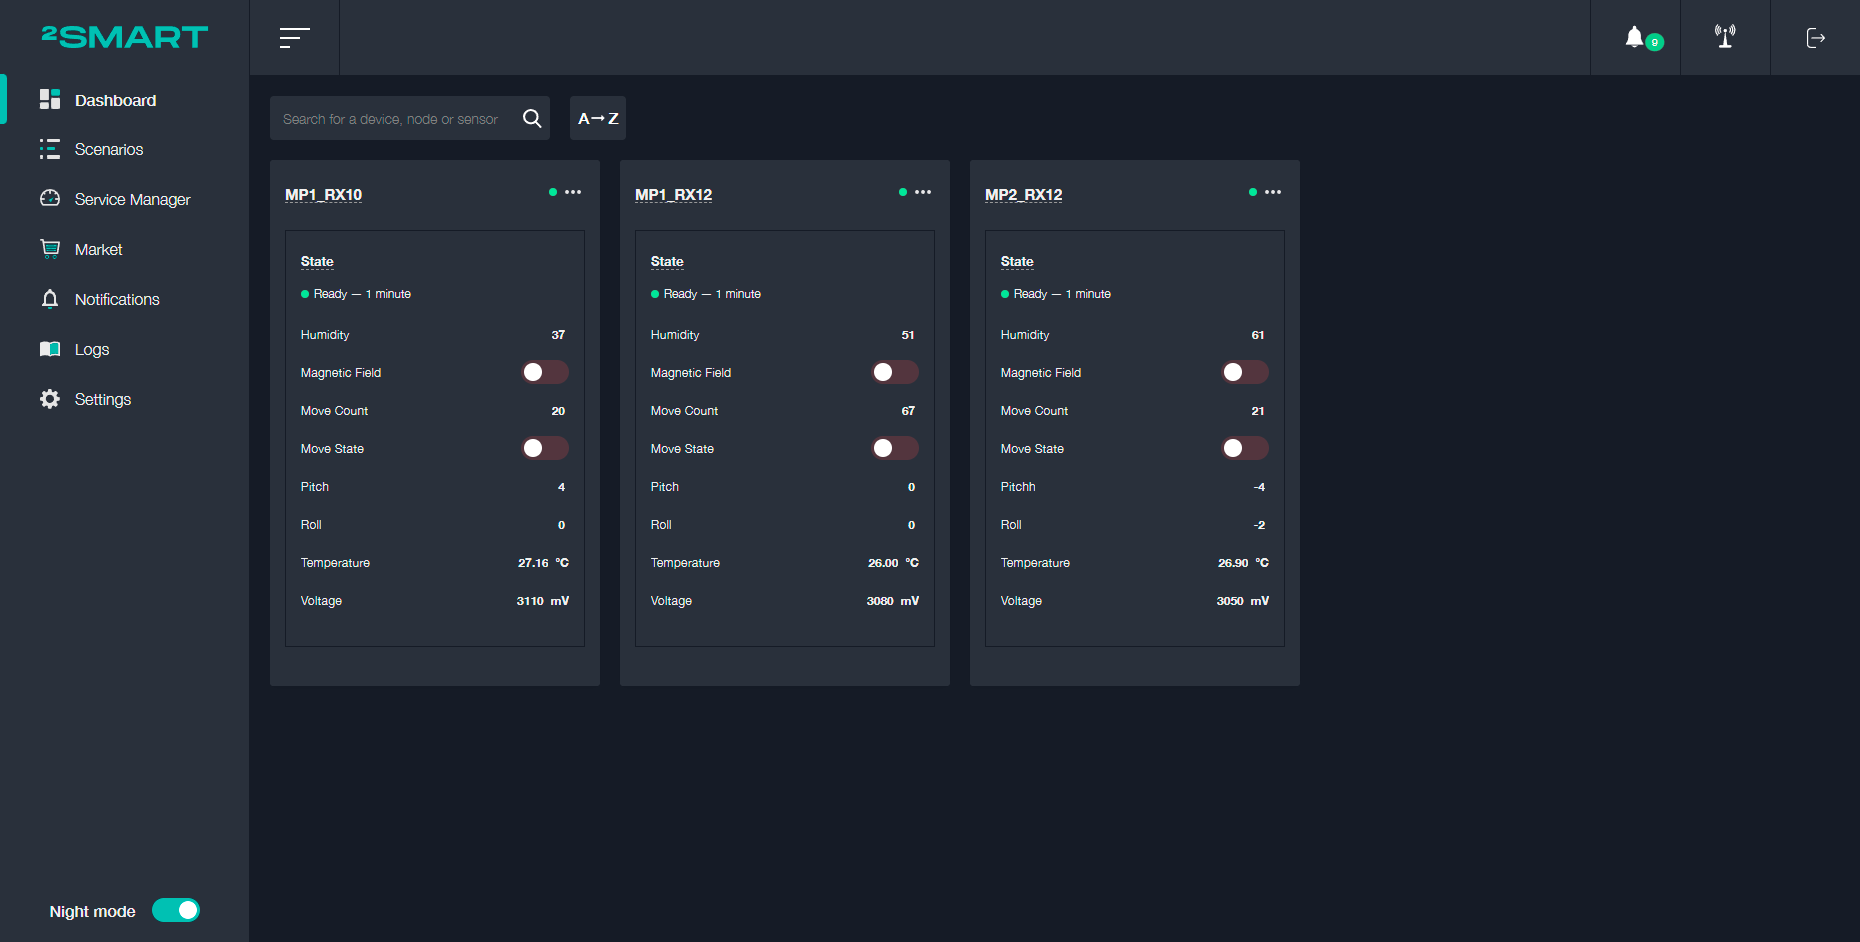
In addition to the admin panel, 2Smart Standalone includes a panel for end users. It allows you to grant access to monitoring to the many users who need it without giving them access to device administration. In addition, the user panel allows you to customize the data display using a library of widgets flexibly.
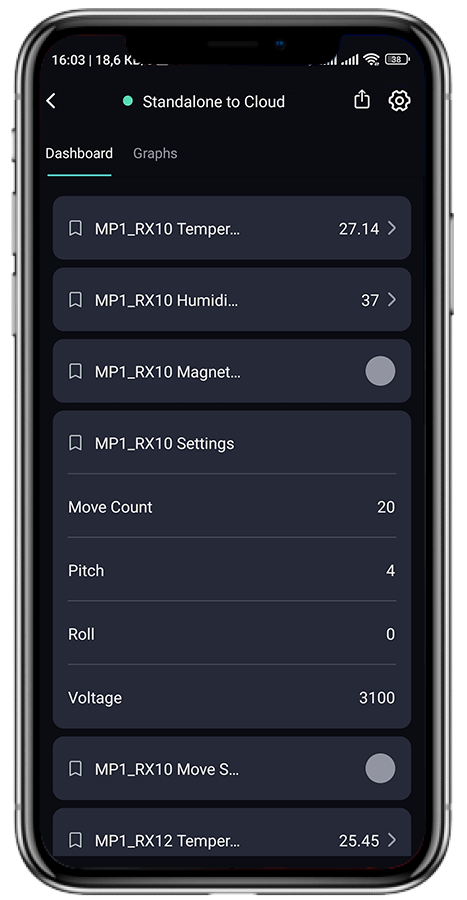
We have configured a Gauge widget for each Teltonika IoT device that displays temperature and humidity readings. We brought the readings of less significant sensors on a separate card as a list. And settable sensors were brought on cards with buttons for switching the status.
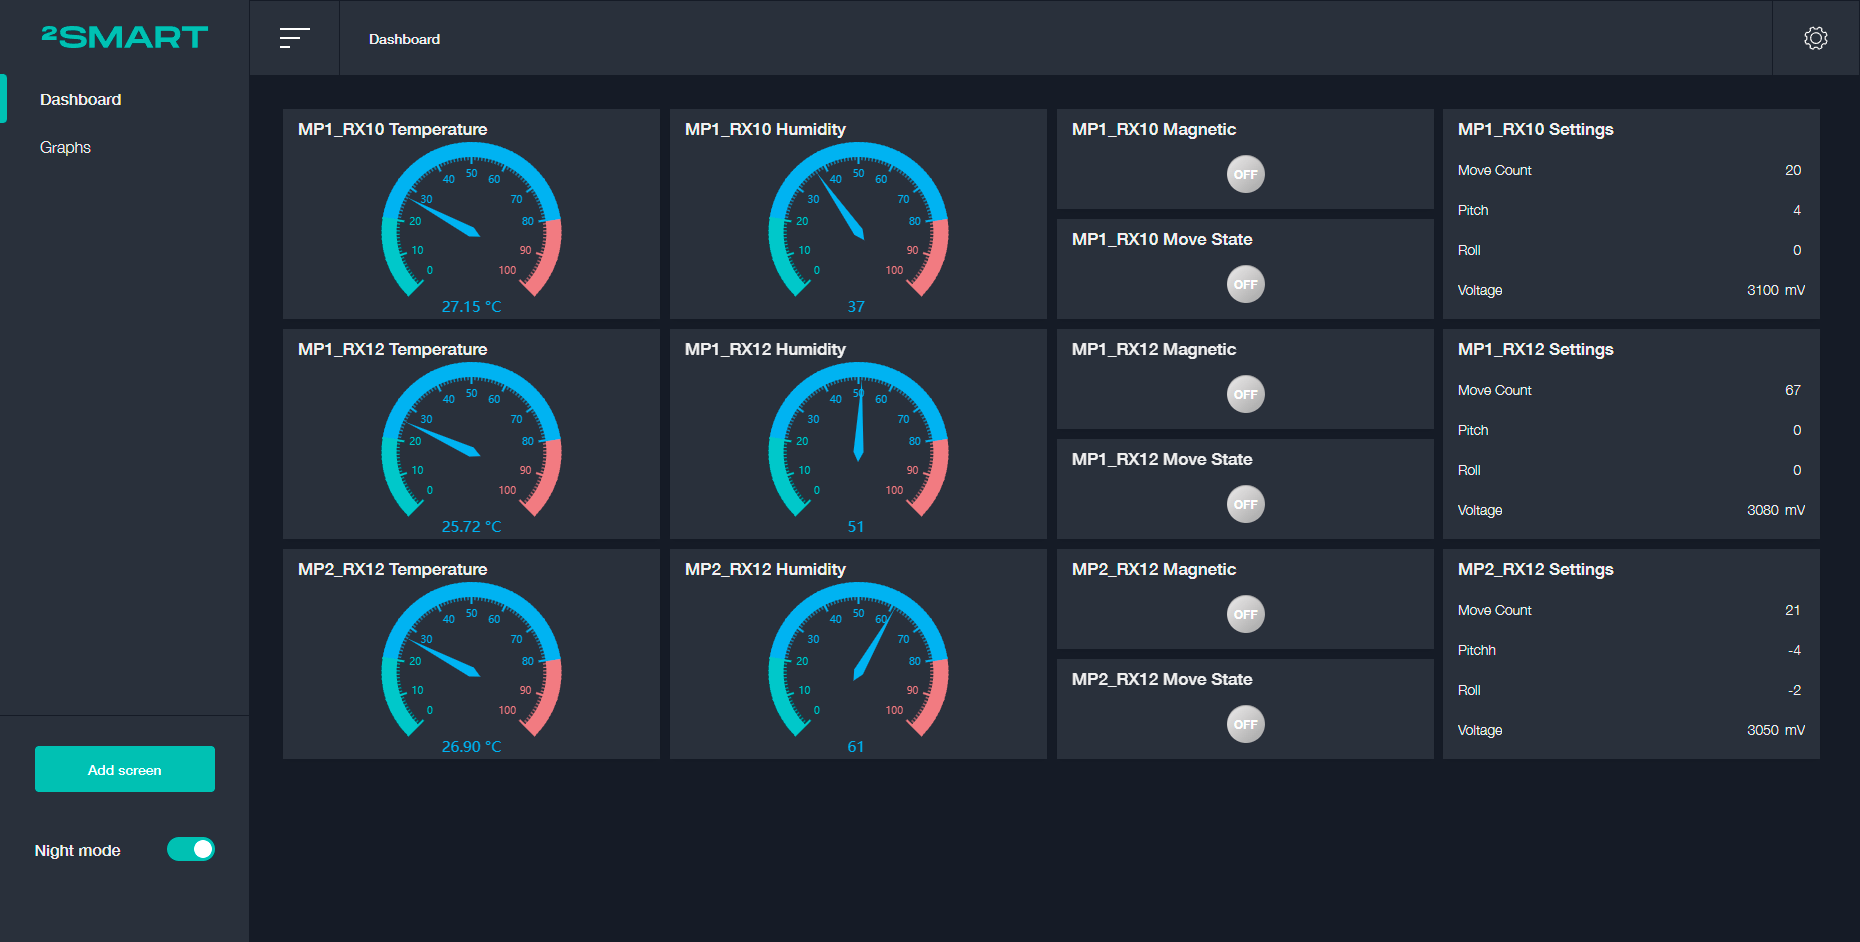
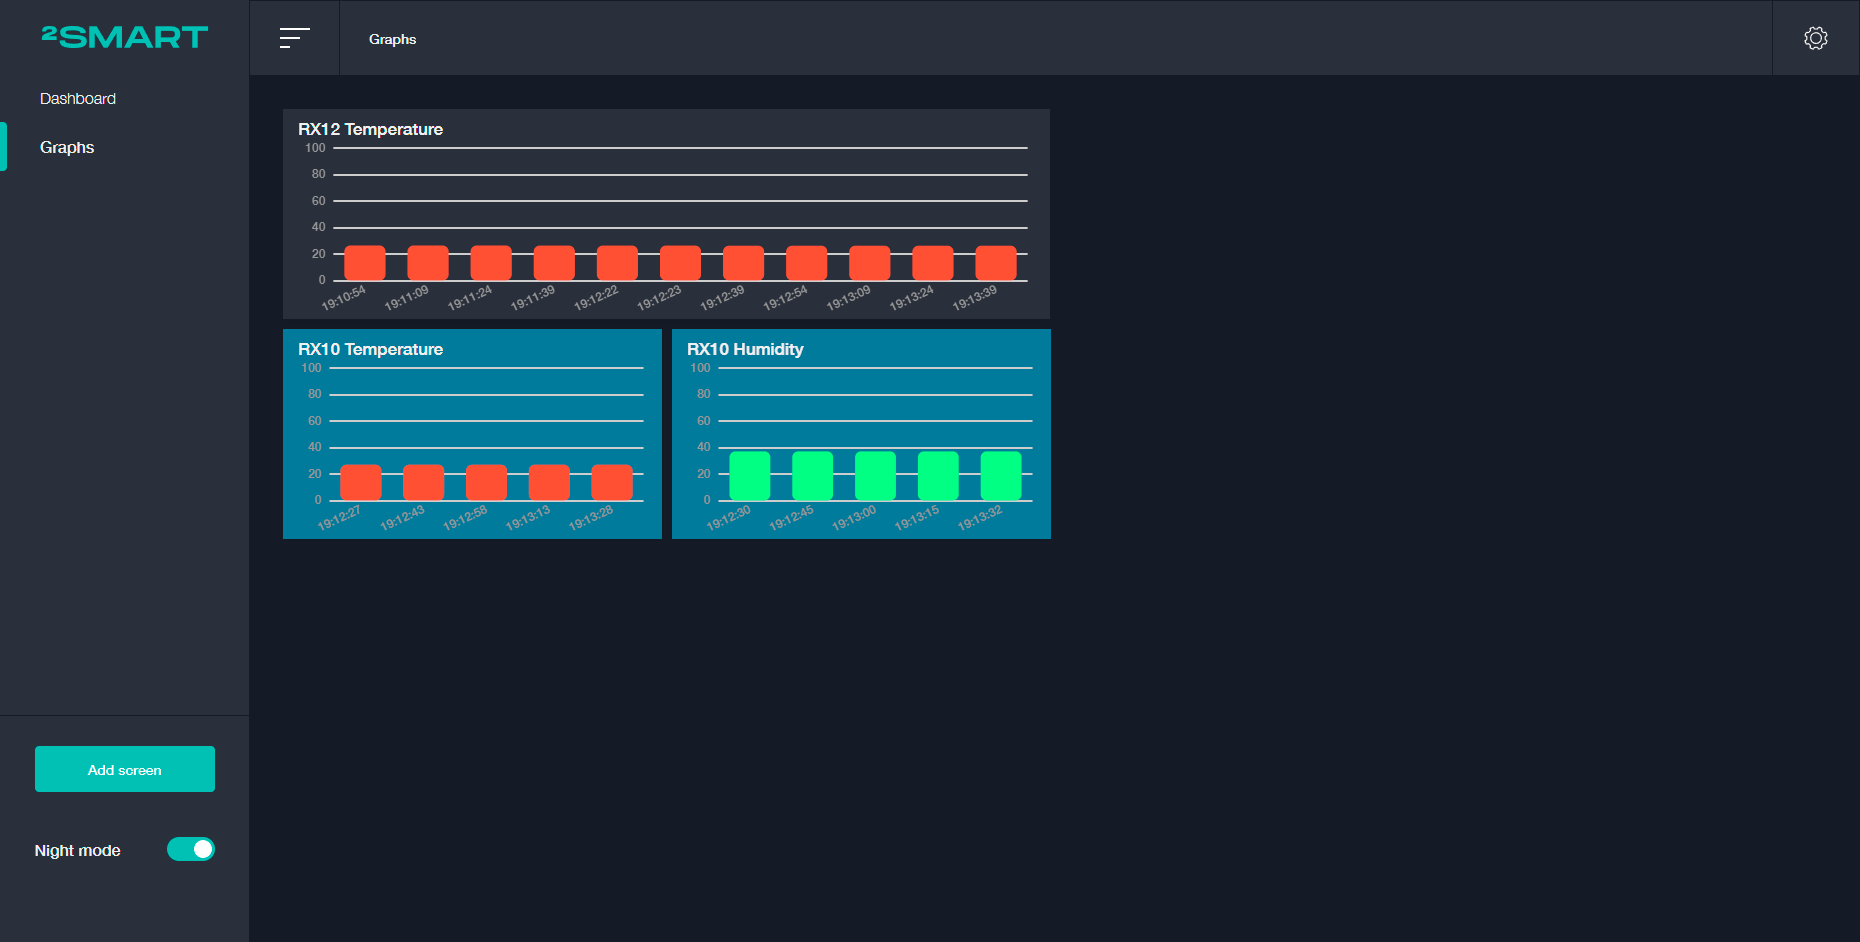
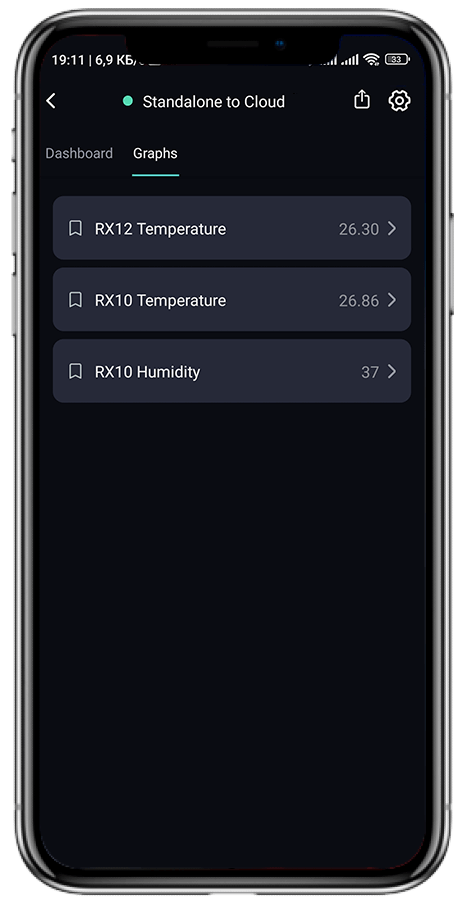
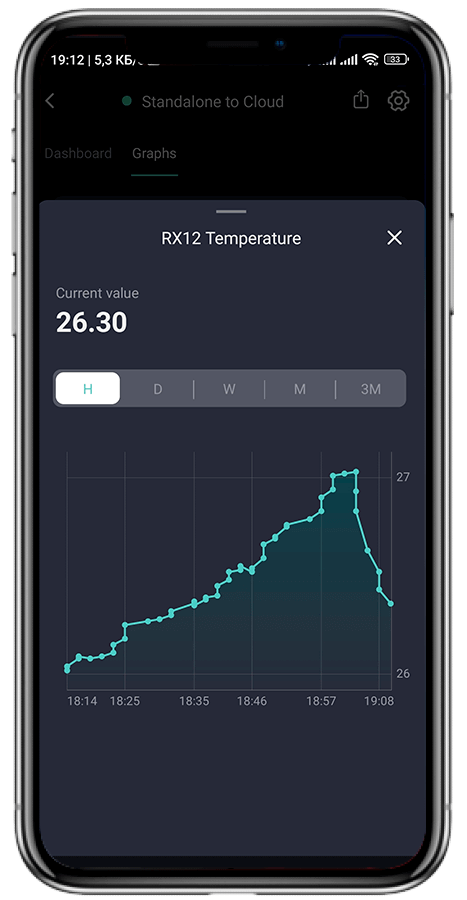
In addition to the main dashboard, we added the Graphs tab to the user panel, where we set up the temperature and humidity data display on the charts.
As we said above, the Historical Dashboards bridge, which is based on the Grafana web application, is used for IoT device monitoring and control.
If we talk about automation scenarios, then in the framework of this experiment, we used the notification setting for triggering motion and magnetic sensors.
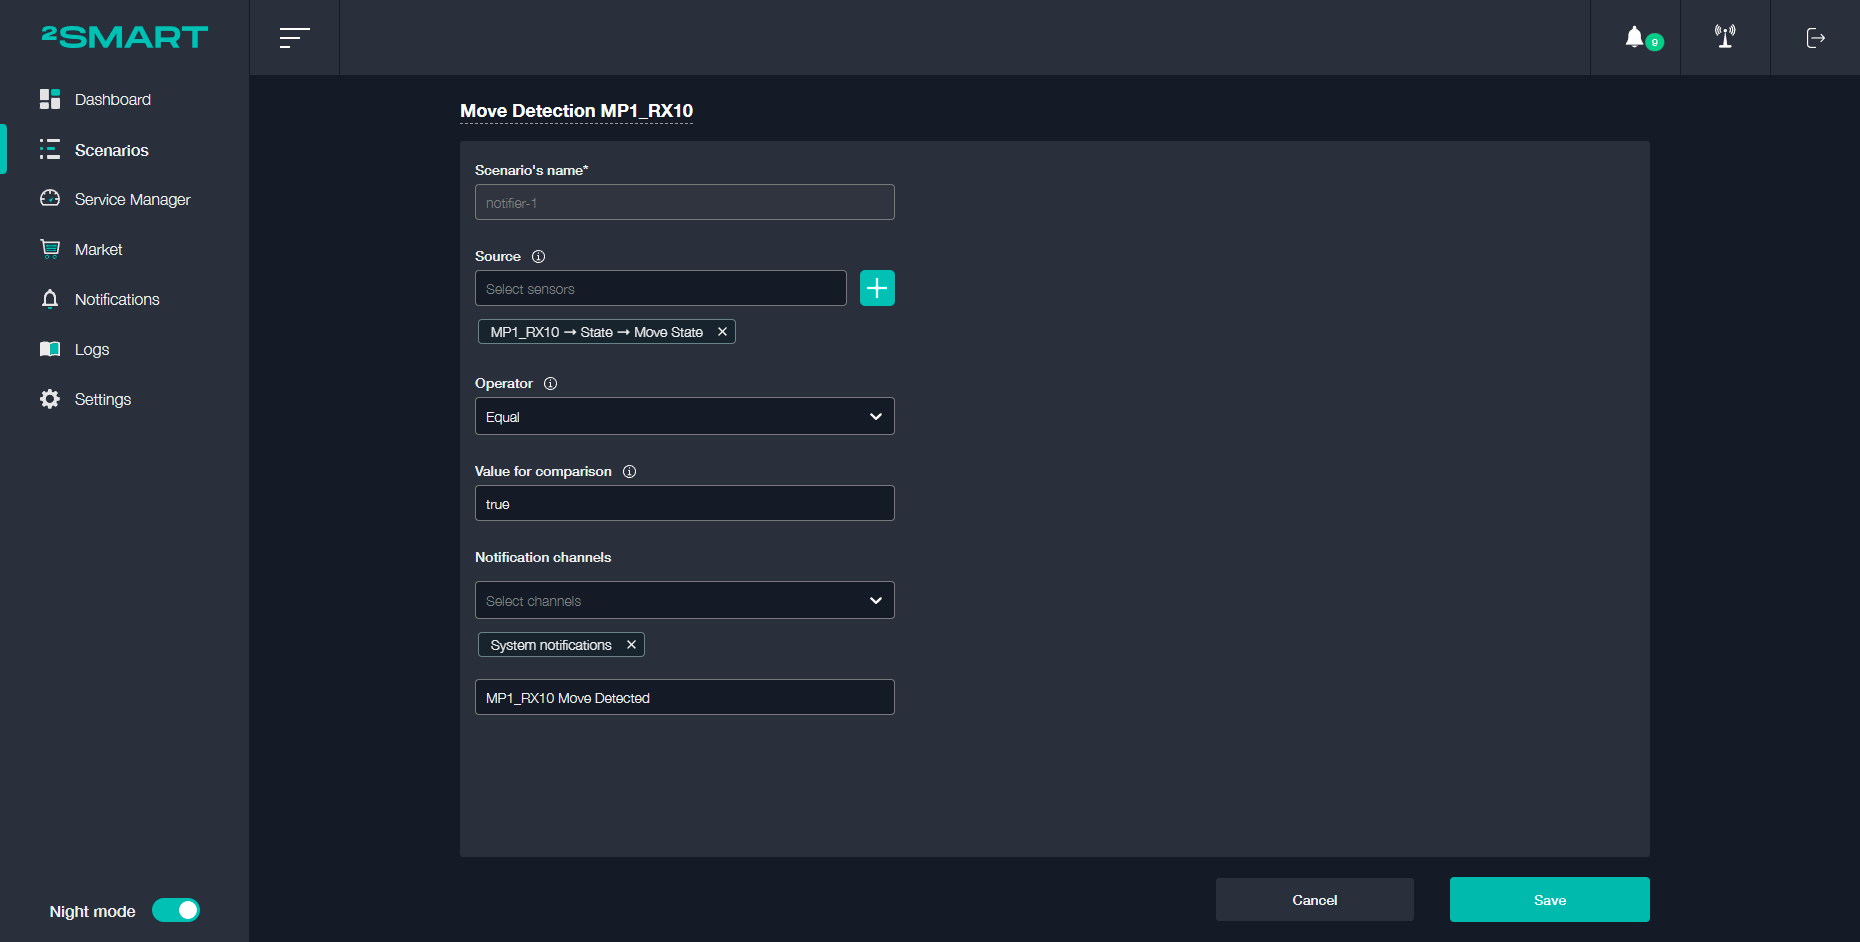
System notifications about such events appear in the 2Smart Standalone web application and are duplicated in the Slack and Telegram messengers of users for whom this integration is configured.
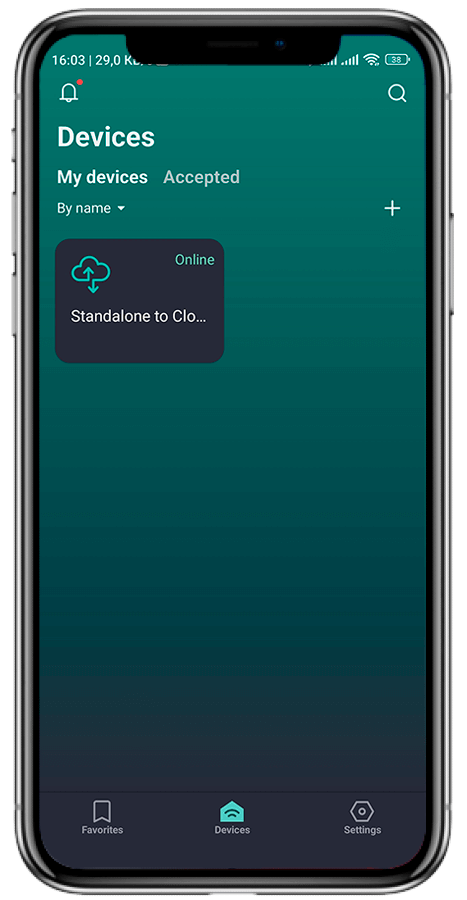
We also connected the “Standalone to Cloud” bridge, making integrating Standalone devices into a 2Smart Cloud account possible. Such integration allows using the 2Smart Cloud mobile application and all its features for equipment monitoring and management.
After setting up the integration, all devices linked to 2Smart Standalone are displayed in the mobile application as one device. At the same time, the mobile application user sees the same widgets that are configured in the Standalone web application.
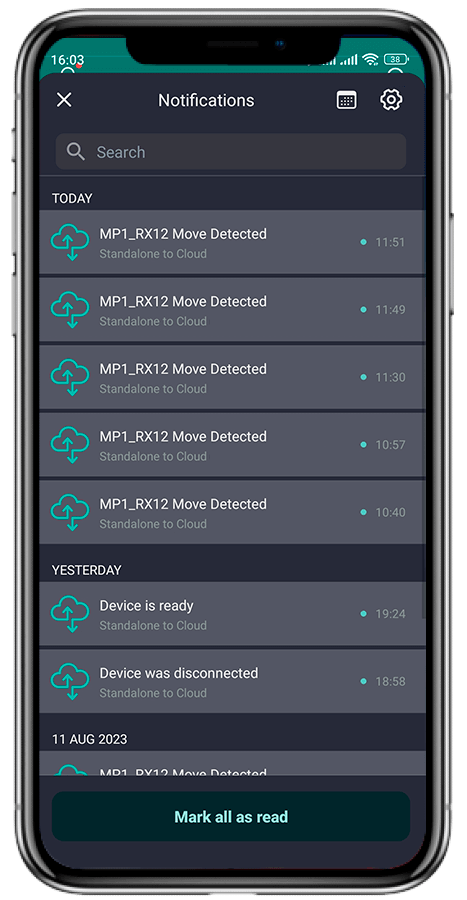
The mobile app’s Notifications section provides event messages configured in the web app automation scenarios.
As for the possible scenarios for using the integration of Teltonika IoT devices and the 2Smart Standalone platform, a business can use the capabilities described above to monitor the current conditions in which goods are stored or transported. Teltonika IoT sensors can also be used in an office or residential building to monitor air conditions and set up automatic scenarios based on sensor readings.
If you connect additional equipment to the automation platform, which includes controlled sensors, you can configure more complex scenarios than sending notifications about specific events, for example, control of heating and cooling of air to maintain its stable temperature, automatic activation of ventilation when the threshold value of humidity in the room is exceeded, etc.
To learn more about Teltonika IoT solutions, including the Teltonika remote management system, visit the manufacturer’s website and contact Teltonika team via the contact form. If you need more details about the 2Smart Standalone IoT monitoring and automation platform, please get in touch with us at contact@2smart.com
Don't forget to share this post!
Read Next


Let’s dive into your case
Share with us your business idea and expectations about the software or additional services.
