
Table of contents:
After creating a new IoT device in 2Smart Cloud (in our example, a smart Wi-Fi relay), testing the prototype, and assembling the device on the Printed circuit board, you have a complete product! The relay is controlled via the mobile app, voice commands in Google and Apple ecosystems, a Telegram bot, and phone calls. The first series of the device has been installed by several users who are fully satisfied with the functionality and user-friendliness.
However, the ESPHome-based device firmware has some limitations, with the main one being unable to update the firmware over the air. To install a new firmware version, each device must be connected to the computer via a USB cable, which can sometimes be inconvenient.
The perfect solution was using the 2Smart Cloud platform SDK development kit. With its help, you can write custom firmware. With the ability to update the entire series of devices over the air, SDK provides extra features like a built-in web interface with device settings, sending notifications about the device’s status, and many more. Thanks to the SDK, all of this is available “out of the box” immediately after installing the device’s firmware.
A notable advantage of the SDK is that it already contains the essential functions of a standard device. The developer needs to get a suitable, ready-made example code and use it for their device based on the tutorial. This will help describe the business logic of the device’s operation. When doing this, there is no need to understand the 2Smart Cloud IoT platform’s mechanics.
Writing the SDK-based Custom firmware
The Custom firmware is already written for the Wi-Fi relay, and you can find the code on GitHub. Changes needed are minimal; one needs to add product-specific parameters to the code.
Because the firmware base is completely changing (we worked with ESPHome before), we can’t edit the existing product on the platform. We have to prepare a new product based on Custom firmware.
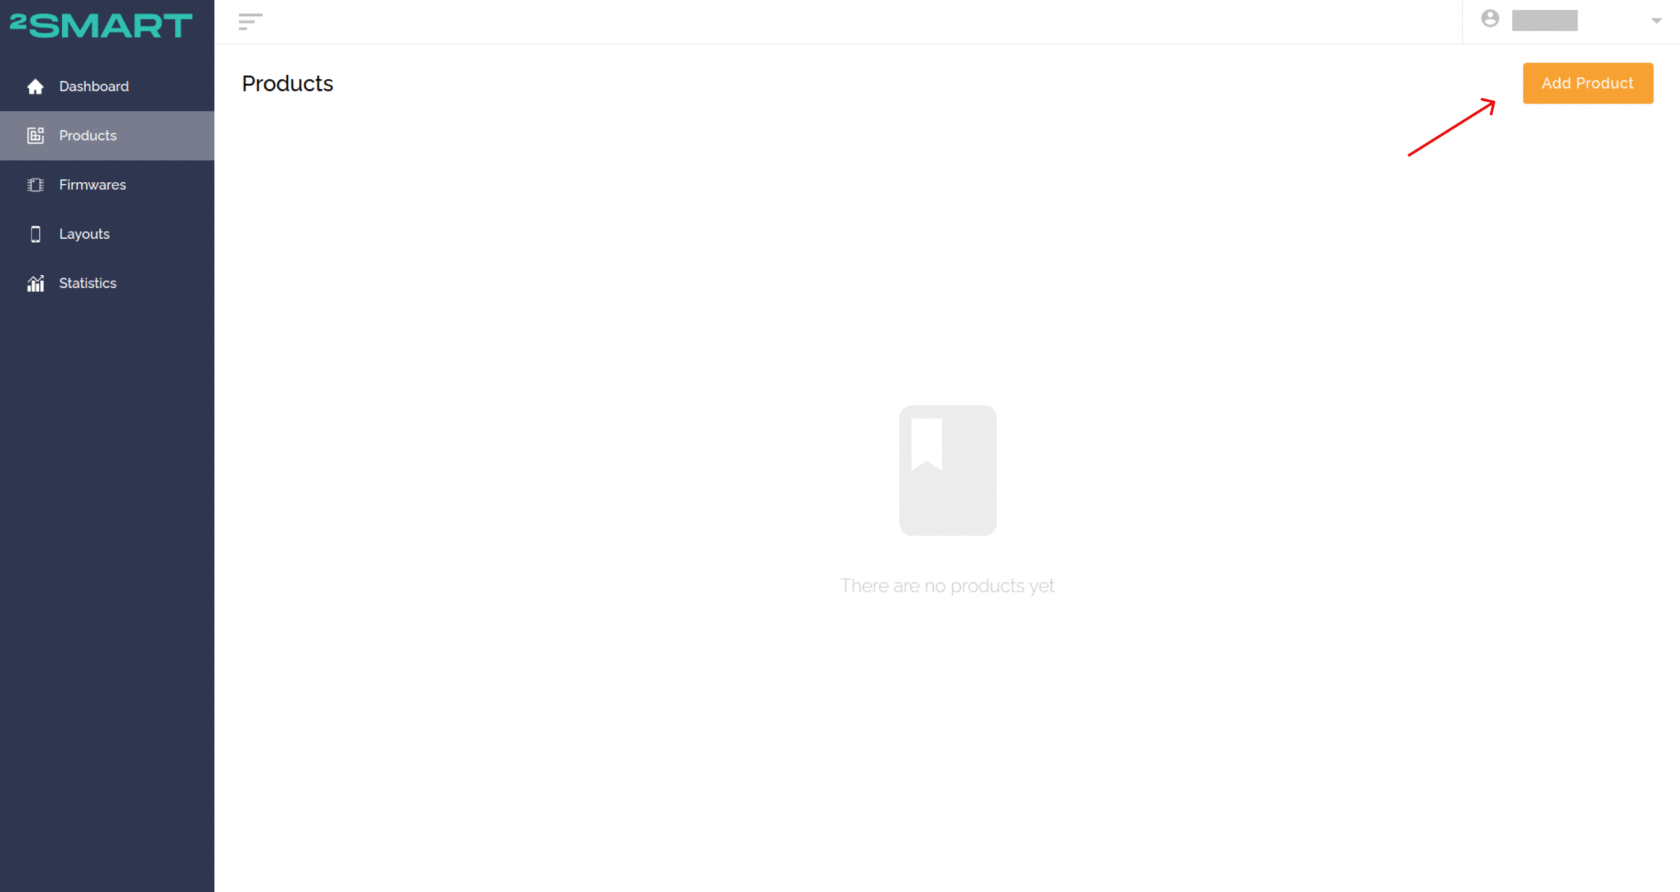
- In the 2Smart Cloud account, go to the “Products” page and click “Add Product”.

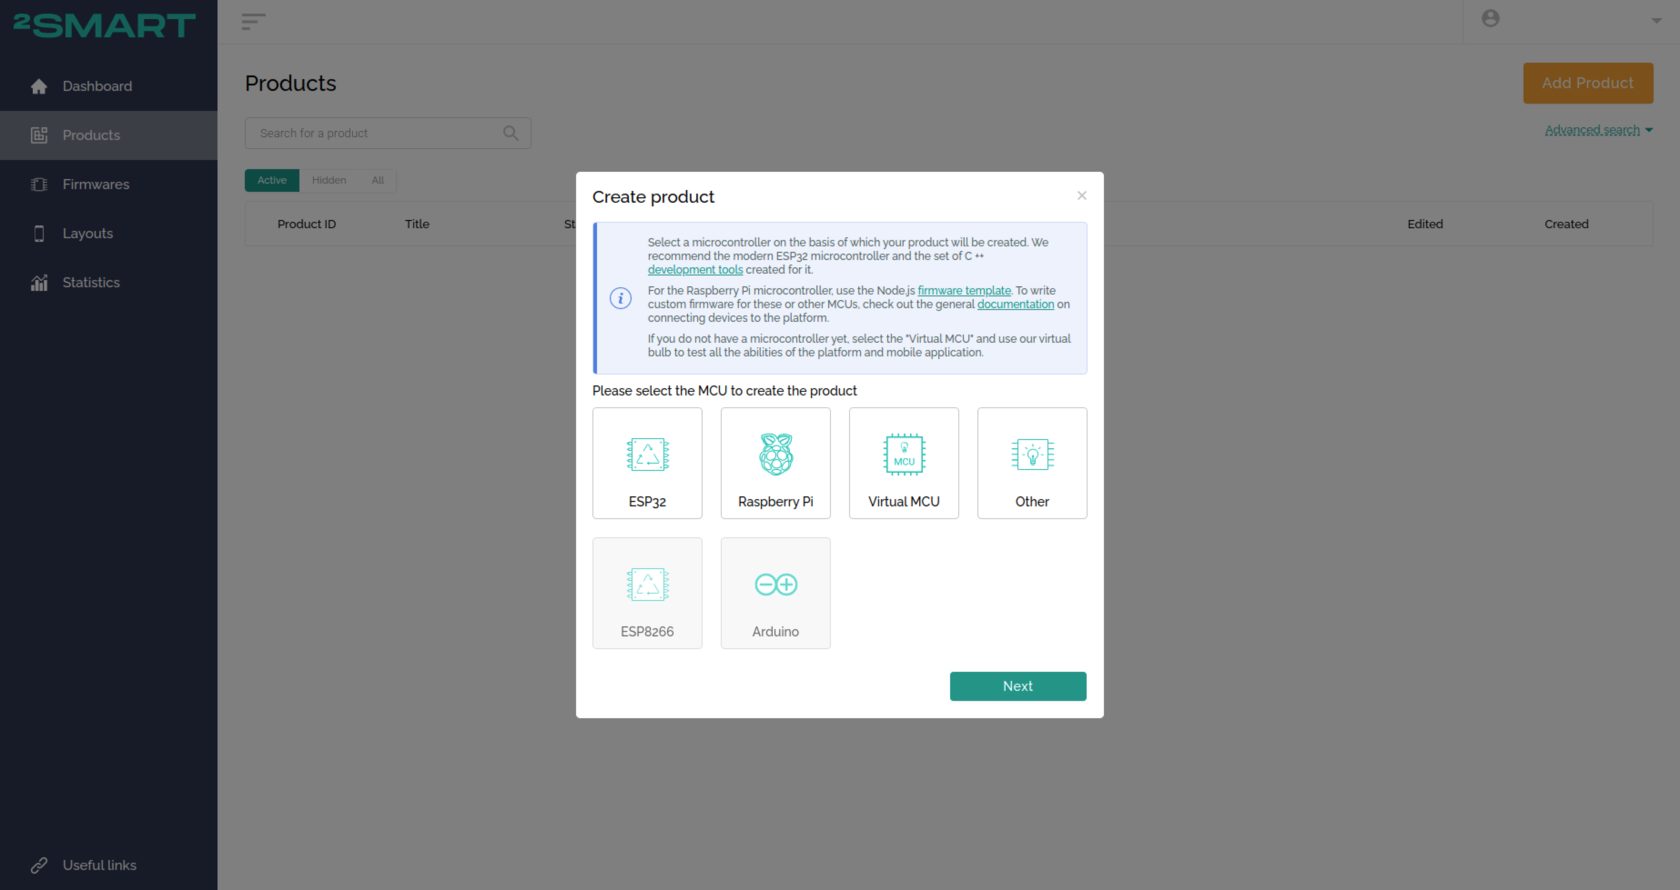
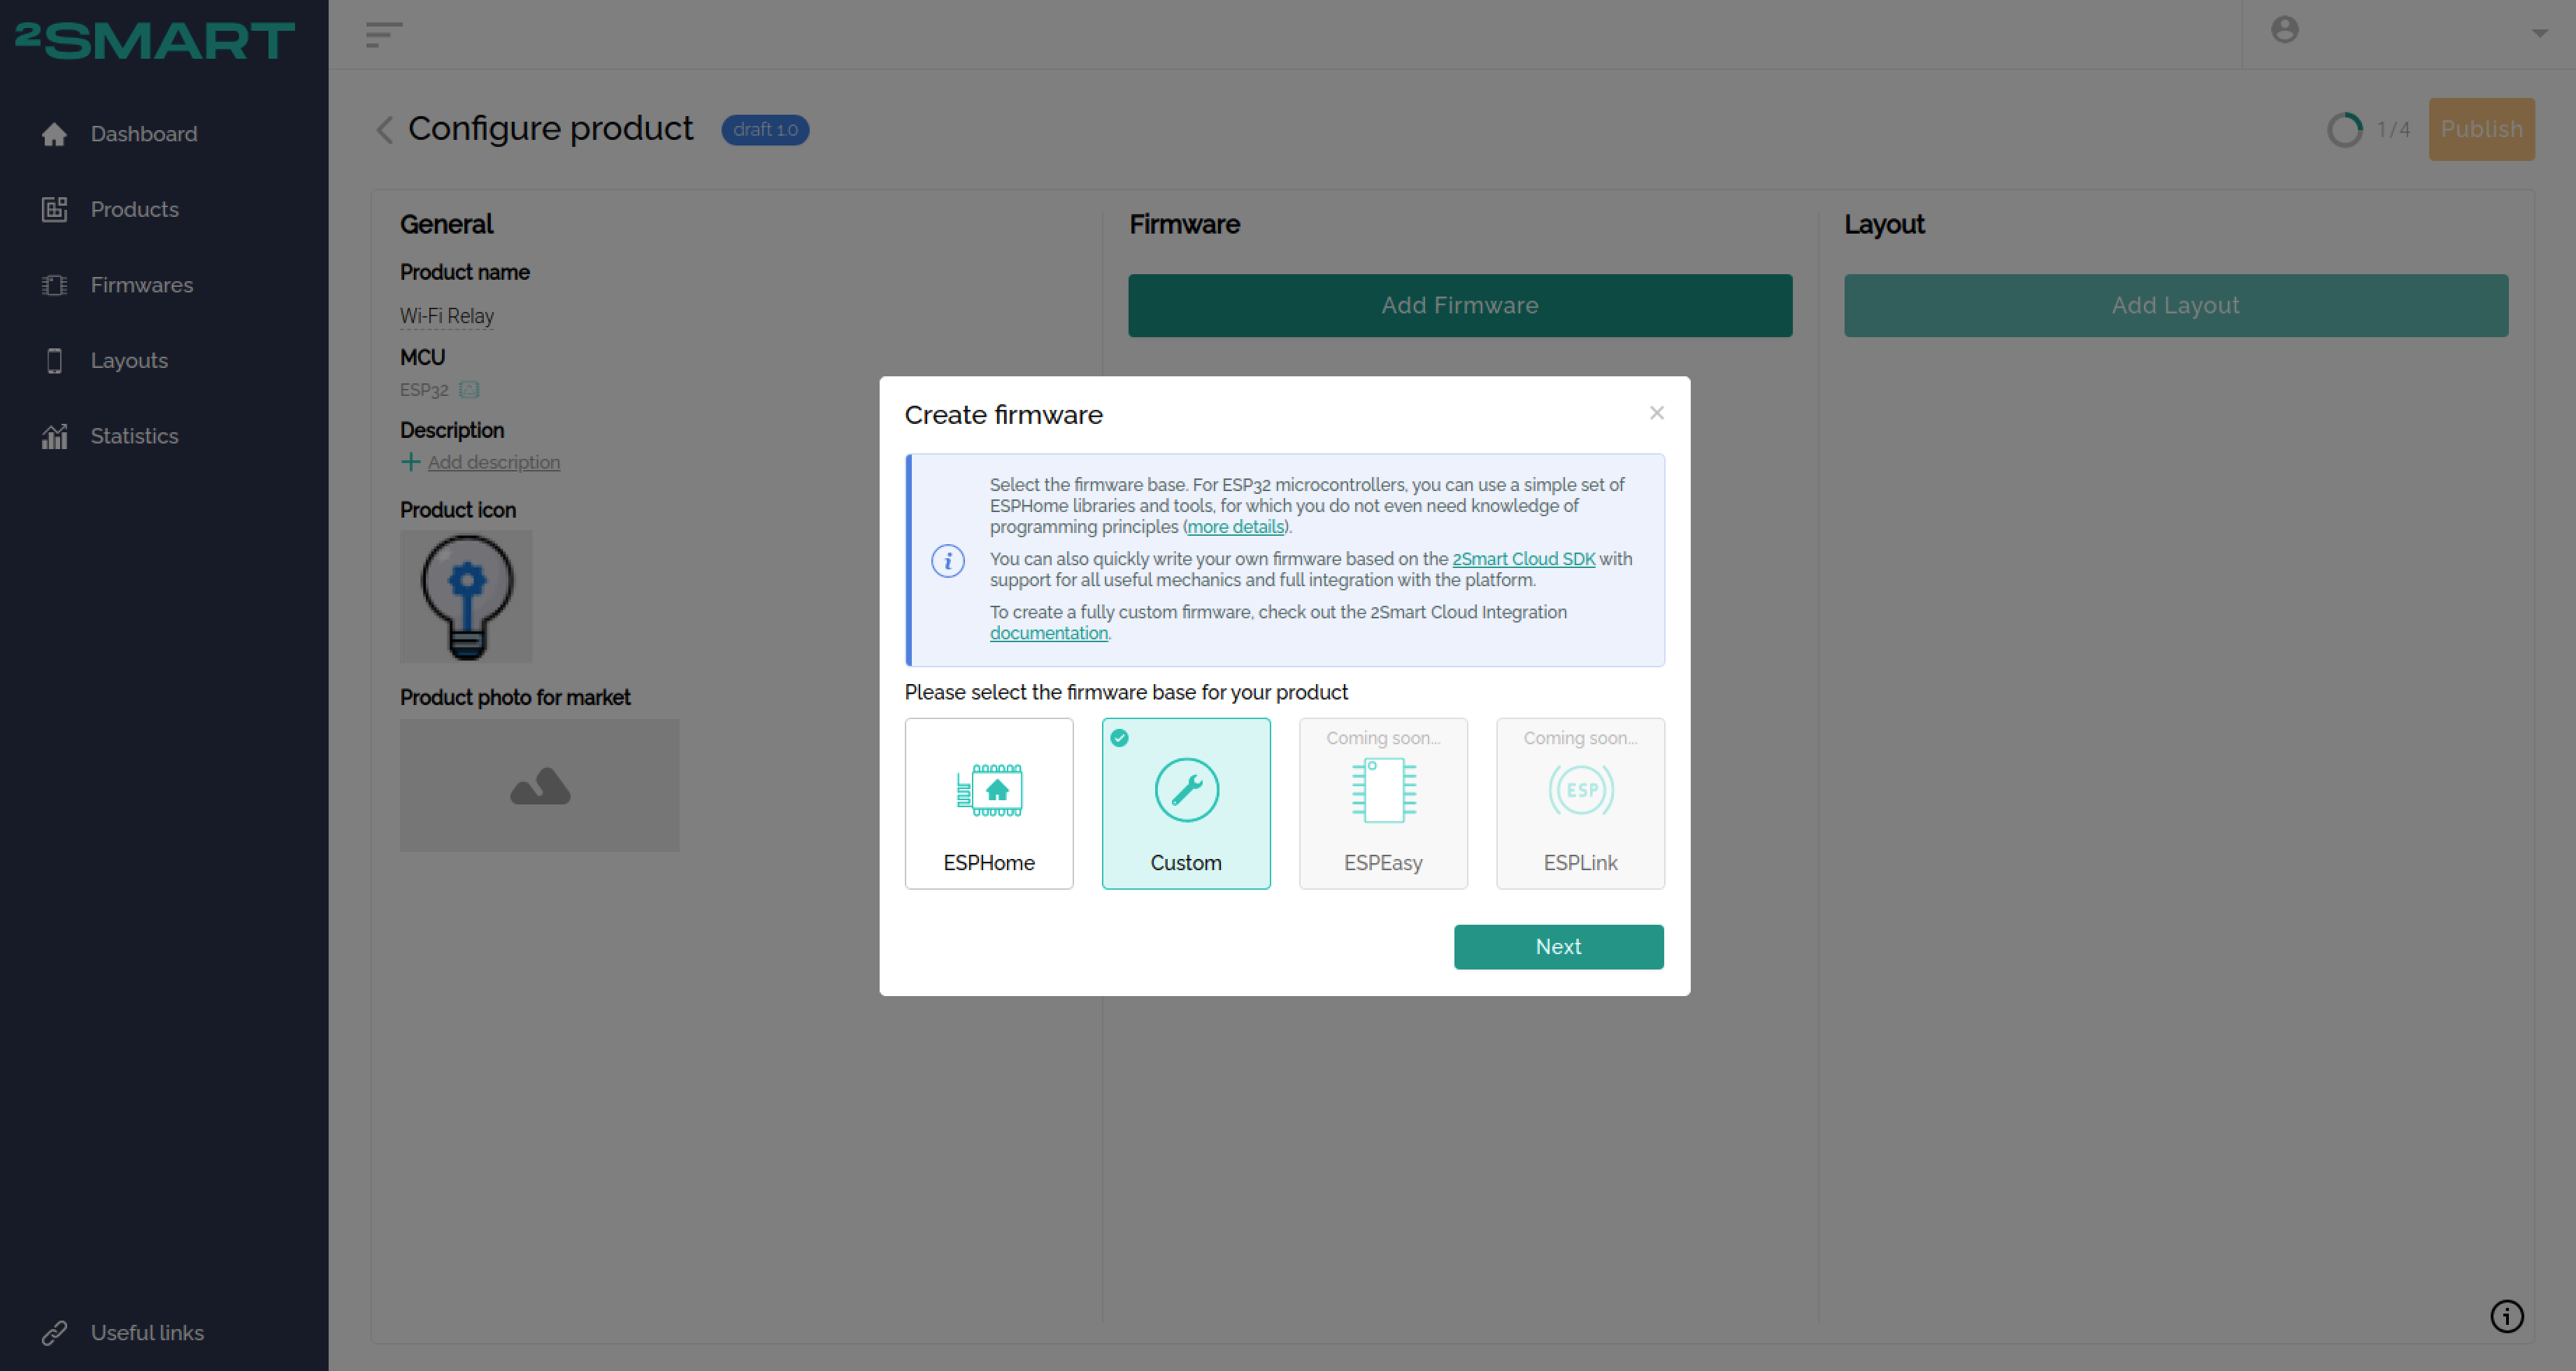
- Select the microcontroller that the device is based on. In our case, it is the ESP32.

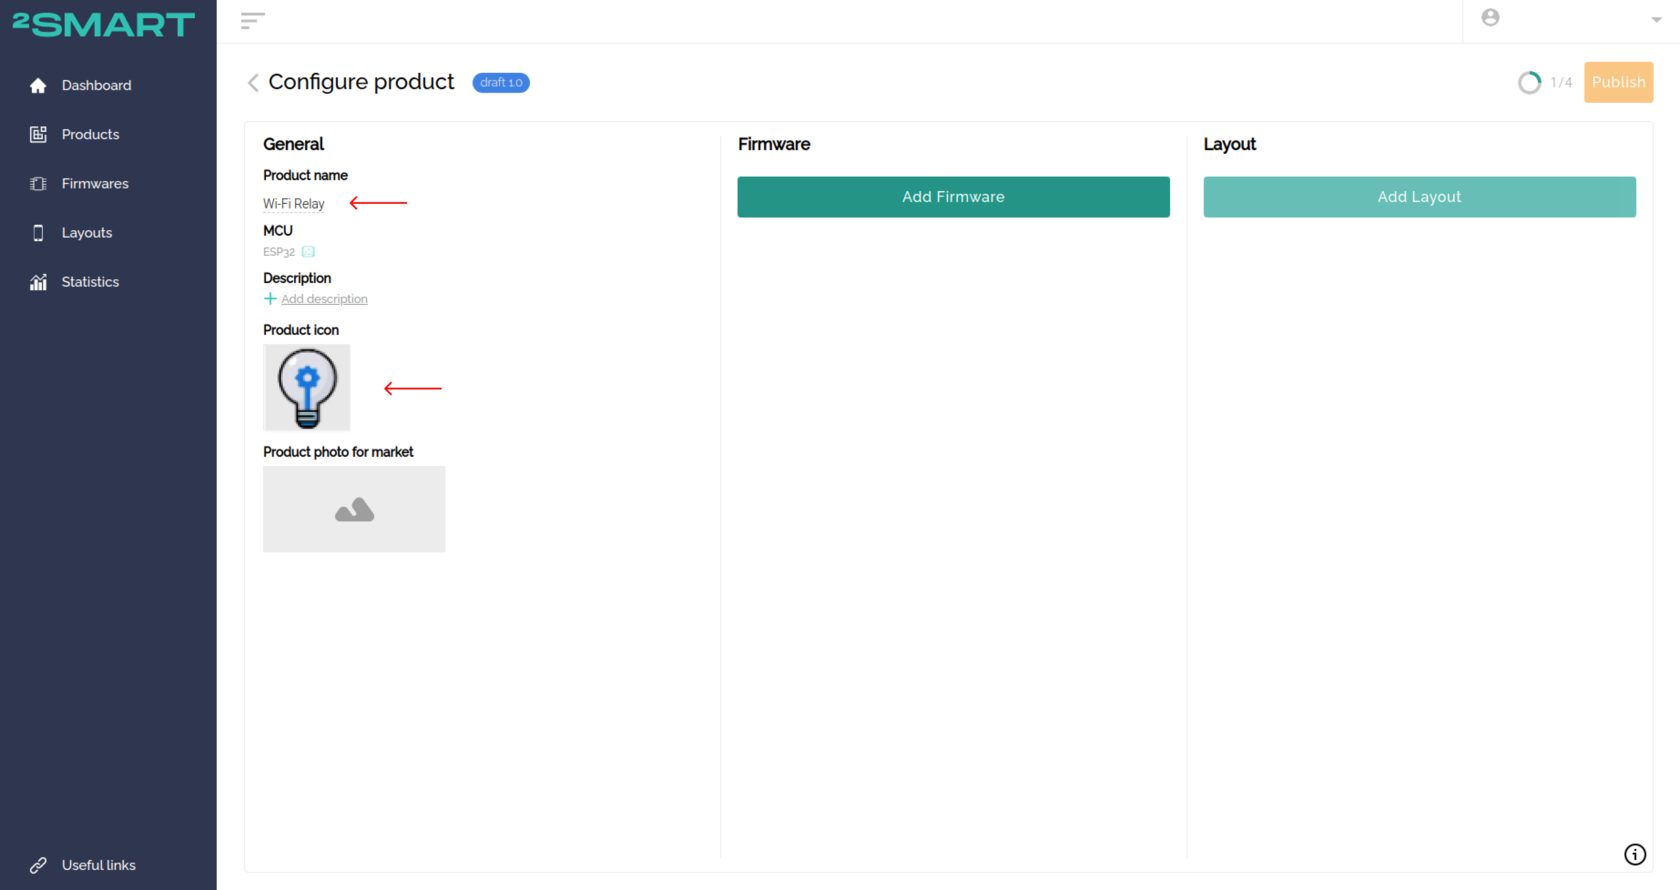
- Enter the information about the device, such as its name, and upload an icon.
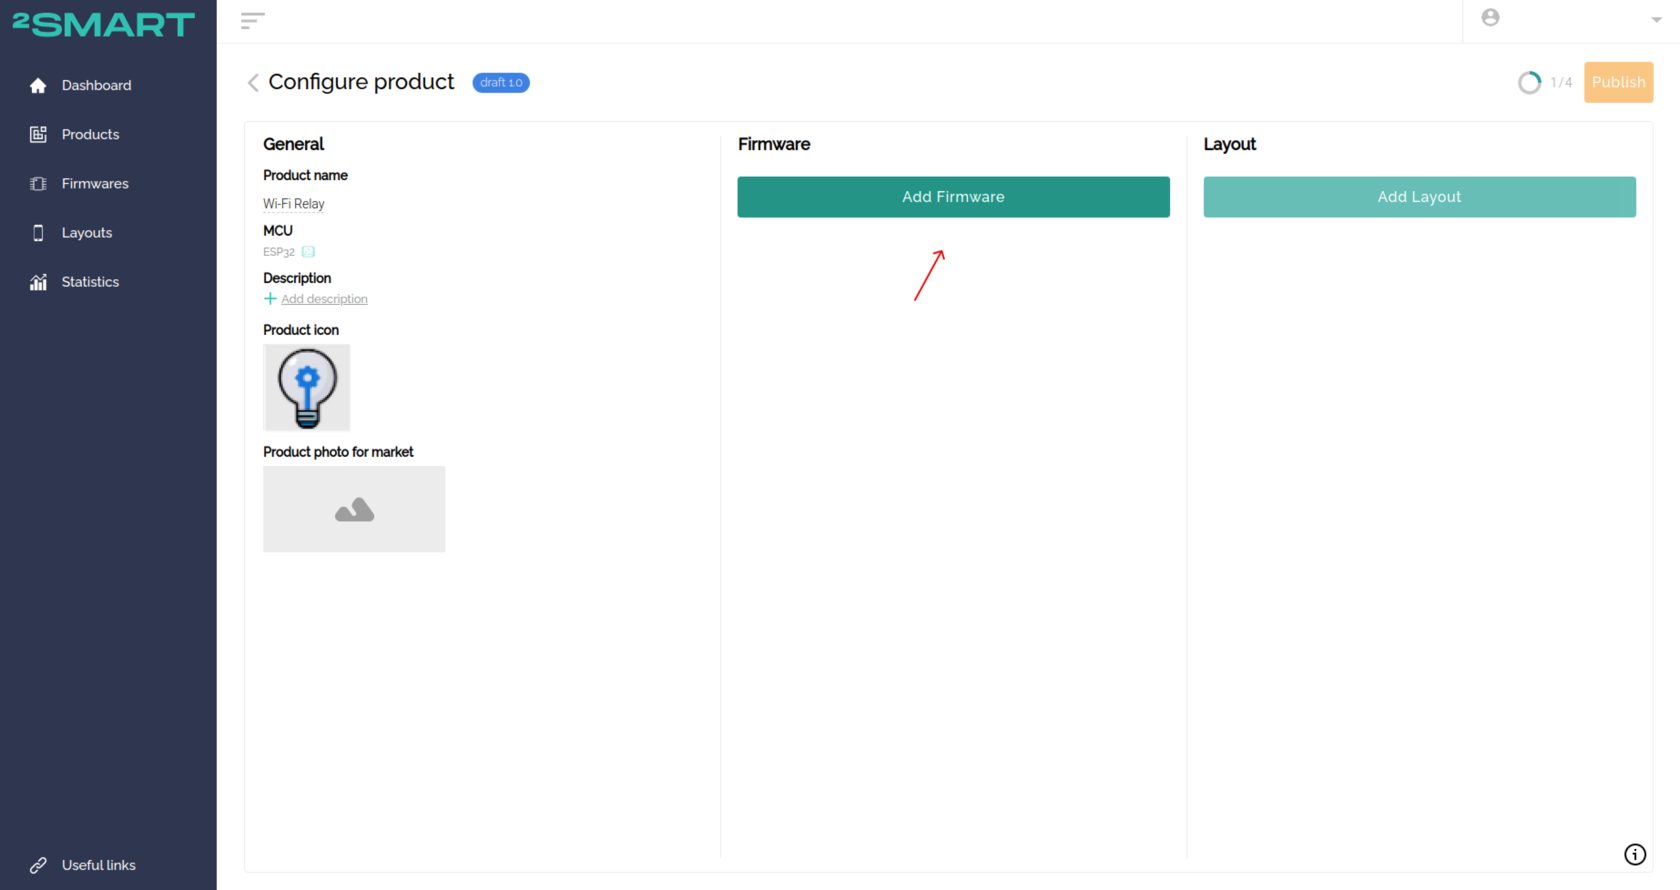
- Click “Add Firmware”.
- Select “Custom” and click “Next”.

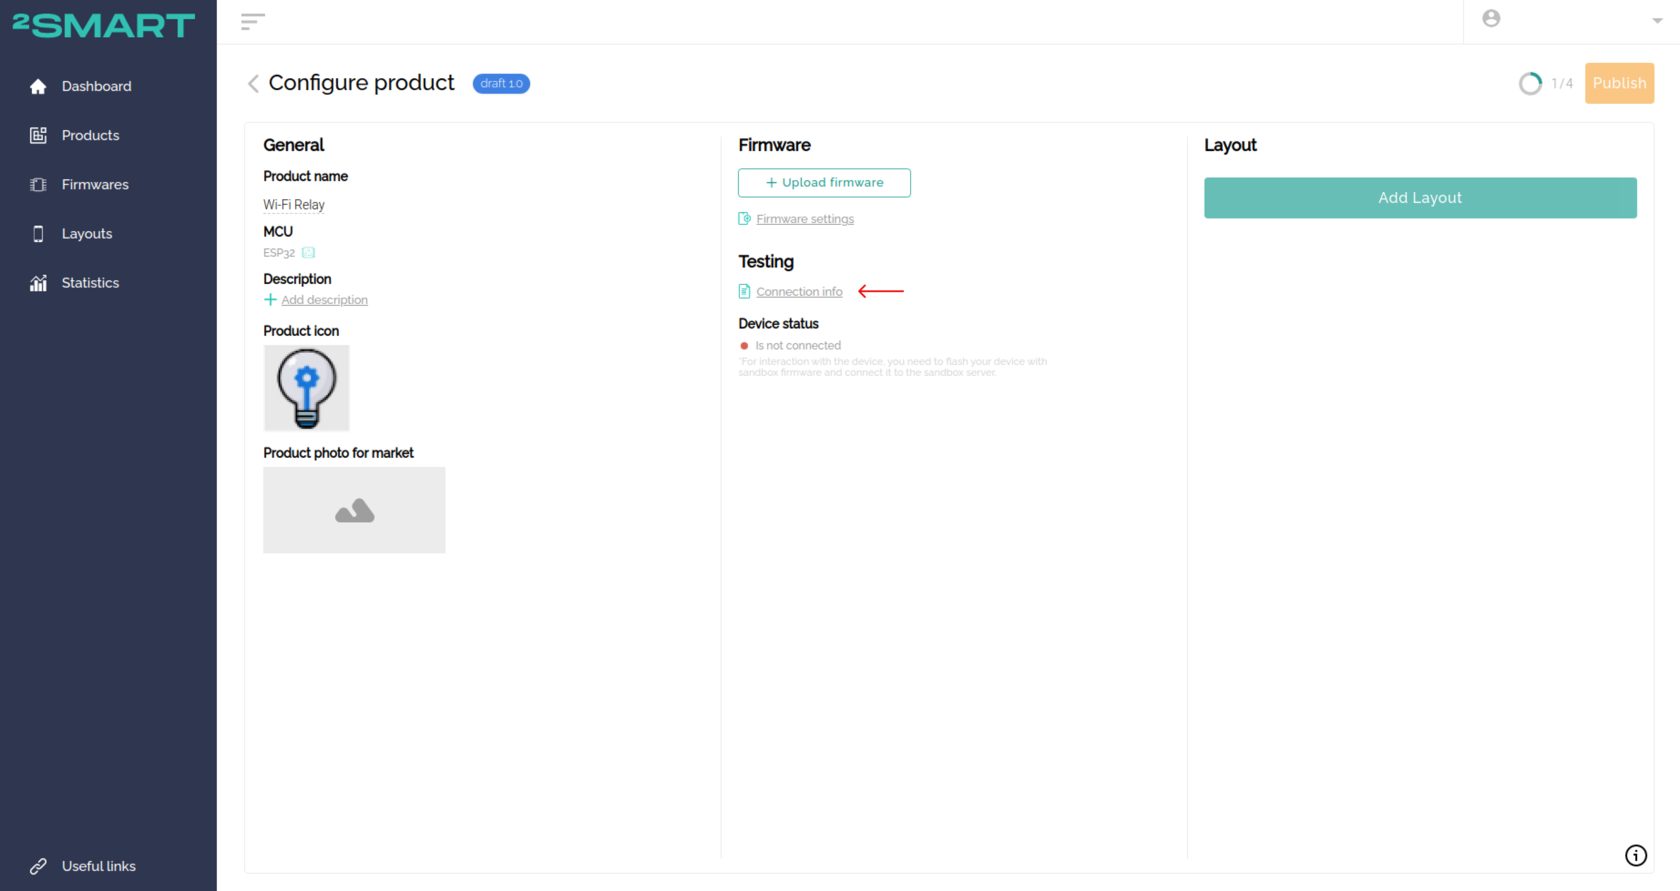
- Click the “Connection Info” link.
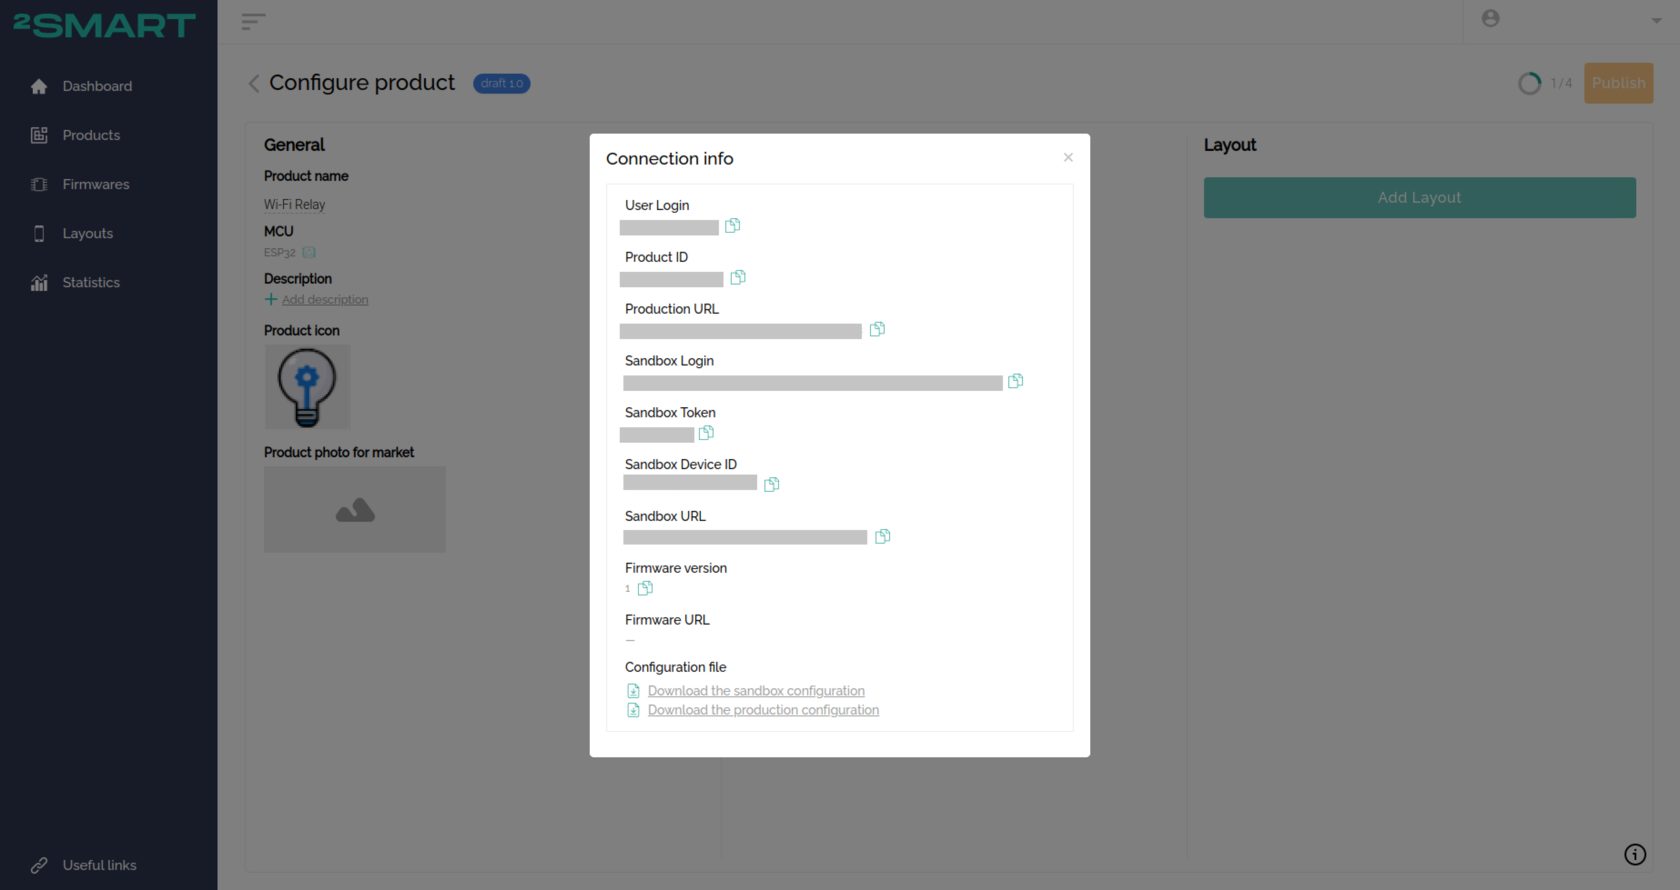
- Leave the window with the connection parameters open, as some will need to be copied into the firmware code.
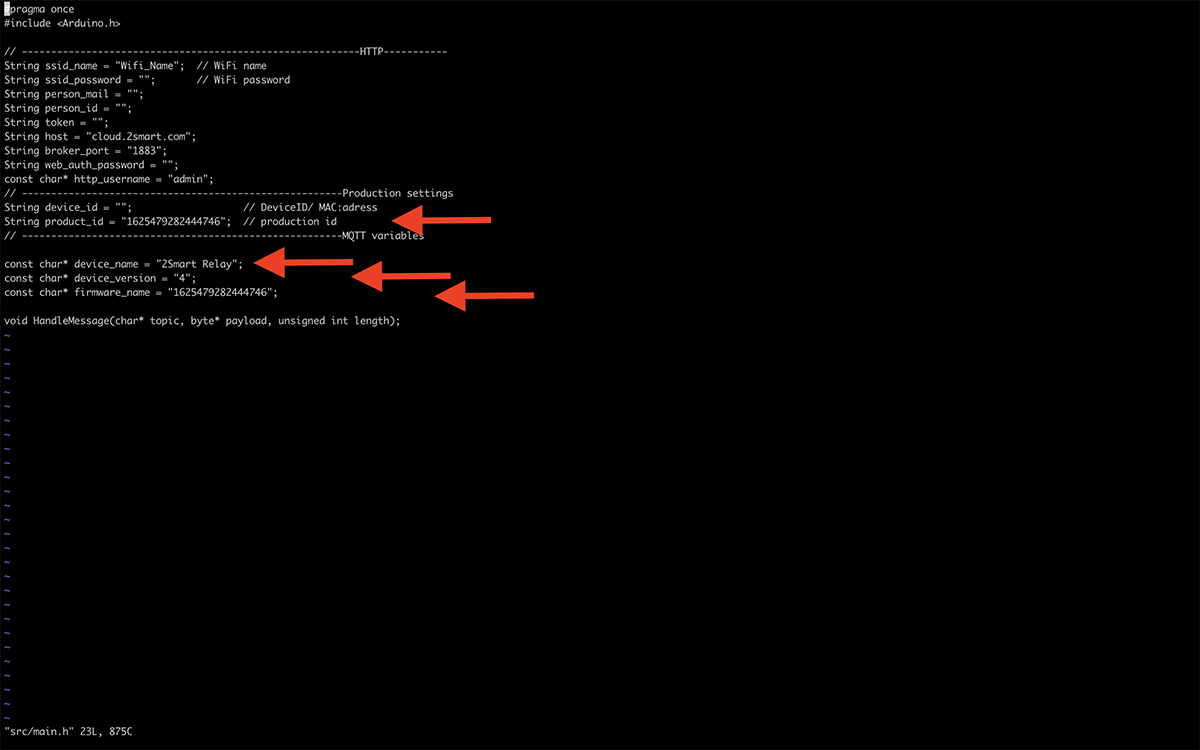
- Go to the downloaded firmware repository and open the file “Firmware/src/main.h” where you will make the following changes:
- Copy the product ID and paste it into the firmware name and product ID fields.
- Specify your product name instead of the default one in the “device name” section.

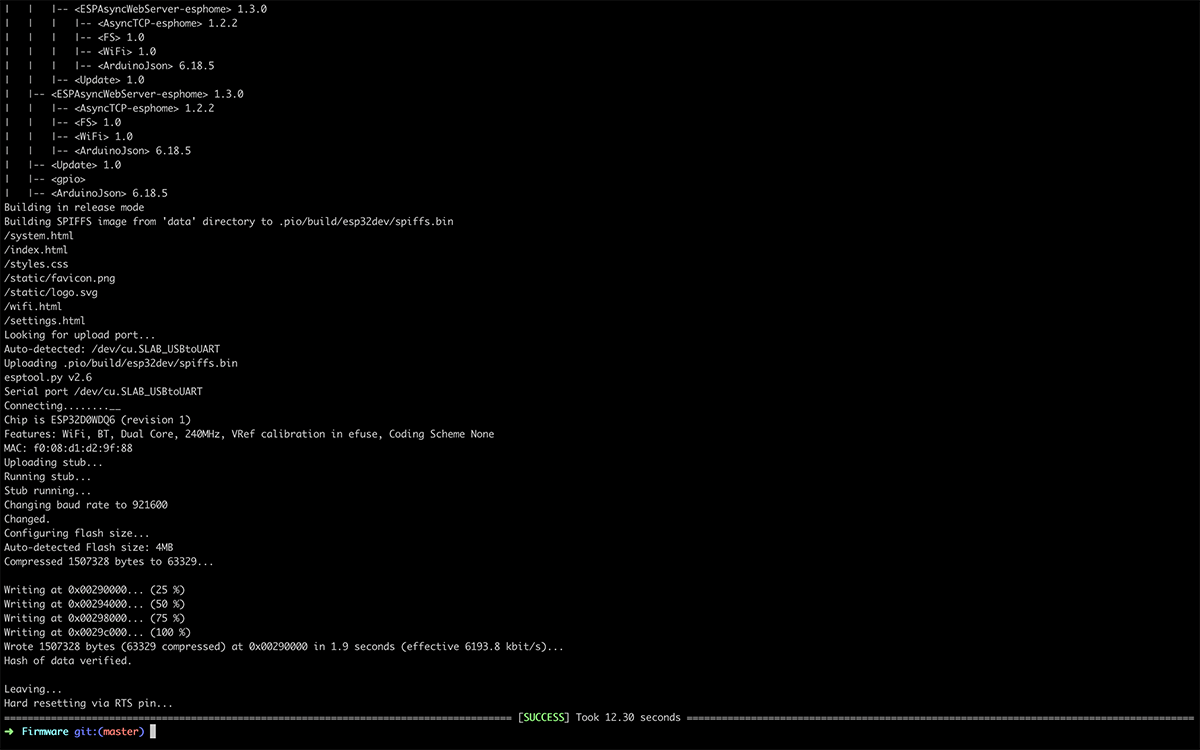
- Save the changes in the firmware code and use it to flash your device.
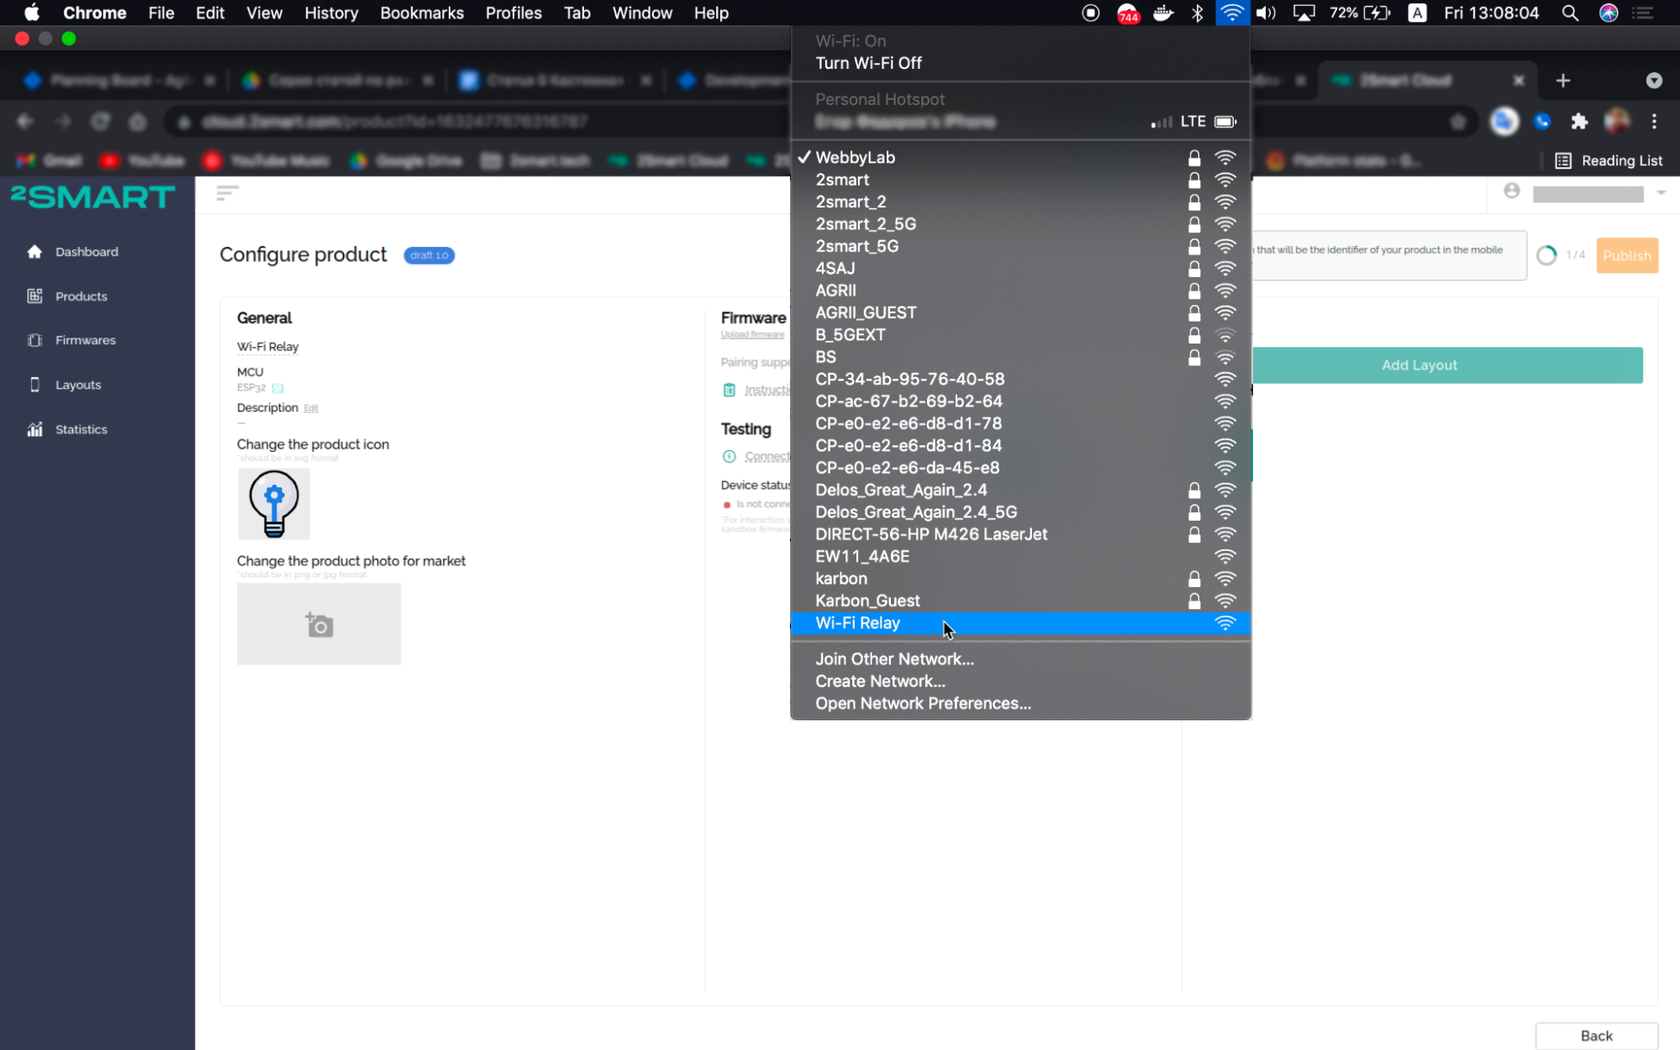
Please note! If the firmware is already installed on the microcontroller, remember to delete it by following the documentation. - After successful firmware installation, the device will create its Wi-Fi hotspot with the same name specified for the device in the firmware code. Connect to this network.
Let’s collaborate
We’re empower your business with our technology expertise
- Go to http://192.168.4.1/ to open the web interface of your device. Use the login “admin” and password “admin” to log in (if necessary, you can change the default values in the settings).

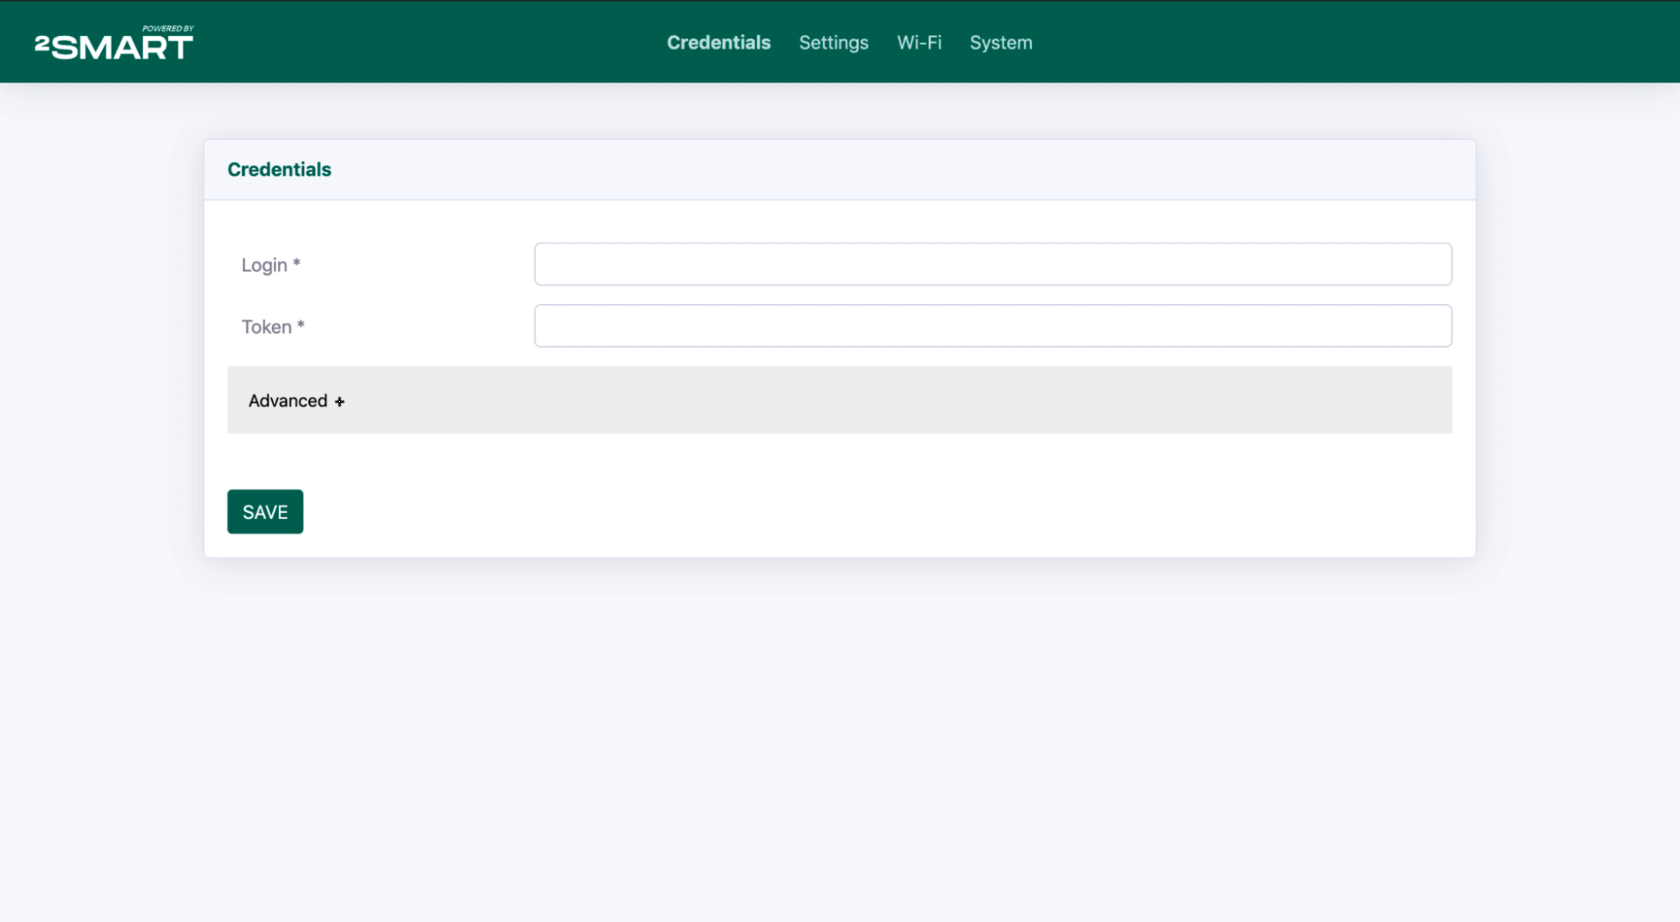
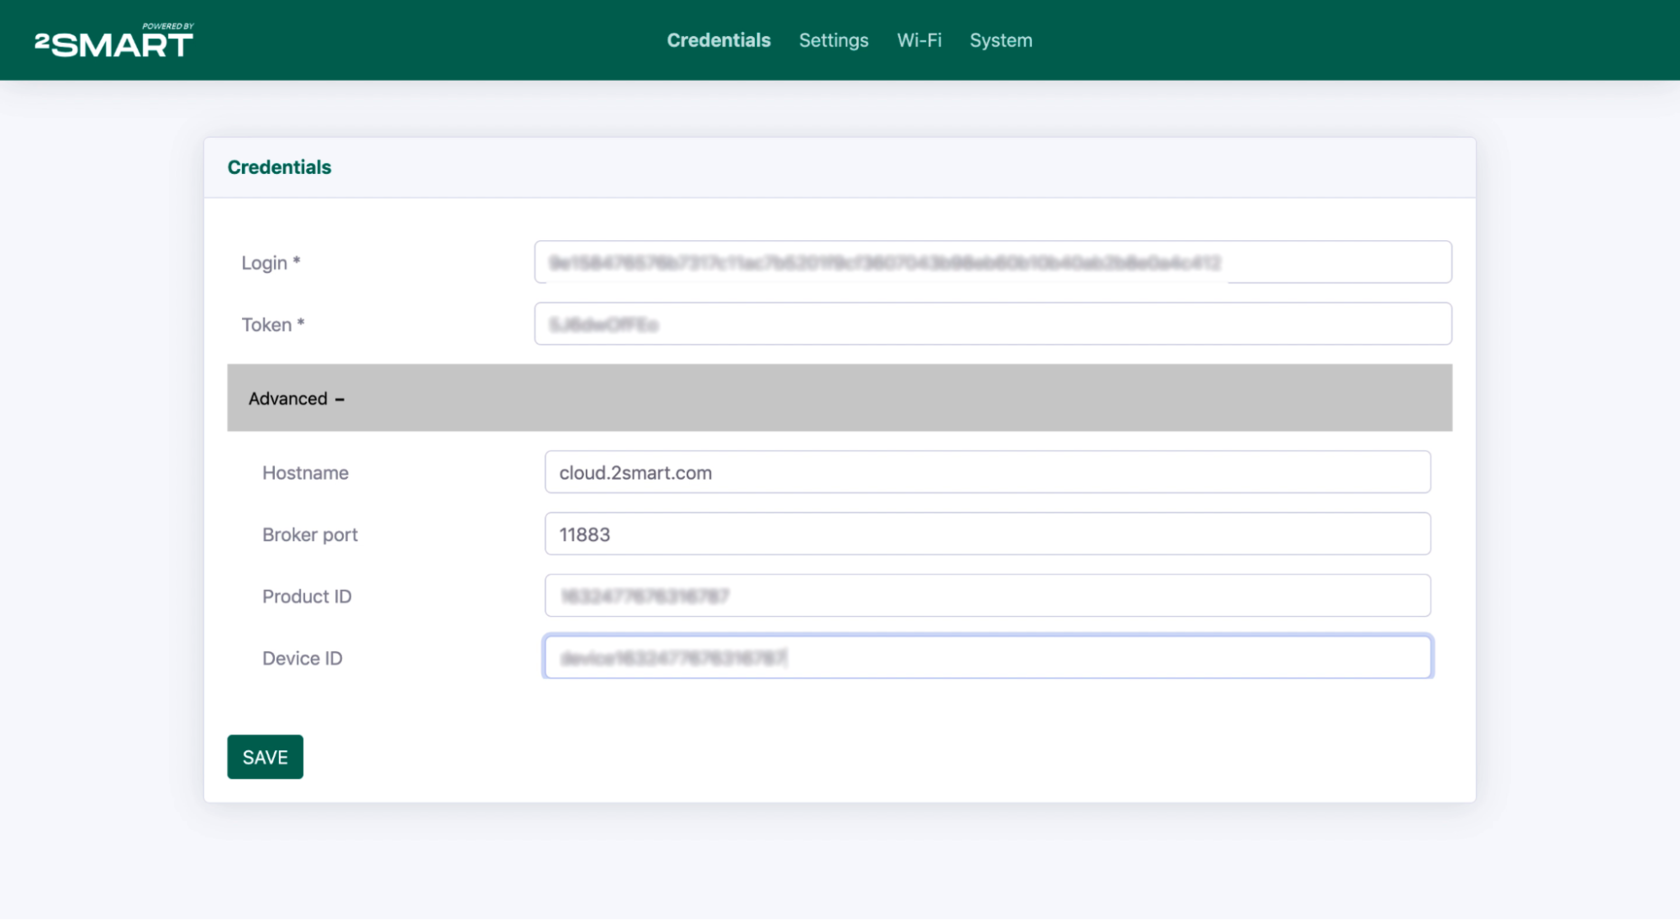
- Copy the information from the “Connection Information” window into the fields on the “Credentials” tab:
- In the “Login” field – “User Login”.
- In the “Token” field – “Access Token”.
- In the Hostname field (under the Advanced spoiler), enter “cloud.2smart.com”.
- Enter “11883” in the Broker port field.
- In the Device ID field, copy “Test device ID”.
After filling in all the fields, click Save.

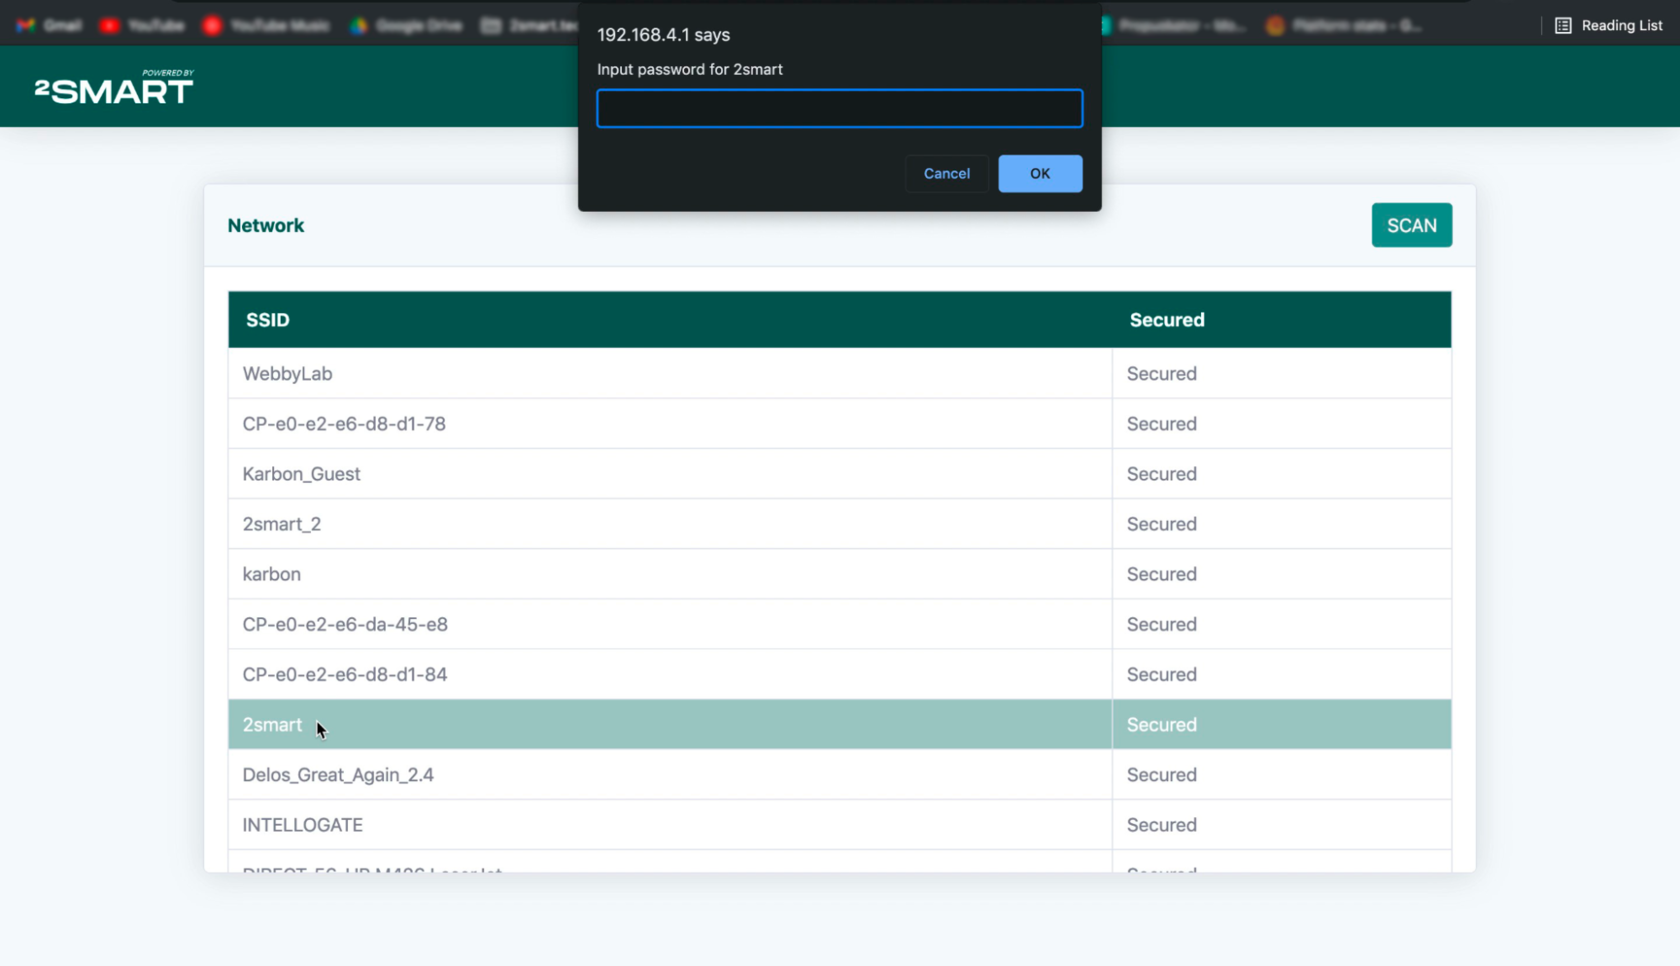
- Confirm that your computer is still connected to the device’s Wi-Fi hotspot. Click the “Wi-Fi” tab and then click “Scan”.
- Select your Wi-Fi network in the list and enter the password to access it. This step is necessary for your Test device to connect to the 2Smart Cloud platform.
Please note! Devices based on the ESP32 microcontroller support only Wi-Fi networks with a frequency range of 2.4 GHz!
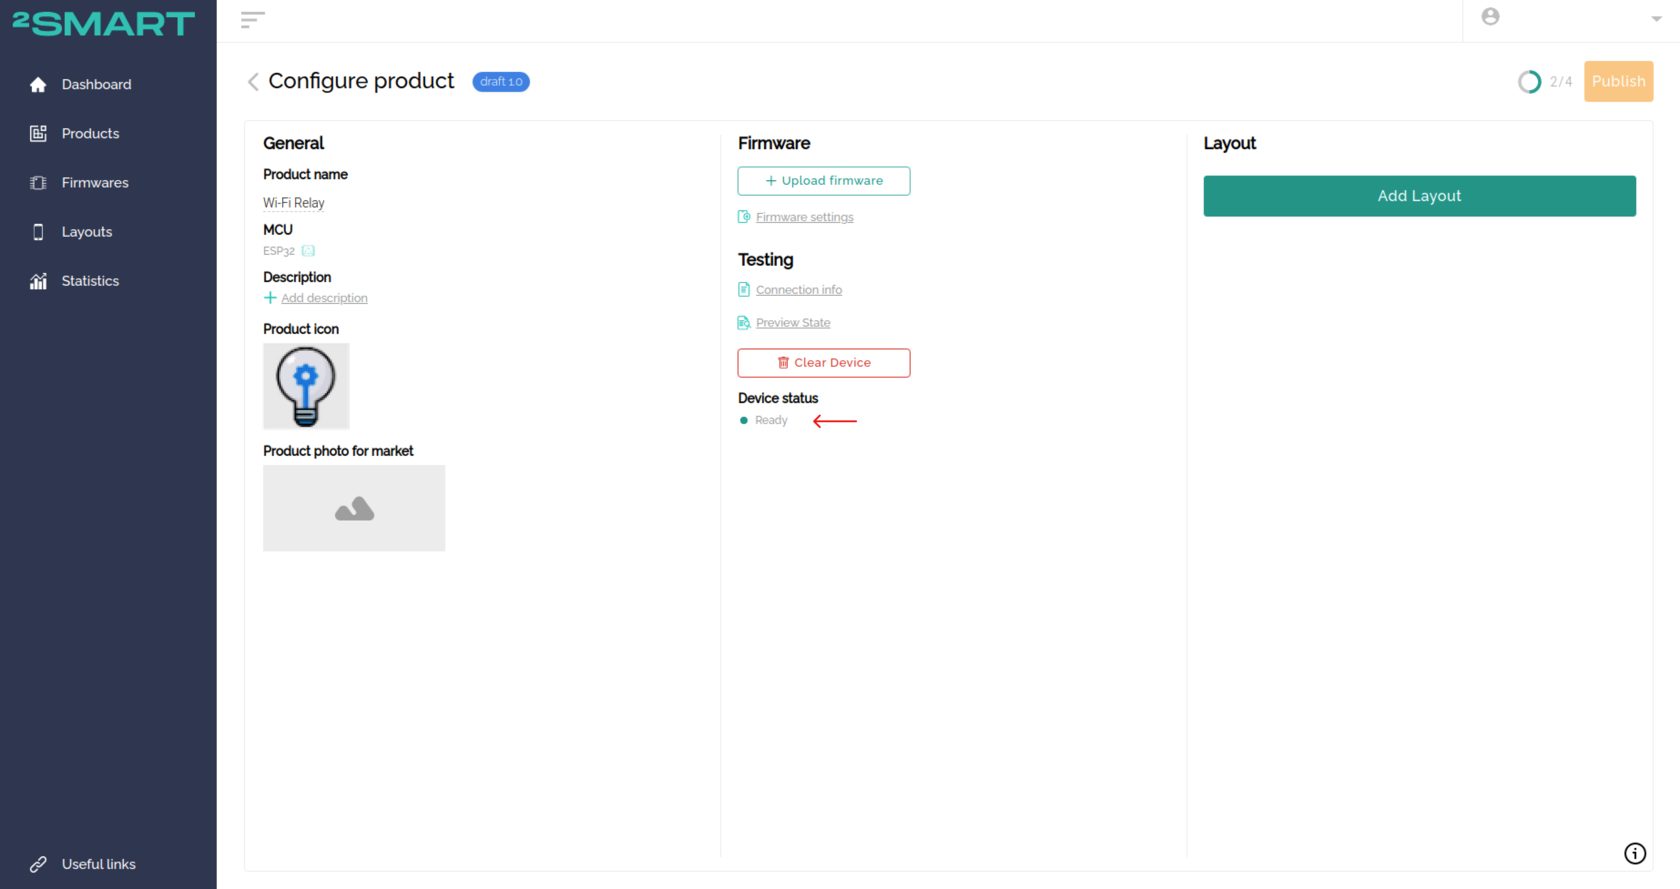
- Return to your Wi-Fi network and open the developer’s account. On the product page, close the window with the connection info. Pay attention to the status of the device. After changing the necessary settings in the device’s web interface, the status should change to “Ready”.

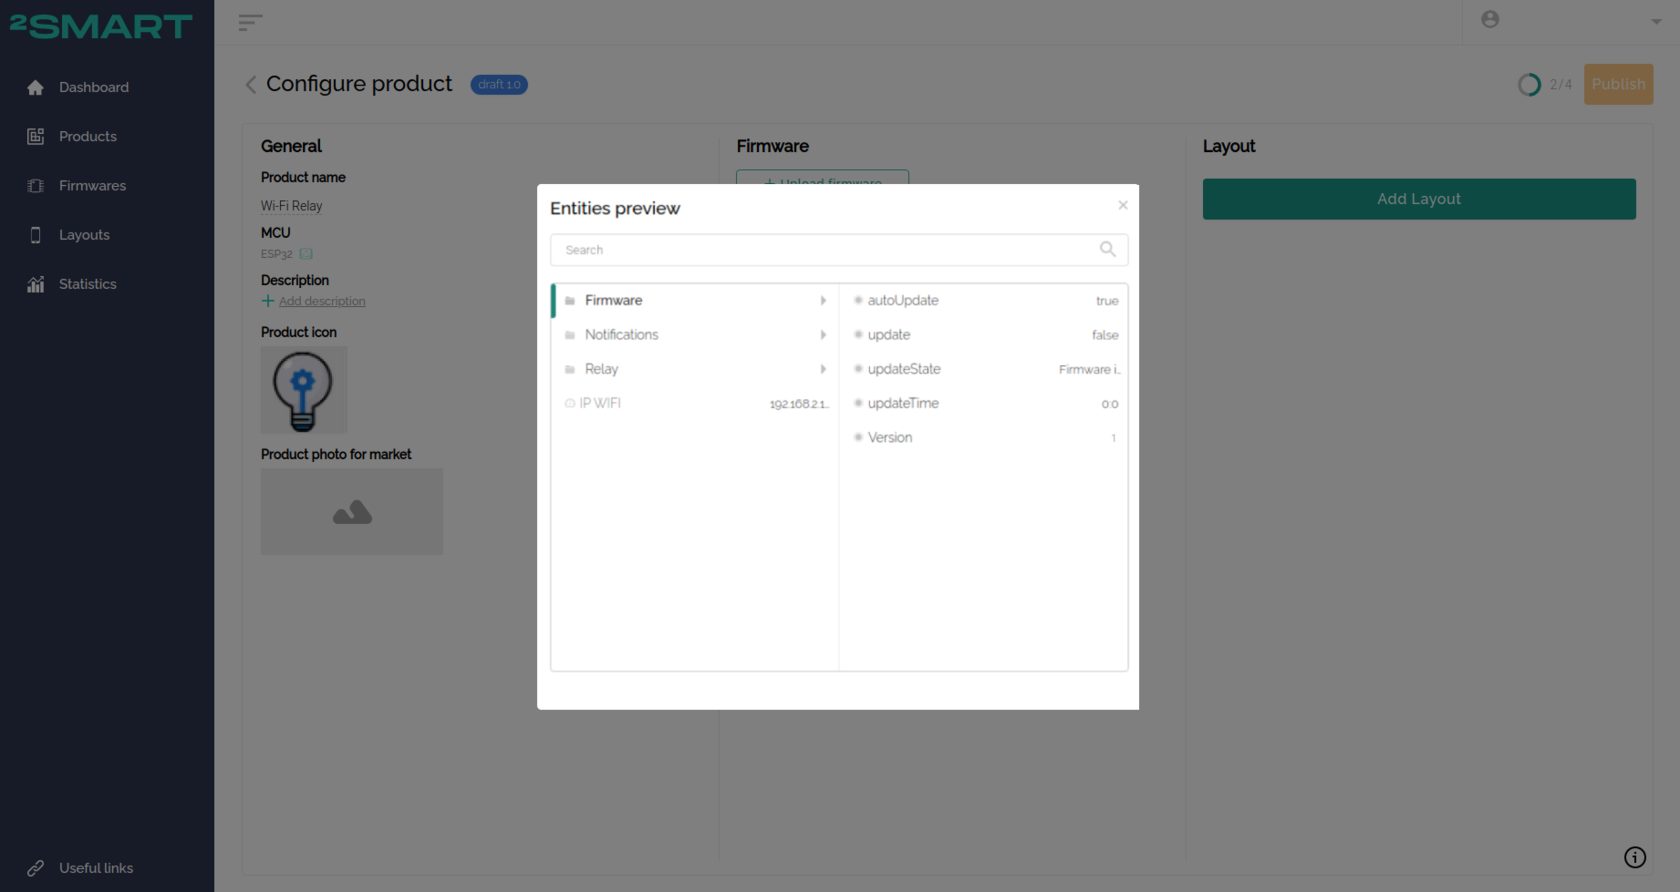
- By clicking the “Preview State” link, you will be presented with the current sensor data of the device.
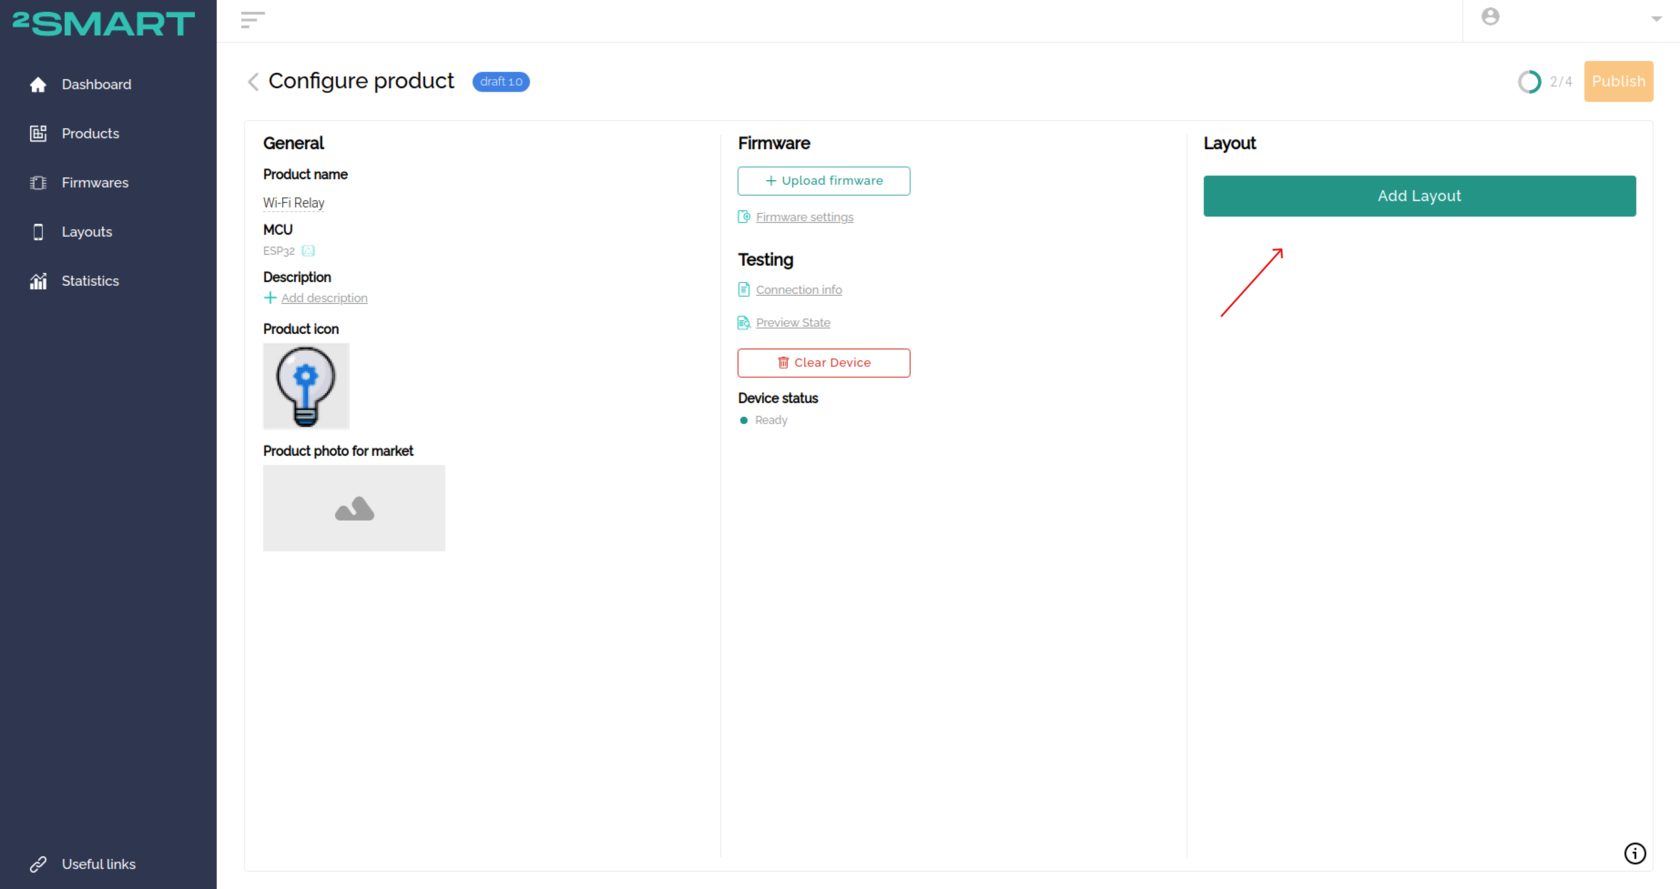
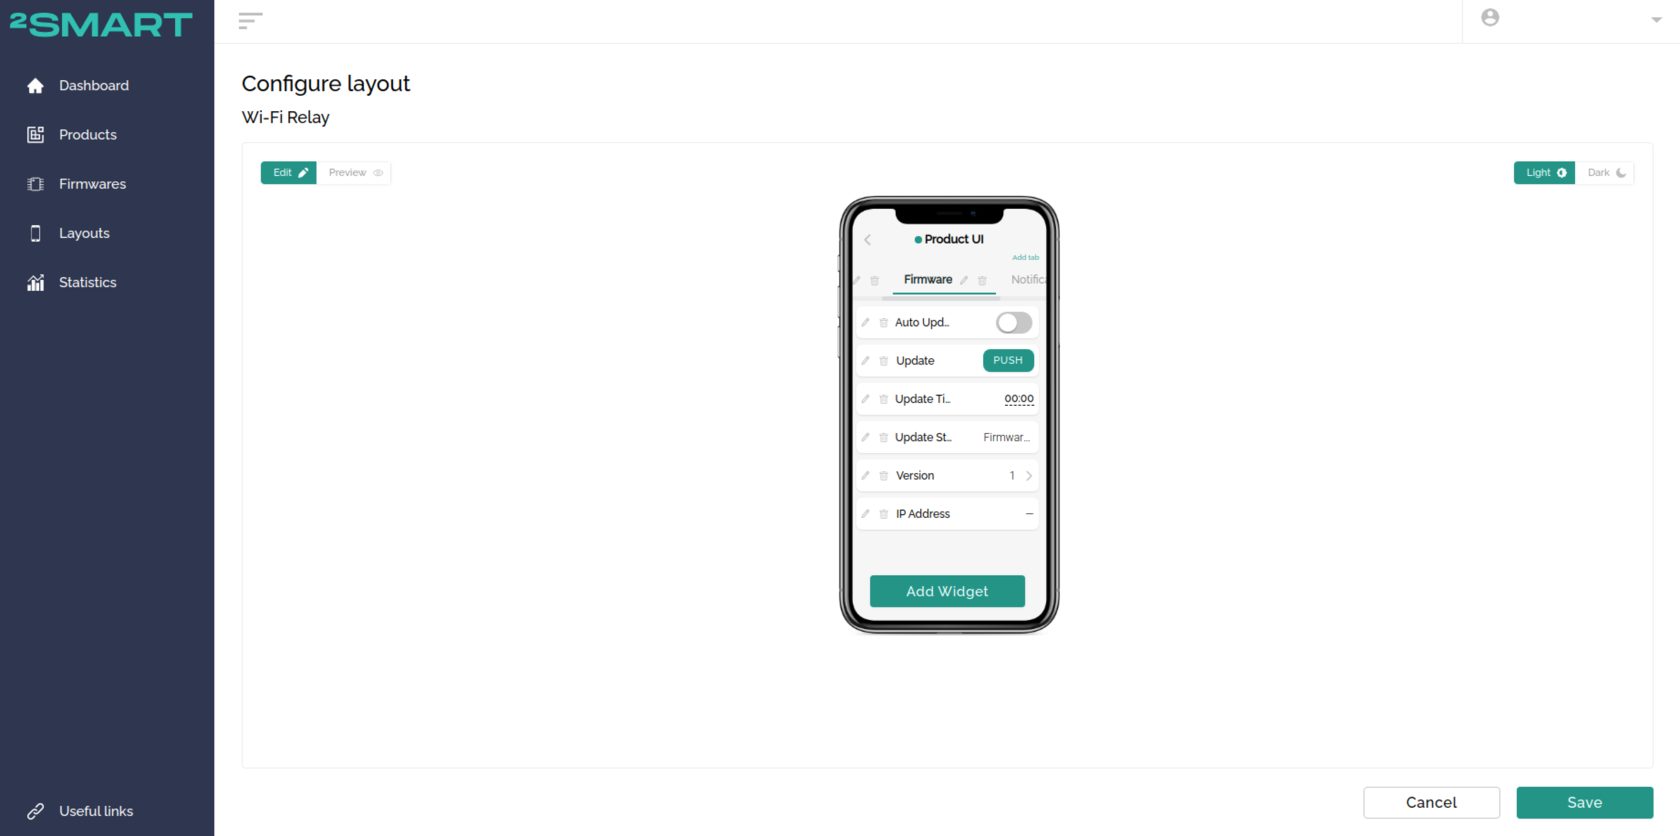
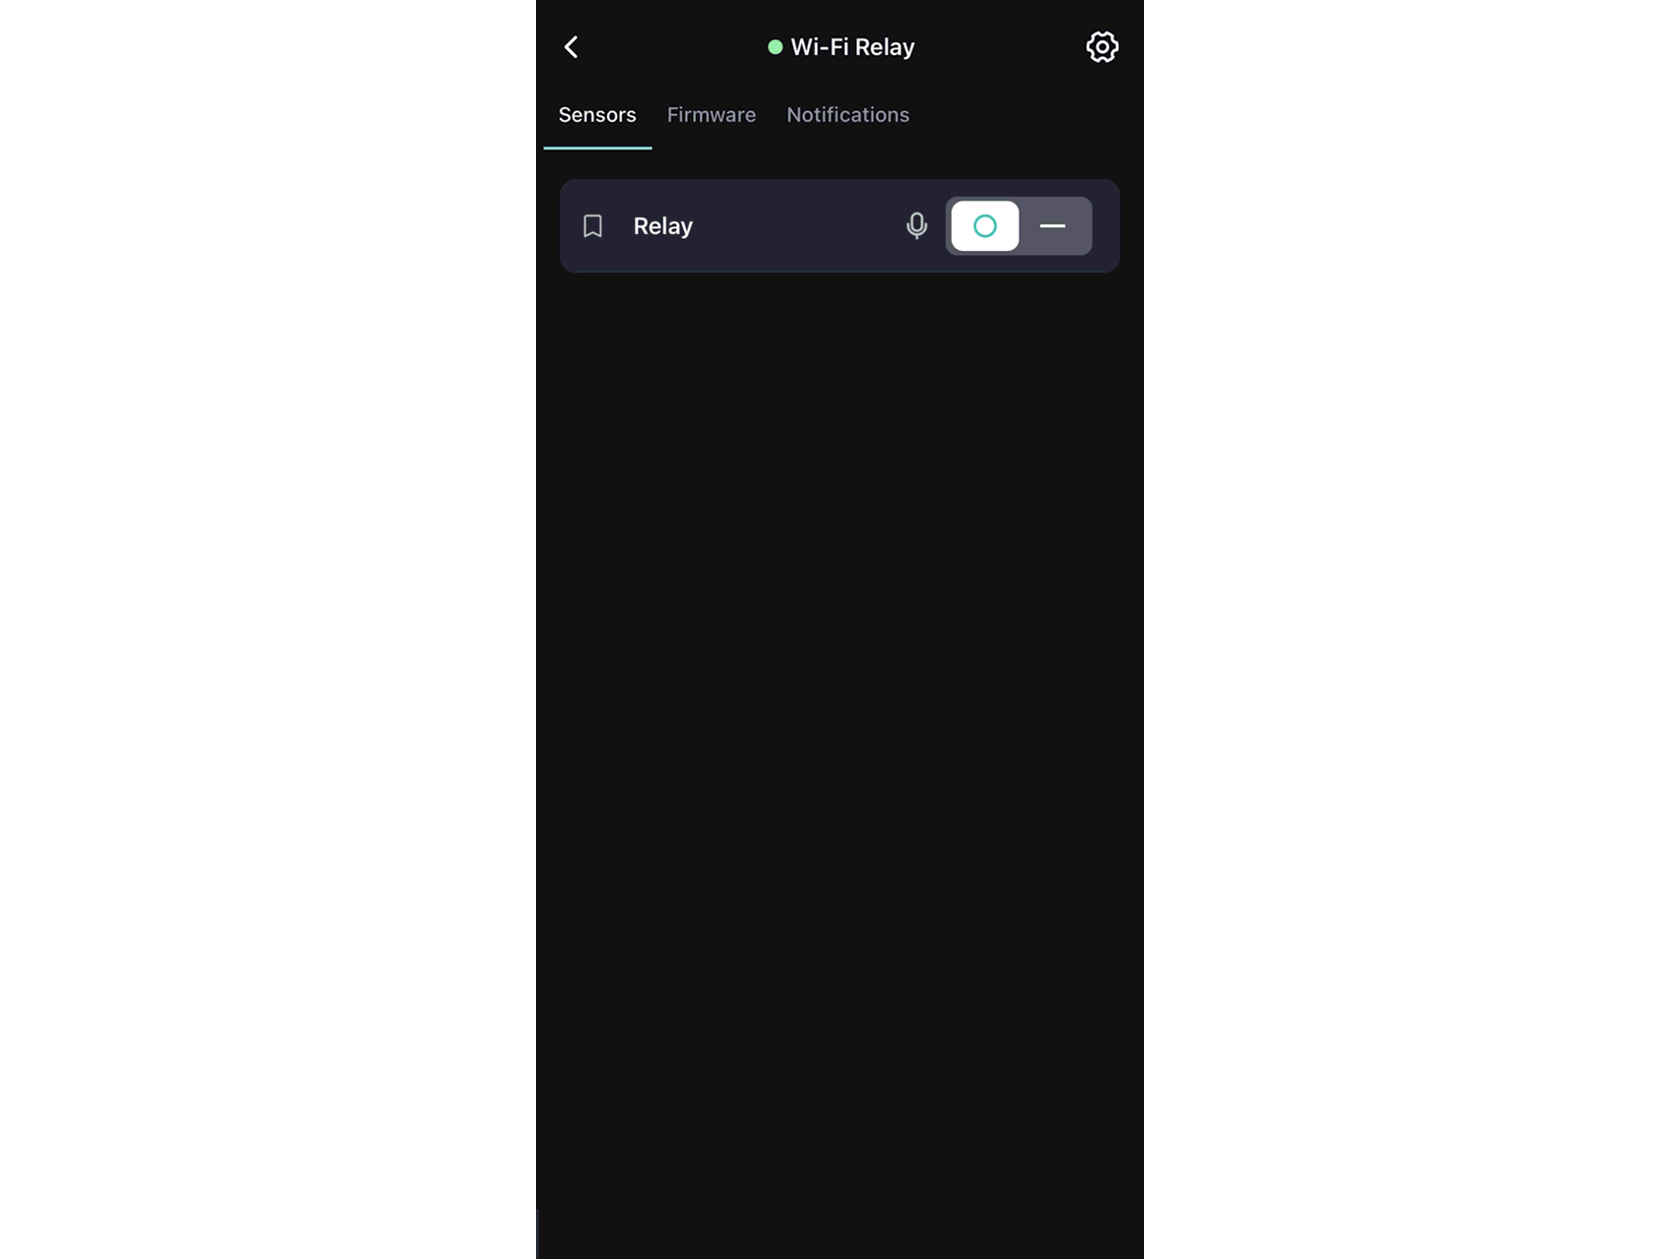
- Click the “Add layout” button and configure the appearance of the mobile app to control the device. Note that after installing the SDK-based firmware on the Wi-Fi relay, widgets are available for you to work with updates and notifications.
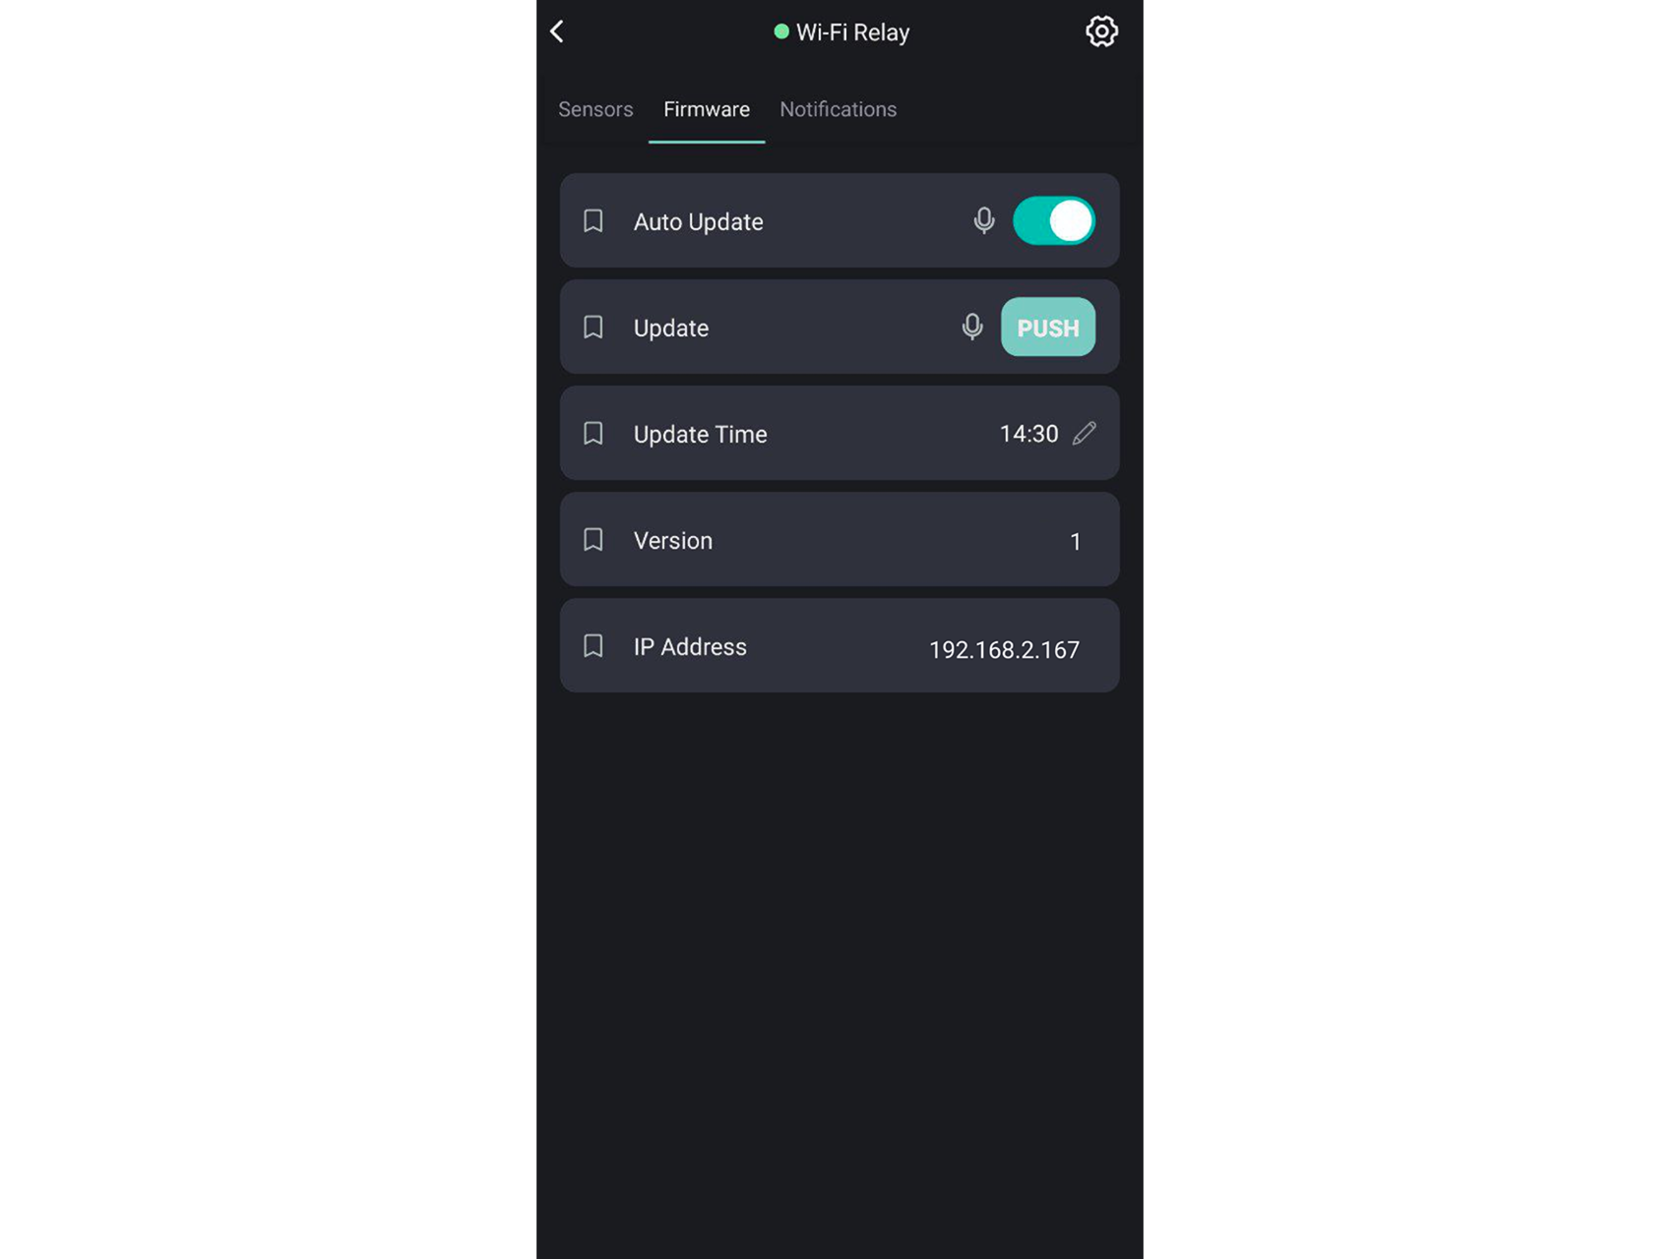
We recommend creating a separate tab in the application interface for widgets related to firmware updates. In our example, we added six such widgets to the Firmware tab:- The Auto Update switch enables the automatic firmware update.
- The Update button forces manual firmware update.
- The TimePicker widget for setting the exact time of day when the device will search a new firmware version for automatic updates.
- The Text widget with the update status.
- The Text widget with the version number of the current firmware installed on the device.
- The Text widget with the IP address of the device’s web panel.

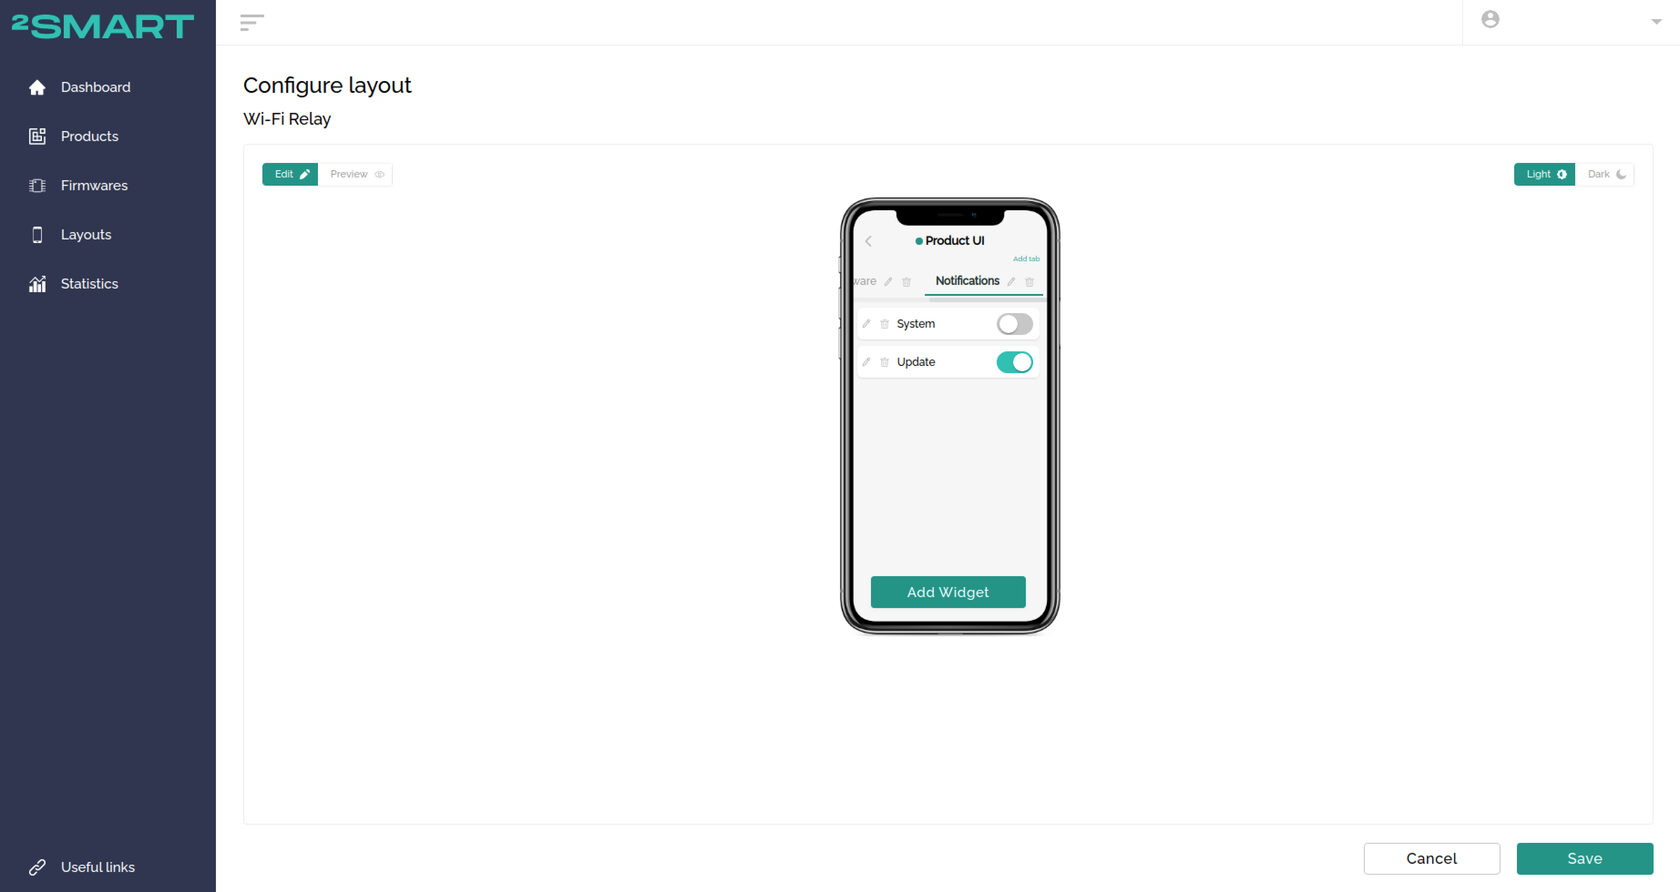
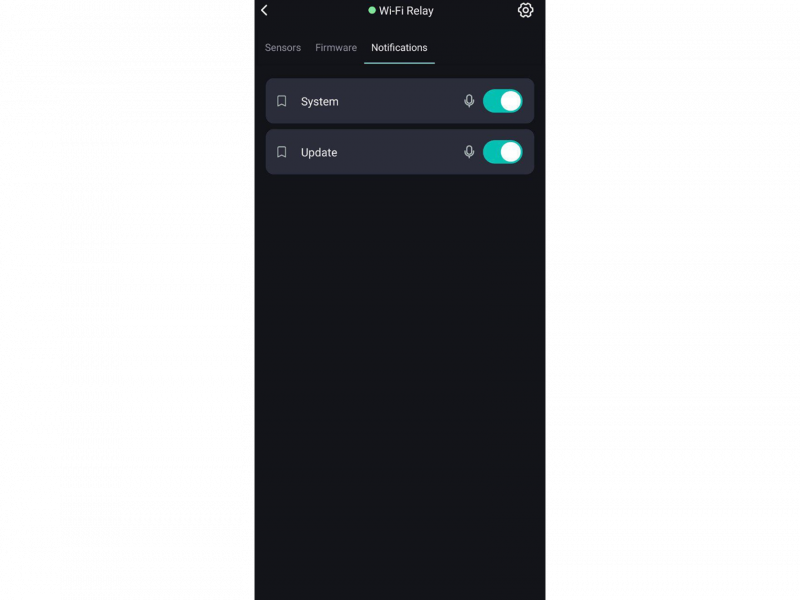
To configure notifications, consider creating a Notifications tab and add the following widgets to it:
- The System switch for system notifications (for Wi-Fi relays, these are relay switching messages using the physical button on the housing).
- The Update switch for firmware update notifications.
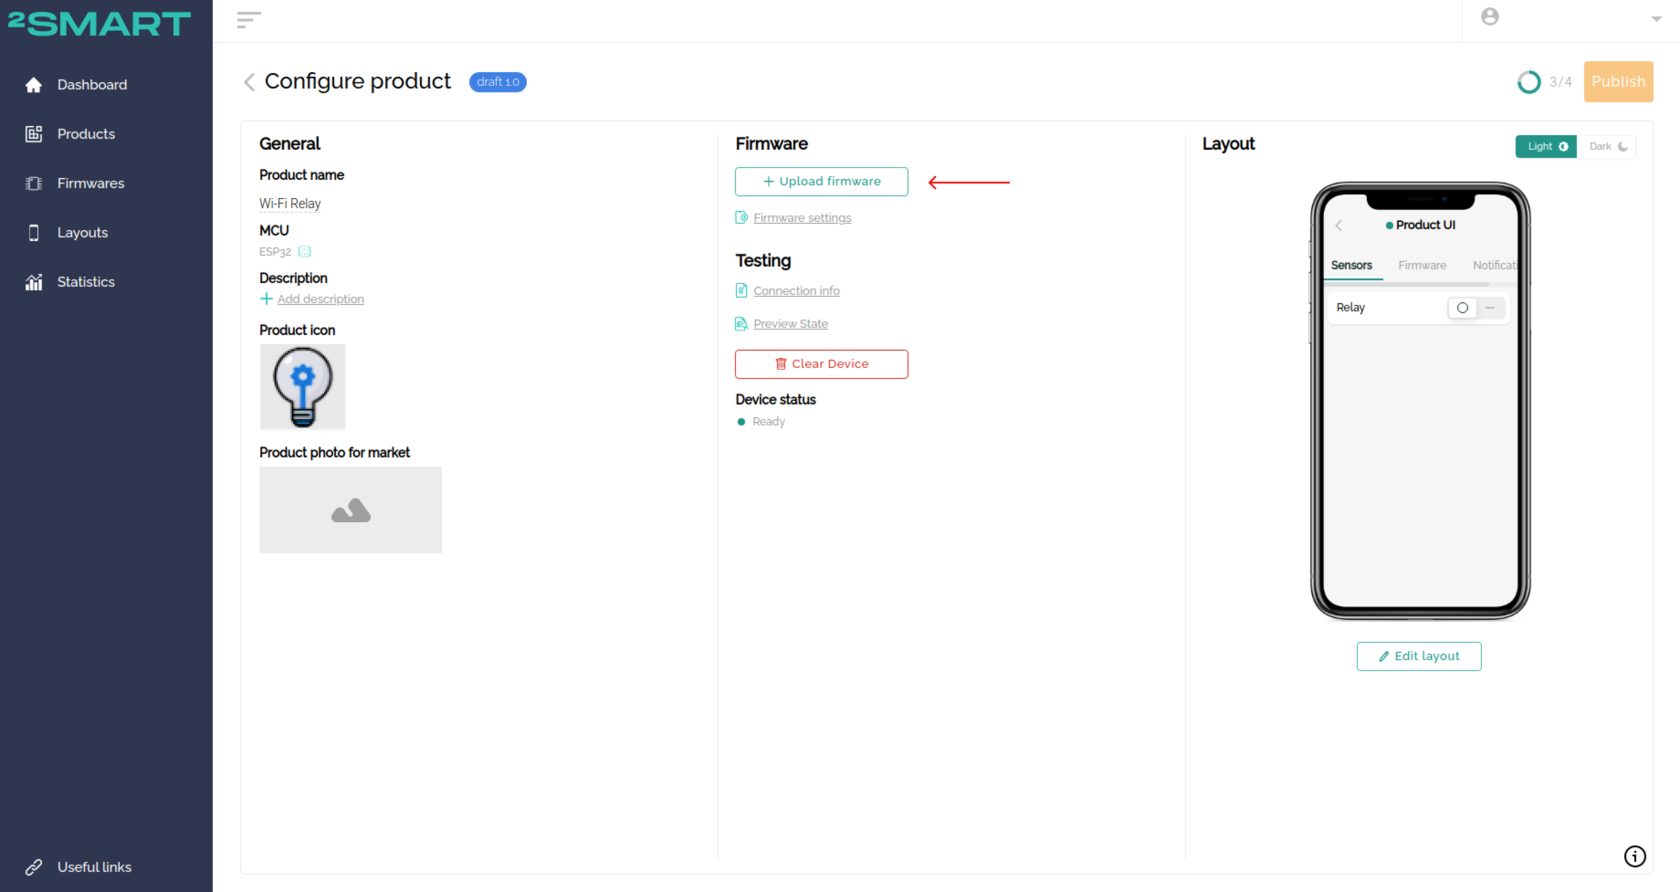
- After saving the configured interface, click the “Upload firmware” link and upload the ready firmware.bin file to the platform, which is located in the folder with the firmware .pio/build/esp32ev/. Enable the display of hidden files on your device if you can’t find the generated firmware.
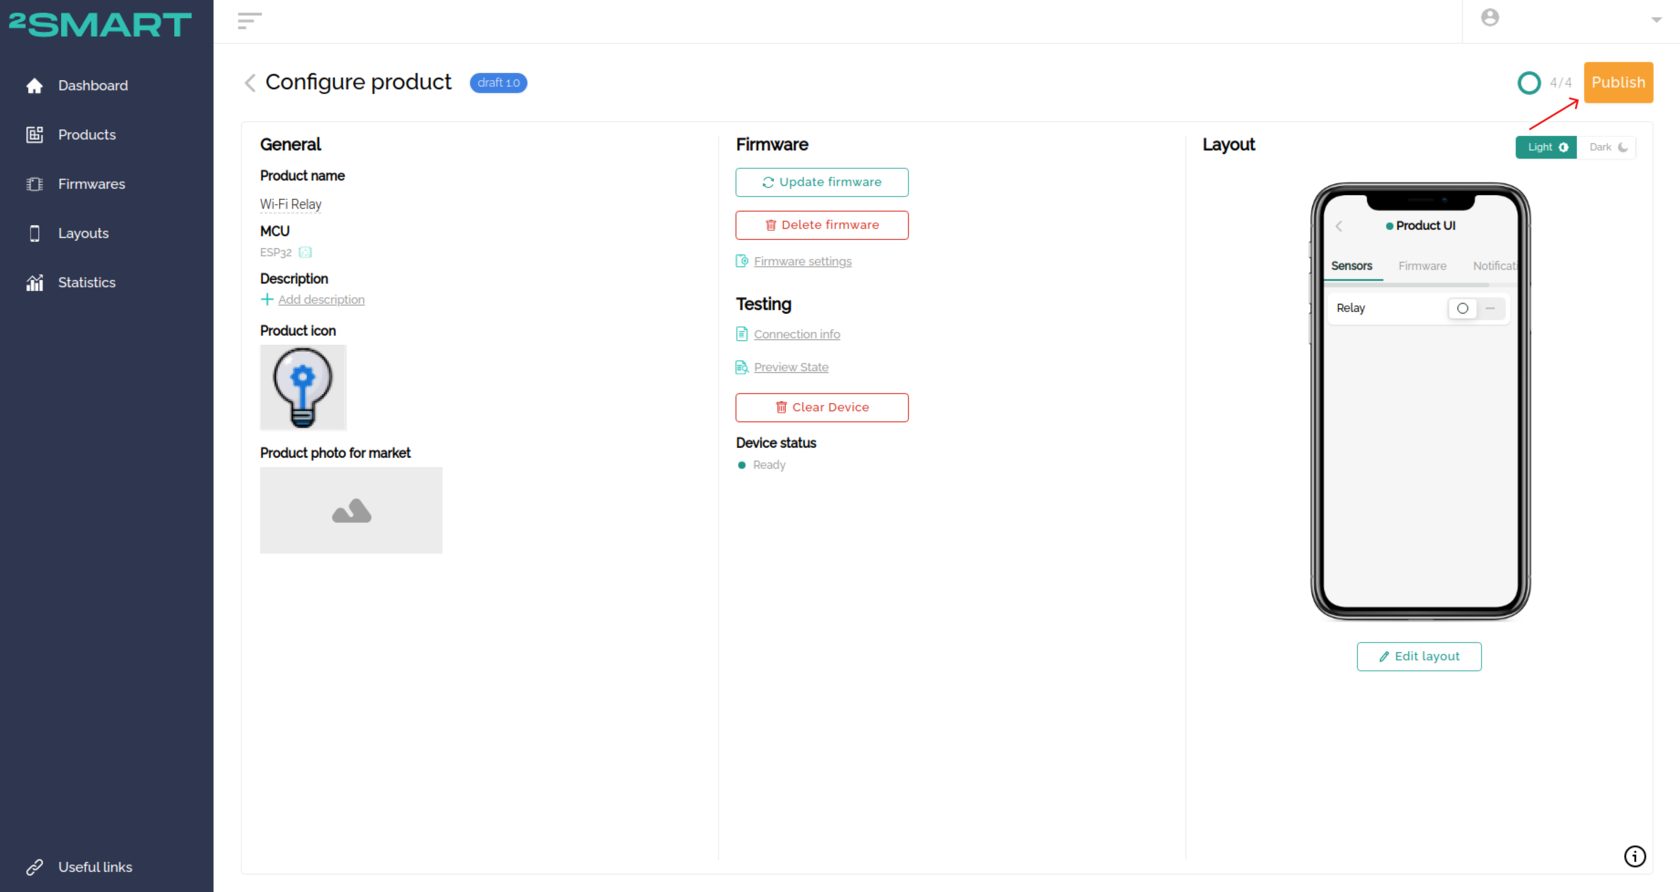
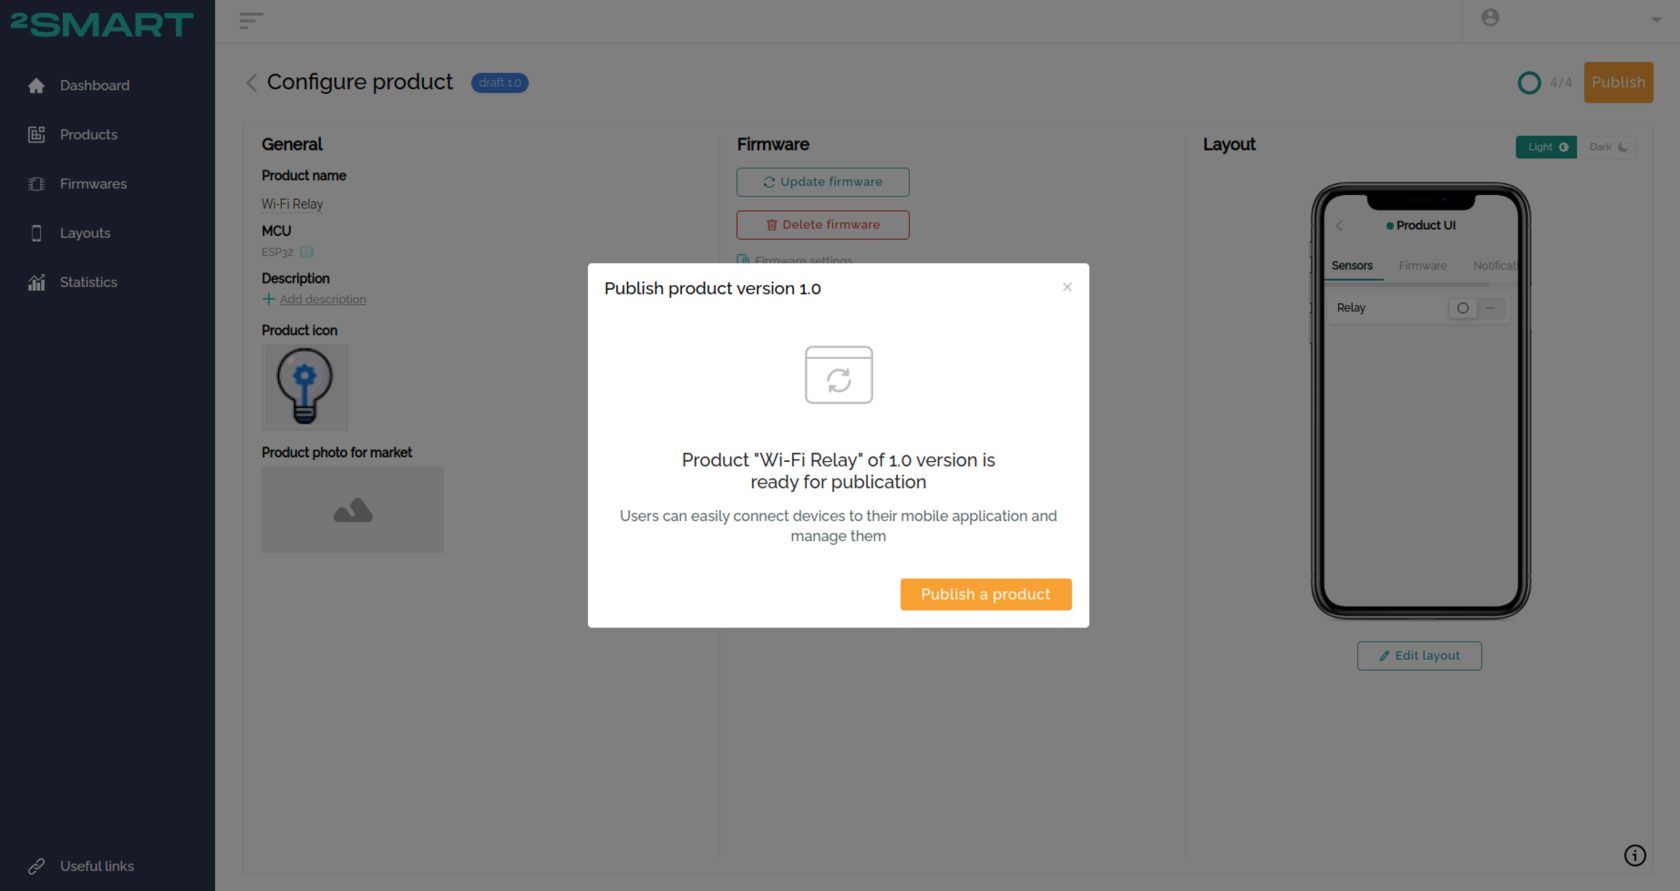
- Click “Publish” and confirm your wish to place the new product on the platform.
- Since you have created a new device on the platform, delete the previous option from the 2Smart Cloud application and pair the device again by following the standard pairing action.
The control interface of the new device gives additional features configured in the developer’s account. They include control of firmware updates over the air and the configuration of notifications from the device. In the case of a Wi-Fi relay, this is exactly what we wanted to get from Custom firmware.

And that’s it. You installed the Custom firmware on the same device where ESPHome was installed. After ensuring that the Wi-Fi relay works smoothly and is controlled from the mobile app, you can reflash the whole batch of devices. This will be the last firmware update via USB cable. Thanks to the use of SDK-based Custom firmware, the following updates will happen over the air.
The article that follows explains how firmware updates are prepared and how the update is done over the air.
Links:
- 2Smart Cloud IoT platform – https://cloud.2smart.com/
- Materials for creating Wi-Fi Relay at public repository – https://github.com/2SmartCloud/2smart-cloud-esp32-relay
All articles about IoT device creation and support
- Learn your way around the IoT platform – create your first device and control it from your smartphone without an MCU
- How to create a Wi-Fi switch to control via a mobile app and Telegram bot
- How to build an IoT device using the 2Smart platform?
- How to create an IoT device on a printed circuit board and take it from prototype to finished product
- How to write SDK-based firmware for an IoT device
- How to update the firmware and mobile application of ready-made devices within 5 minutes
- Collection and analysis of statistics – a useful tool for product improvement
Don't forget to share this post!
Read Next


Let’s dive into your case
Share with us your business idea and expectations about the software or additional services.
