
Table of contents:
You can enjoy the benefits of the 2Smart Cloud mobile app for your Sonoff smart products for free. The following describes how to connect a Sonoff switch or smart socket to the 2Smart Cloud mobile app in just 20 minutes.
Flashing Sonoff Smart Devices: What You Get
The 2Smart Cloud mobile application is an alternative to the Sonoff’s native eWeLink. You will be able to use it after flashing the Sonoff smart relay or socket, and here are the benefits it has:
- user-friendly interface with the ability to pin favorite widgets on a separate screen;
- device control with Siri and Google Assistant voice commands;
- device control with a free phone call from any country, if the Internet is not available;
- two Telegram bots for device management: with classic and web interfaces;
- notifications from devices to Slack, Telegram, and WhatsApp messengers;
- advanced sharing through a mobile application or browser with the ability to set the access period;
- integration with other smart services and ecosystems using IFTTT.
You can also customize the mobile app’s interface to your liking using 2Smart Cloud’s extensive widget library. To do this, you need to register on the 2Smart Cloud IoT platform as a vendor and publish a new product with minor modifications to the ready-made firmware for Sonoff. The final section of the article describes how to do this. Don’t worry – it’s free with up to 20 devices connected.
How to Flash Sonoff Smart Products to Connect Them to the 2Smart Cloud Mobile App
To reflash a Sonoff smart device, you need to connect it to your computer via USB. Since there is no USB on smart relays and sockets, you will need an additional device – a USB-TTL converter. The price of such devices on Amazon starts at $2.
You can find ready-made firmware for the following Sonoff smart products in 2Smart Cloud GitHub:
Firmware installation details for the products listed above differ slightly; the general instructions are as follows:
- Ensure that the device is wholly disconnected from the power supply and that no other devices are connected to it (no plug is inserted into the smart socket, no wires are connected to the smart relay connectors).
- Open up the device by unscrewing the screws with a screwdriver.
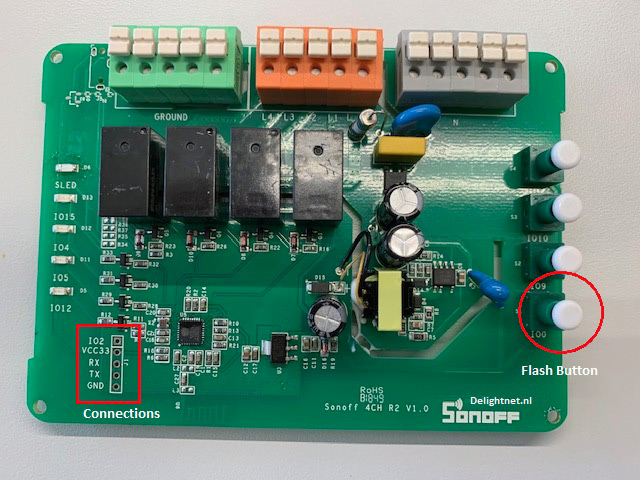
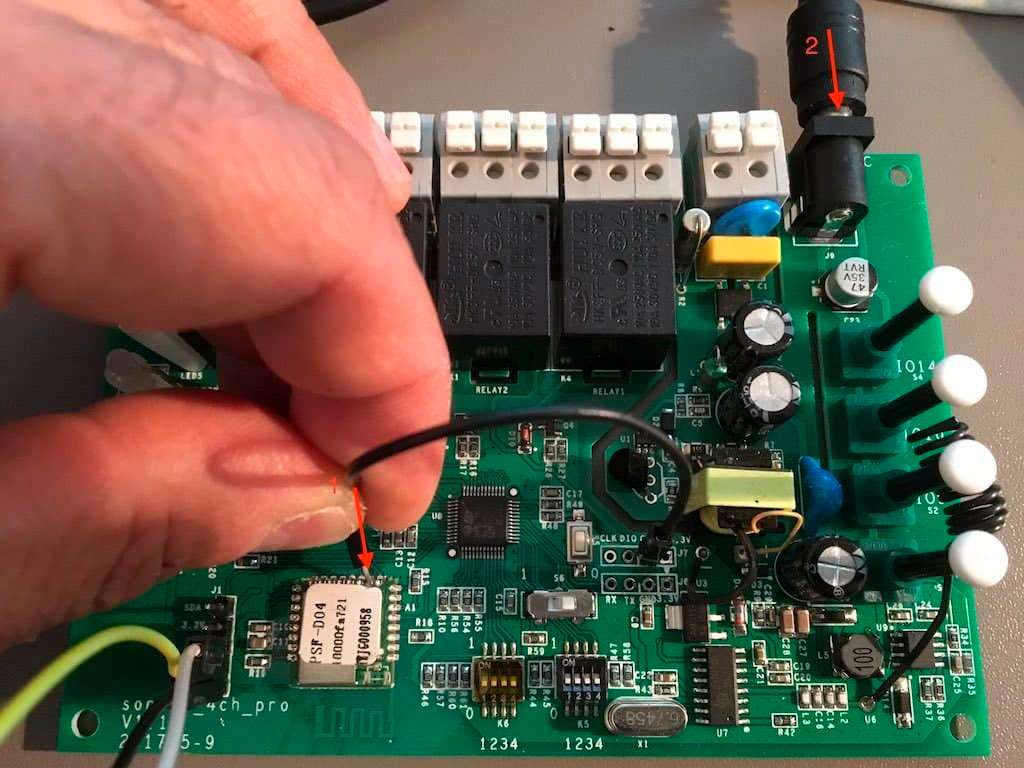
- Locate the pins on the green circuit board to access the UART interface. They look like four holes in a row.
- Determine the purpose of each hole, that is, the UART pinout on this device.Sometimes the pinout is indicated directly on the surface of the board, as in Sonoff 4CH:

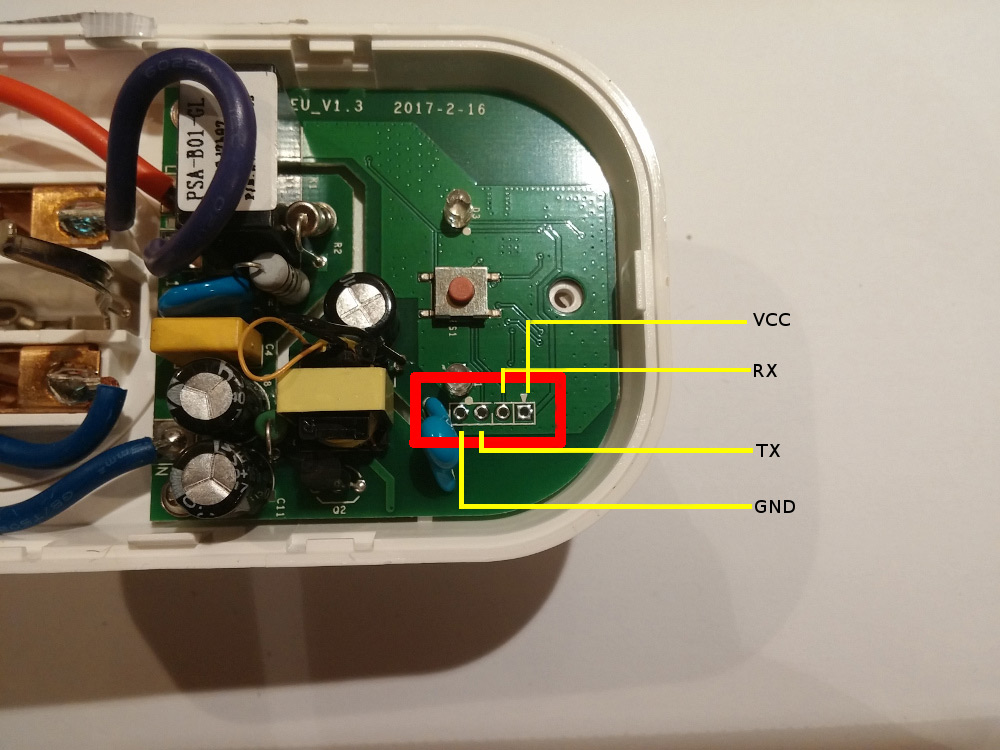
The pinout for Sonoff S20 is as follows:

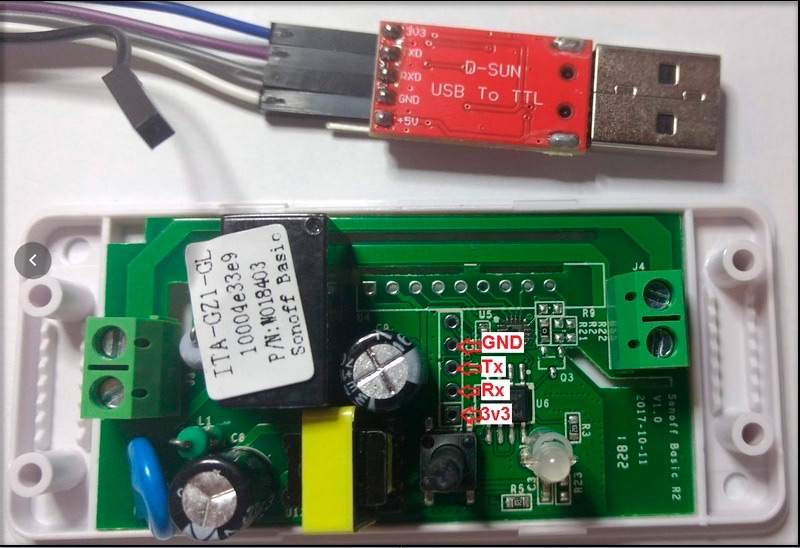
The pinout for Sonoff Basic looks like this:

- Insert the connectors of the USB-TTL converter into the holes on the board, strictly following the pinout. Fasten them securely – using a soldering iron is recommended.
- Only for Sonoff 4CH: set it in Flash mode.
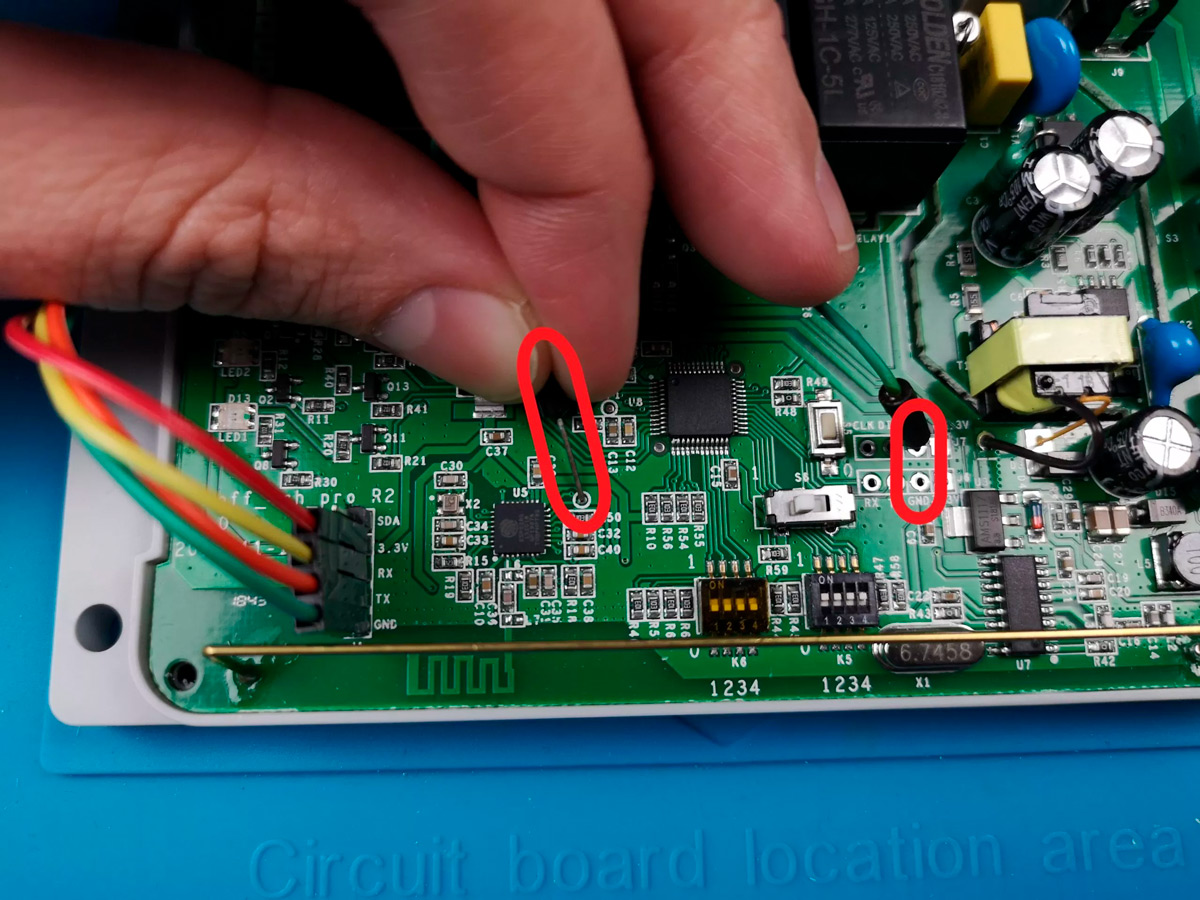
- Press and hold the push button or connect GPIO0 to GND depending on the revision on the Sonoff board.
- While holding the push button insert the USB-TTL in your computer.
- After 3 seconds, release the push button.
- For Sonoff S20 and Basic: Plug the converter’s USB connector into the computer’s USB port.
- Install the 2Smart Cloud firmware on your Sonoff smart device using Docker (Linux only) or installed requirements.
- Connect the Sonoff device to your smartphone using the 2Smart Cloud device pairing guide.
Let’s collaborate
We’re empower your business with our technology expertise
Using Docker (Linux only)
- Download our bash script:
curl https://raw.githubusercontent.com/2SmartCloud/2smart-cloud-cpp-sdk/master/utils/bin/firmware_install.sh > firmware_install.sh
- Make script executable:
chmod +x firmware_install.sh
- Have connected device to your computer.
- Build and write the firmware
./firmware_install.sh write -d <PORT>
or update existing firmware
./firmware_install.sh upload -d <PORT>
full list of commands
./firmware_install.sh
- If everything is okay it should start in AP mode and blink once in a second.
Using installed requirements
- Need have: python (>= v3) installed. You can control it in terminal
python --version
platformio (>= v5.1.1)
pip install -U platformio
- Have connected device to your computer.
- Device should be listed in /dev as one of this:
(Linux)
/dev/ttyUSB0

(OSX)
/dev/cu.SLAB_USBtoUART
/dev/cu.usbserial-0001
- Build and write
pio run -t upload
- If everything is okay it should start in AP mode and blink once in a second.
Factory reset
To reset the connected device press the power button (for Sonoff 4CH: the first channel button) for 10 seconds until the led starts blinking.
How to Use Sonoff Smart Device as Your 2Smart Cloud Product
Using the instructions above, you will be able to use all the benefits that the end user of the 2Smart Cloud IoT platform gets. However, you can make minor modifications to the code of the ready-made firmware from the platform’s GitHub and publish the device as your product.
The most significant advantage you will get in this case is the ability to customize the mobile application interface to your liking using the 2Smart Cloud widget library.
In addition, if you are fond of creating IoT devices, publishing a product with ready-made firmware will allow you to evaluate the platform from the vendor’s point of view.
Use this instruction to modify the firmware and publish your Sonoff smart device as your own 2Smart Cloud product.
Don't forget to share this post!
Read Next


Let’s dive into your case
Share with us your business idea and expectations about the software or additional services.
