
Table of contents:
MQTT Explorer is one of the favorite tools used by developers and QA specialists of the 2Smart team. Below, we’ll show you how to use the MQTT Explorer to make your life easier when developing and testing a new IoT device.
Installation and connection to 2Smart MQTT broker
Go to the developer’s website or GitHub to install the latest version of MQTT Explorer for your operating system.
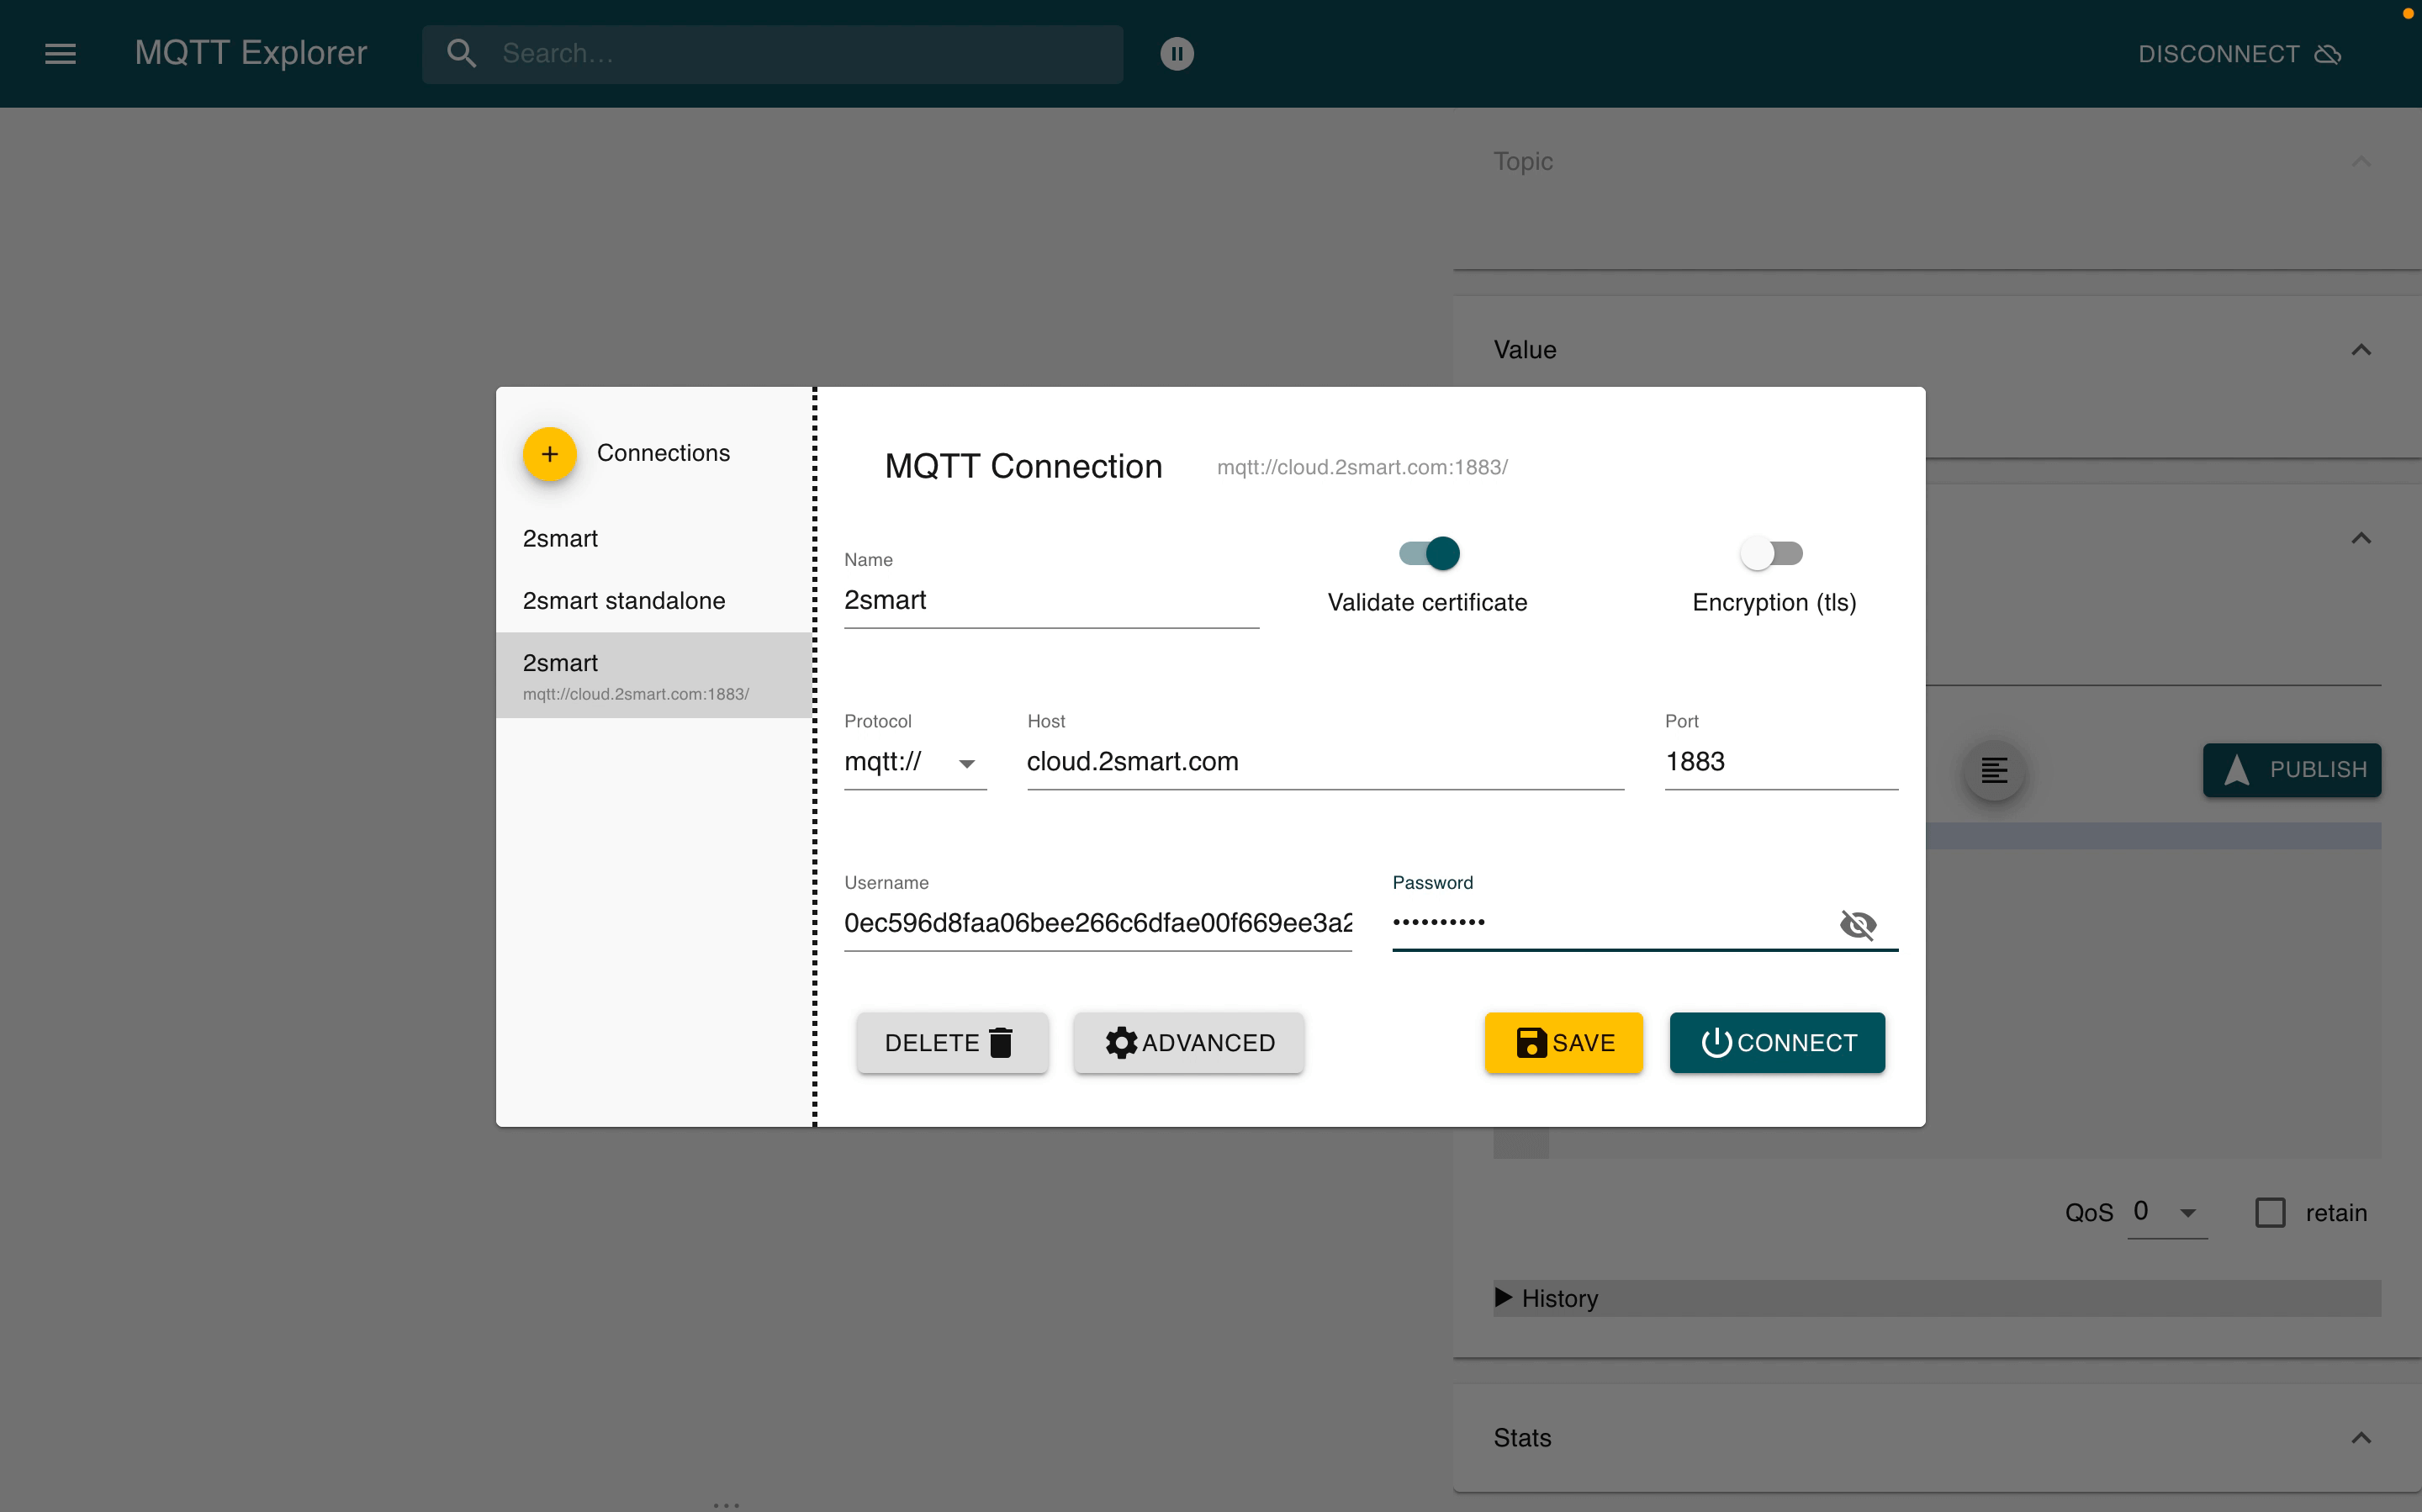
To set up a connection to the 2Smart Cloud MQTT broker, click the “Add connection” icon and fill in the required fields:
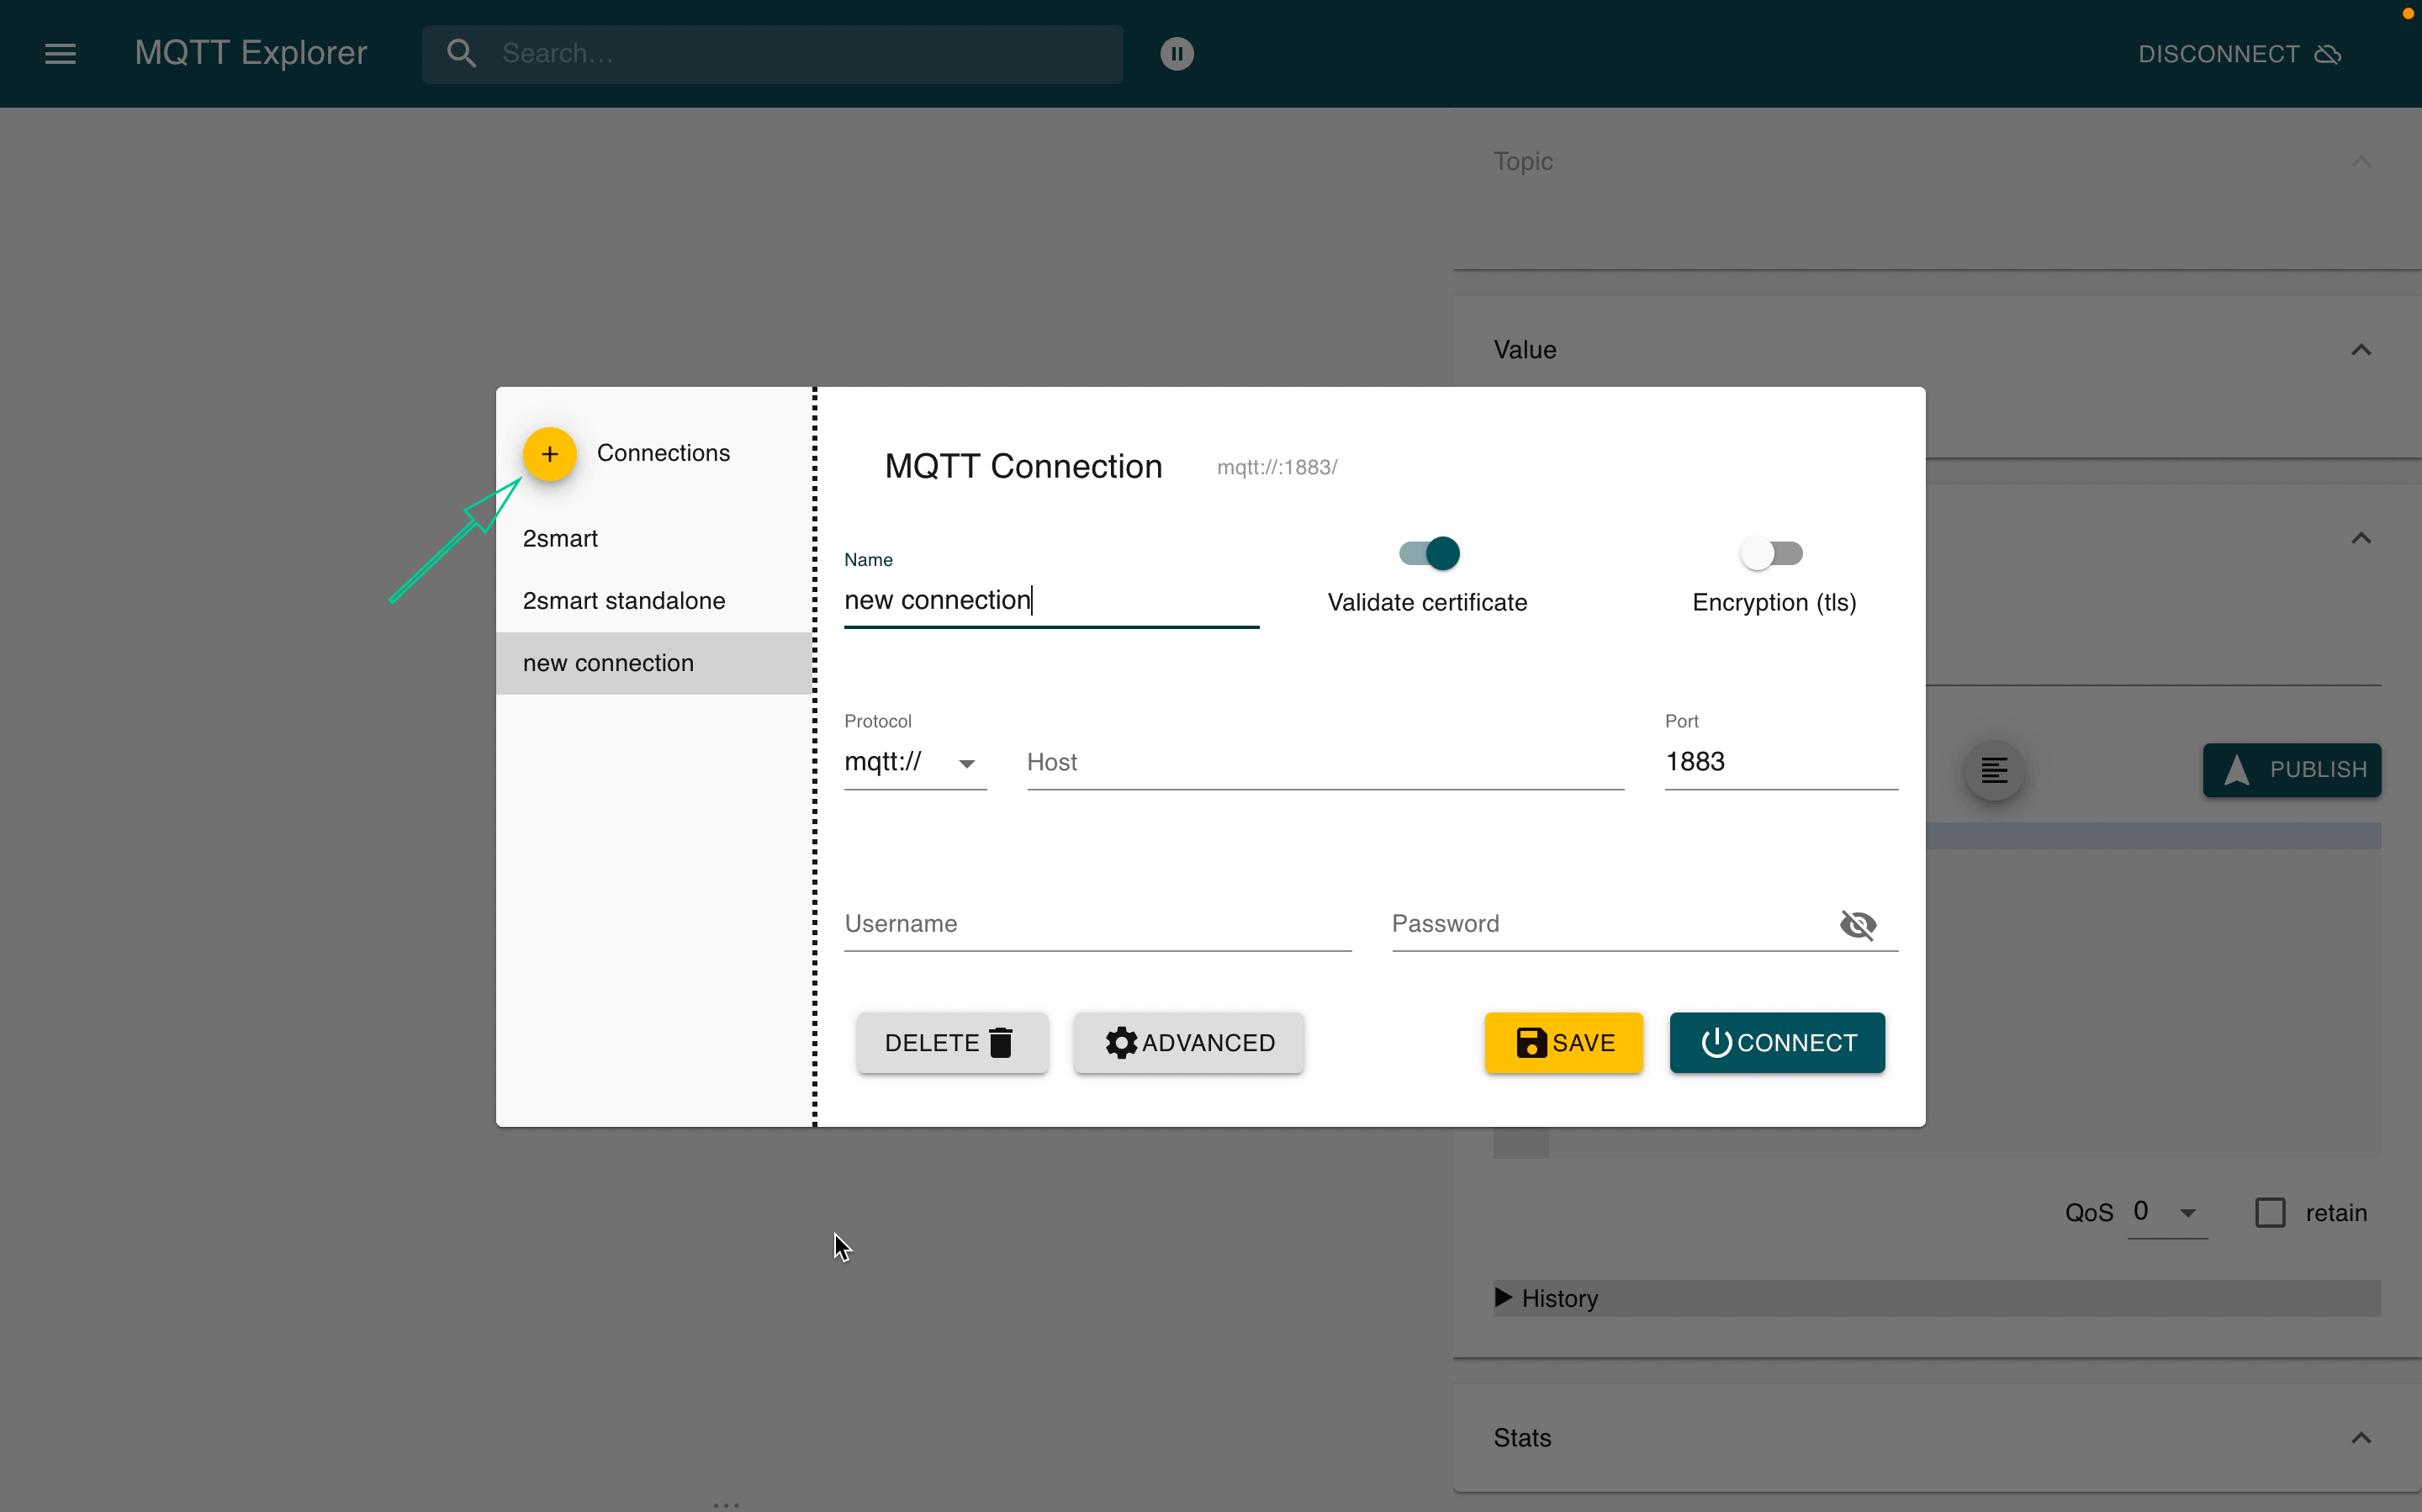
- Specify the connection name – for example, 2Smart.

- Specify the protocol – to do this, follow these steps:
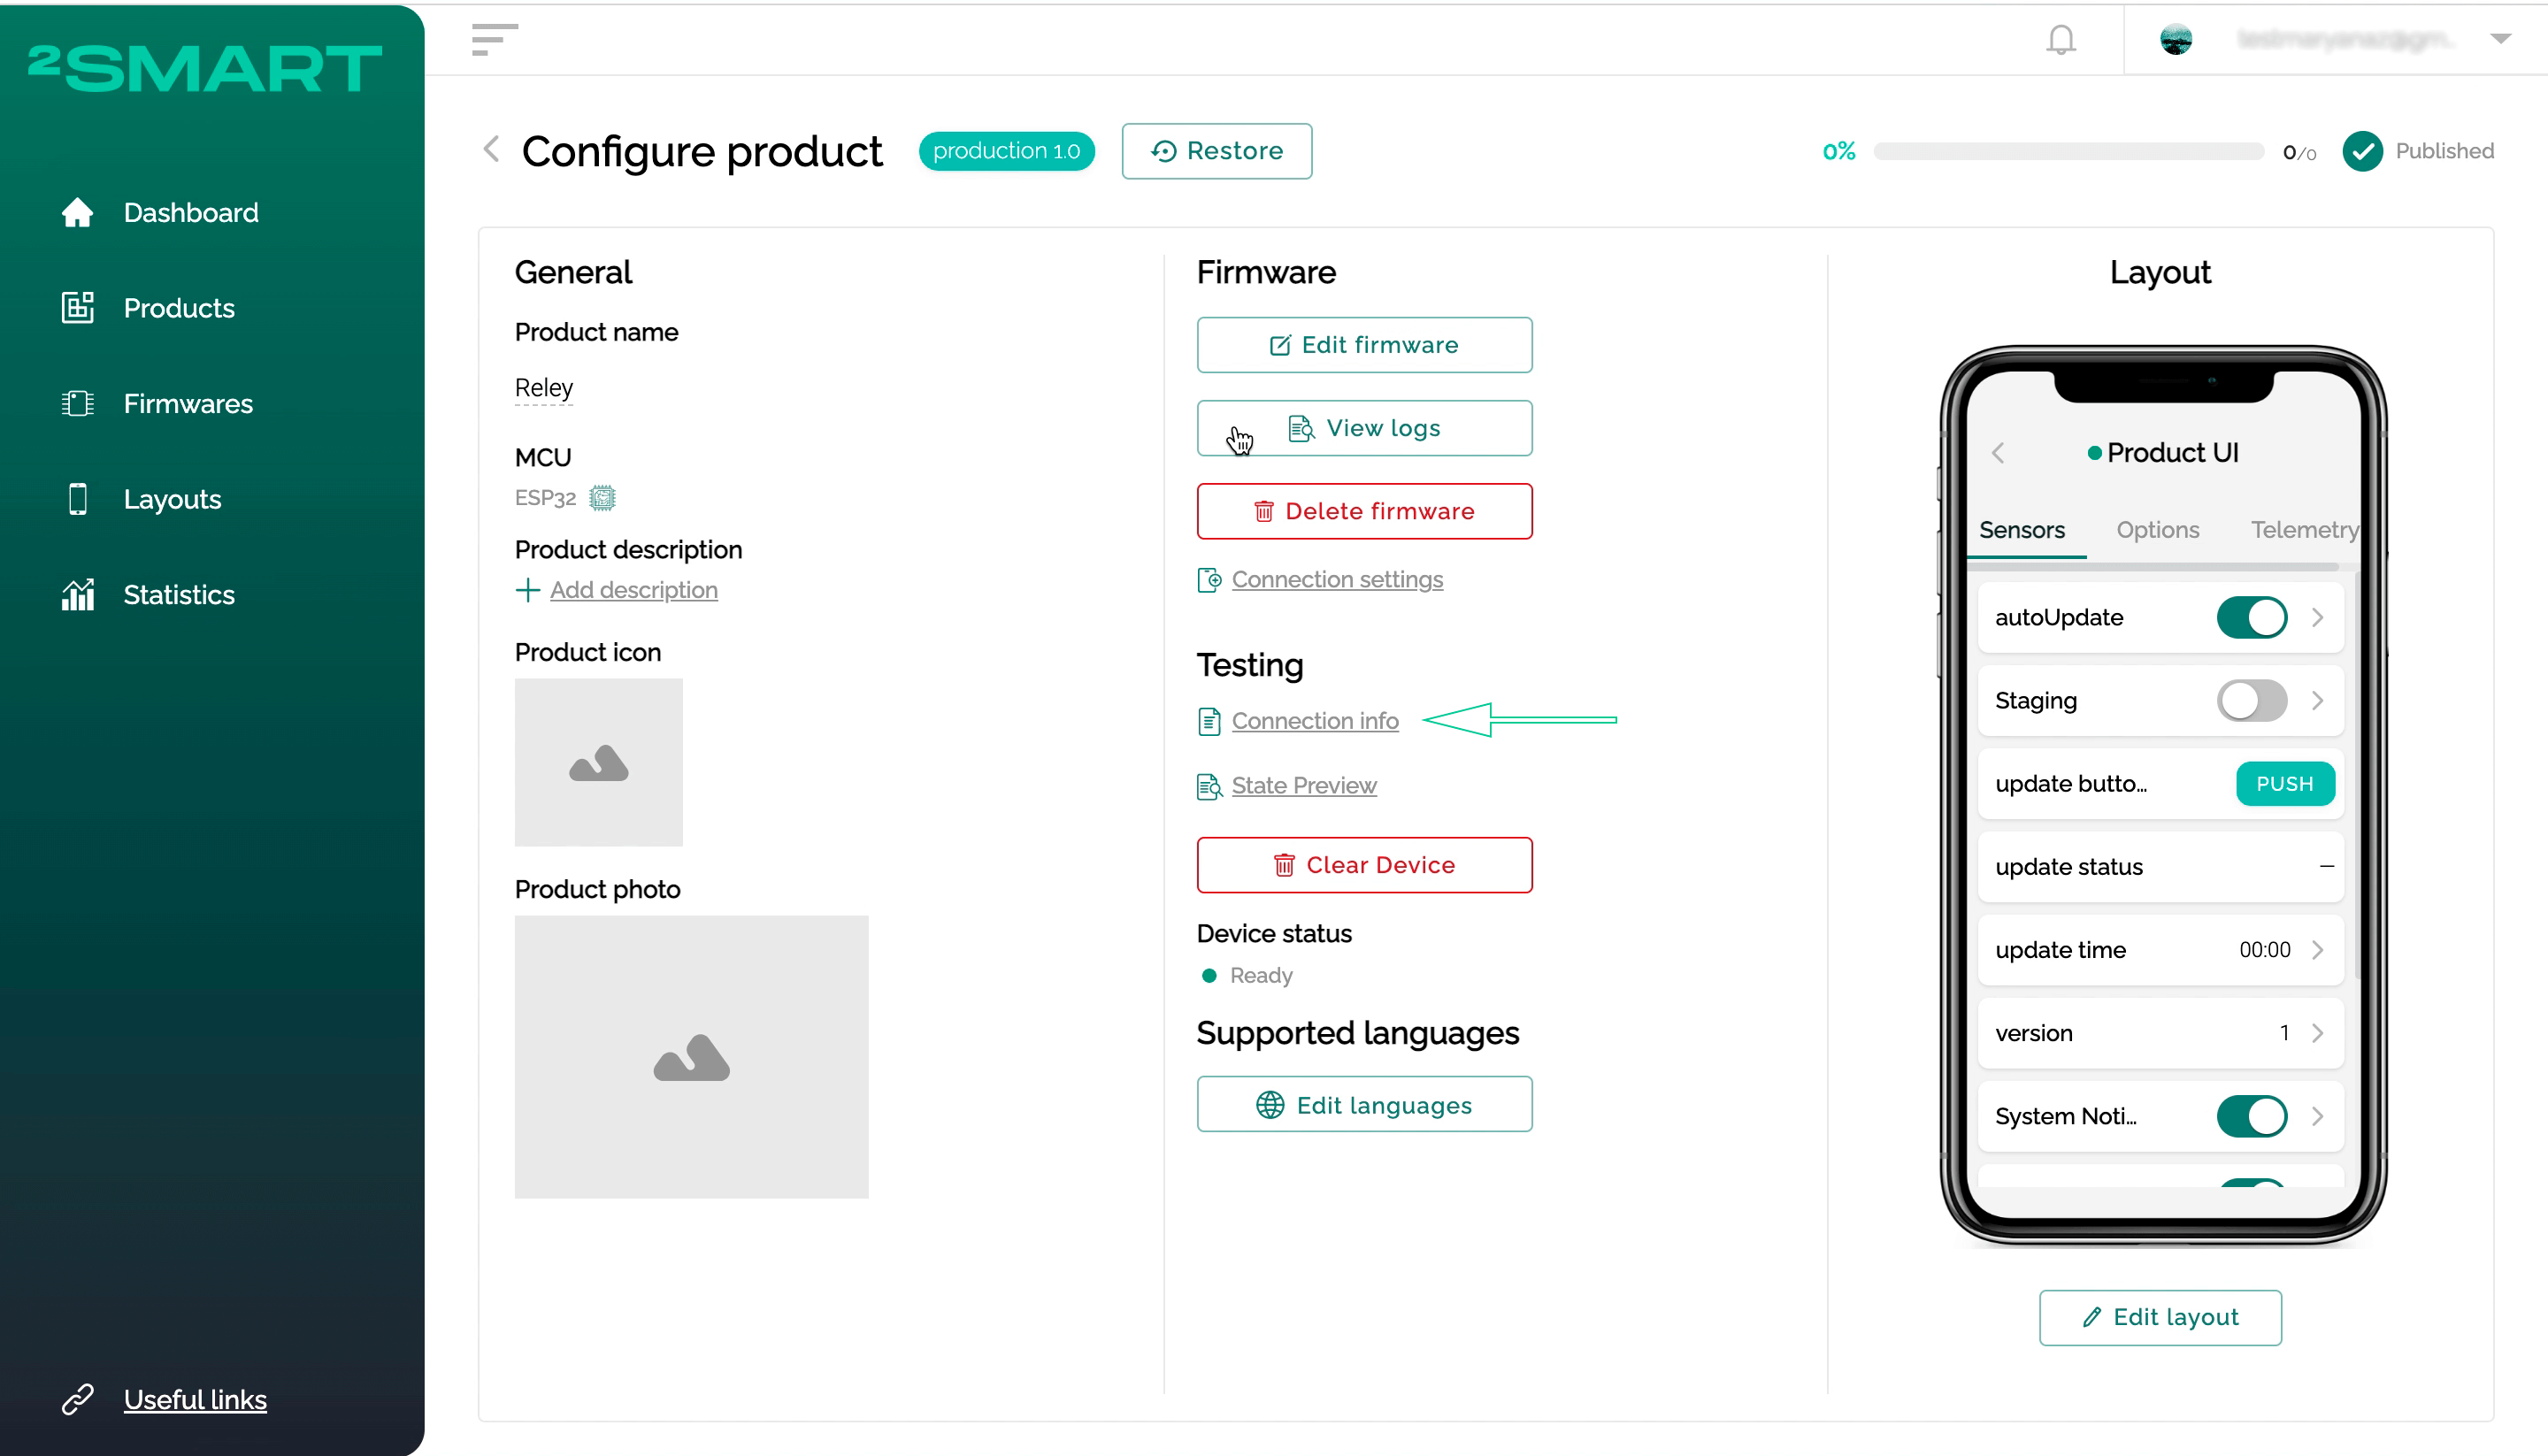
- go to the page of any of your products in the 2Smart Cloud Developer Panel;
- click the “Connection info” link;

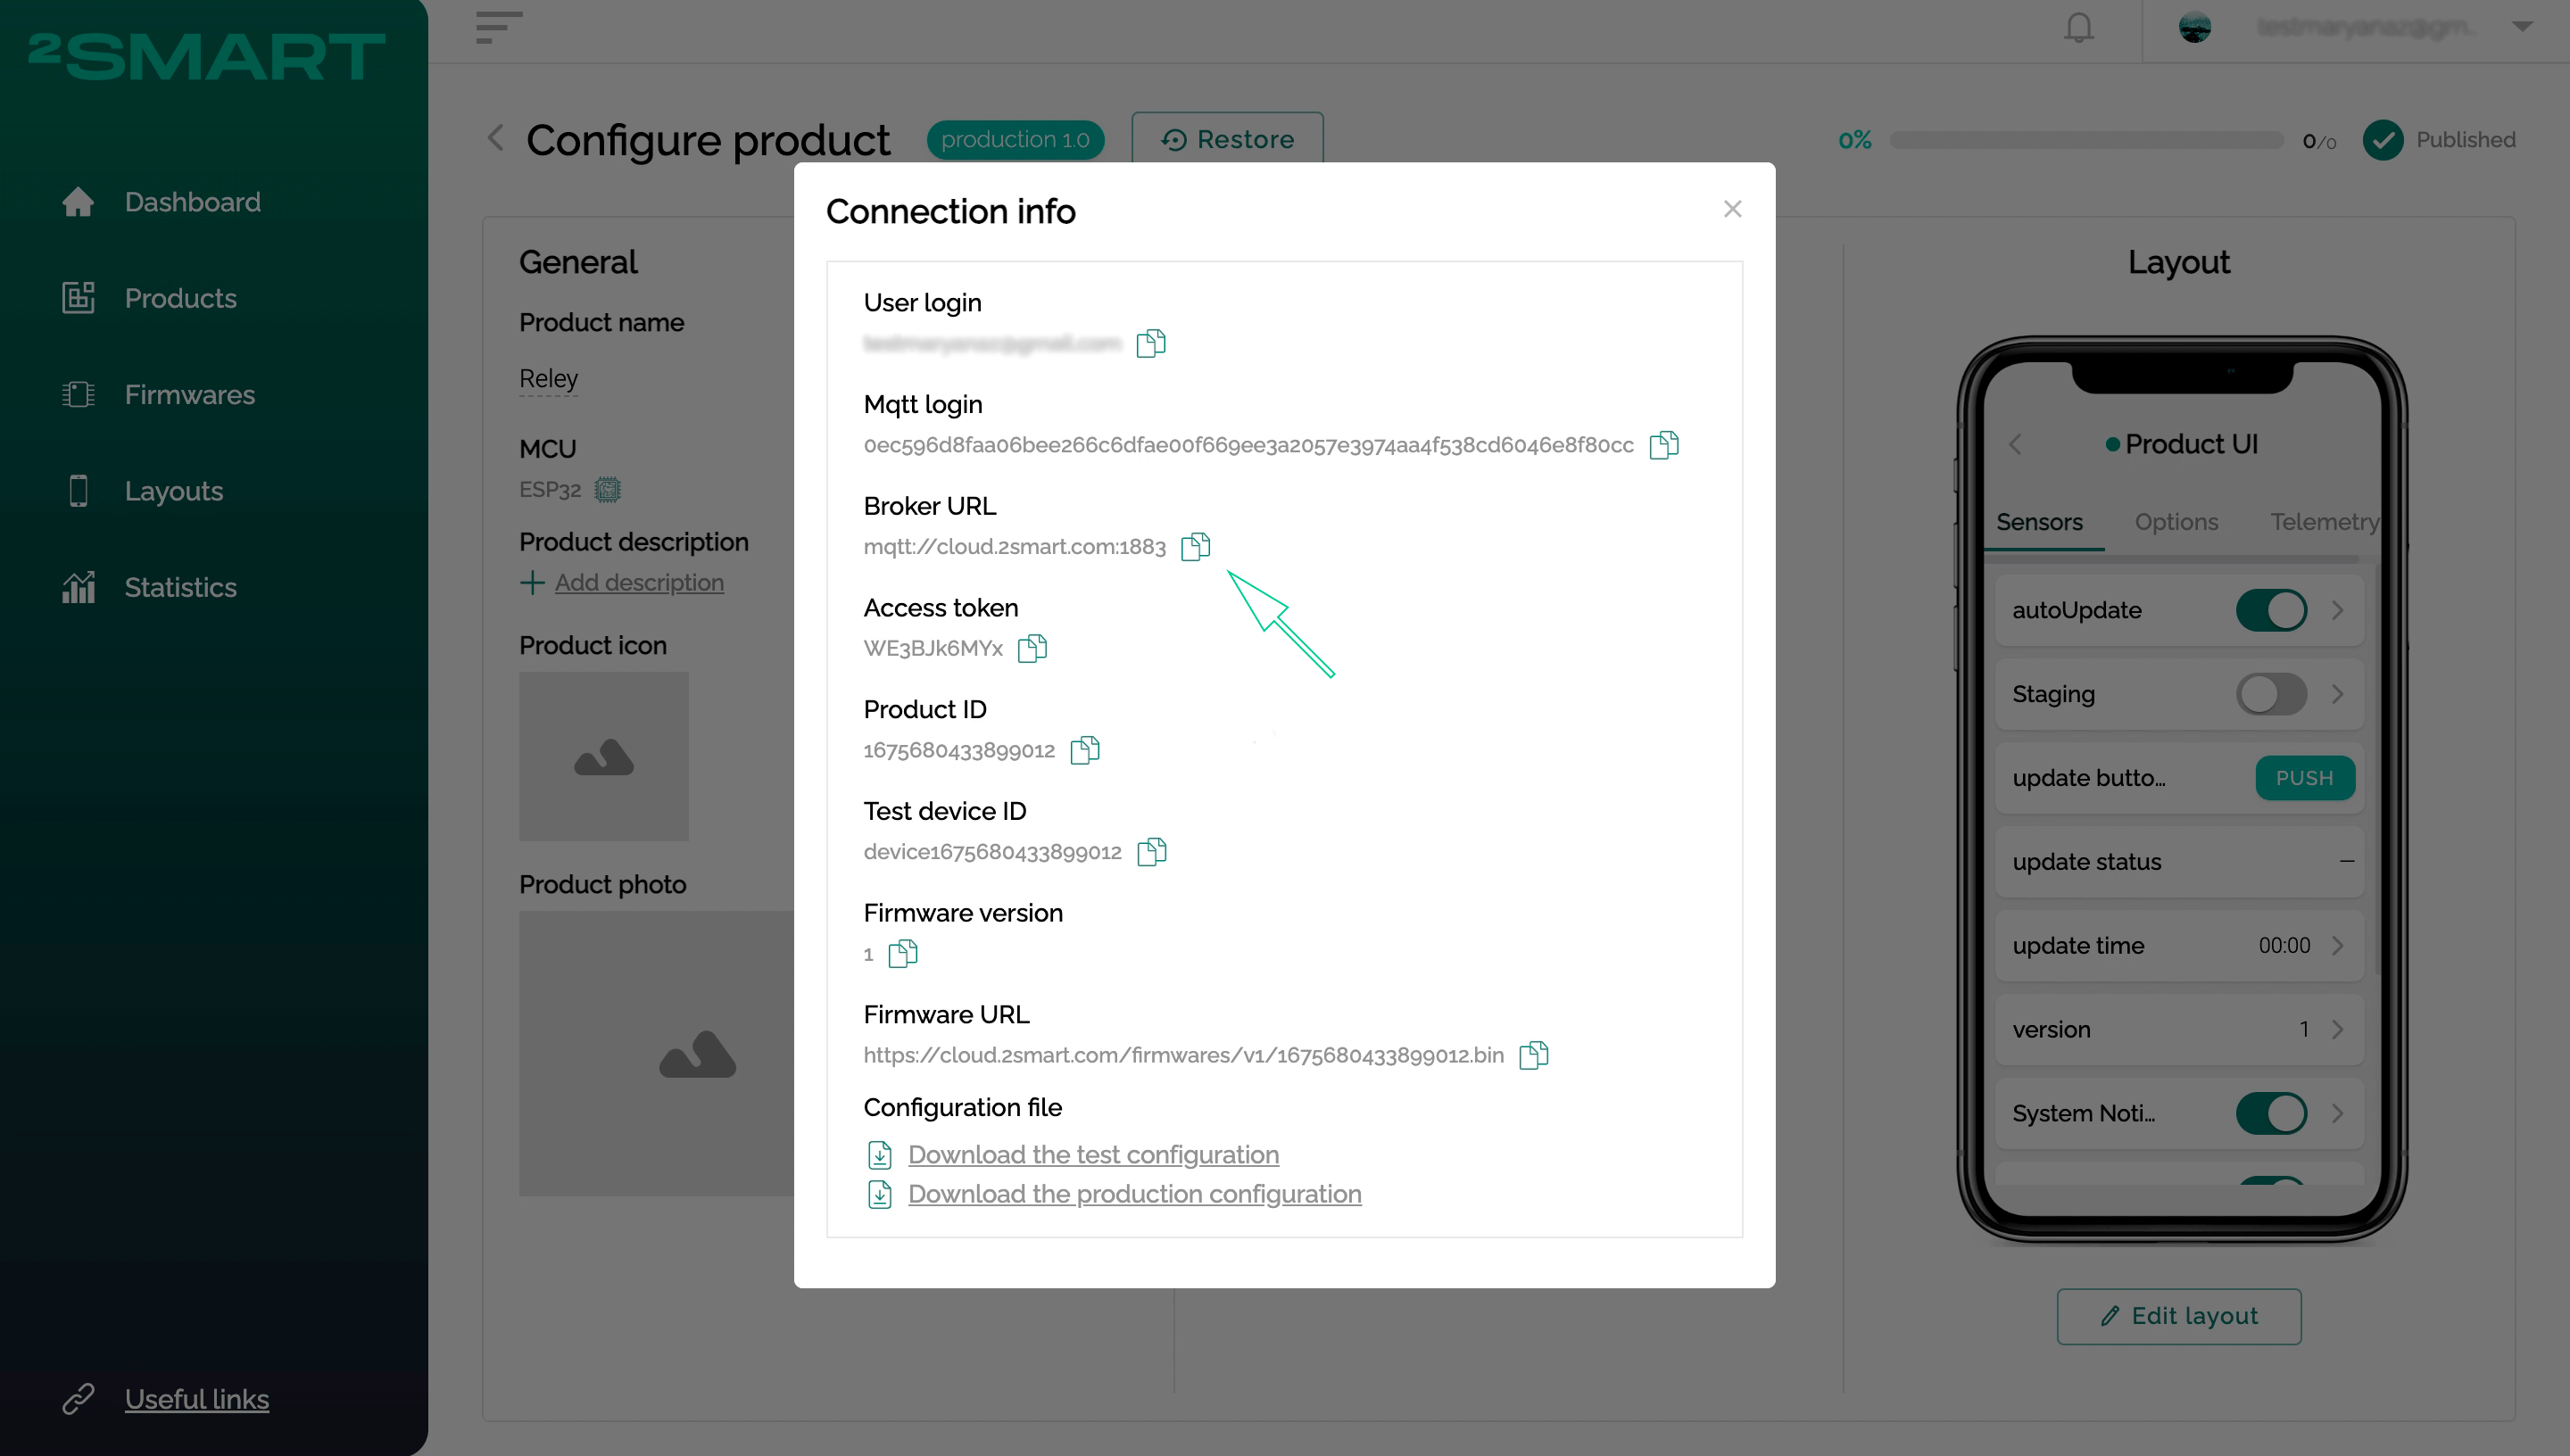
- copy the “Broker URL” value;

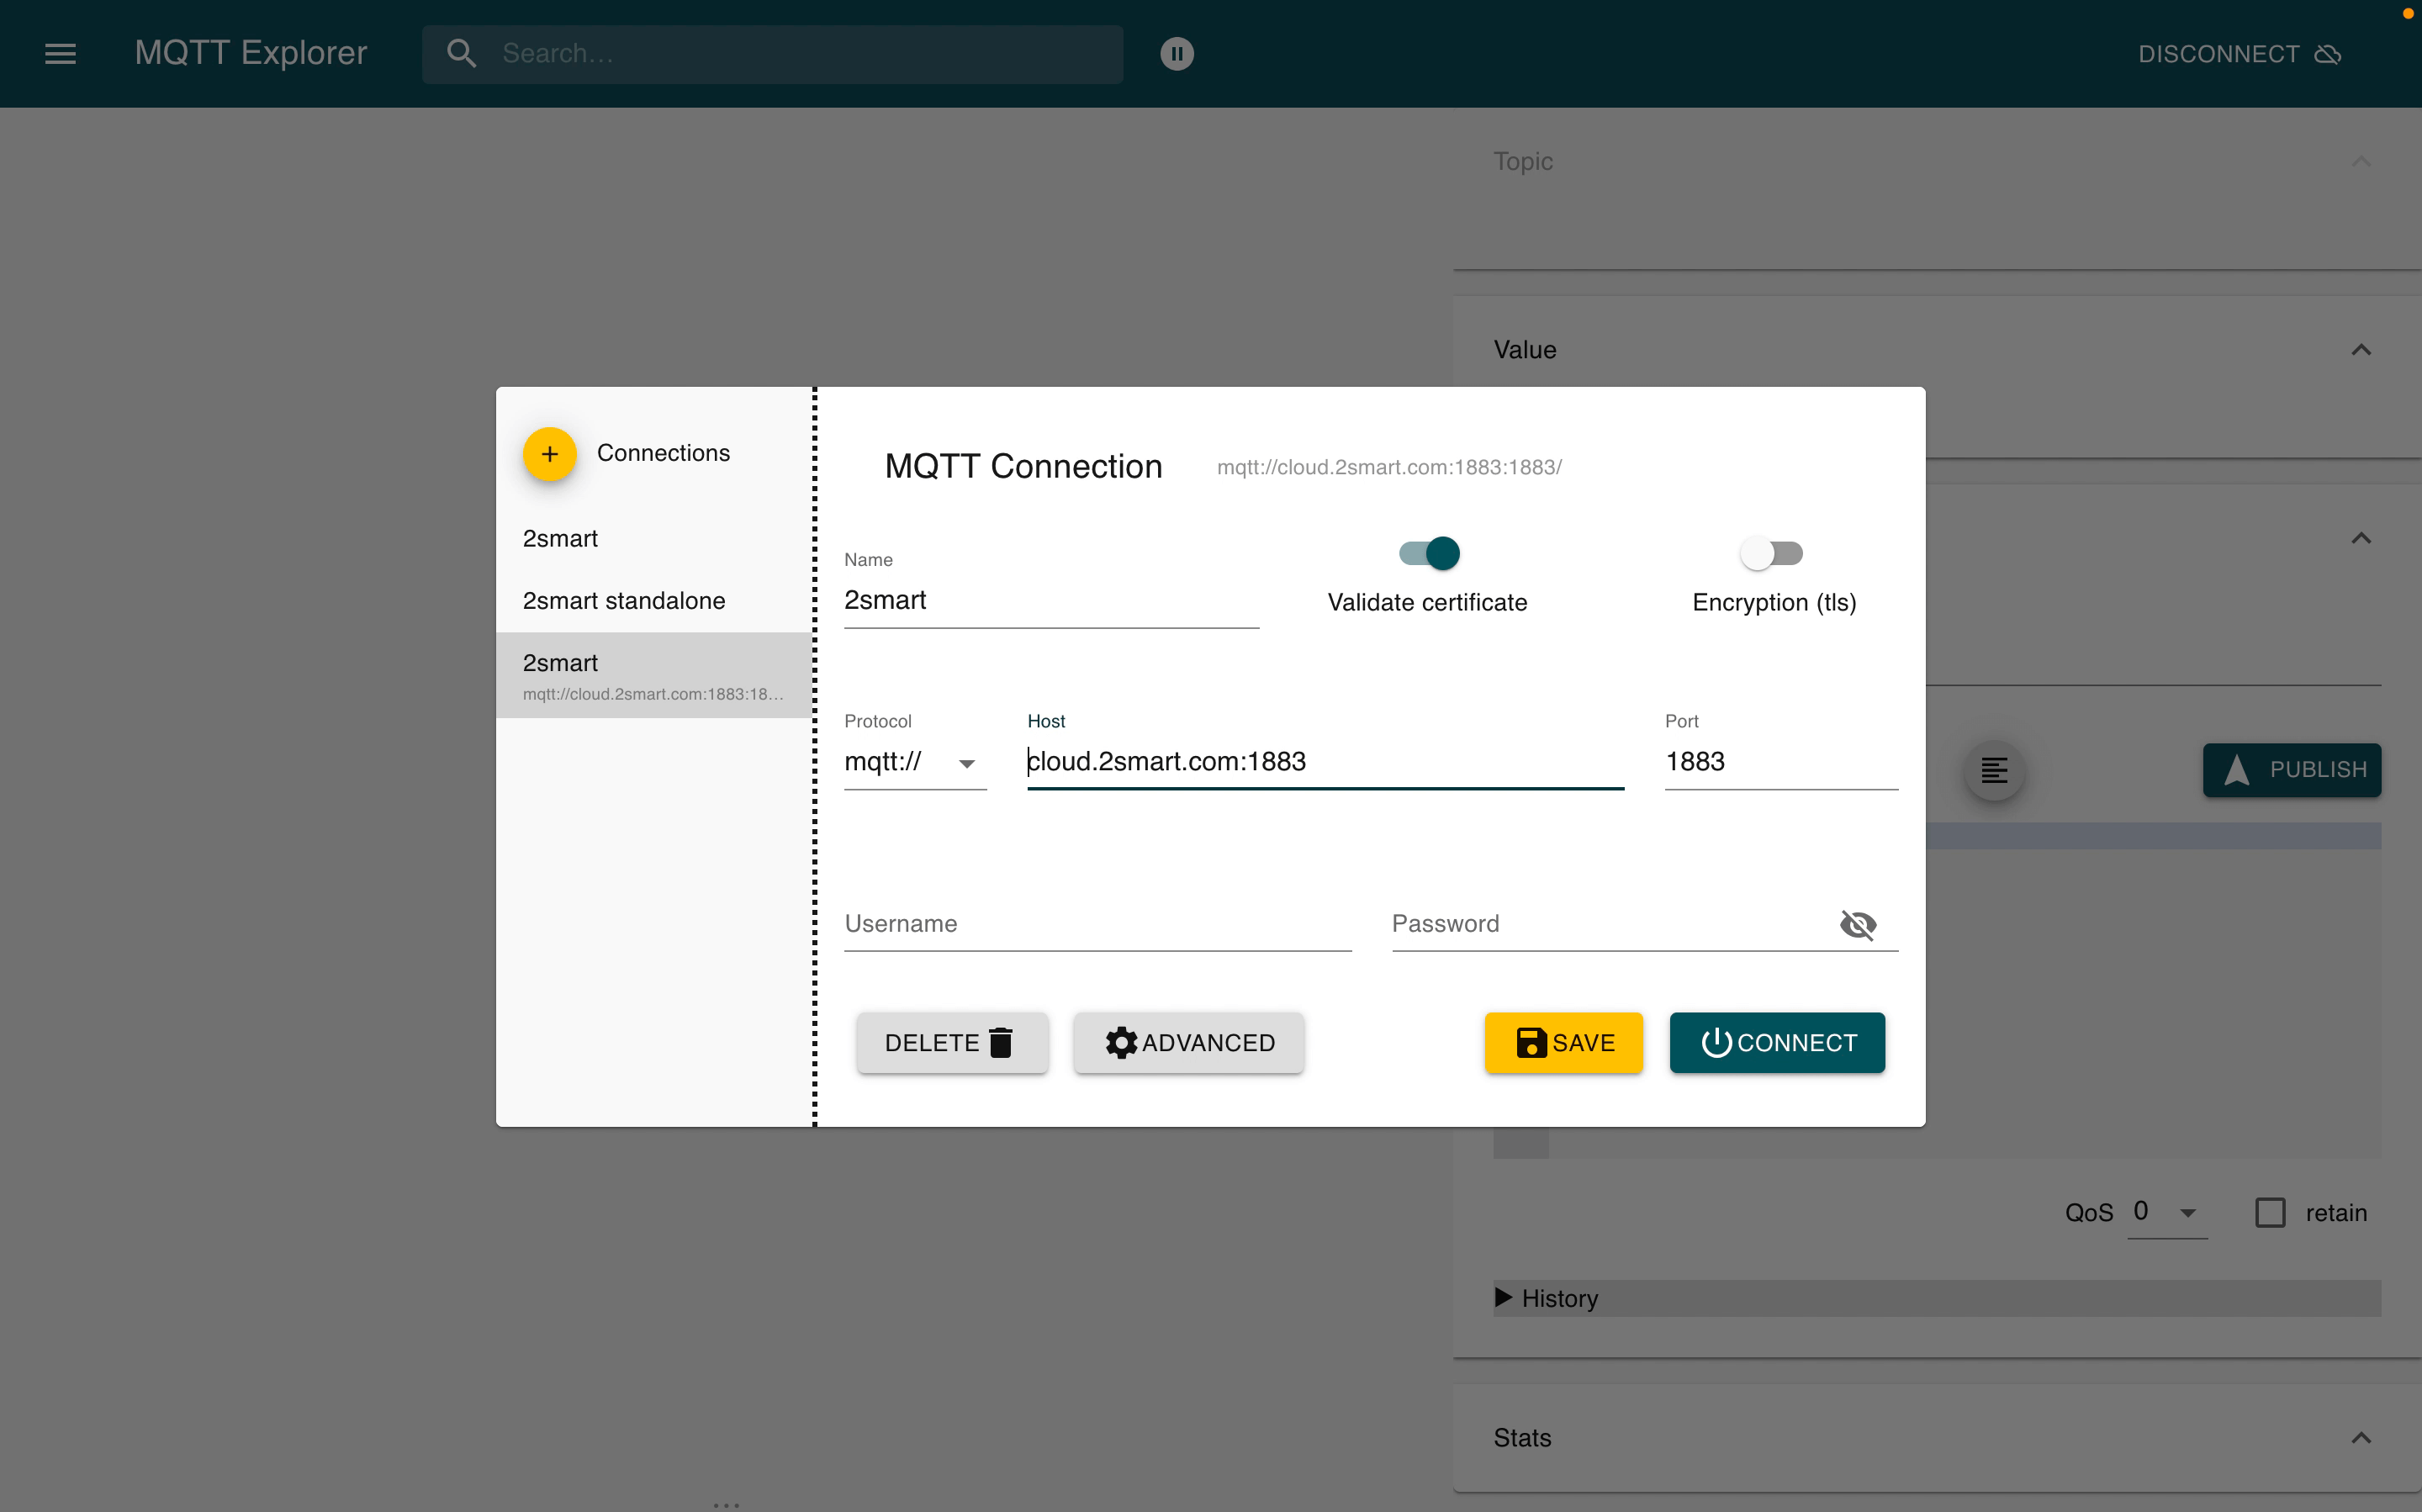
- paste the copied value into the “Host” field of the connection settings window in MQTT Explorer;
- make sure the “Protocol” field is set to “mqtt” and remove the protocol from the “Host” field;
- make sure the “Port” field is set to “1883” and remove the port number from the “Host” field.
- Fill in the “Username” field – to do this, copy the “Mqtt login” value from the “Connection info” window in the developer panel.
- Fill in the “Password” field – to do this, copy the “Access token” value from the “Connection info” window in the developer panel.
- Click “Save”.


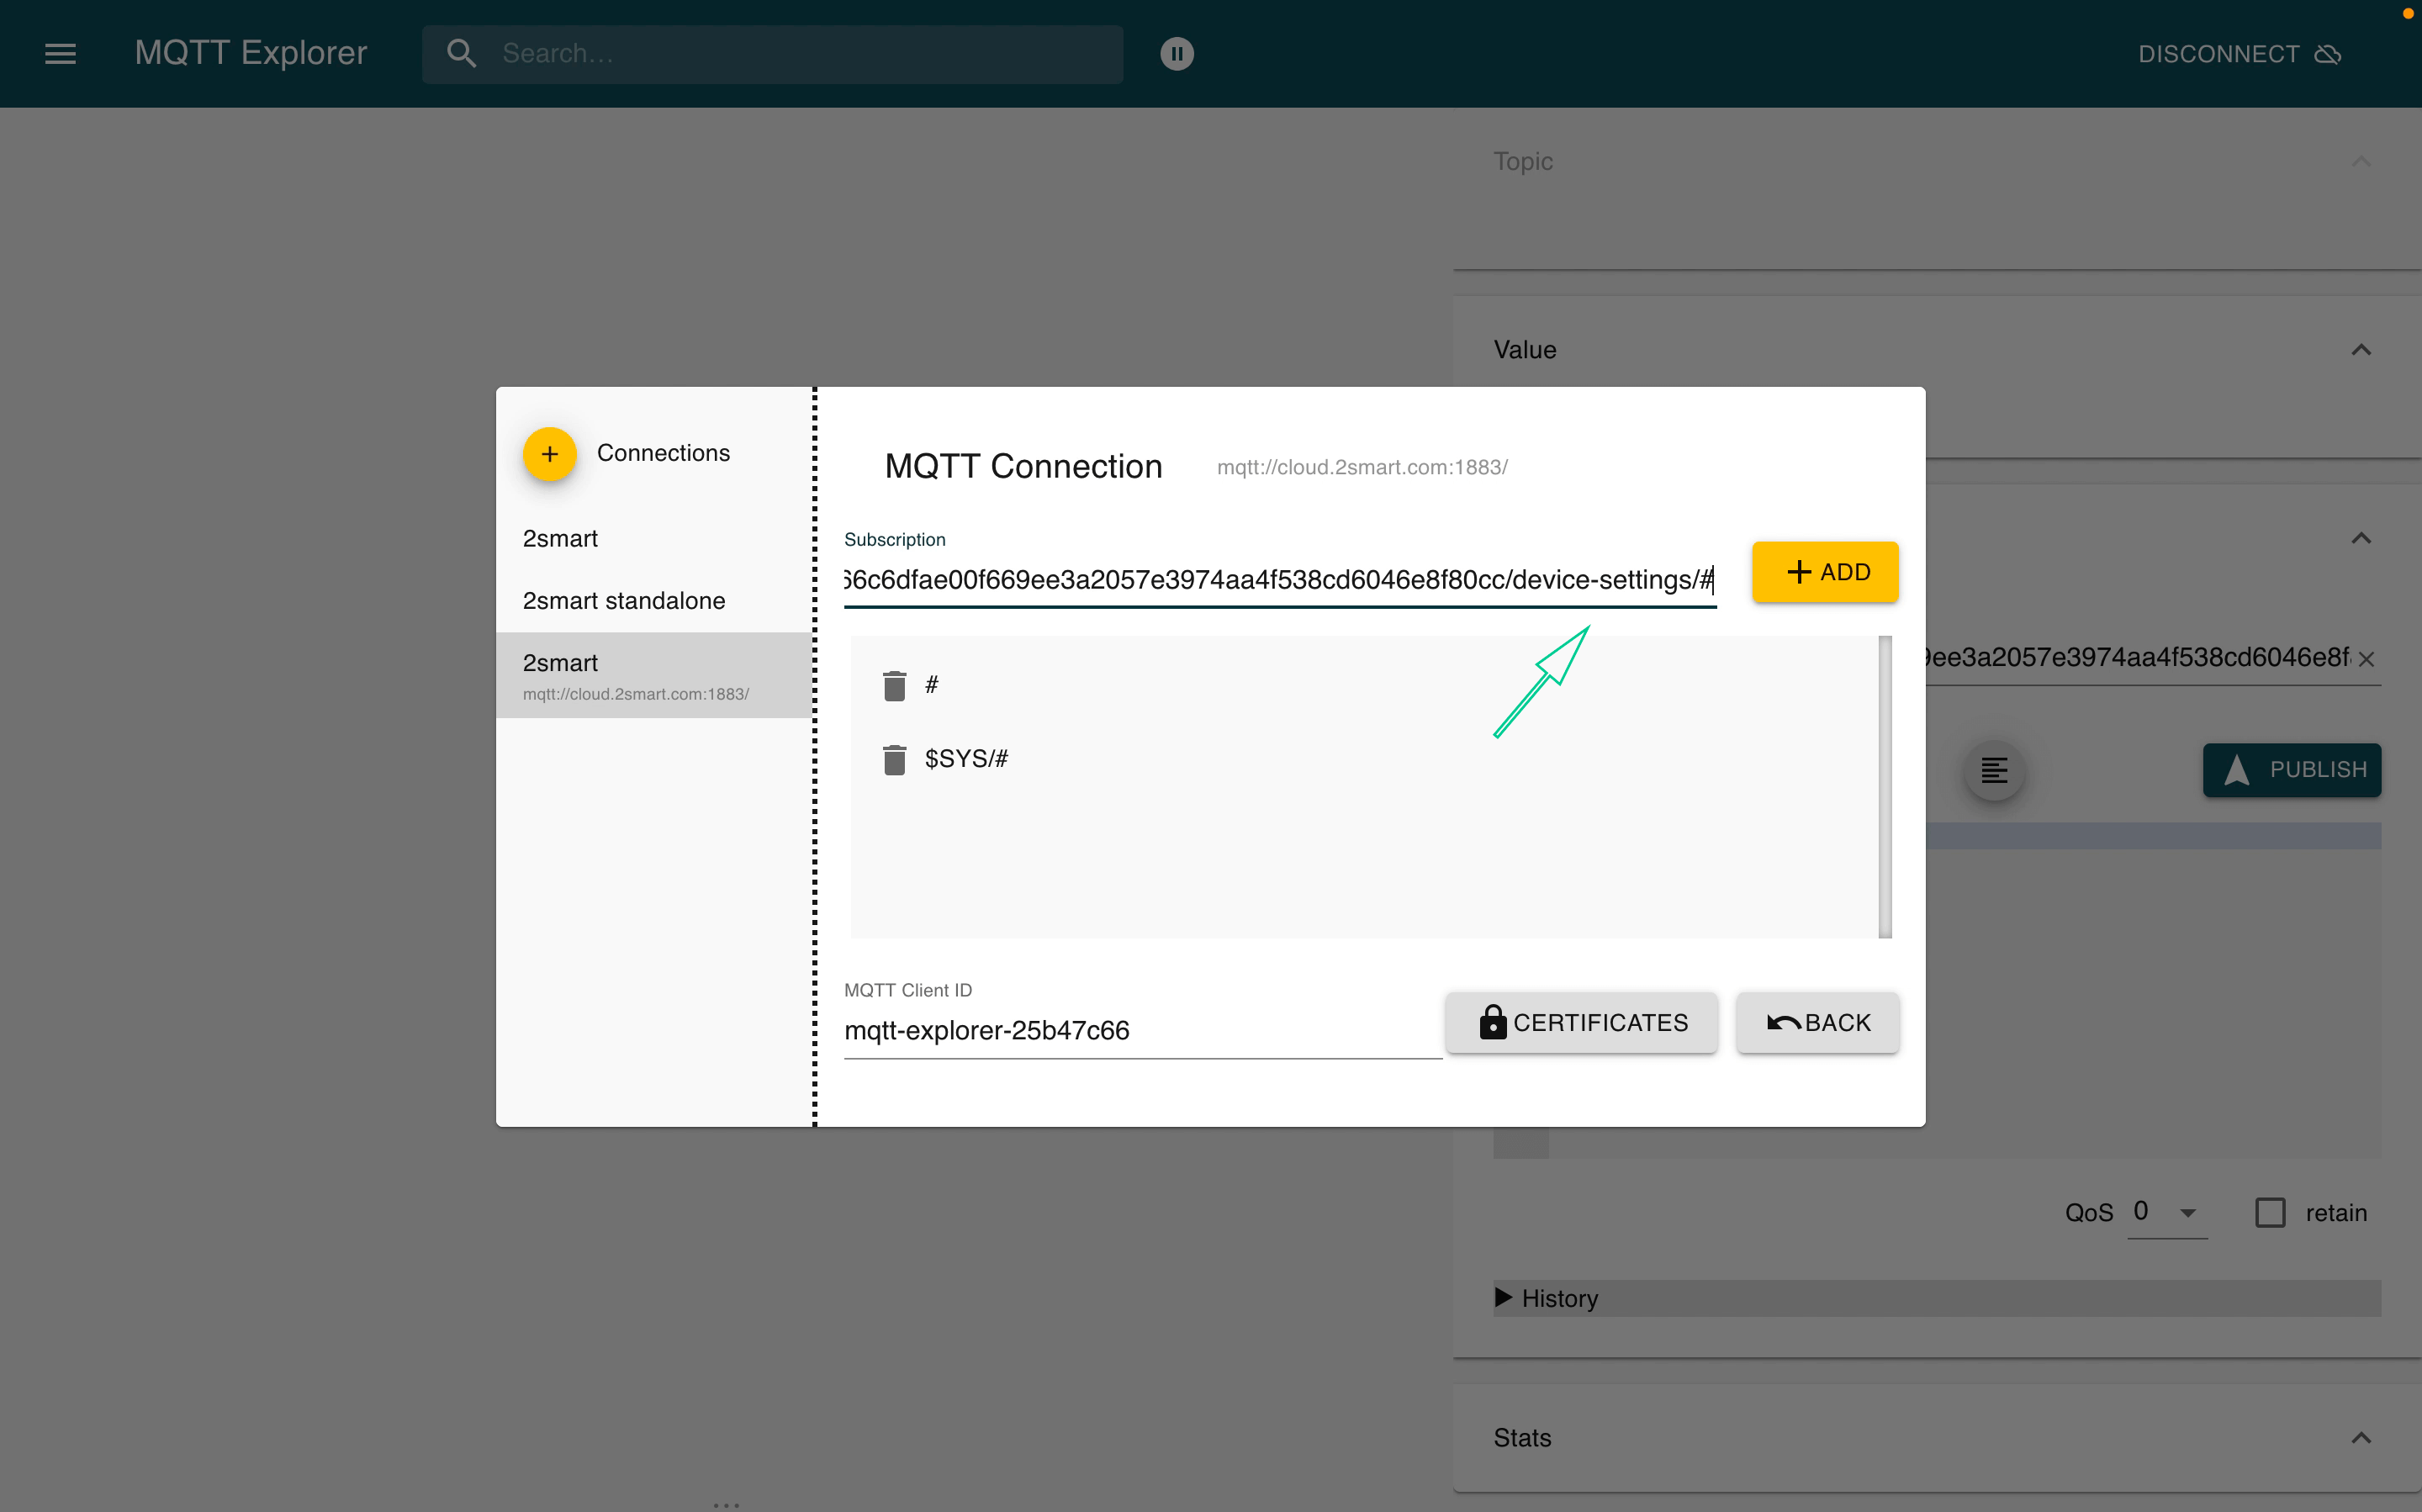
Topics subscription
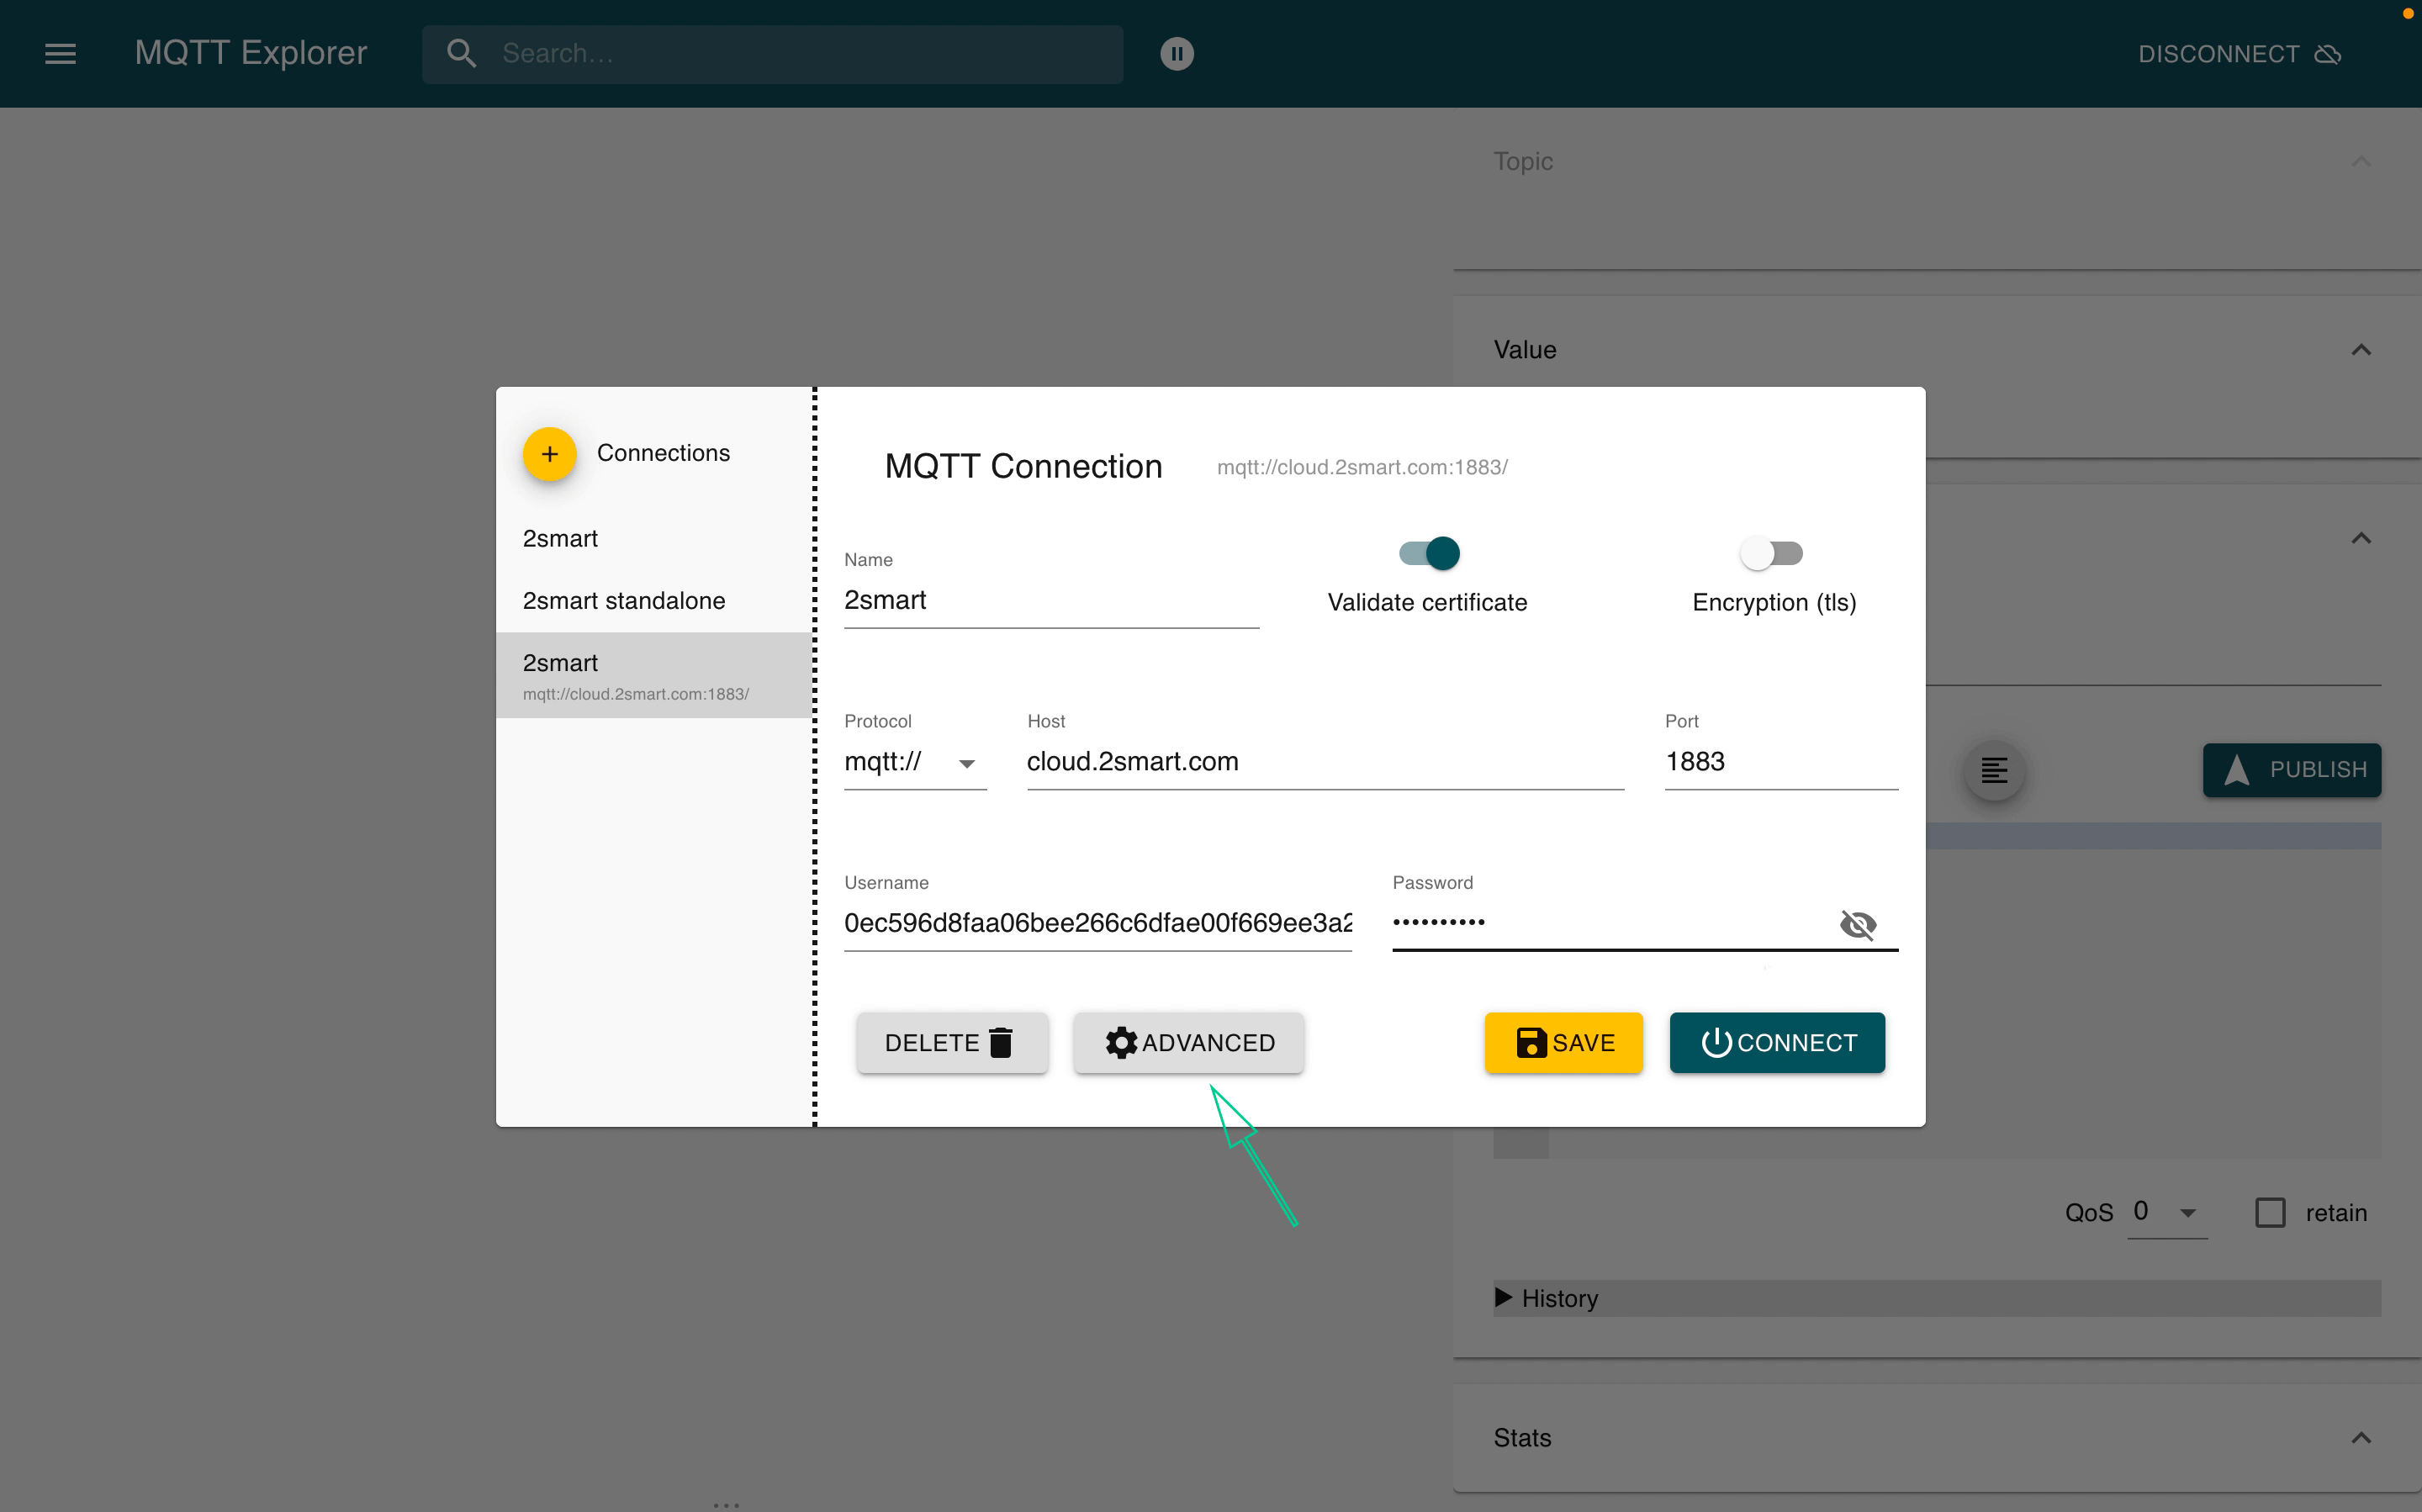
- To subscribe to the topics of your devices, click the “Advanced” button in the connection settings window.
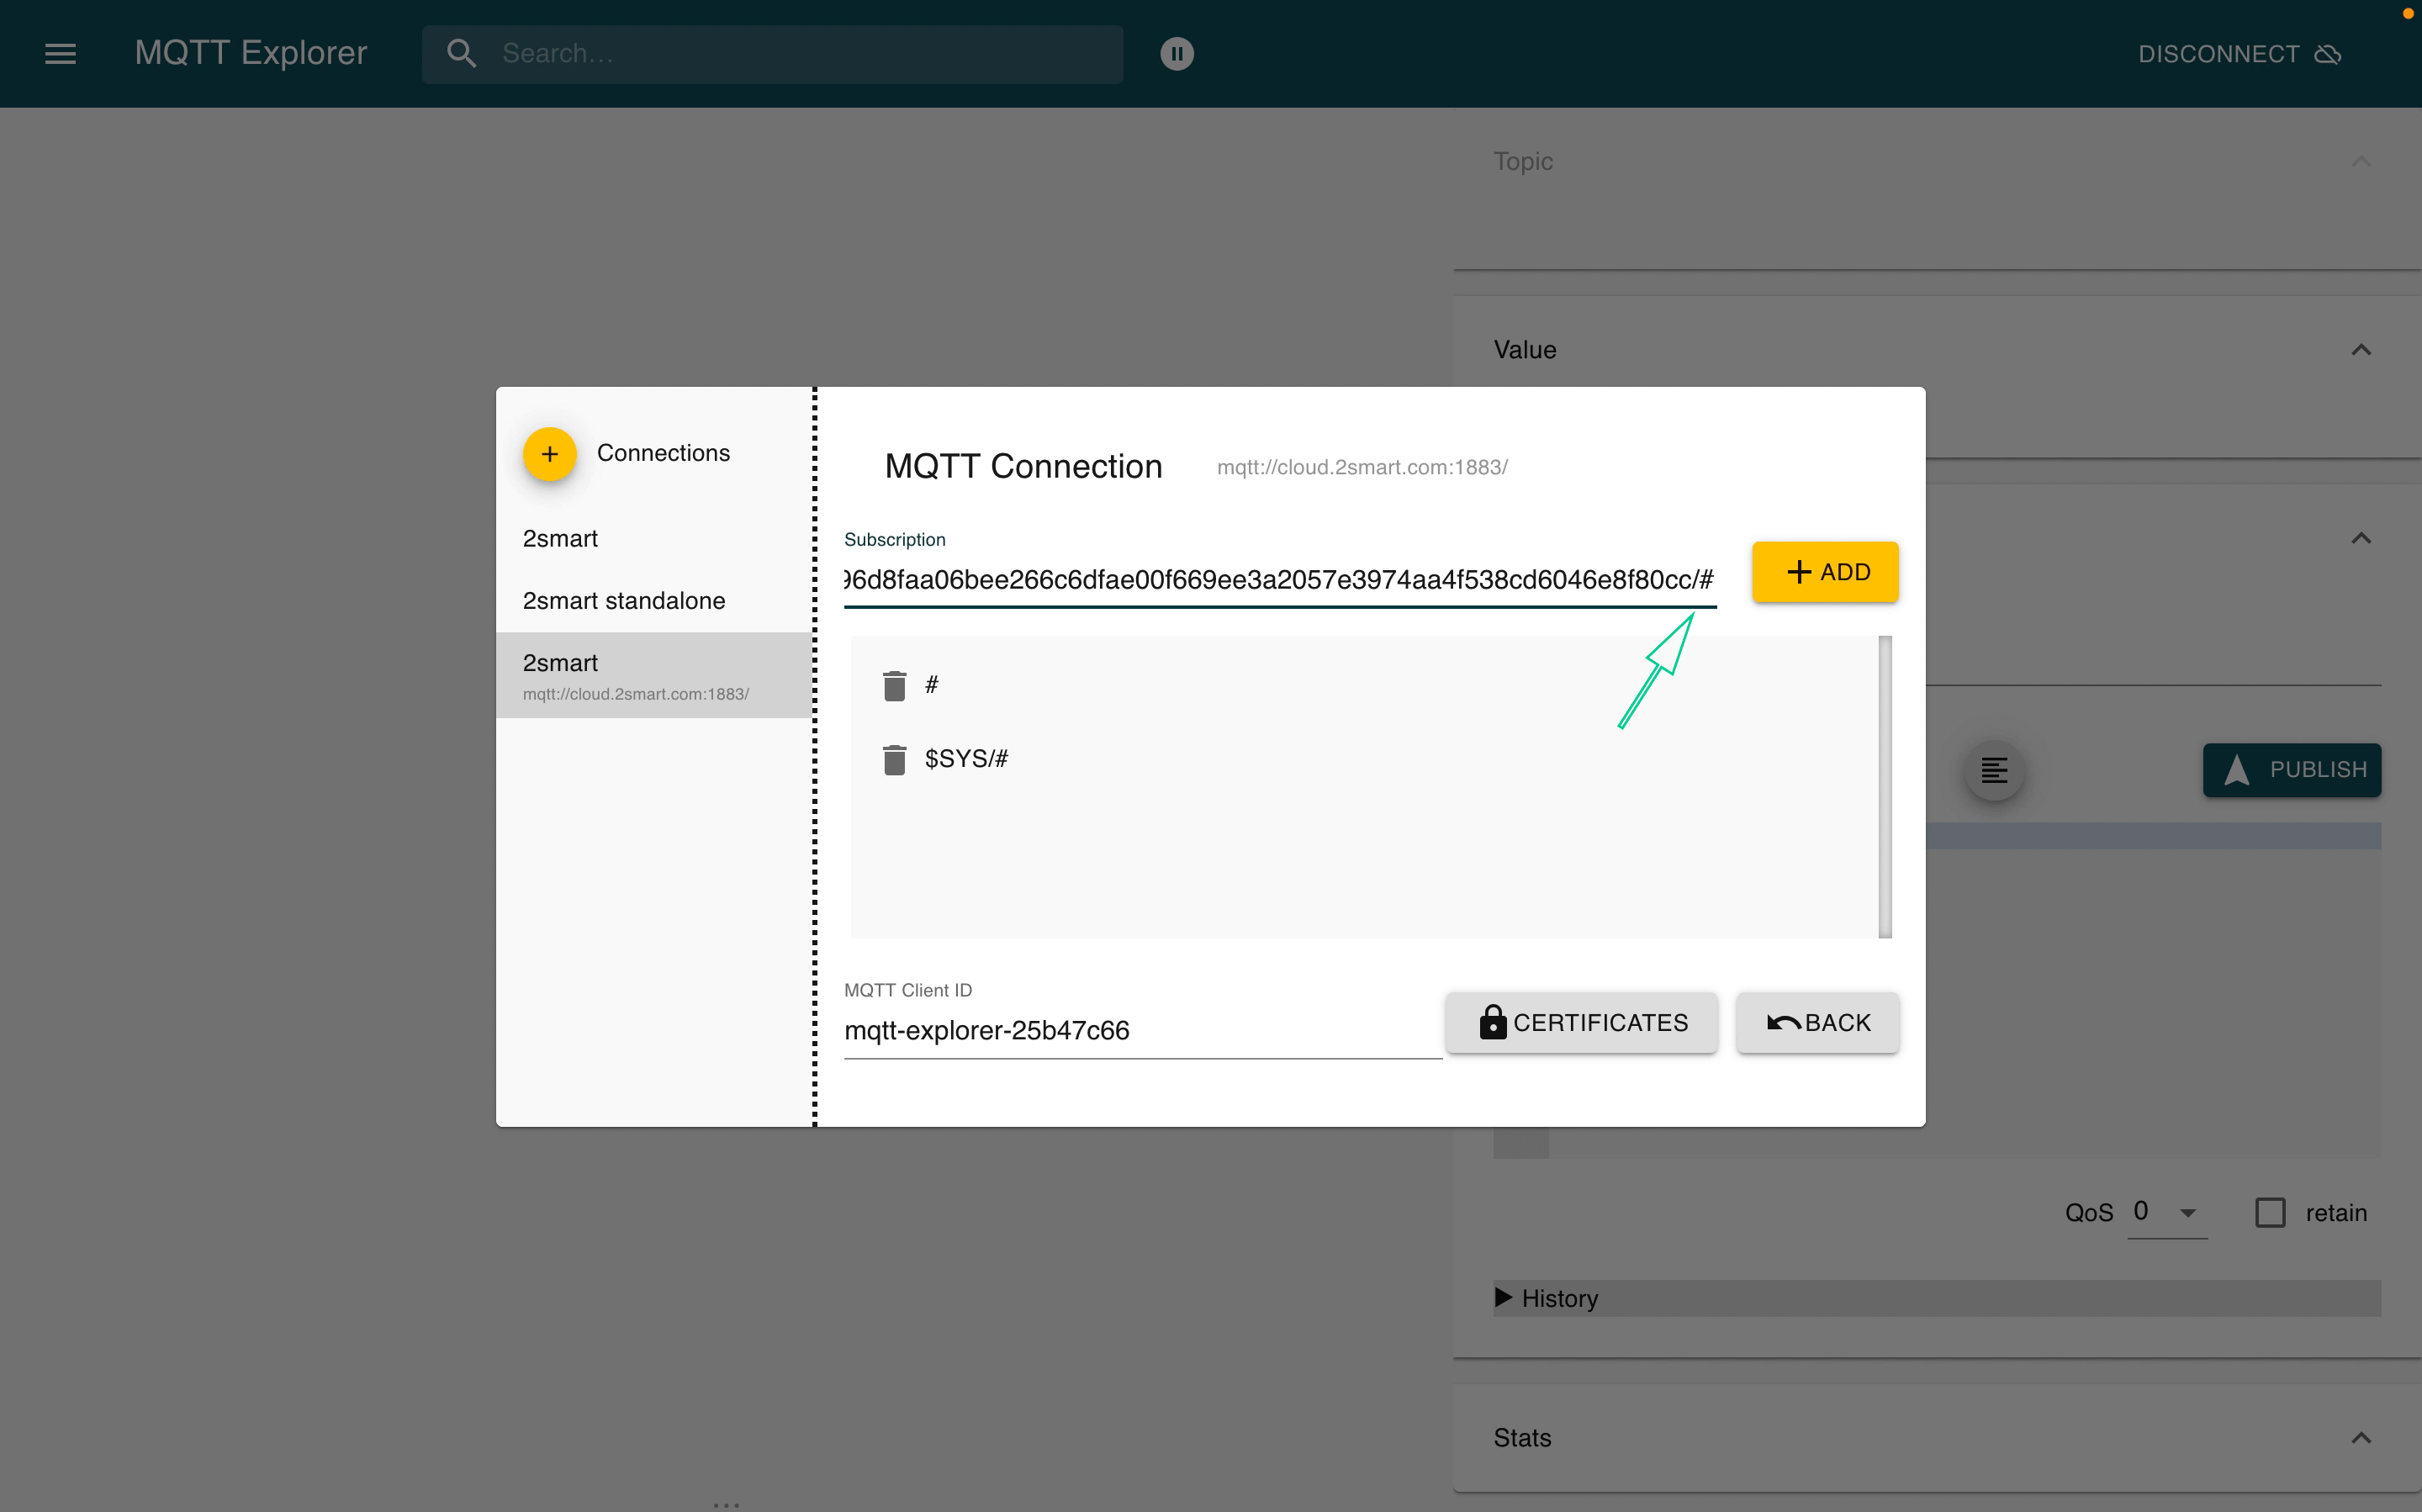
- Copy the “Mqtt login” value from the “Connection info” window of the developer panel and paste it into the “Subscription” field.
- To subscribe to all topics on all your devices, add slashes and a pound sign to your MQTT login: “/#”.
- Click “Add”.
- Return to the main connection settings window using the “Back” button and click “Save”.

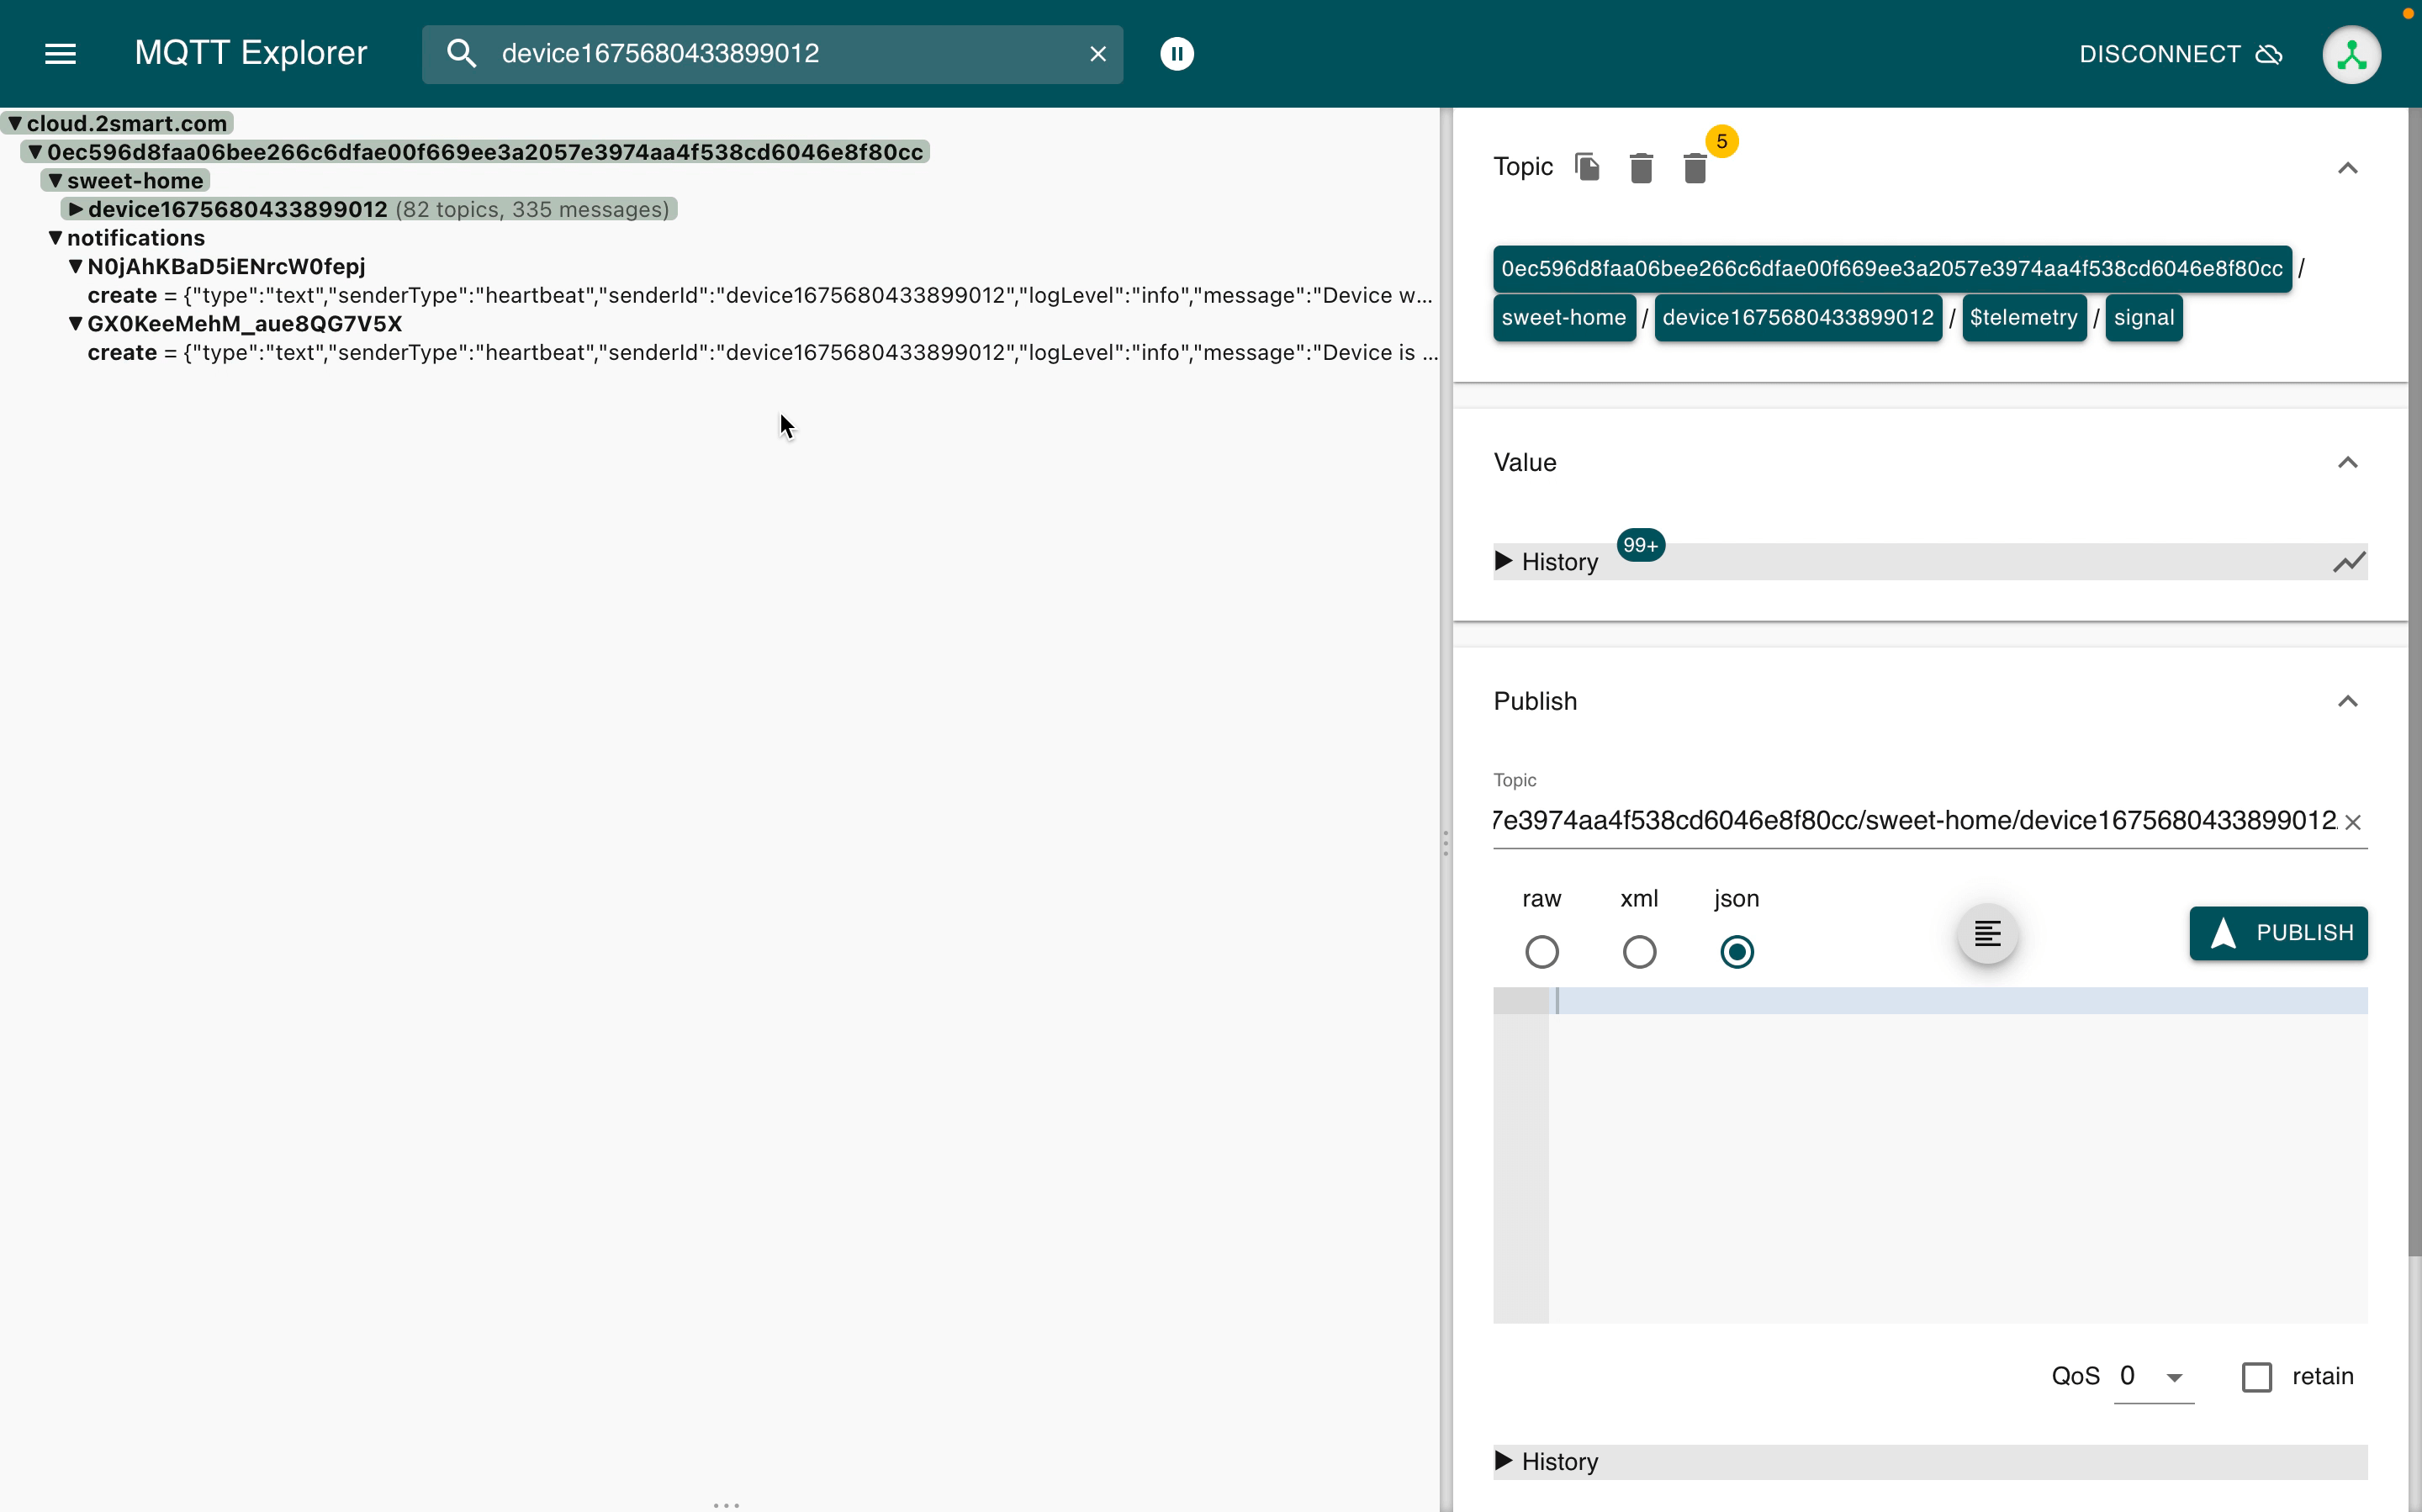
Browsing topics
After setting up the connection and subscribing to topics, you can quickly connect to the broker at any time and view the topics of your products.
MQTT Explorer displays topics in an intuitive tree structure.
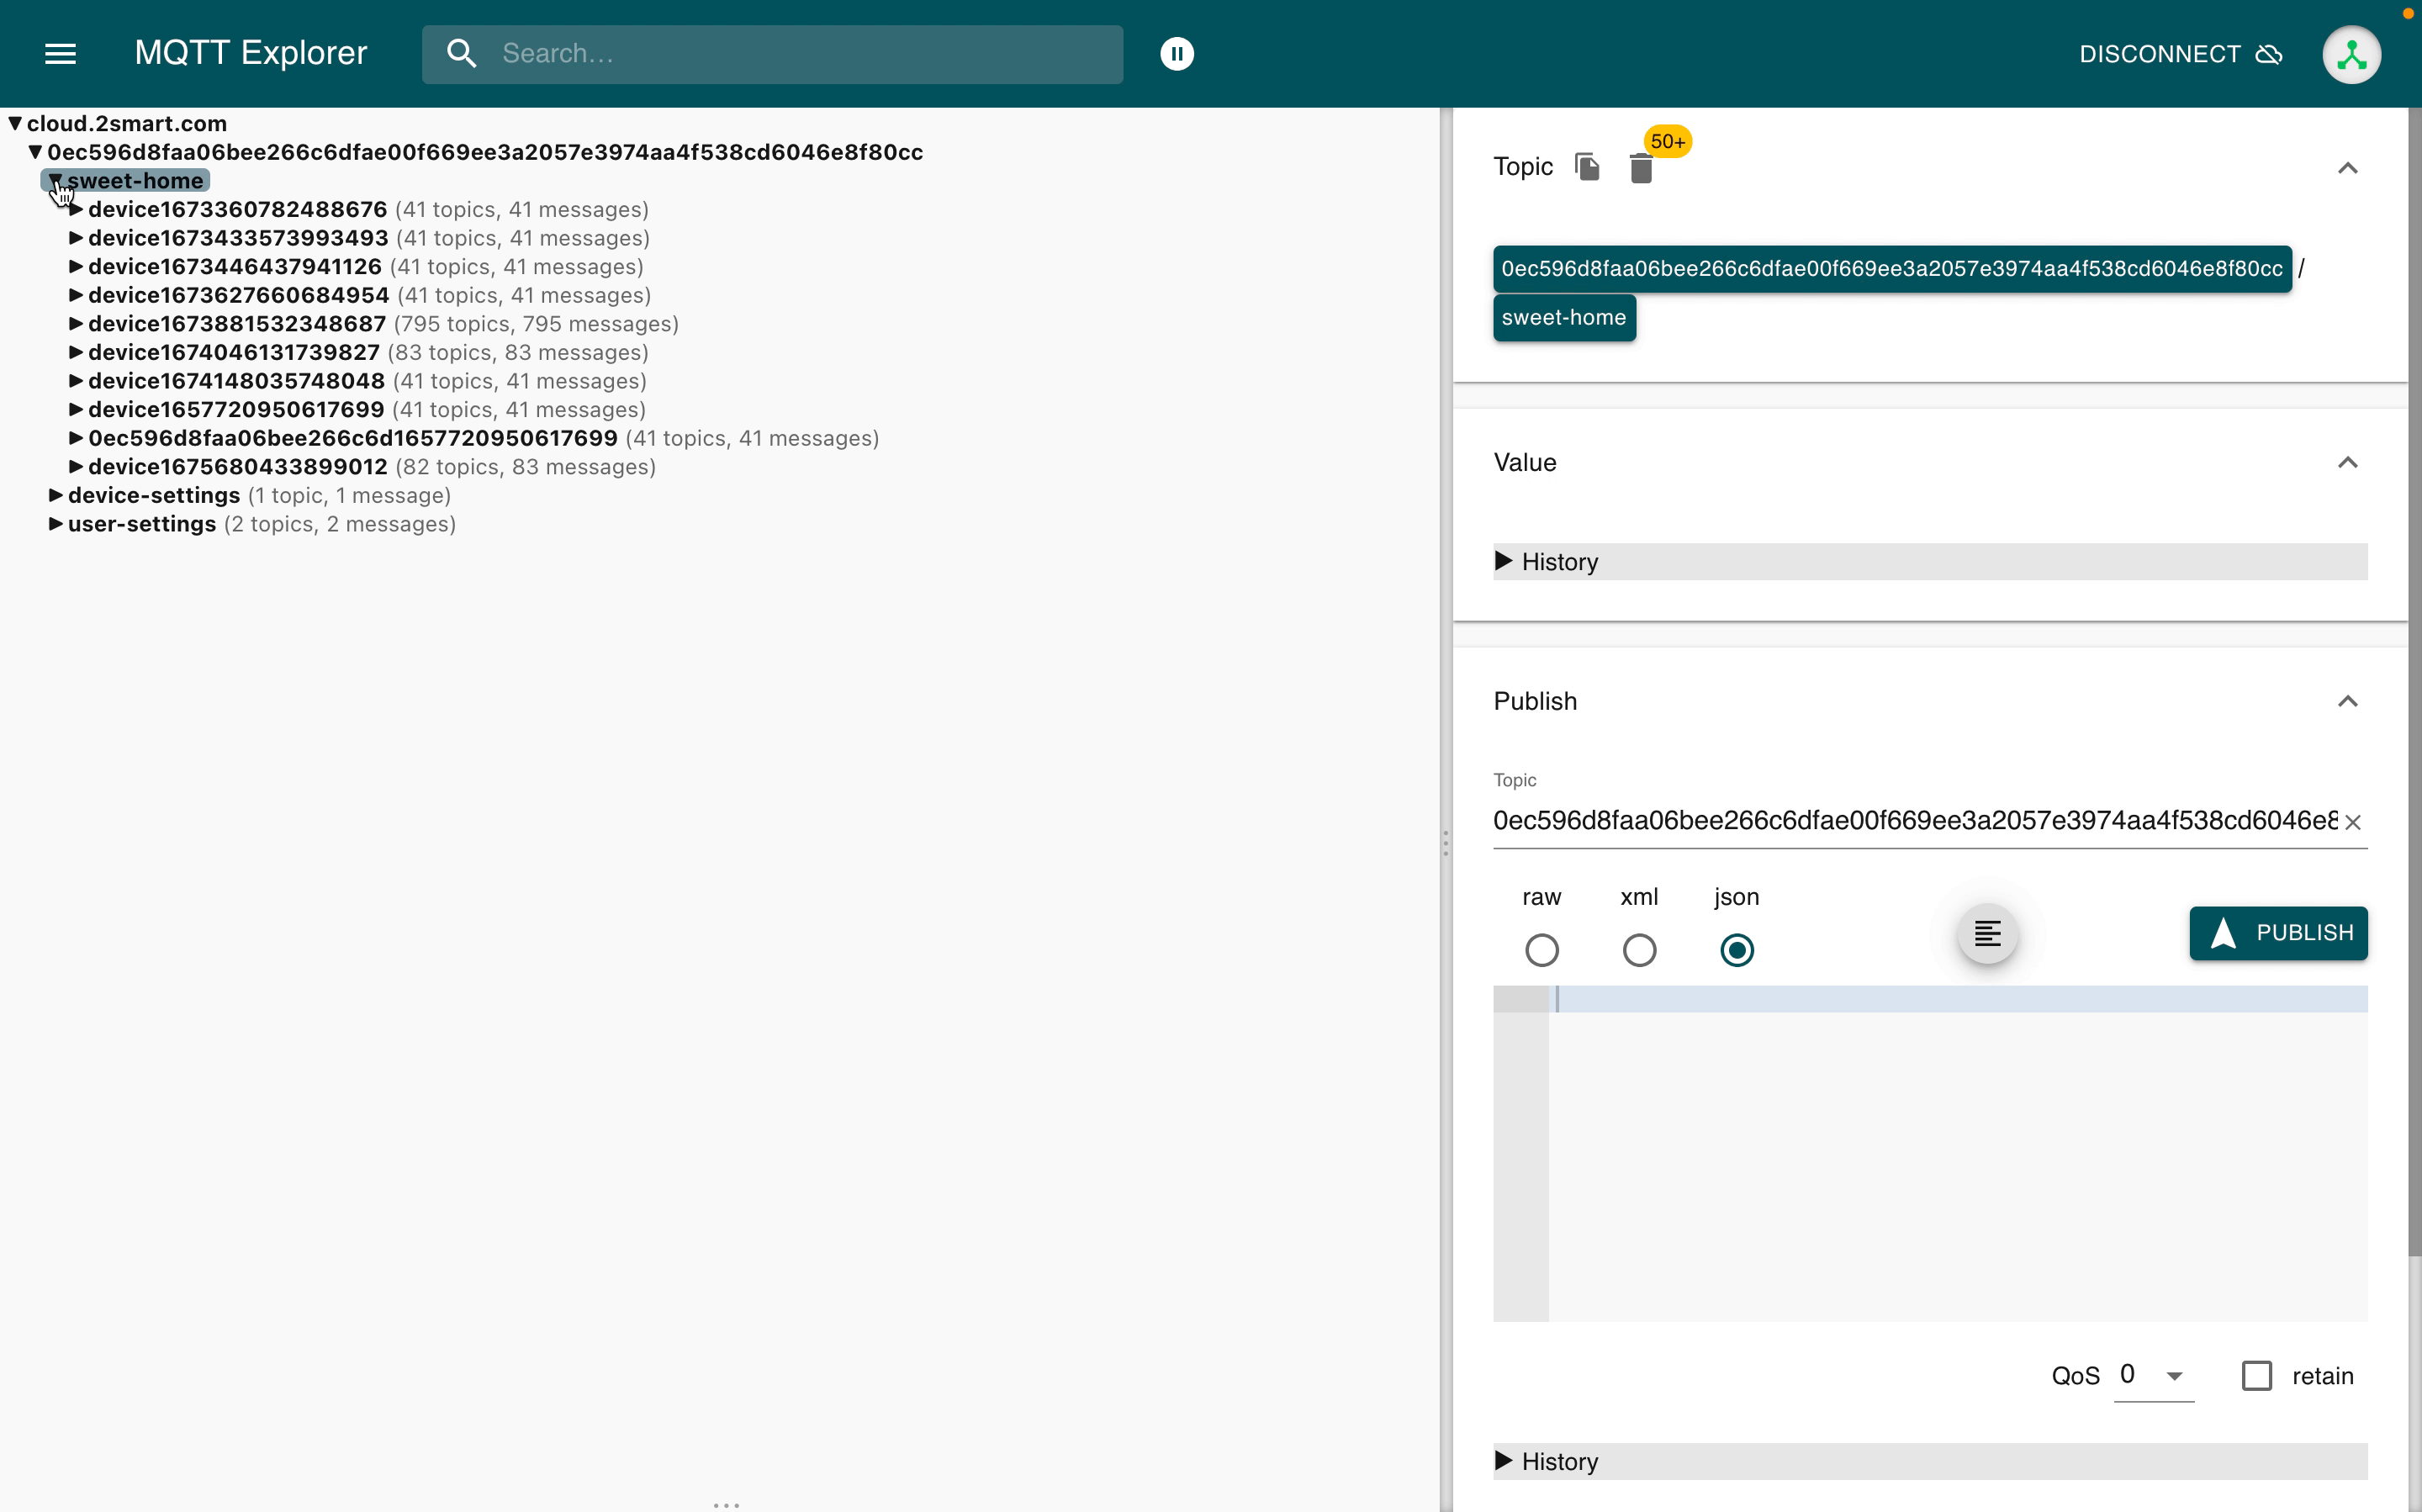
The structure of topics in your 2Smart Cloud account branch is as follows:
- the “sweet-home” branch includes all of your devices,
- the “user-settings” branch contains information about the email with which you are registered in the system and the registration date,
- the optional “device-settings” branch contains your device settings,
- the optional “notifications” branch contains your notifications.
Filtering and searching for the required topics
To filter topics, use the “Search” field of the MQTT Explorer application. For example, you can display only topics for your specific test device. To do this, copy the “Test device ID” field in the “Connection info” window in the 2Smart Cloud Developer Panel and paste it into the MQTT Explorer search field.
You can use part of the test device ID, in which case MQTT Explorer will show all your test products whose IDs include this part.
Using the “Search” field, you can instantly filter topics by any principle. The “name” request will allow you to see the complete list of your product names, the “state” request – their states, and so on.
If you need to work with specific topics regularly, we recommend setting up a new connection and subscribing only to them.
For example, to subscribe to the “device-settings” branch, in the “Advanced” section of the connection settings window, enter your MQTT login and add the following to it: “/device-settings/#”.
Displaying historical sensor values on a chart
You can select any sensor to view its current value and history of values. In the example below, the current value of the “signal” sensor is 74, and in the “Value” field on the right, you can see that the previous value was 76.
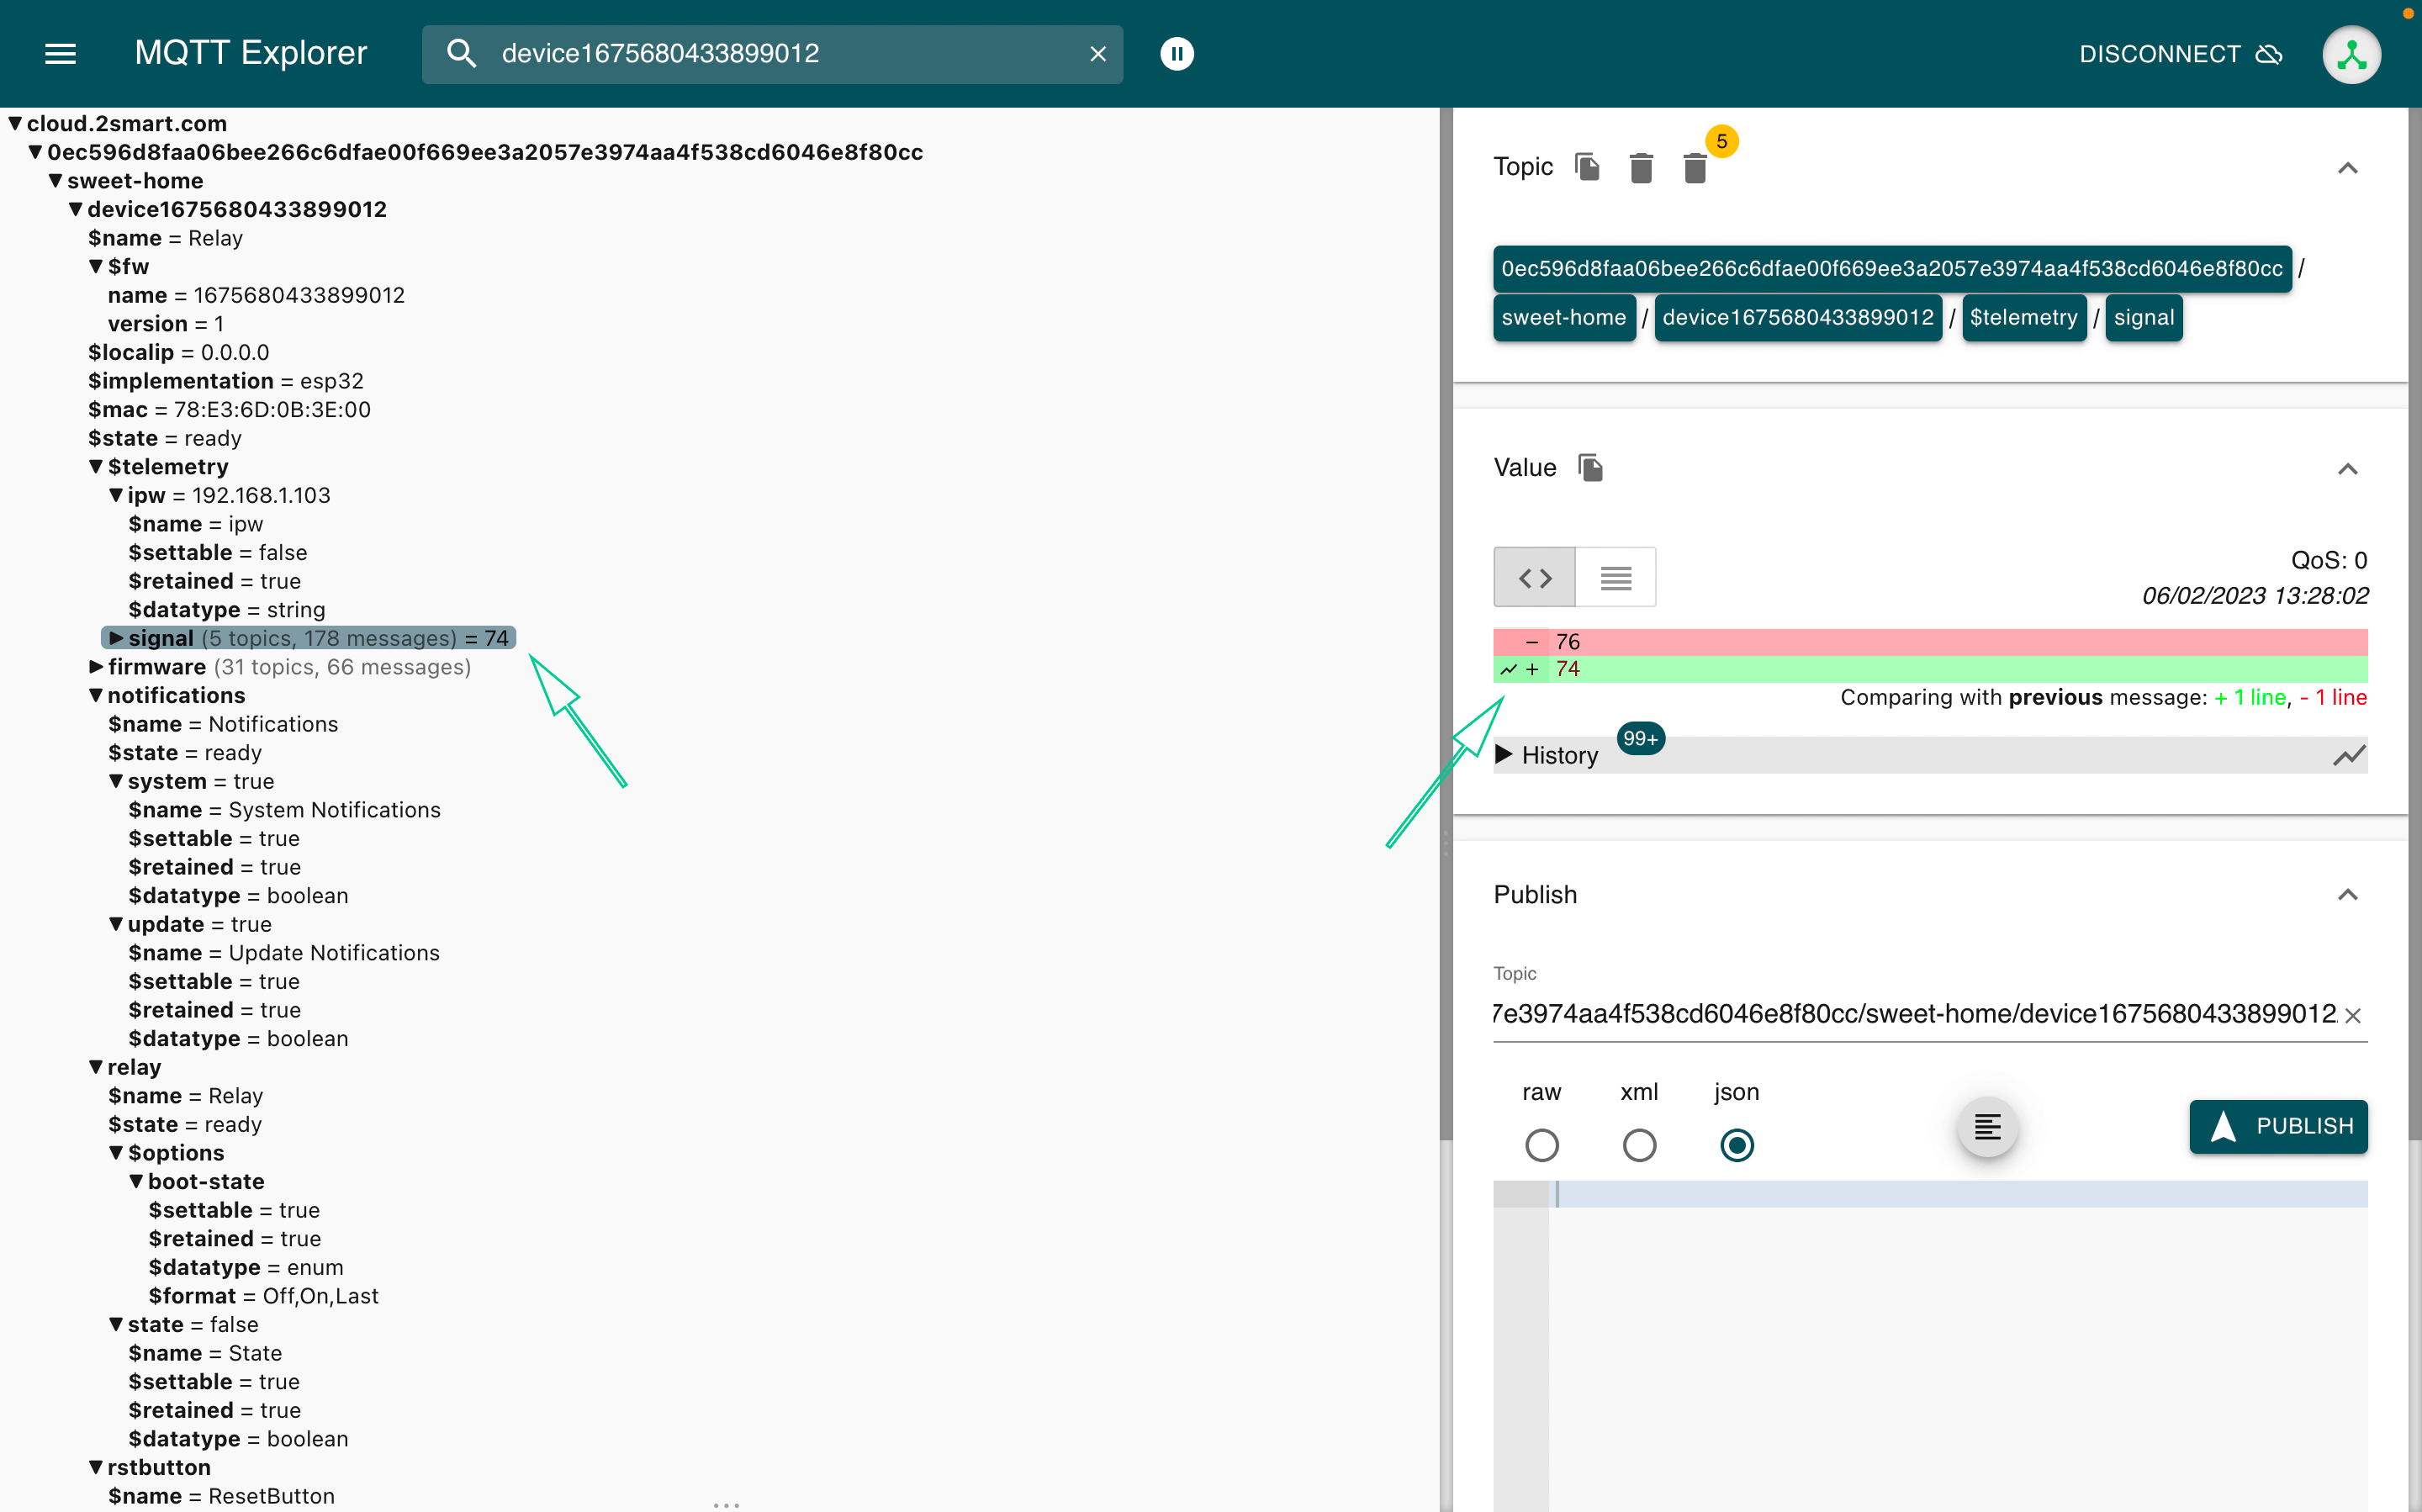
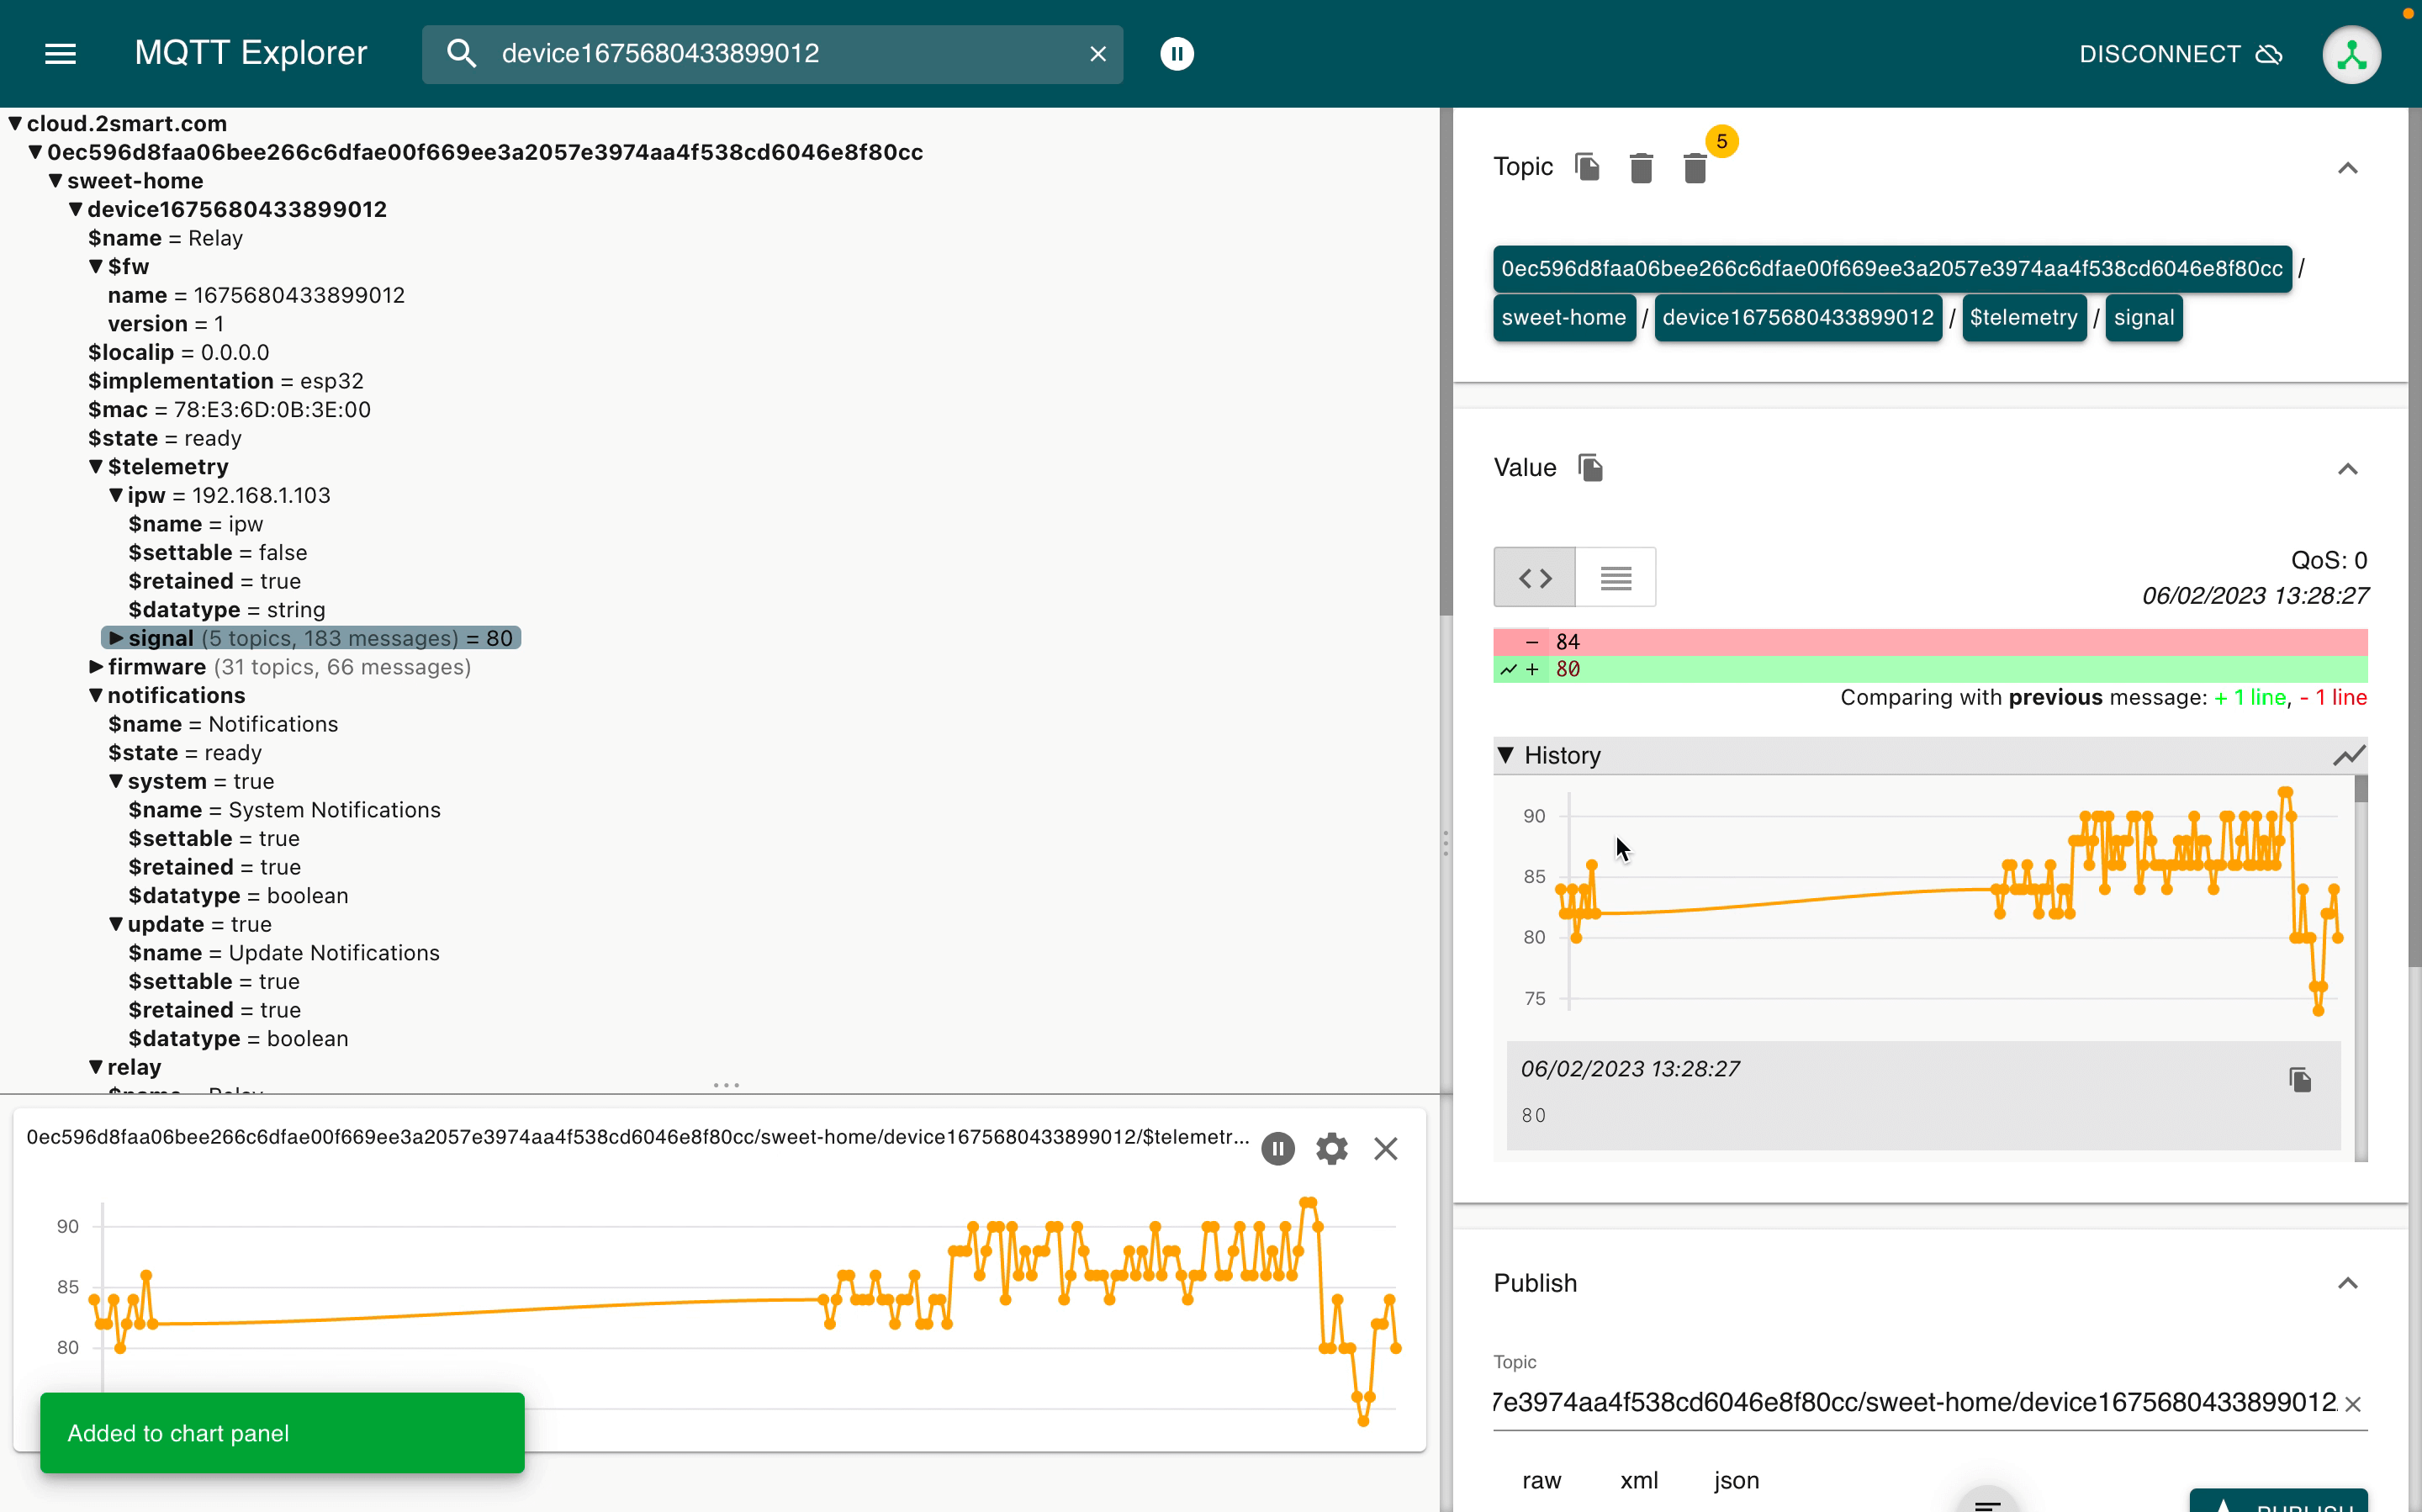
Expand the “History” field to see a historical graph and a table of sensor value changes.
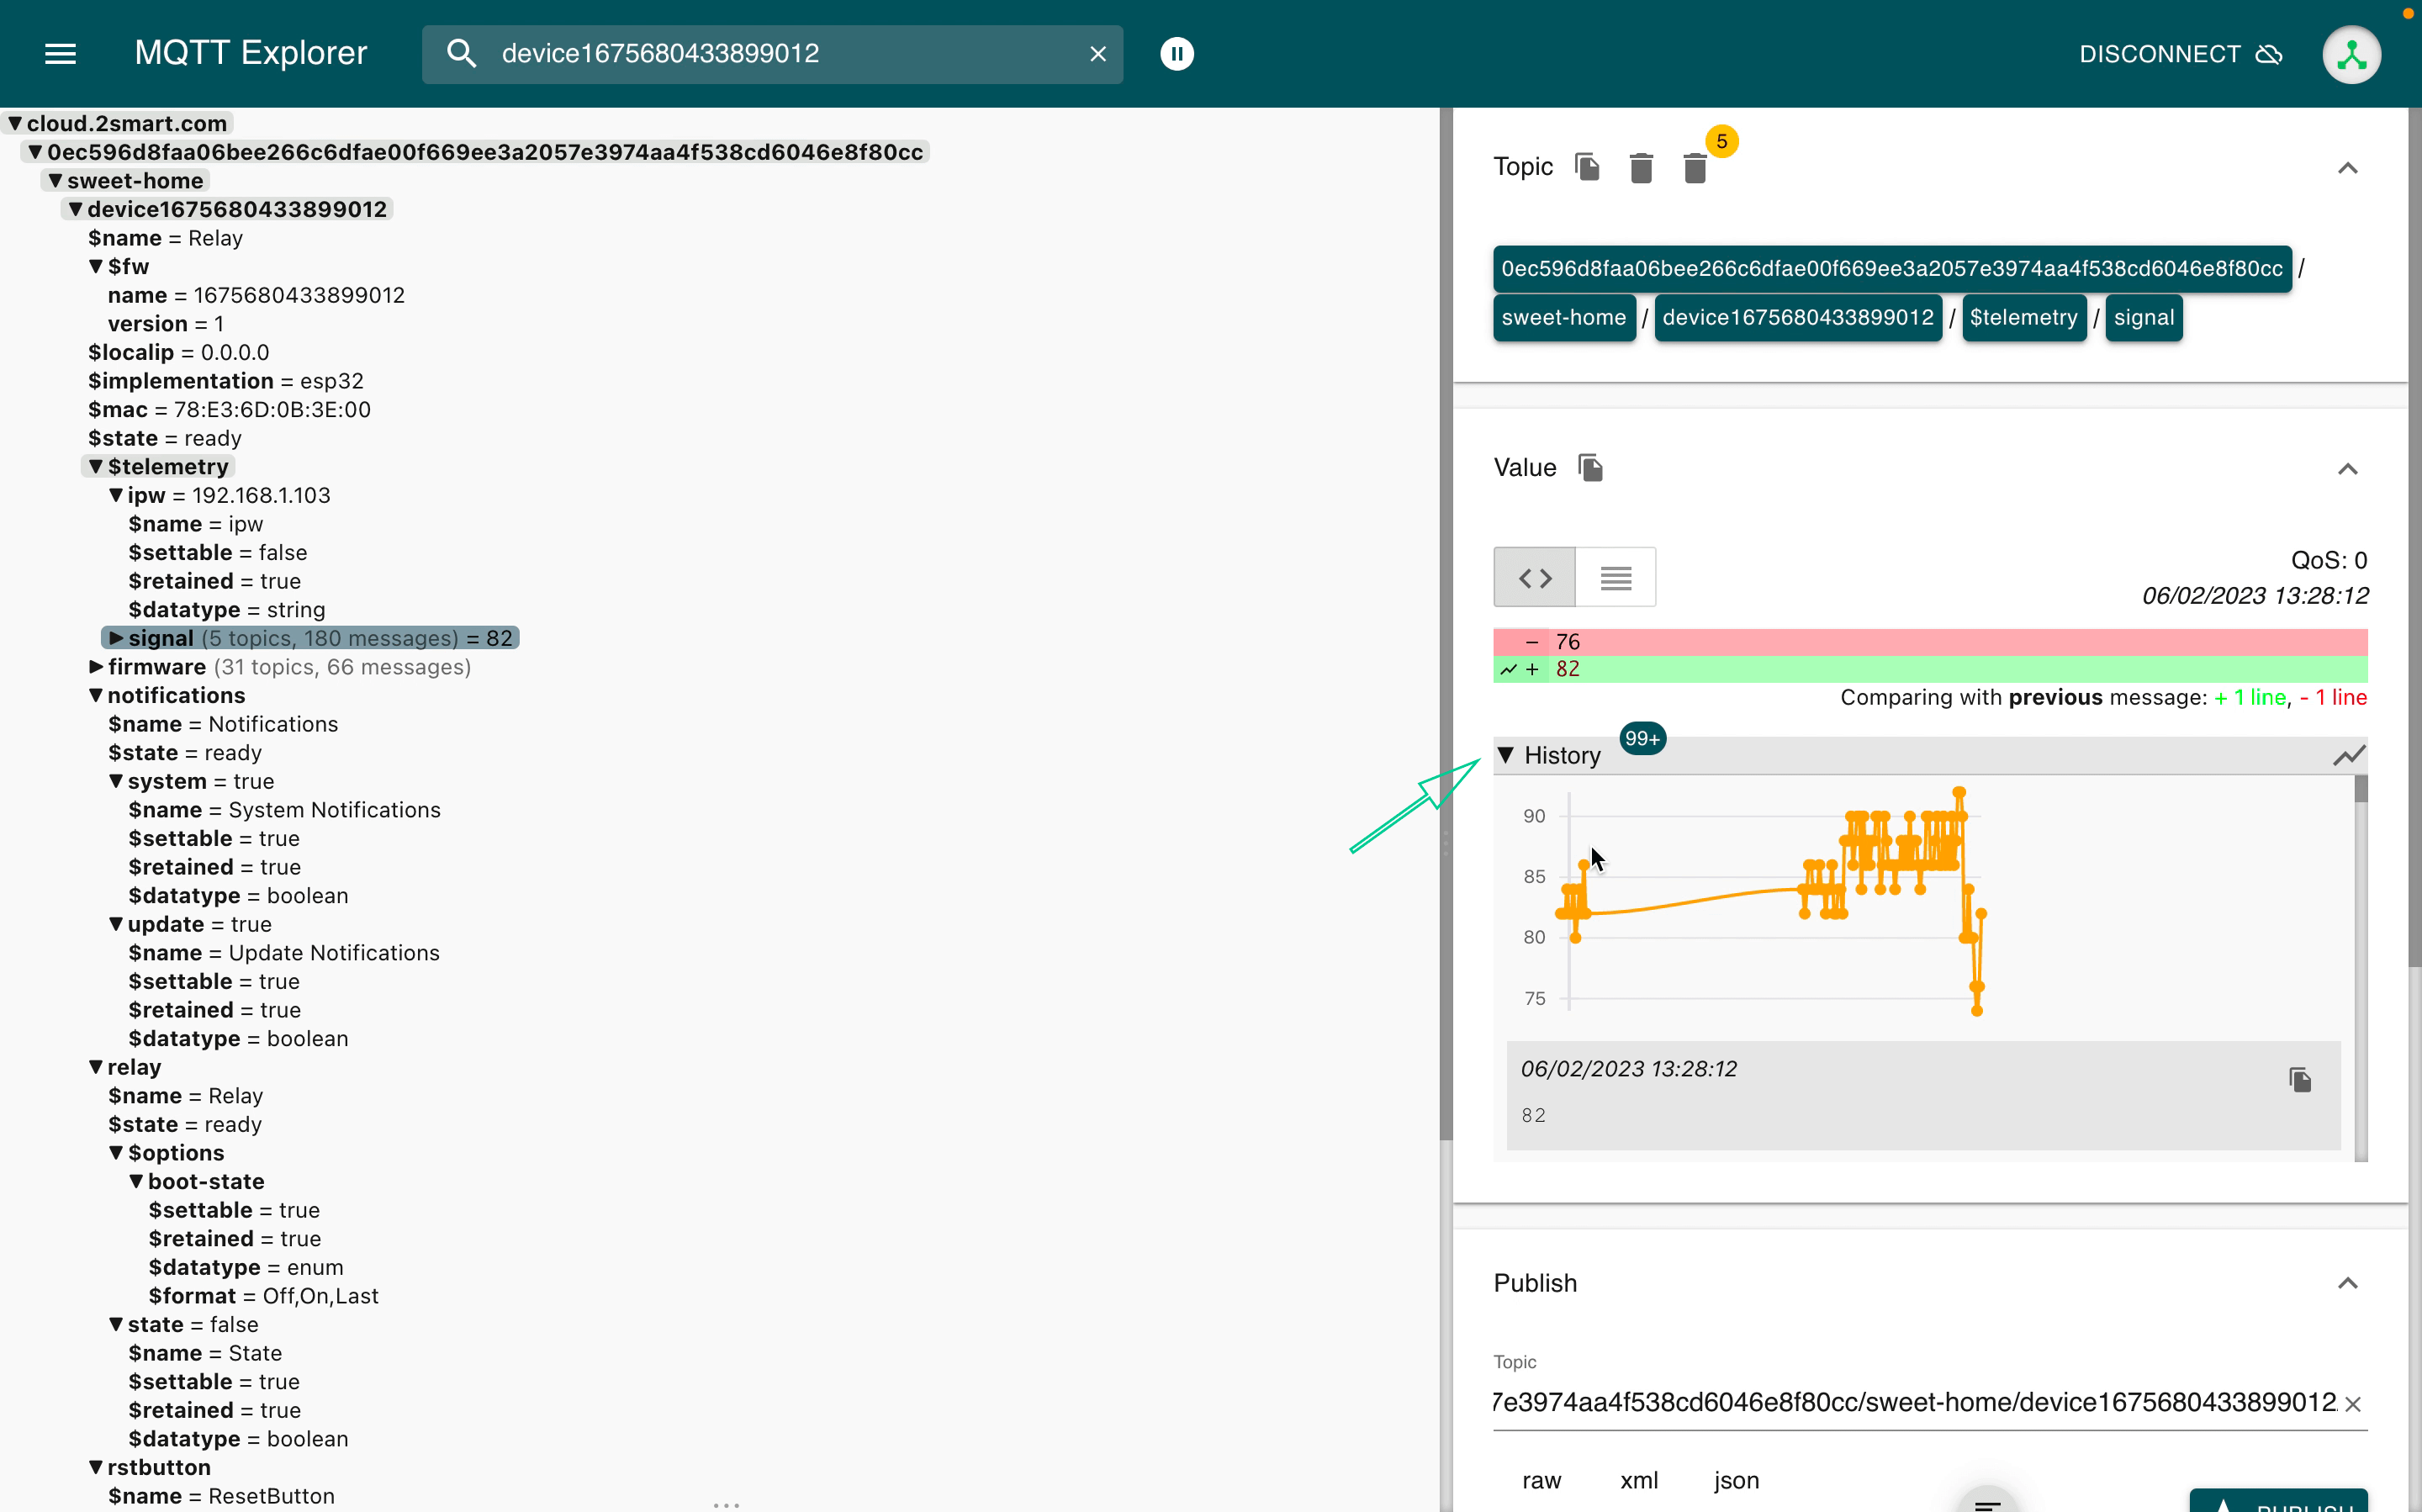
You can also use the “Add to chart panel” icon to plot the sensor values separately.
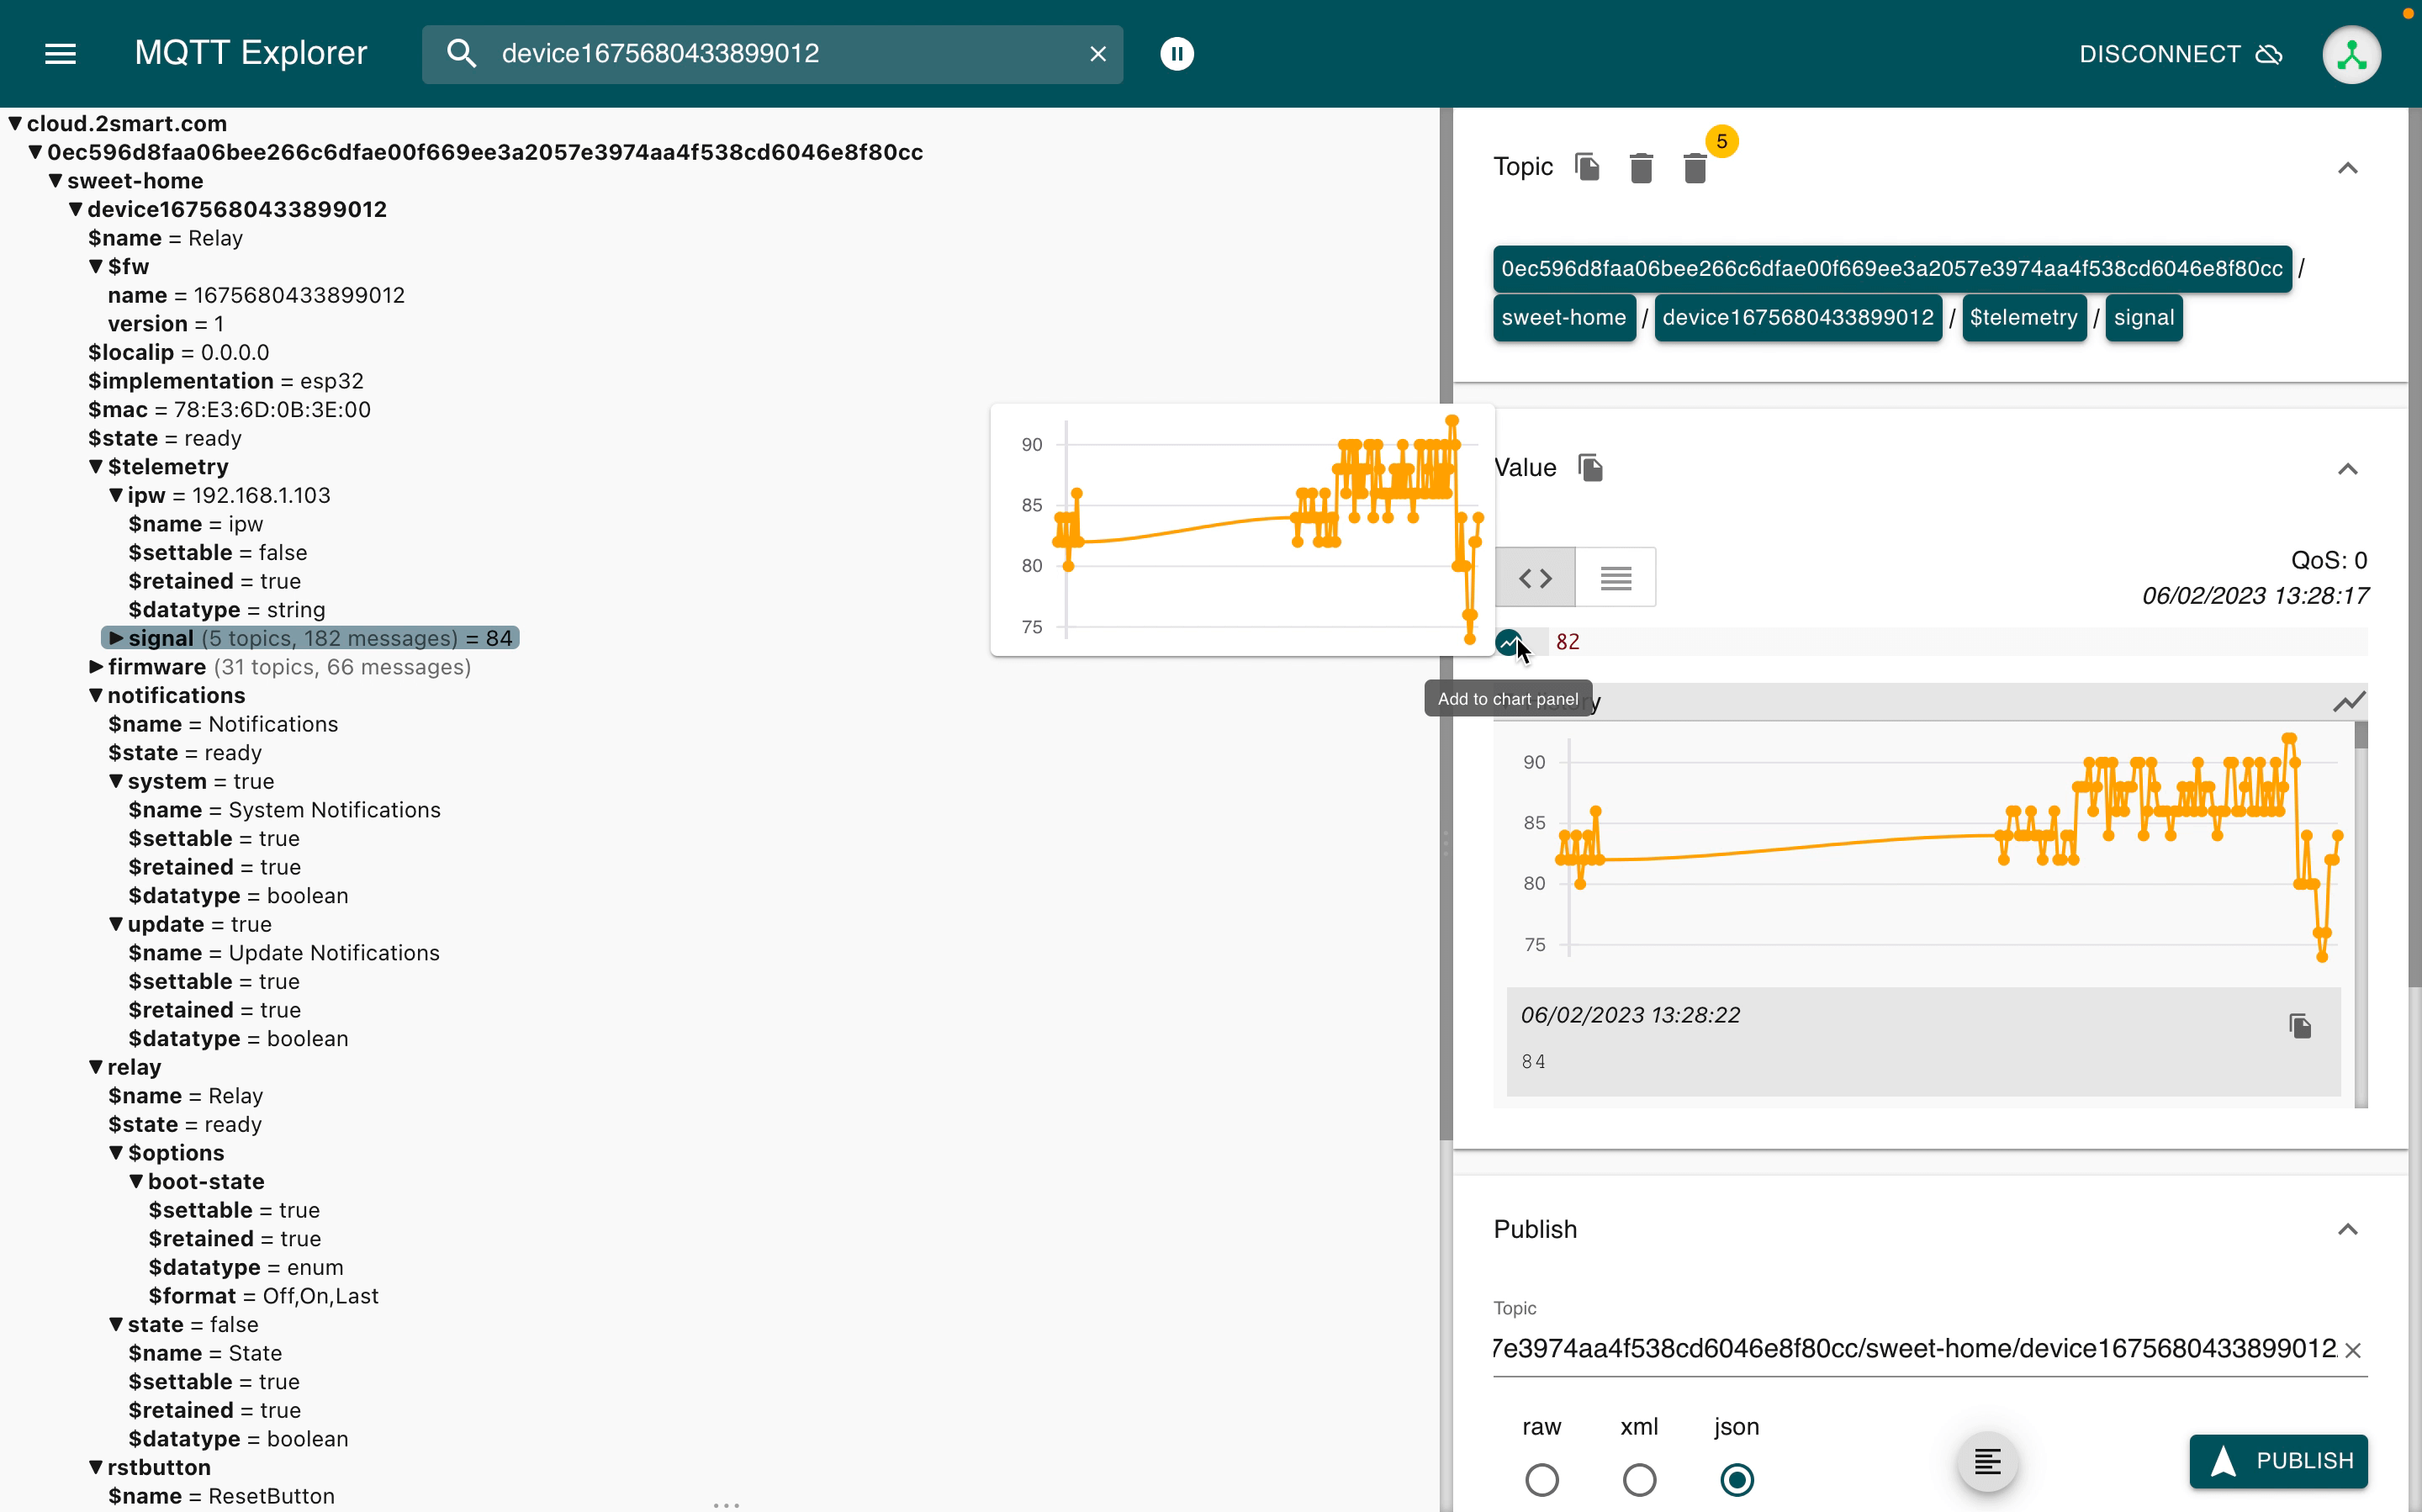
Use the “Chart settings” icon to customize the chart’s appearance that is convenient for you.

Topic publishing
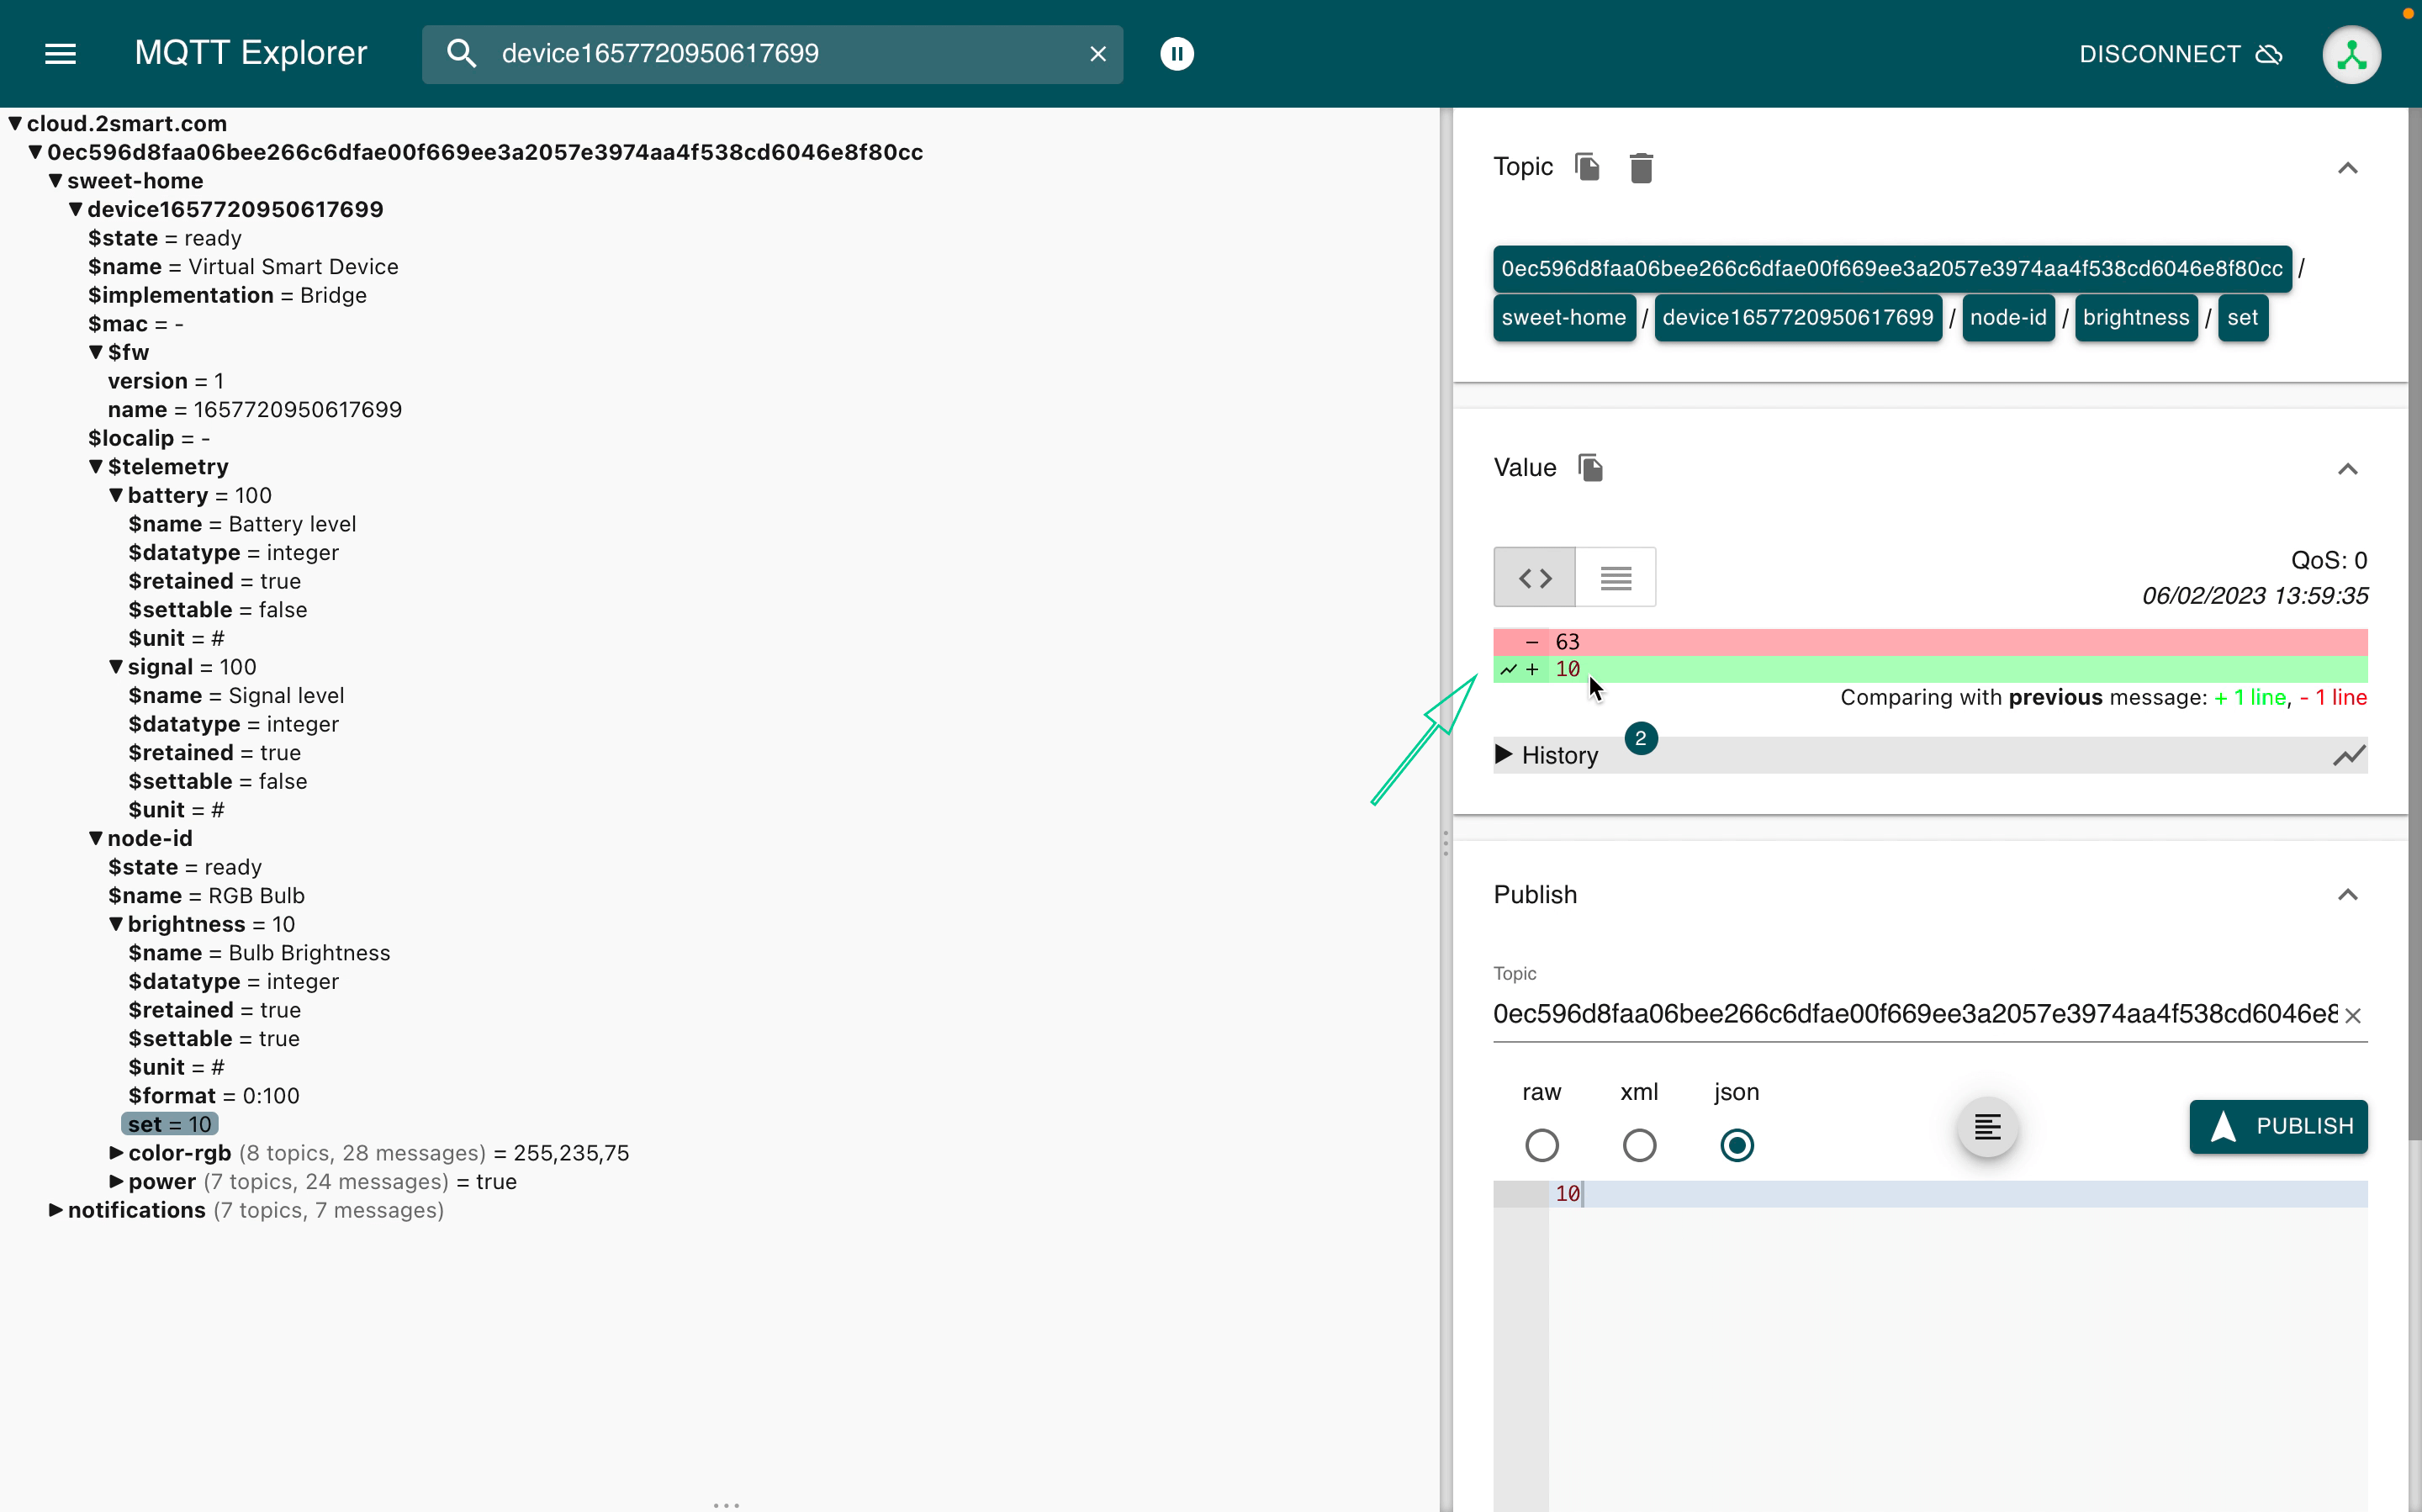
MQTT Explorer allows you to publish topic values to the broker. You can force change the value of any sensor, which is especially useful when the device is not currently providing this value.
In the example below, the brightness of the virtual lamp is 63, but we want to set the value to 10. To do this, select the “set” topic, enter a value of 10 in the field on the right, and click the “Publish” button.


In the “Value” field, you can see that the topic’s value has changed.
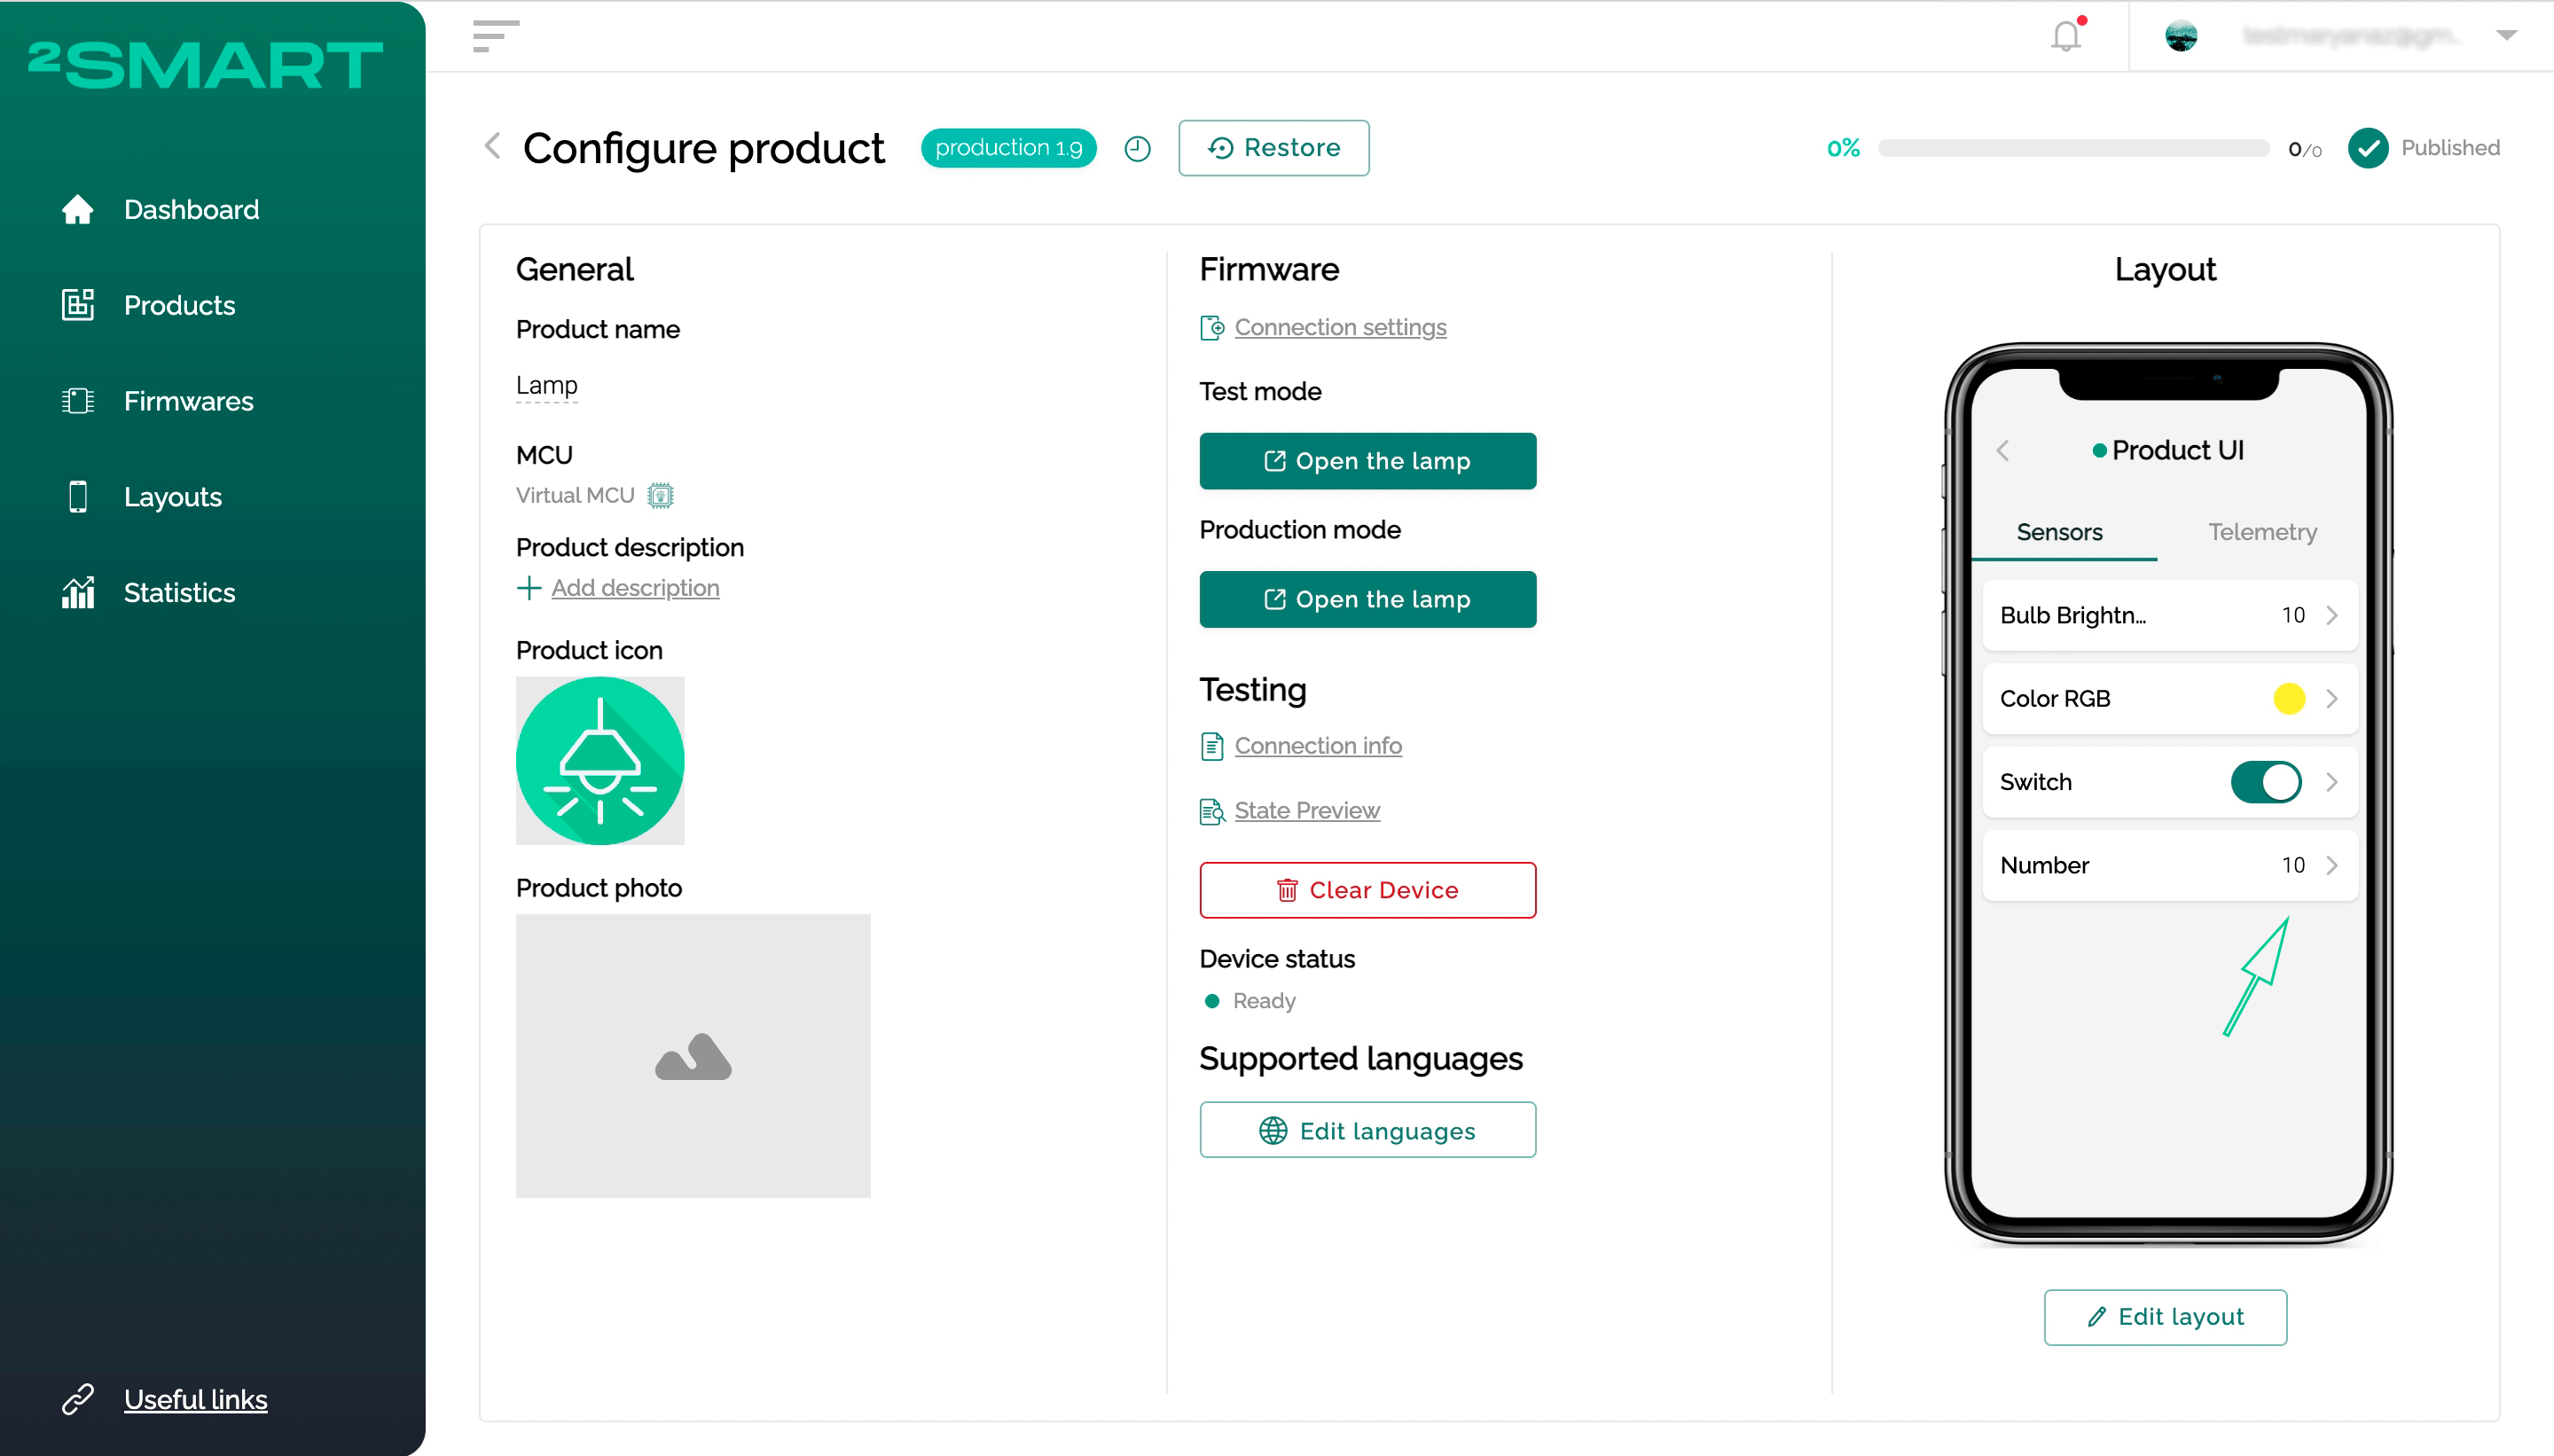
Also, the new brightness value is now displayed in the mobile app emulator in the 2Smart Cloud Developer Panel.
Another case where publishing topics can be helpful for you is when working with a new version of your product’s firmware. Suppose you have prepared a new firmware version and want to test it as an end user but are not ready to publish the update to others.
To avoid reflashing your device, you can follow these steps:
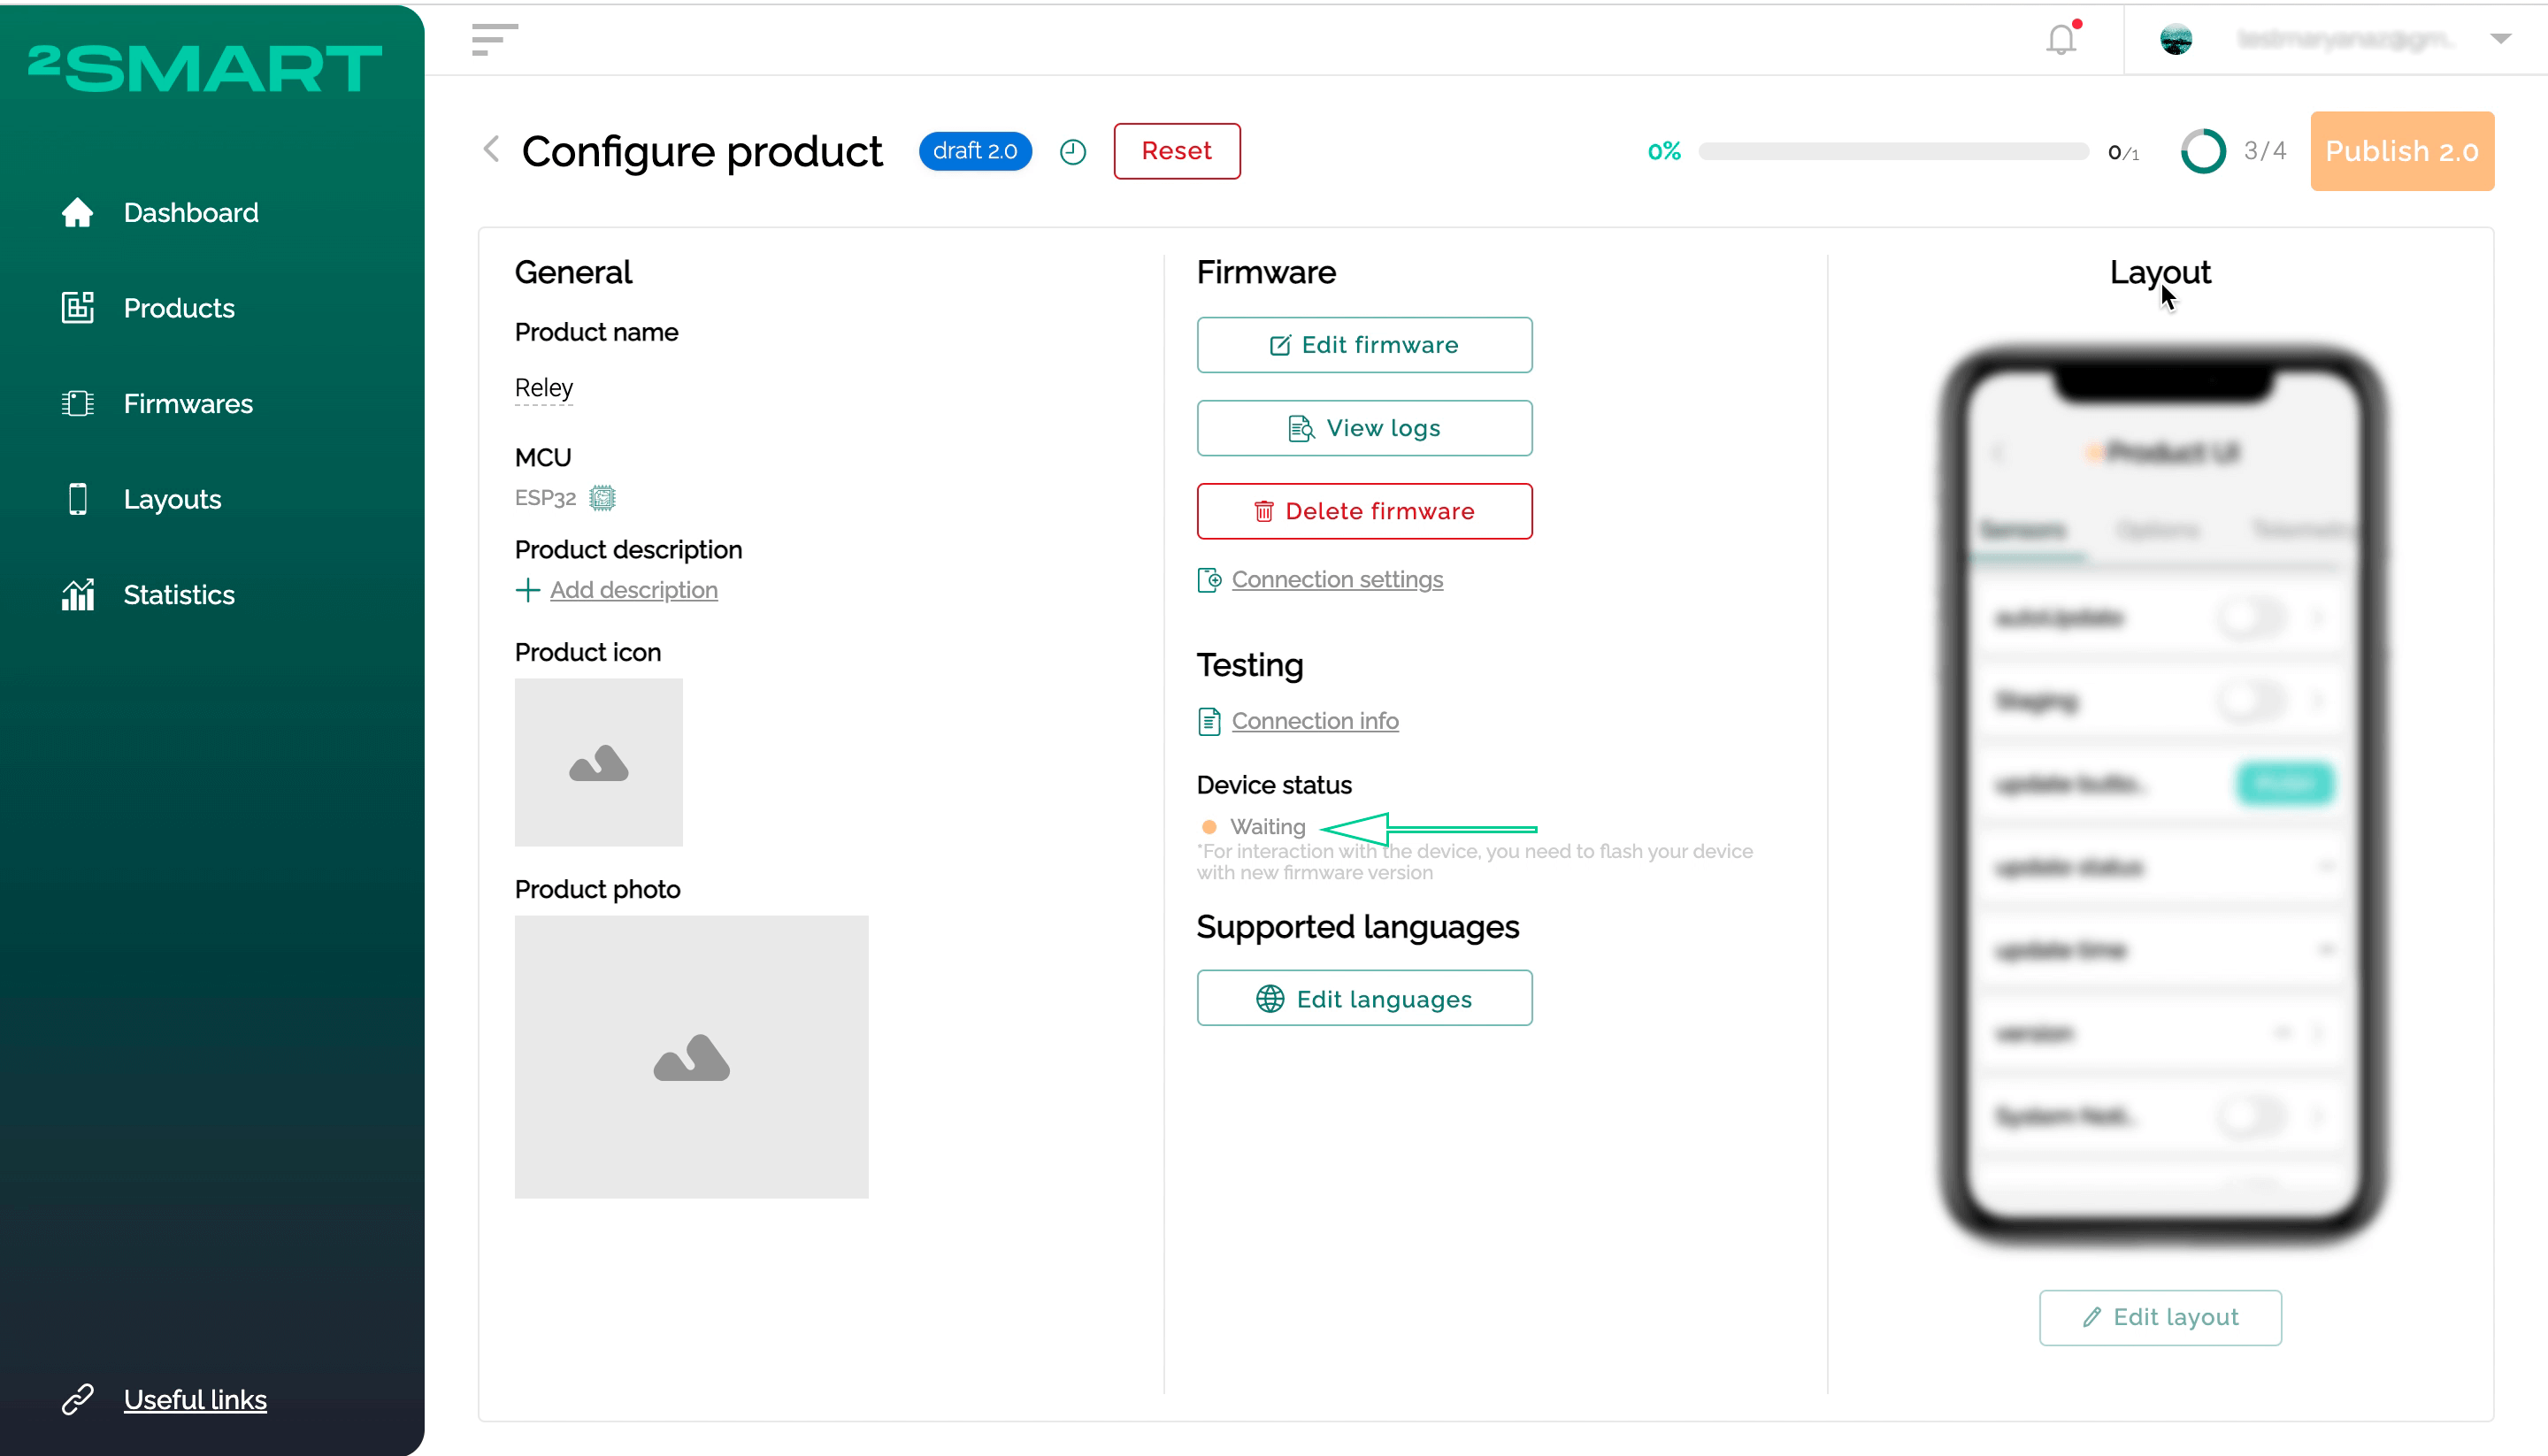
- upload the new firmware version using the “Edit firmware” button on the product page in the developer panel,
- the device status has changed to “Waiting” – the platform is waiting for the connection of a device with updated firmware,
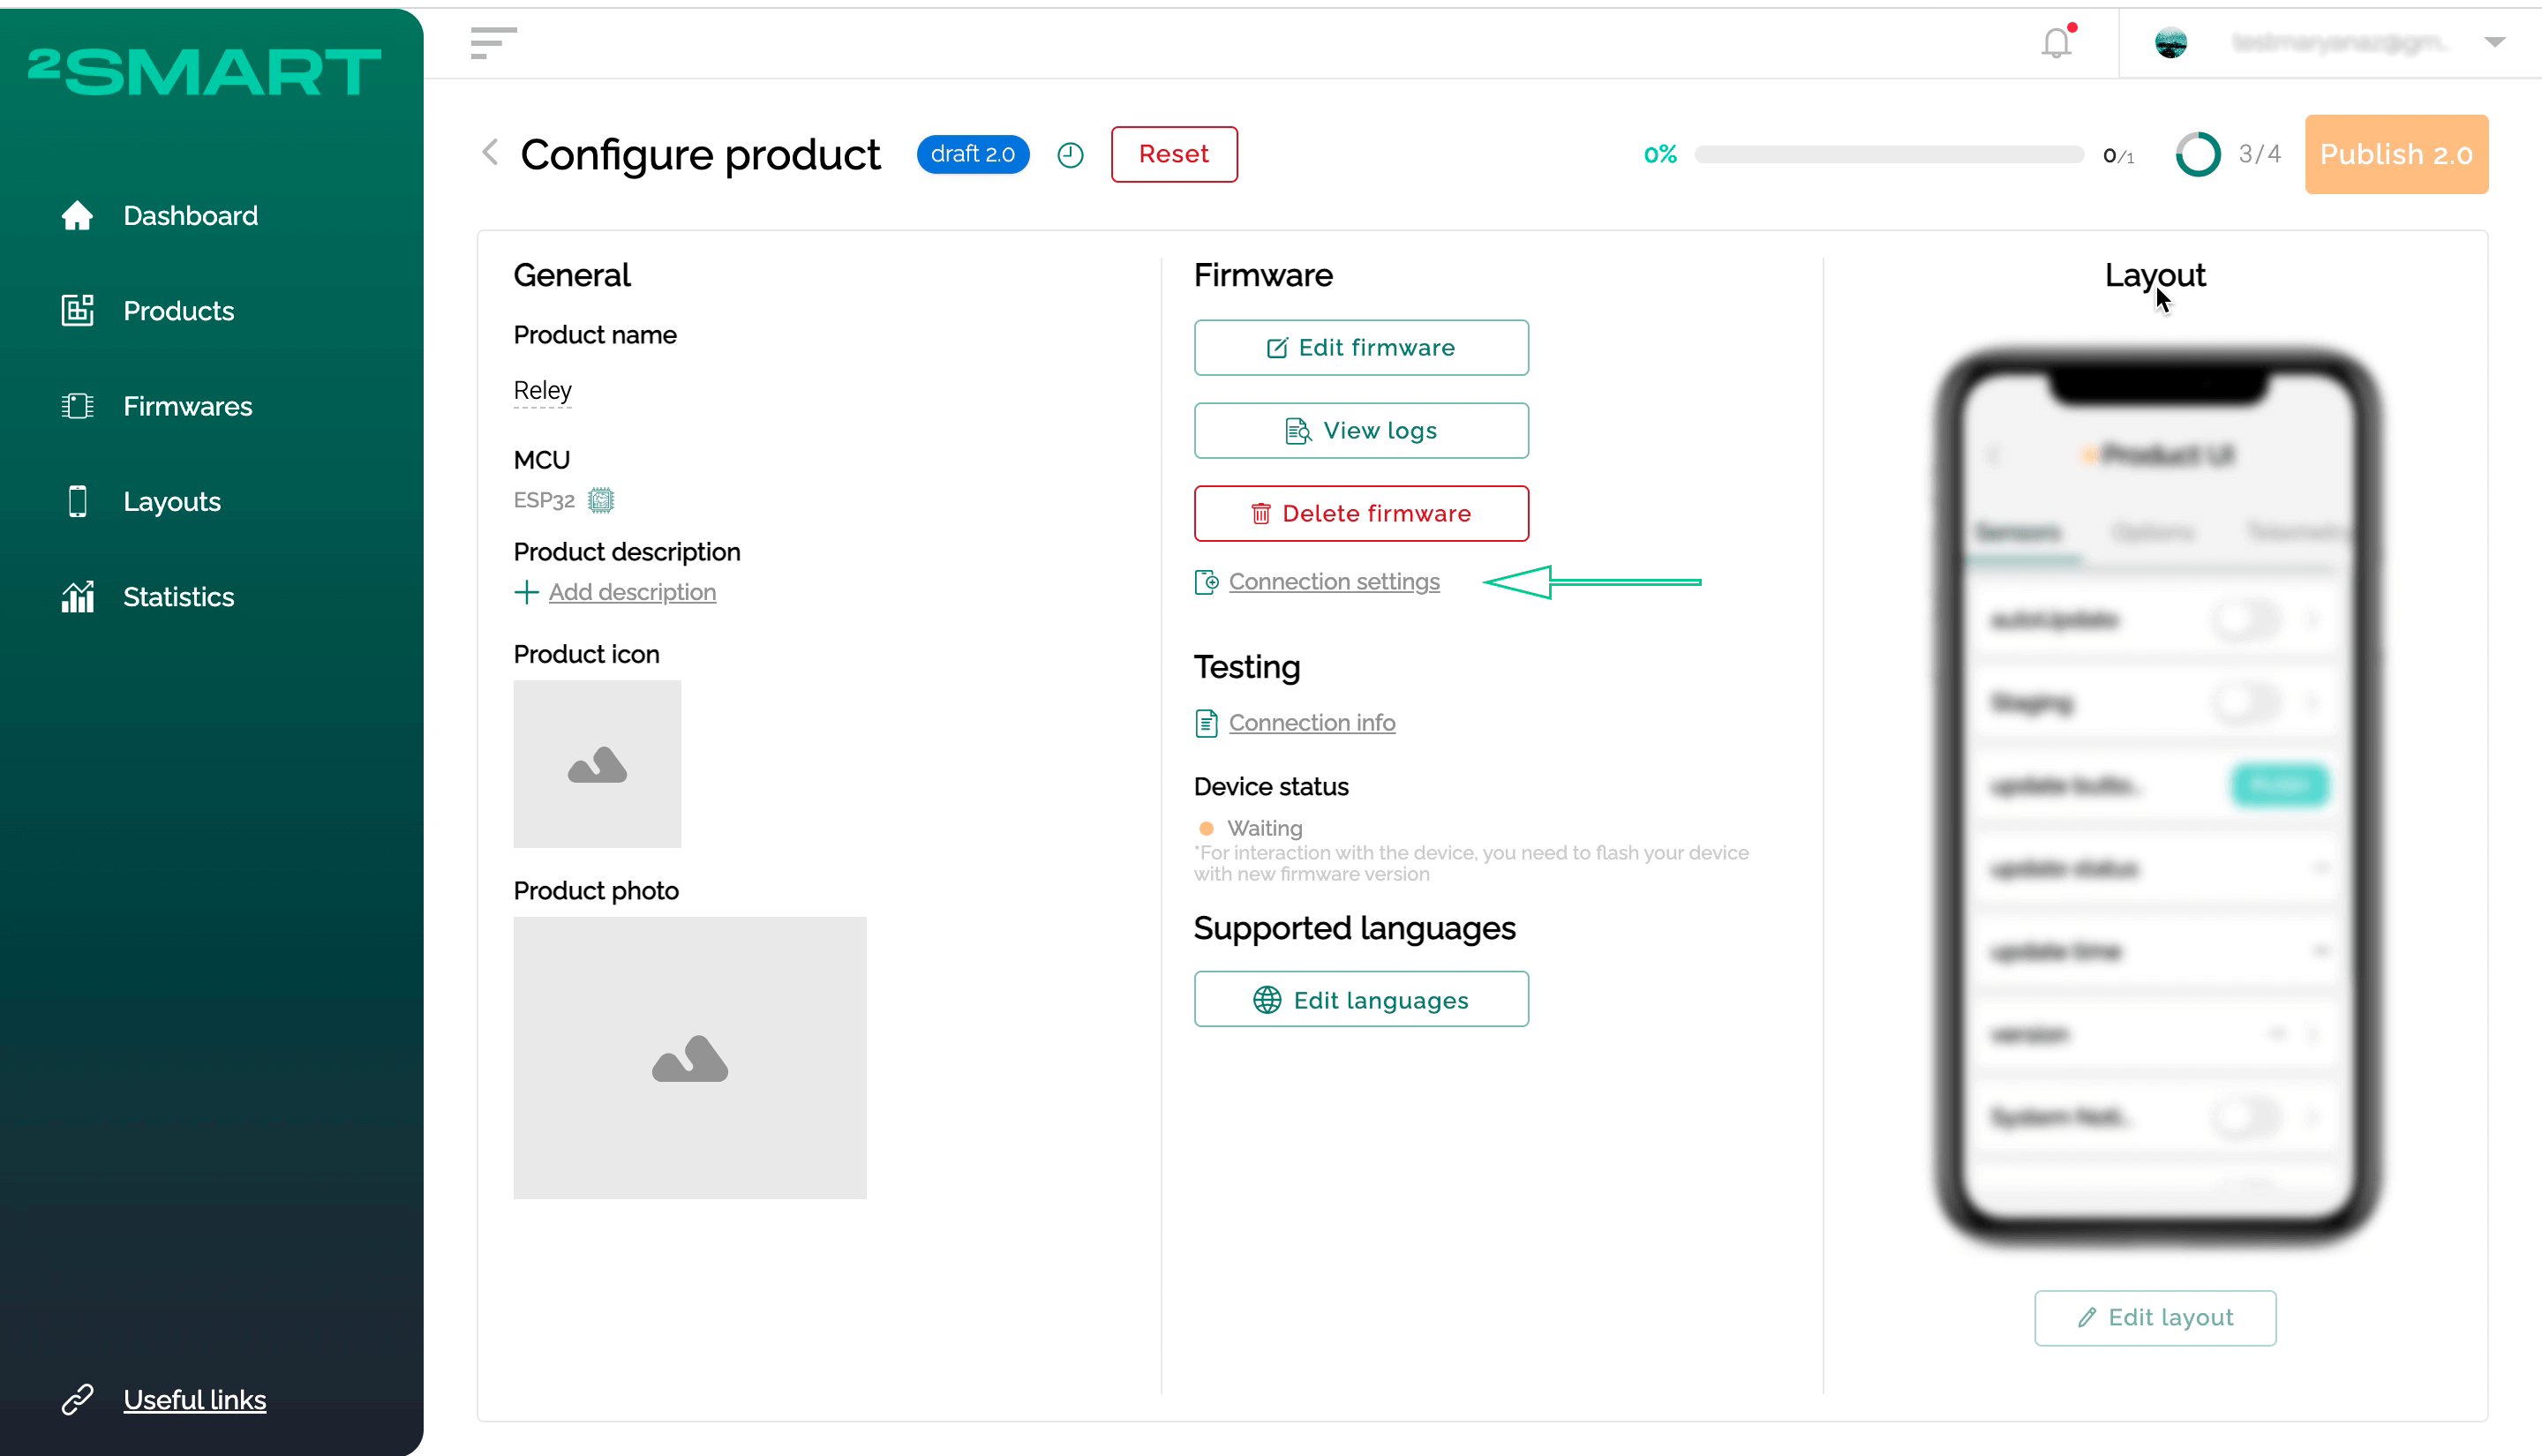
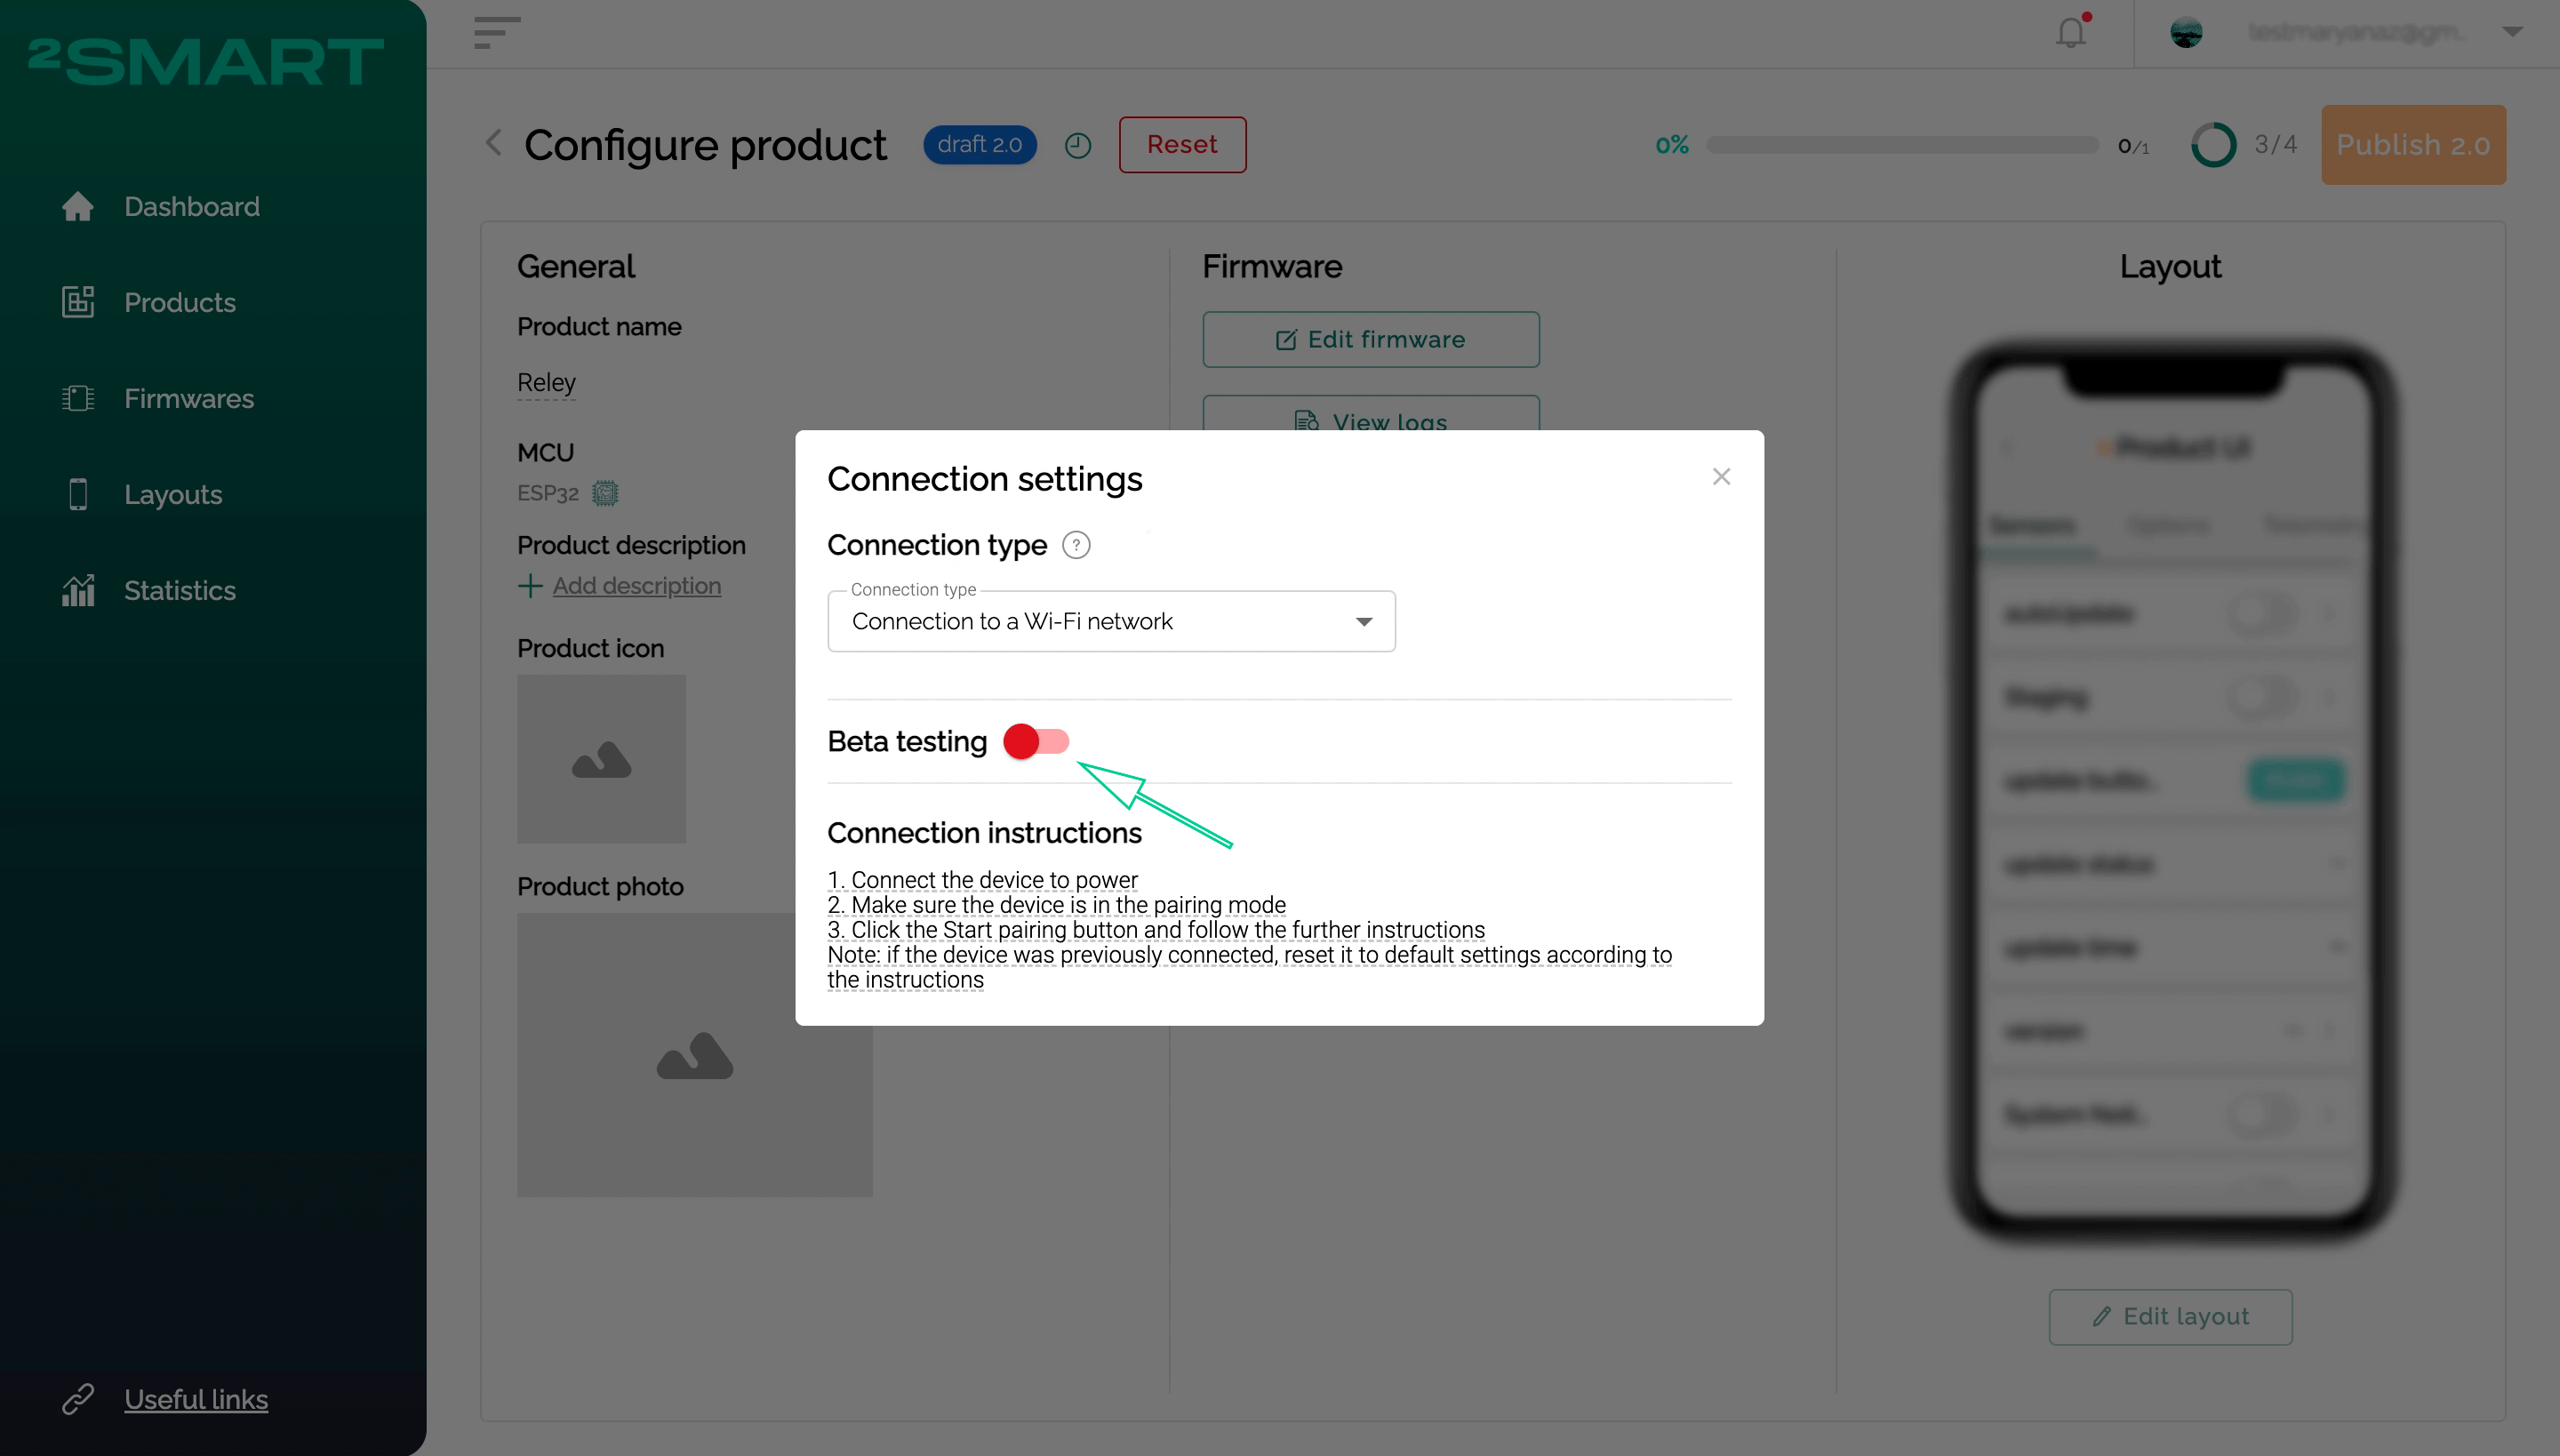
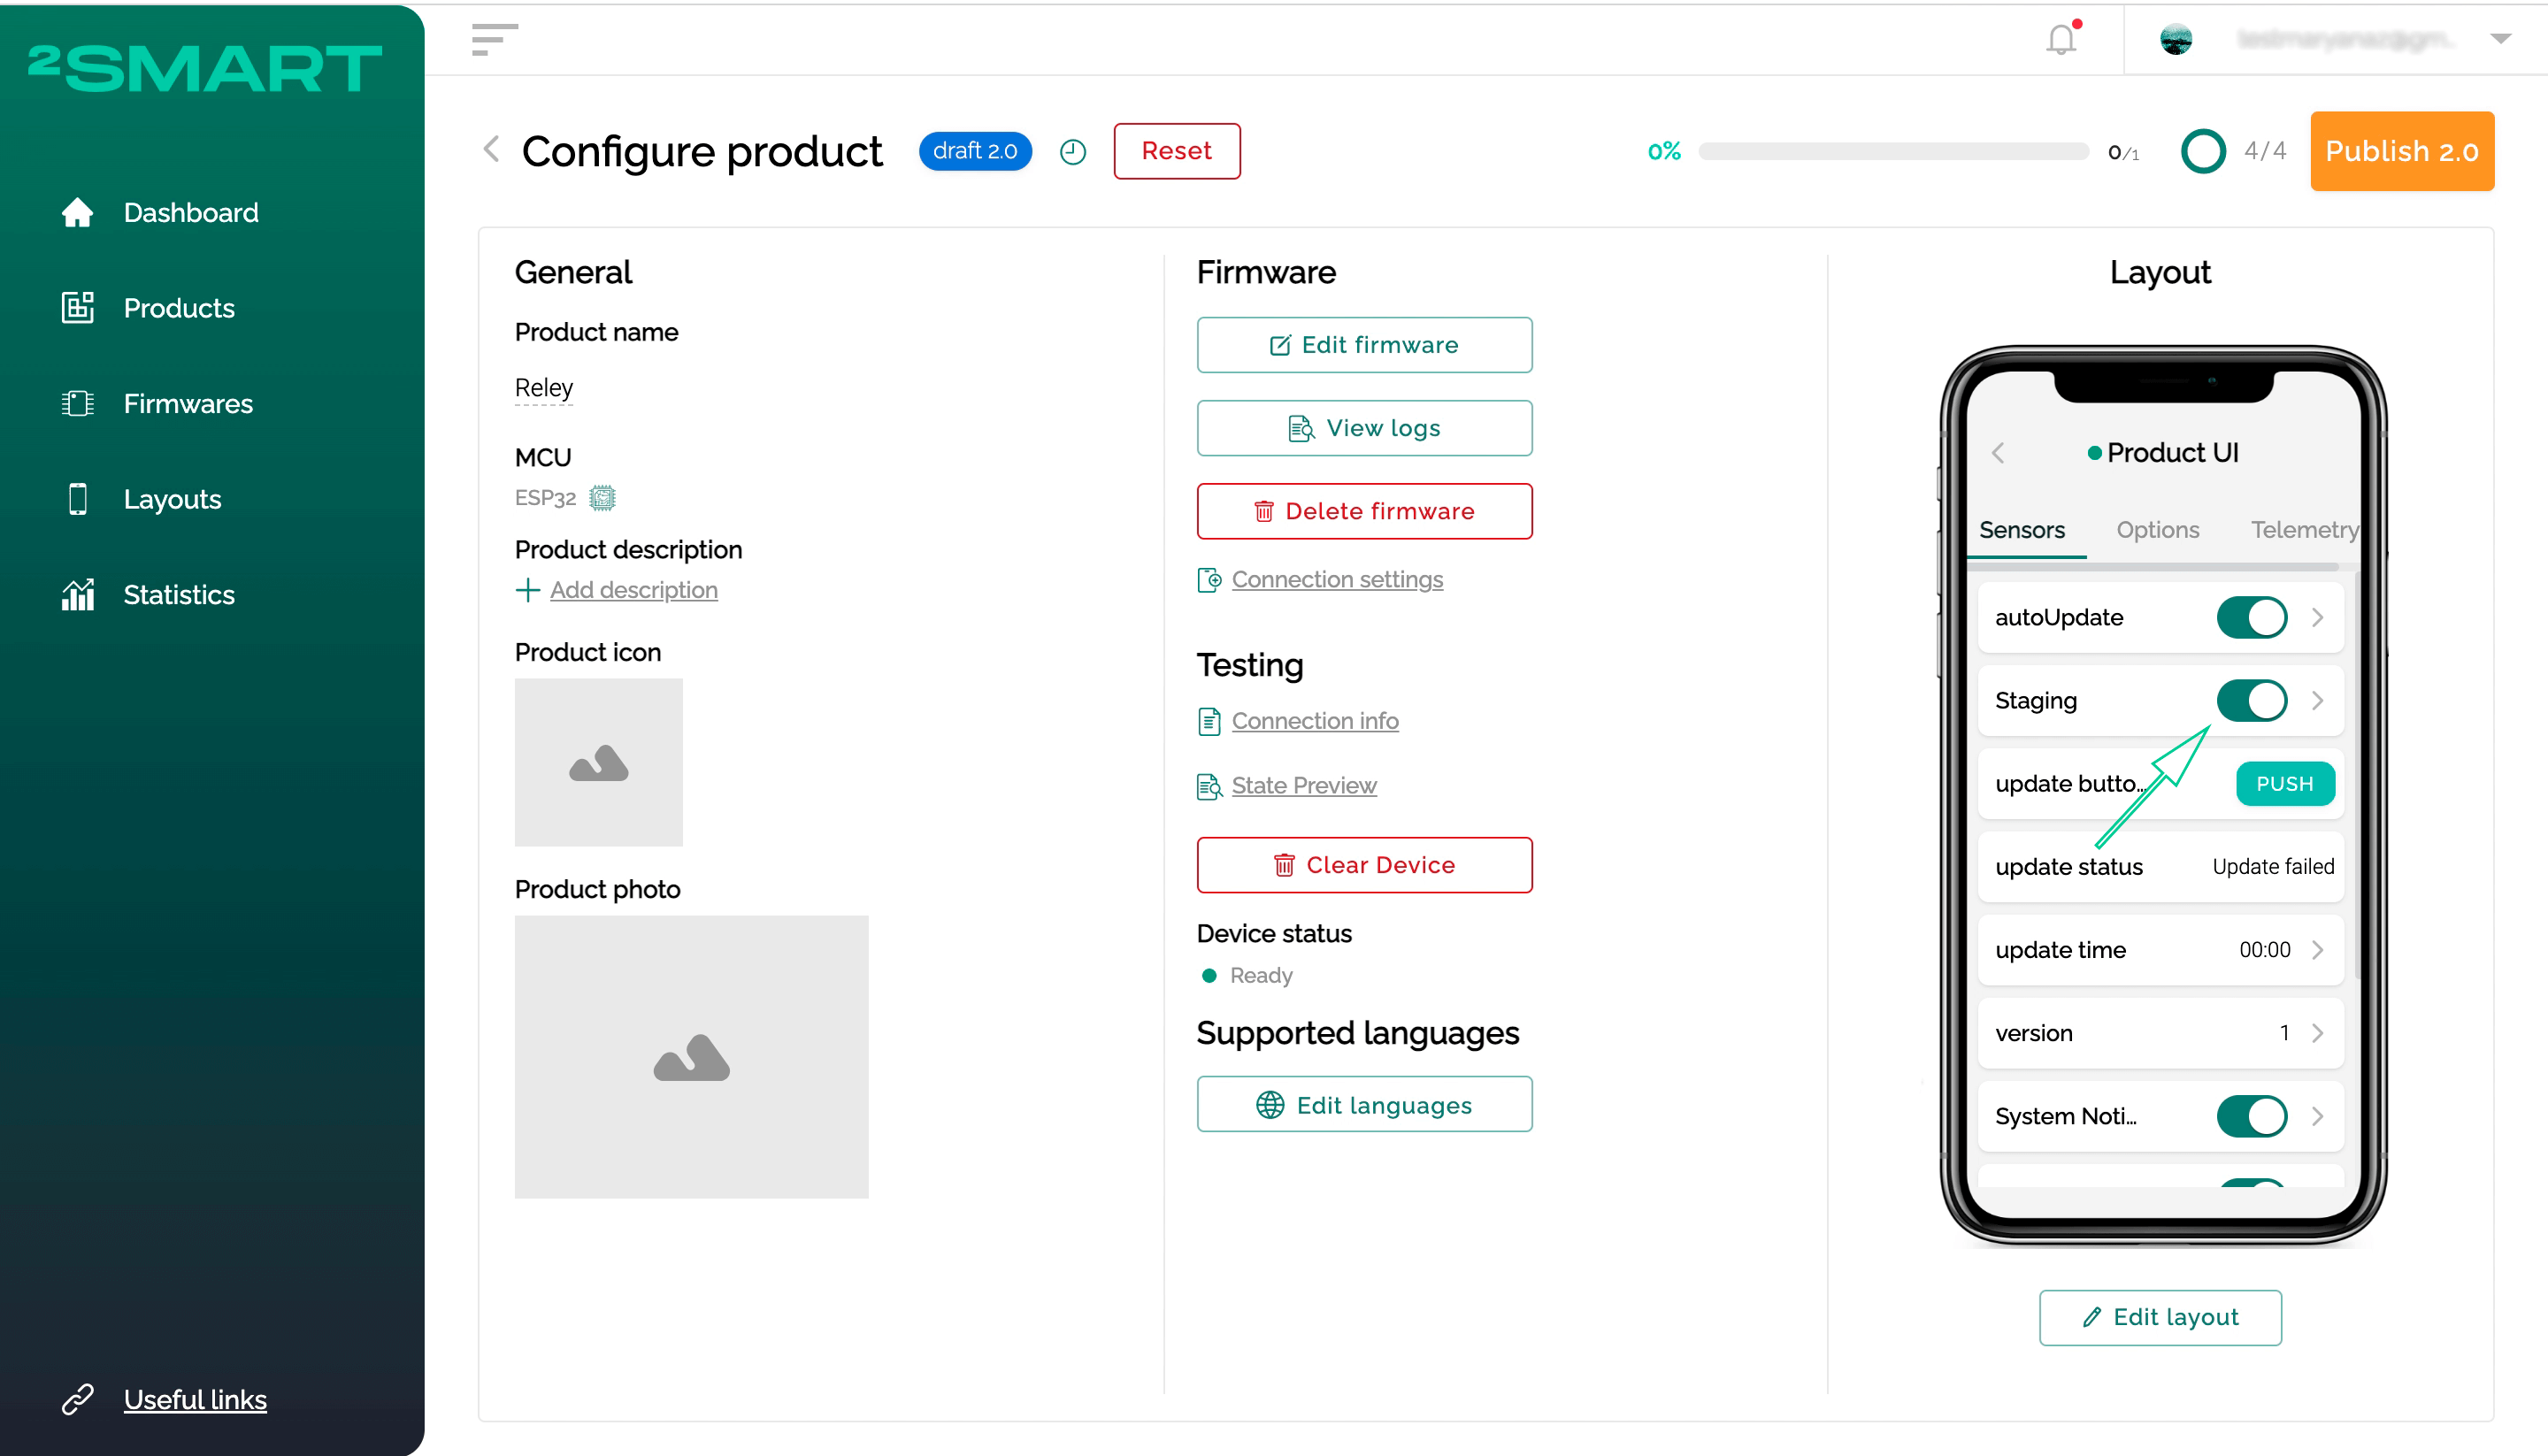
- click on the “Connection settings” link and enable the “Beta testing” mode,


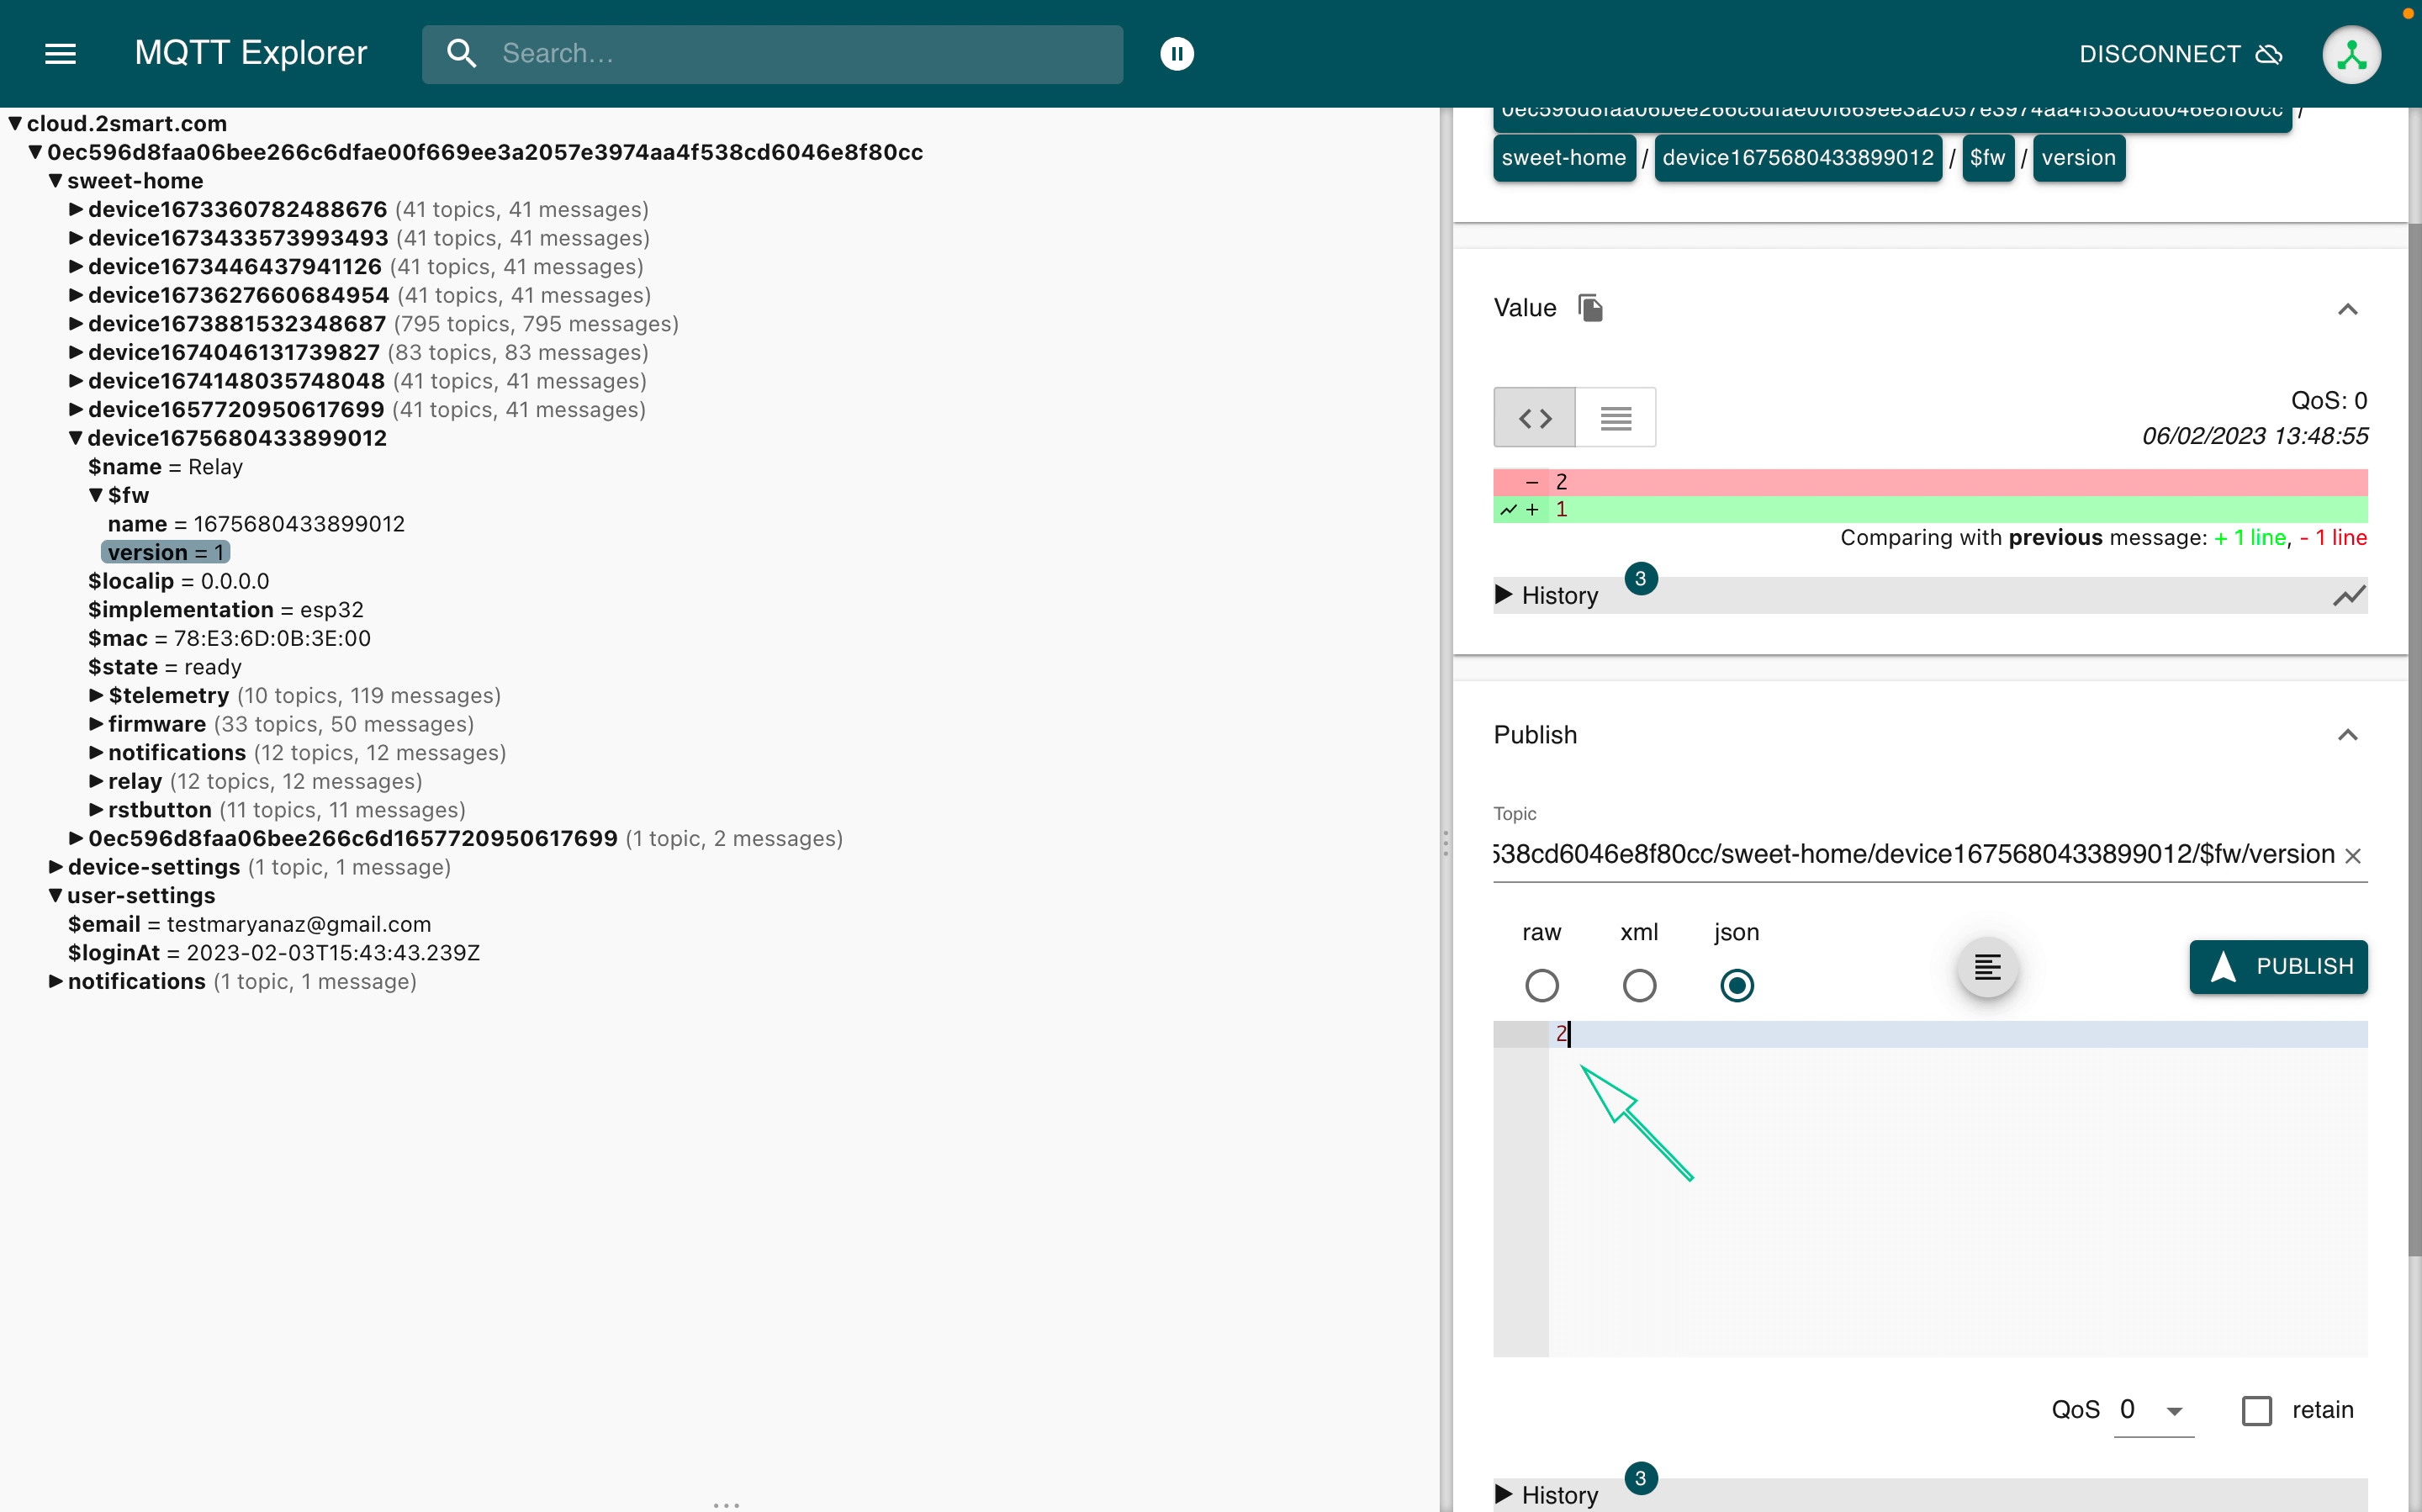
- using MQTT Explorer’s publish function, set the new firmware version for the test device,
- device status will change to “Ready”,
- make sure that the “Staging” widget is enabled in the device settings in the mobile application emulator,
- start the device update using the appropriate widget,

- when the update process is completed, the firmware version will be changed to the new one.


Sending notifications to the broker
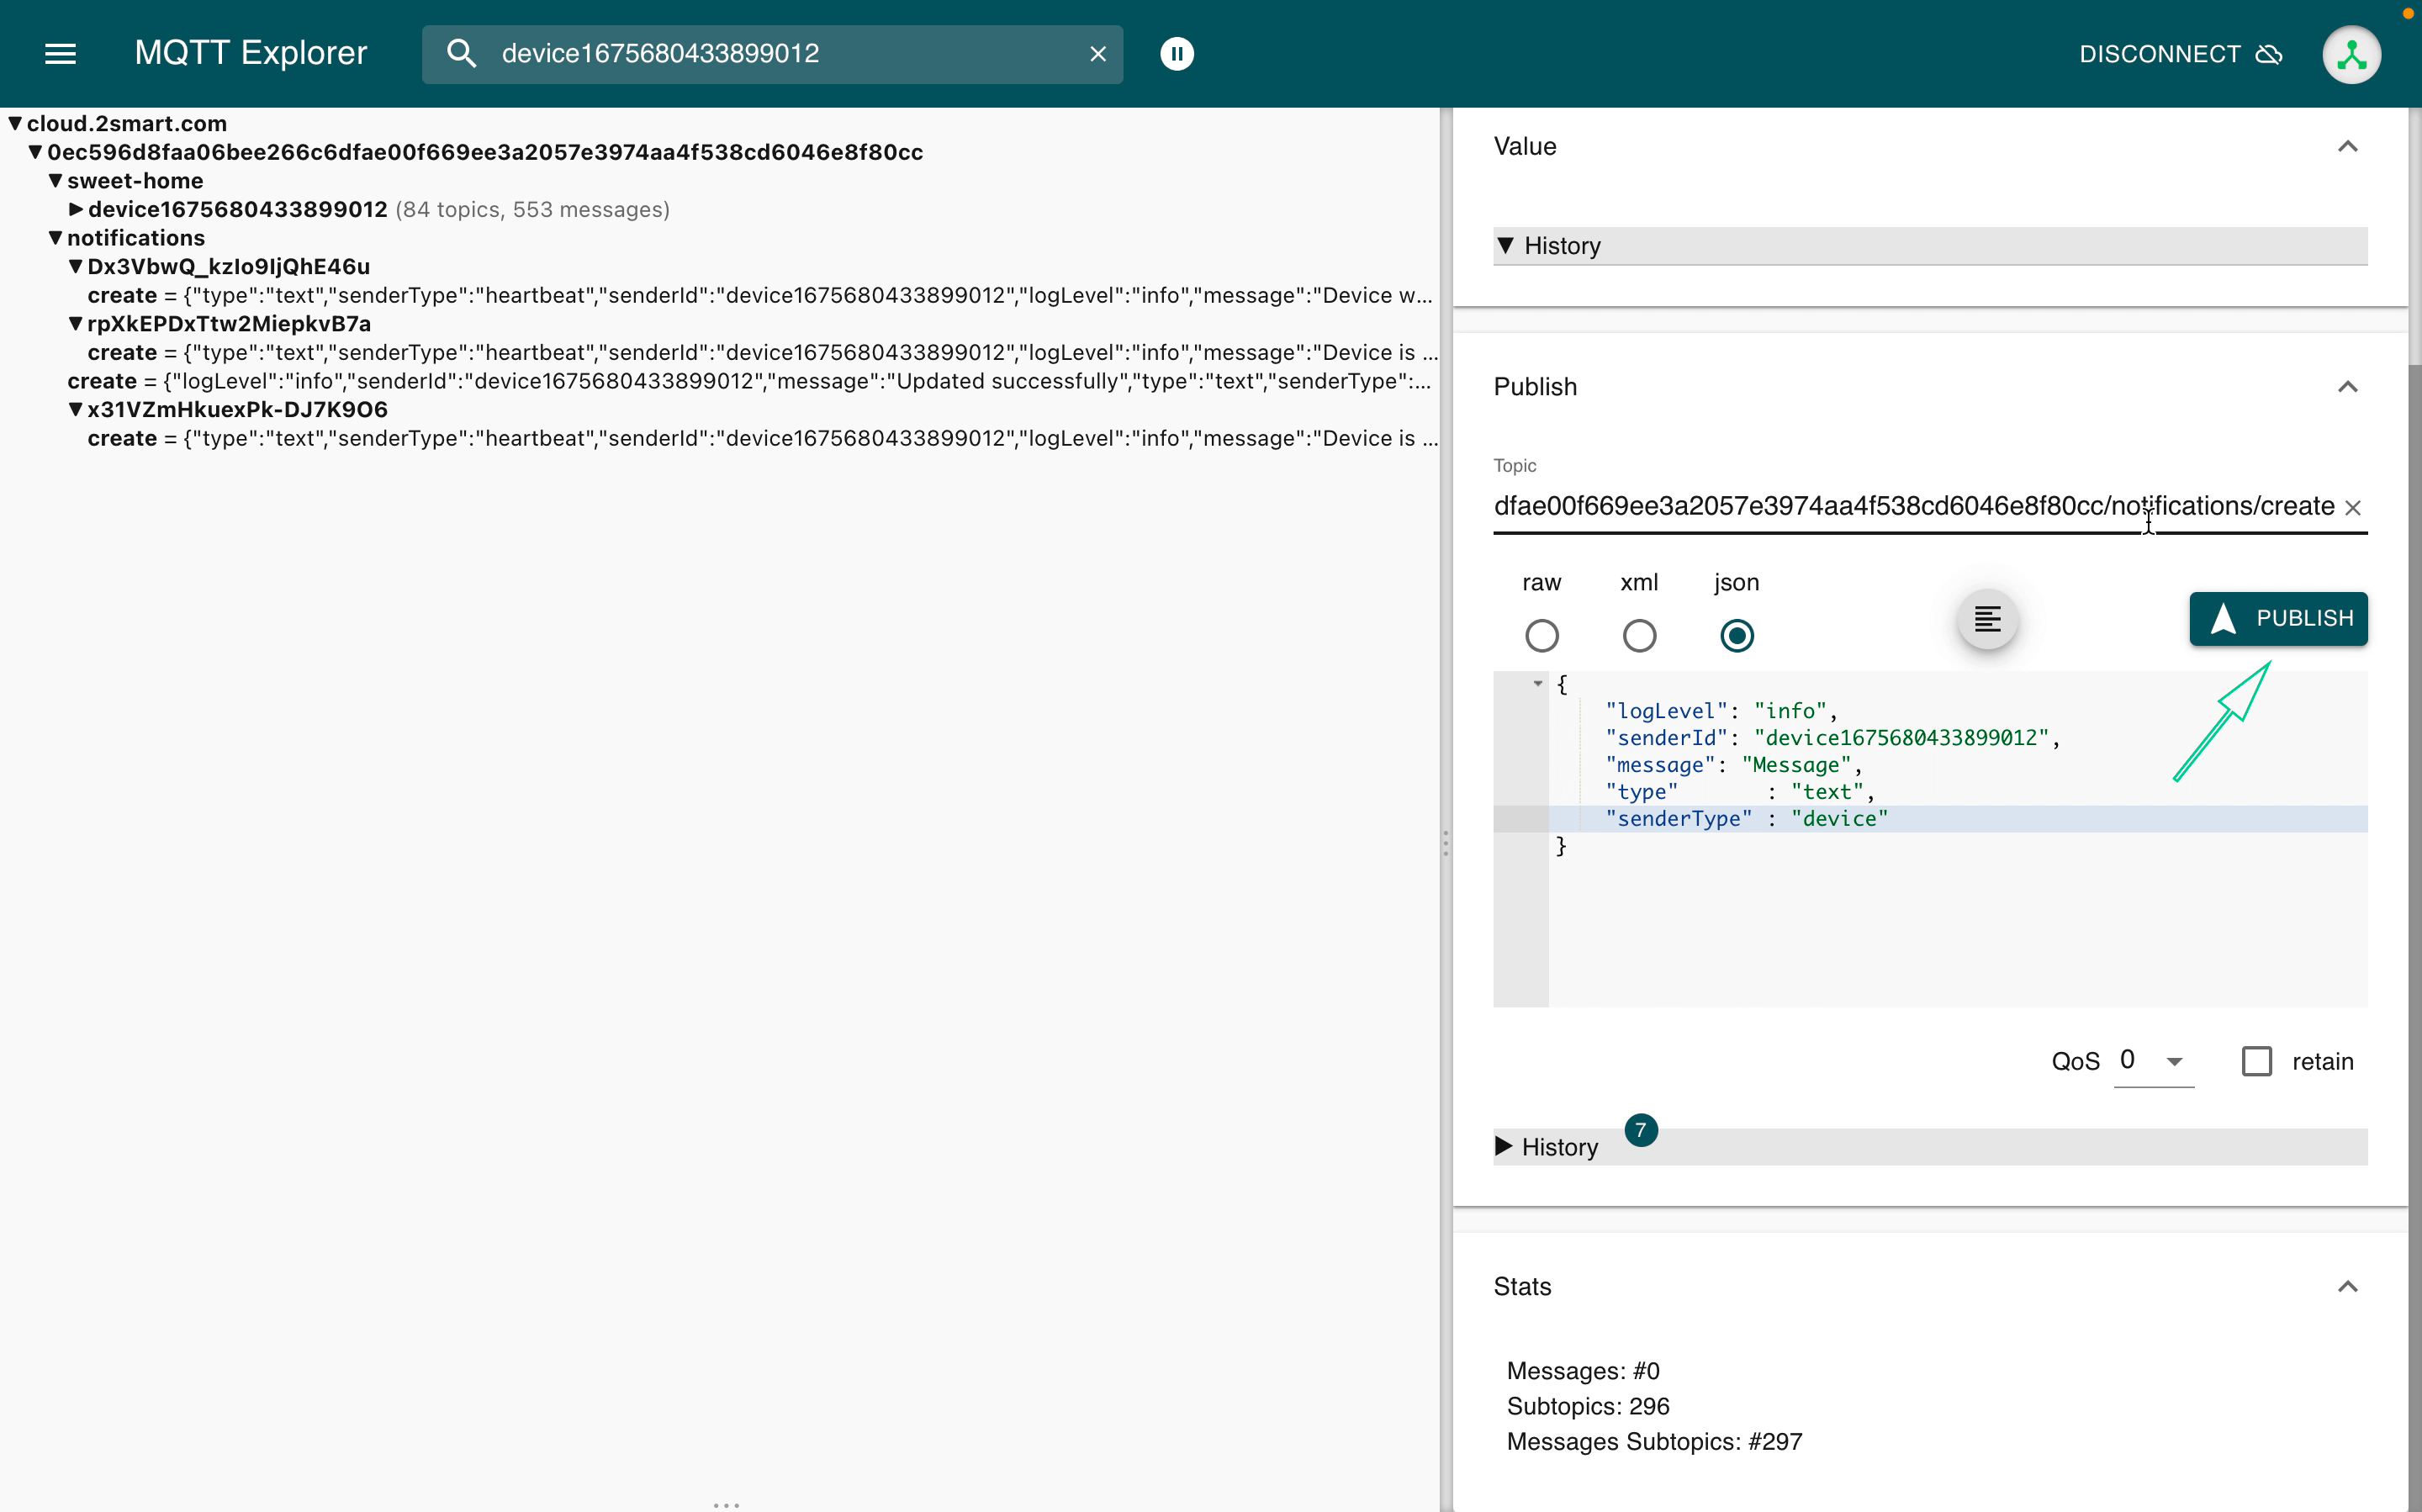
With json support, you can use MQTT Explorer to send notifications from the device to the broker. To do this, select the “/notifications/create” topic and enter the following json message:
{

“logLevel”: “info”,

“senderId”: “deviceXXXXXXXX”,

“message”: “Message”,

“type”: “text”,

“senderType”: “device”

}

In “senderId”, specify the identifier of the device on whose behalf you want to send a message, and in the “message” field, enter the message text.
Click the Publish button, and your message will be published to the MQTT broker.
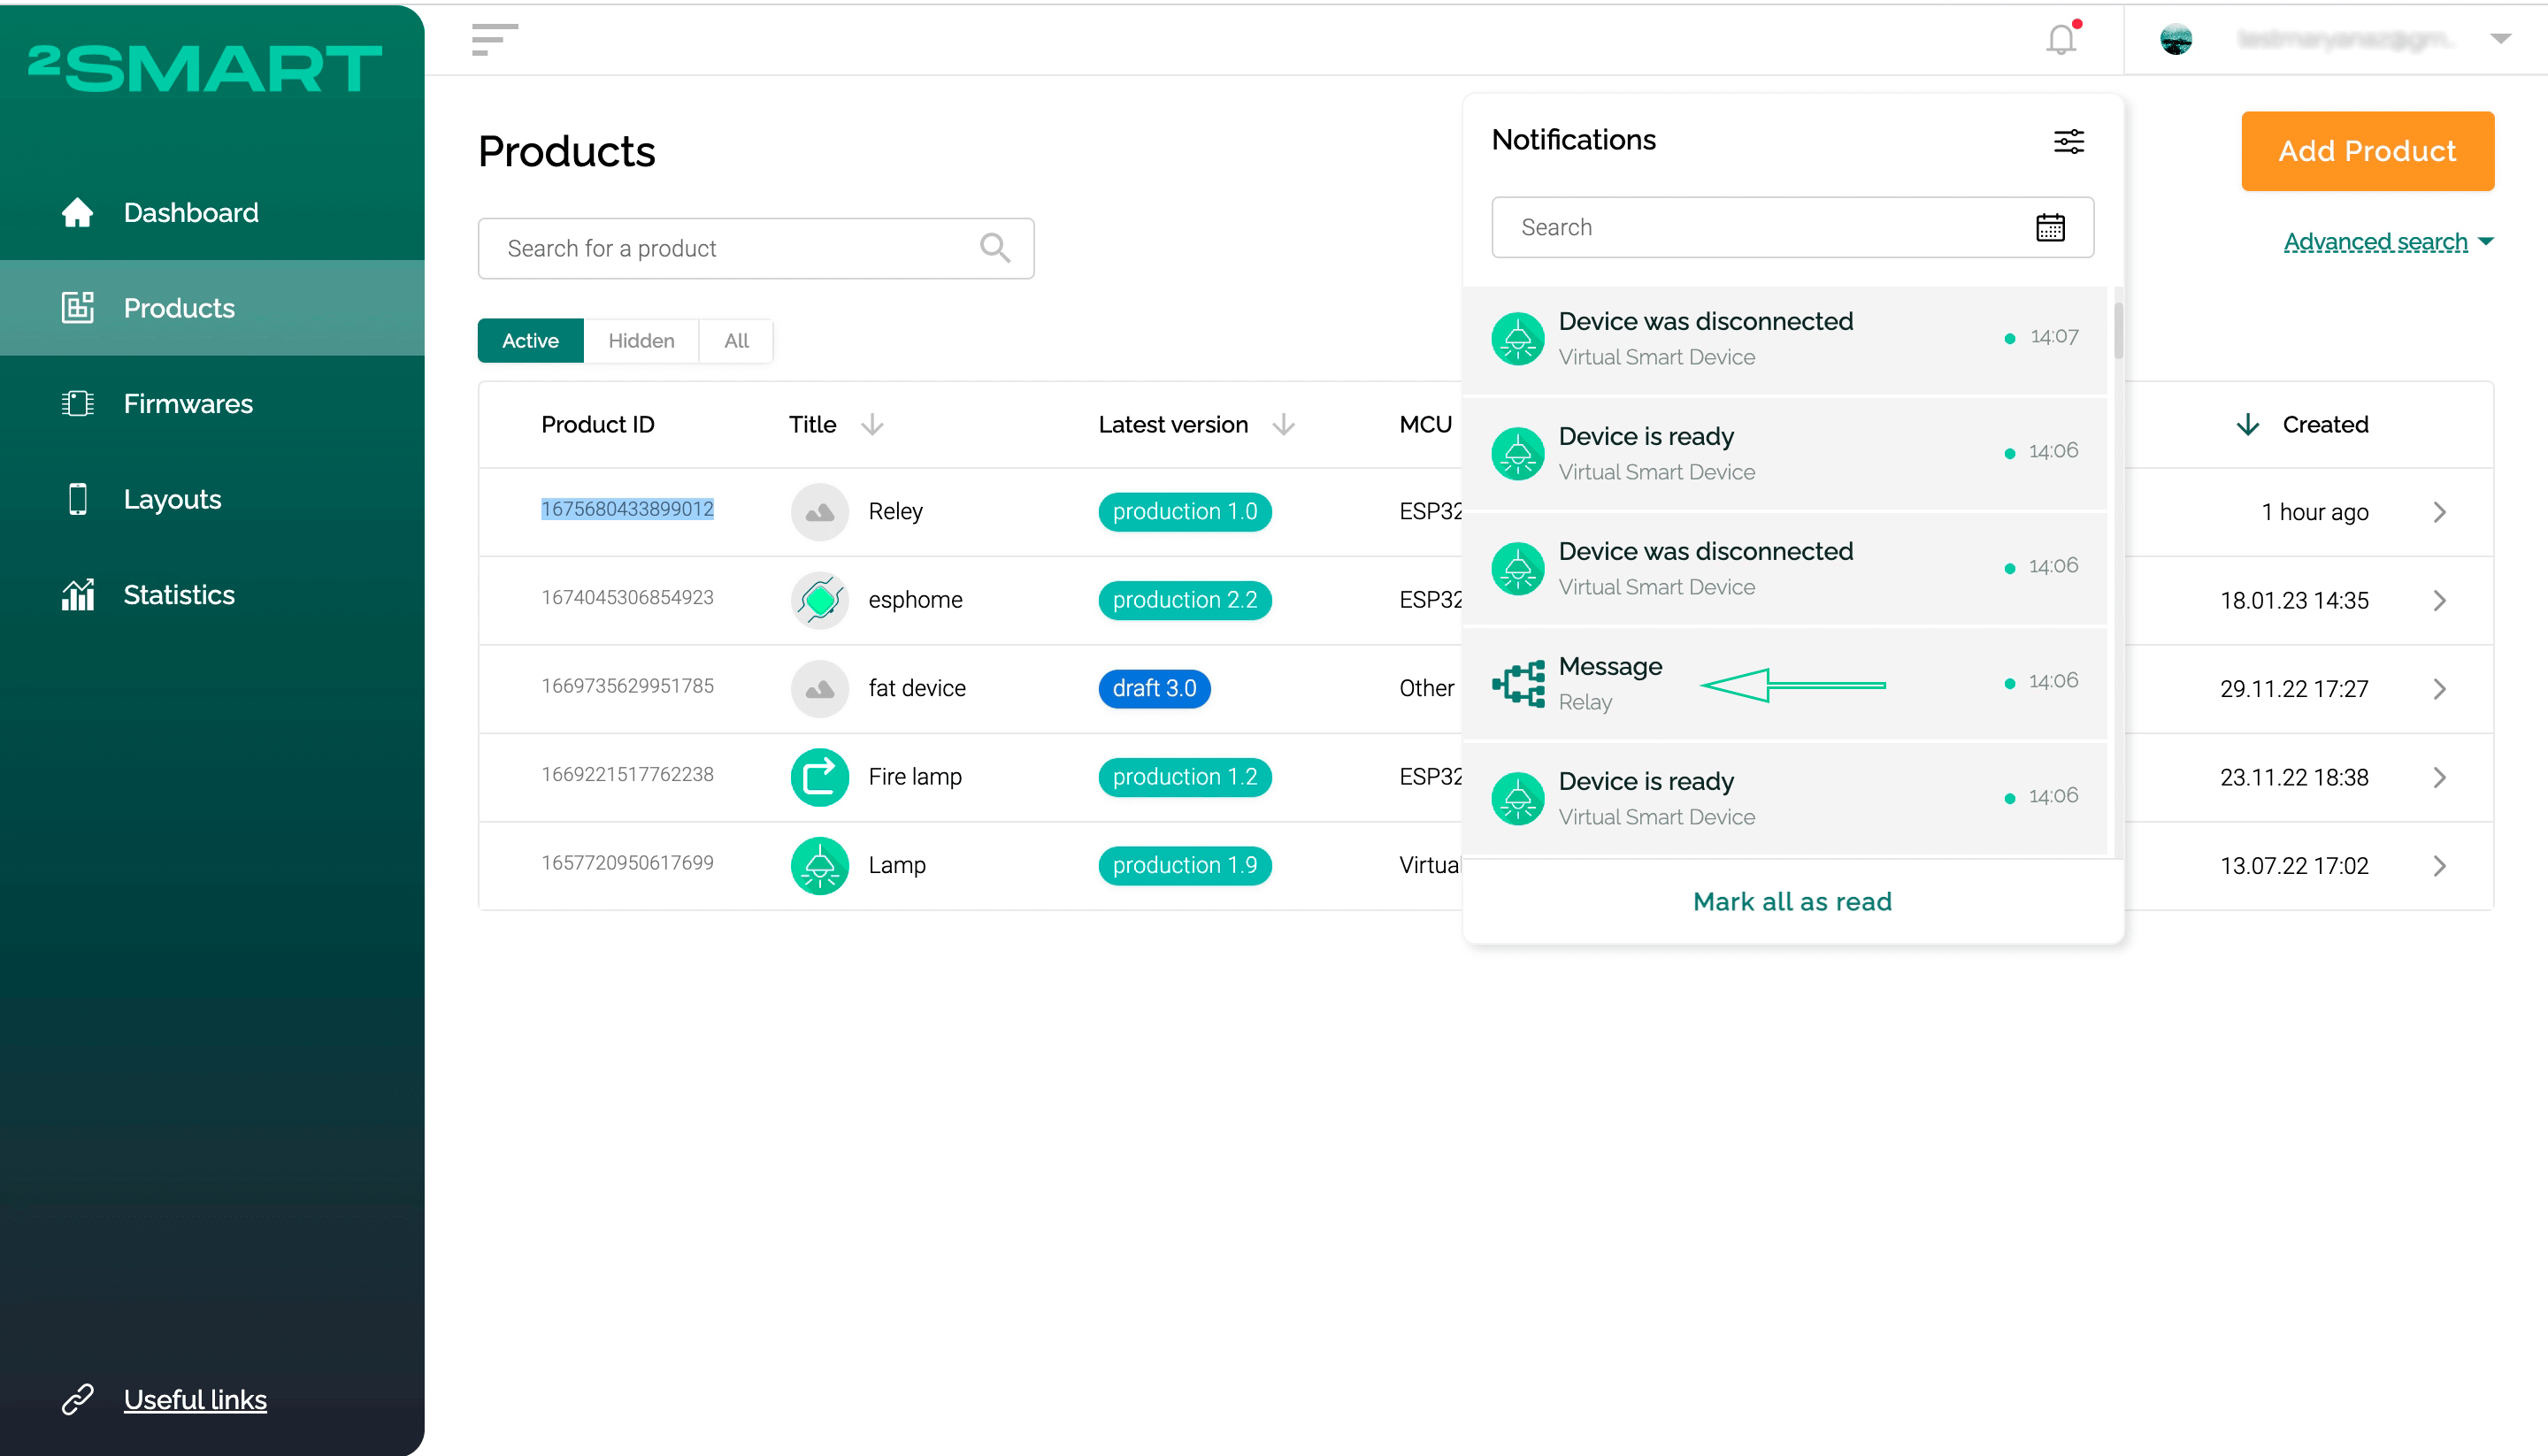
You can read the sent message in the notifications section of your account in the 2Smart Cloud Developer Panel.
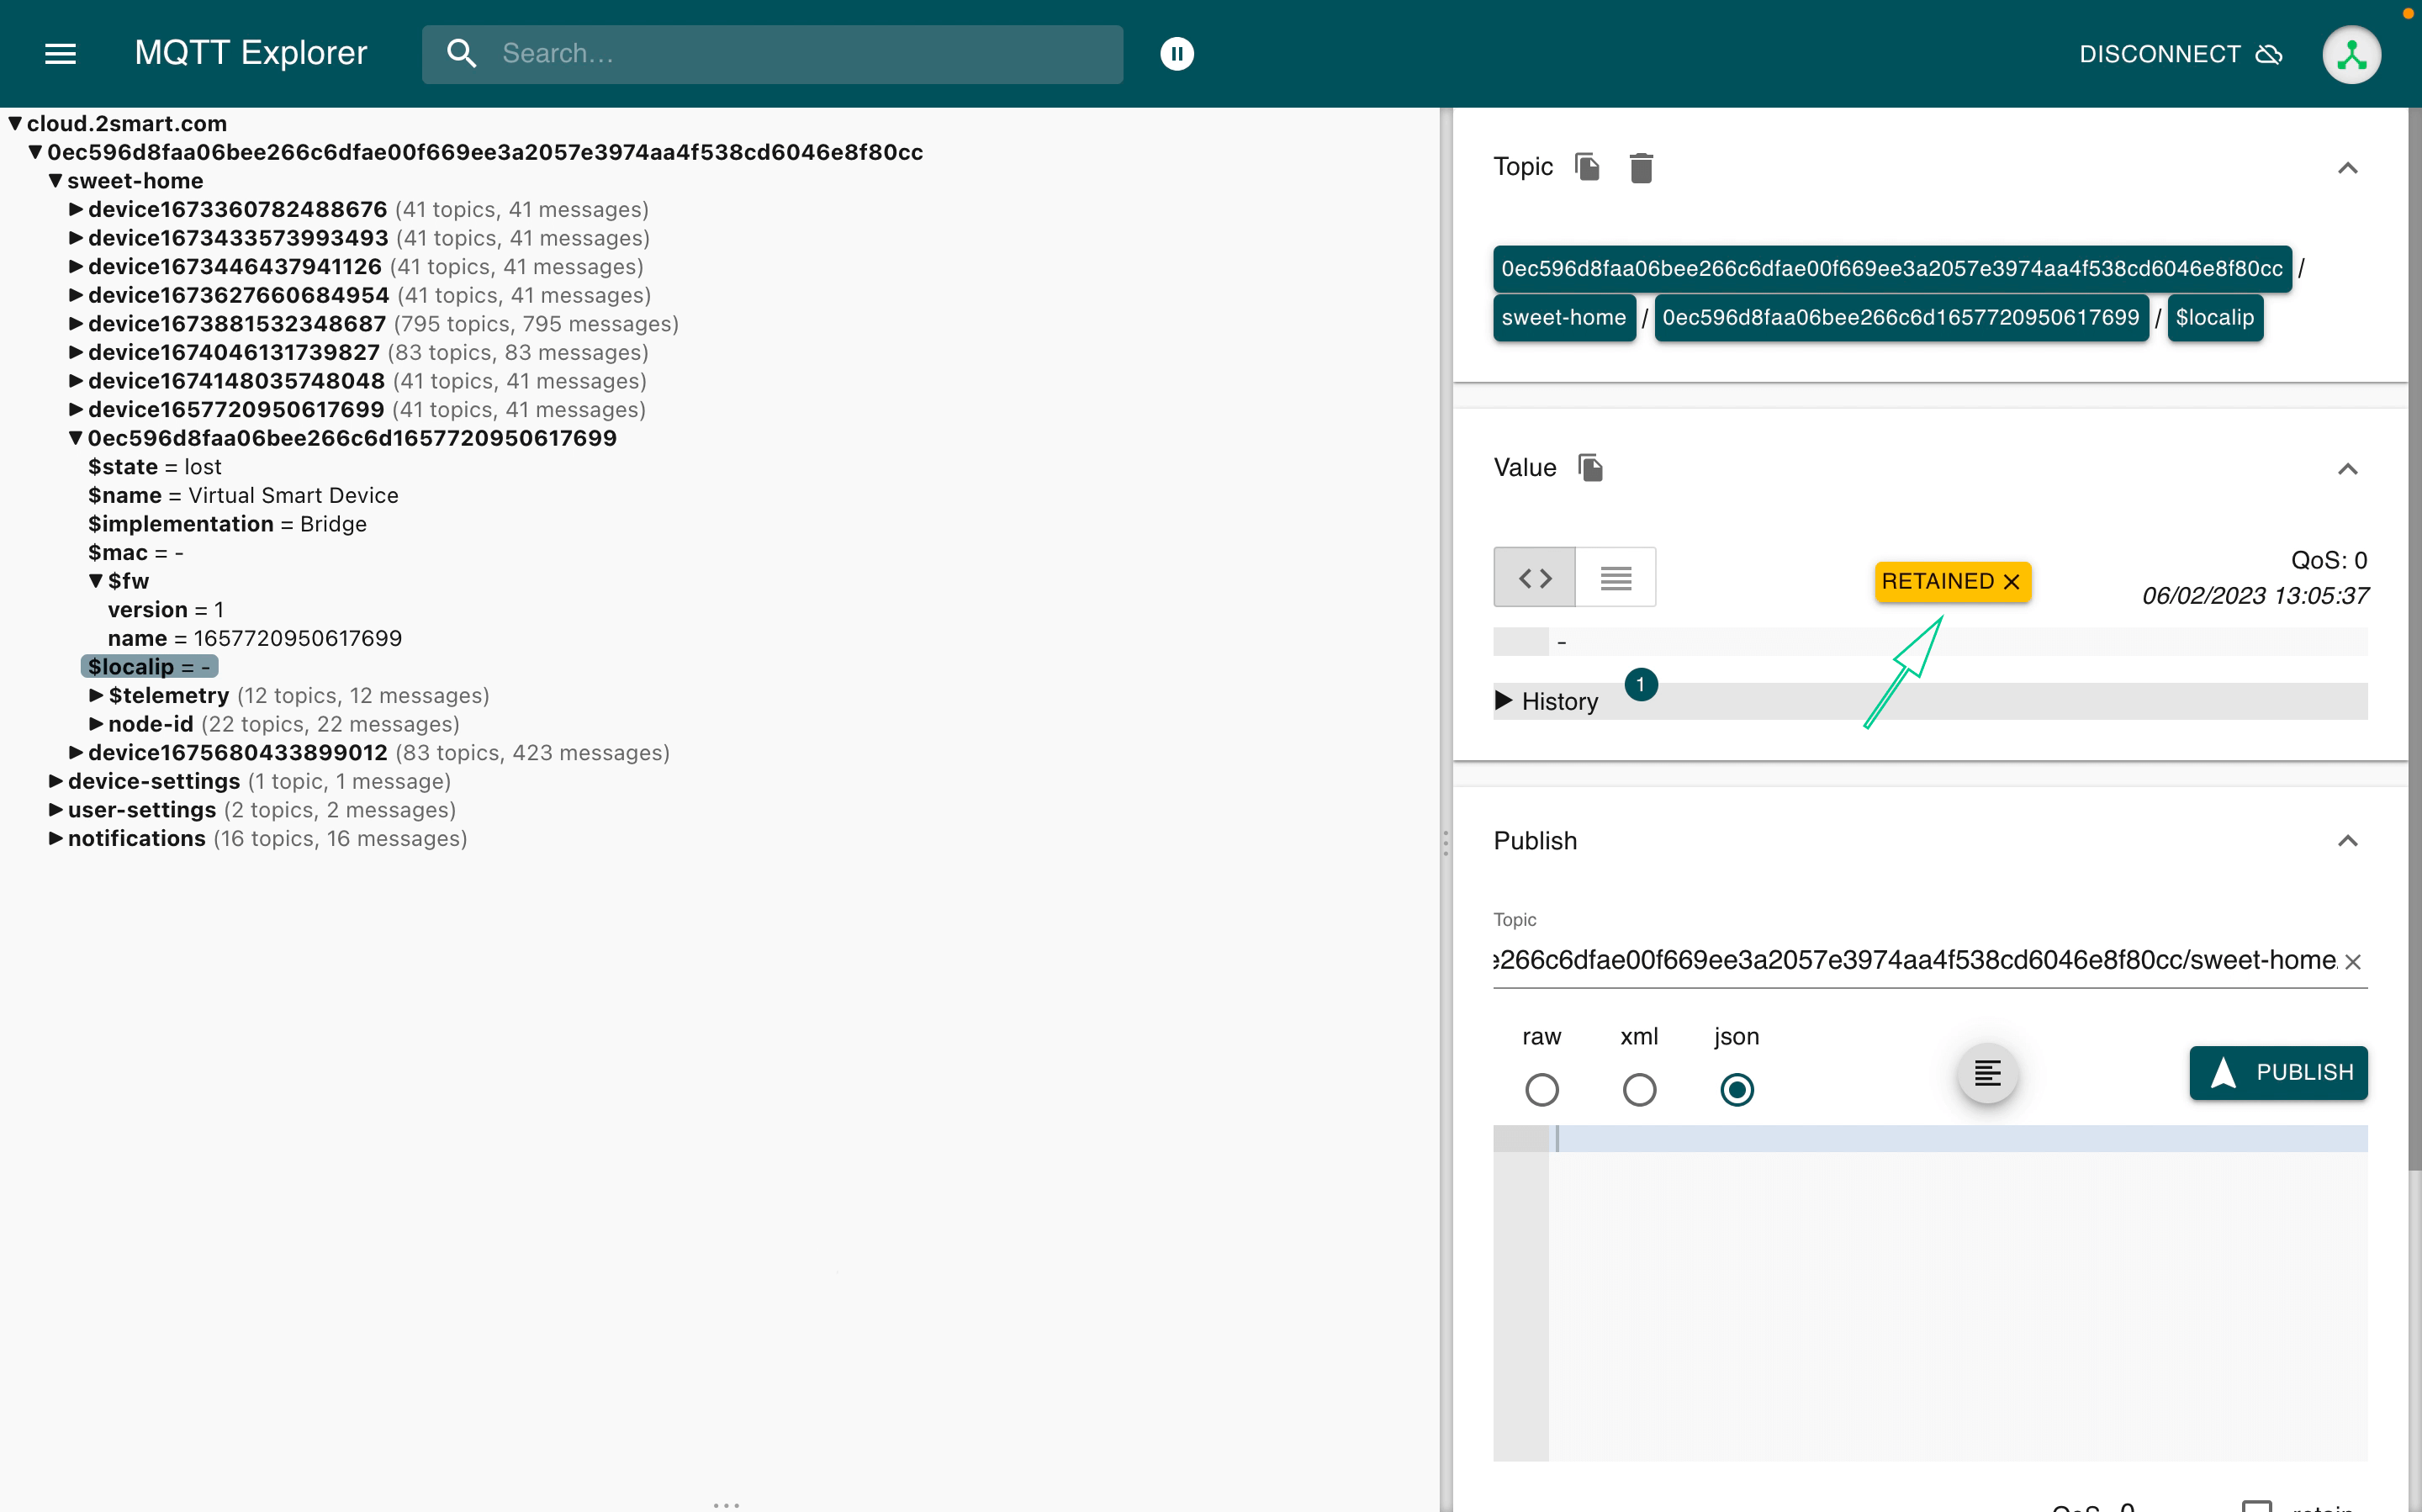
Deleting retained topics
Attention! Use this MQTT Explorer feature with care so as not to disable your device!
You can remove any retained topic in one click. To do this, select it and click on the “Retained” button.
Recursive deleting of topics
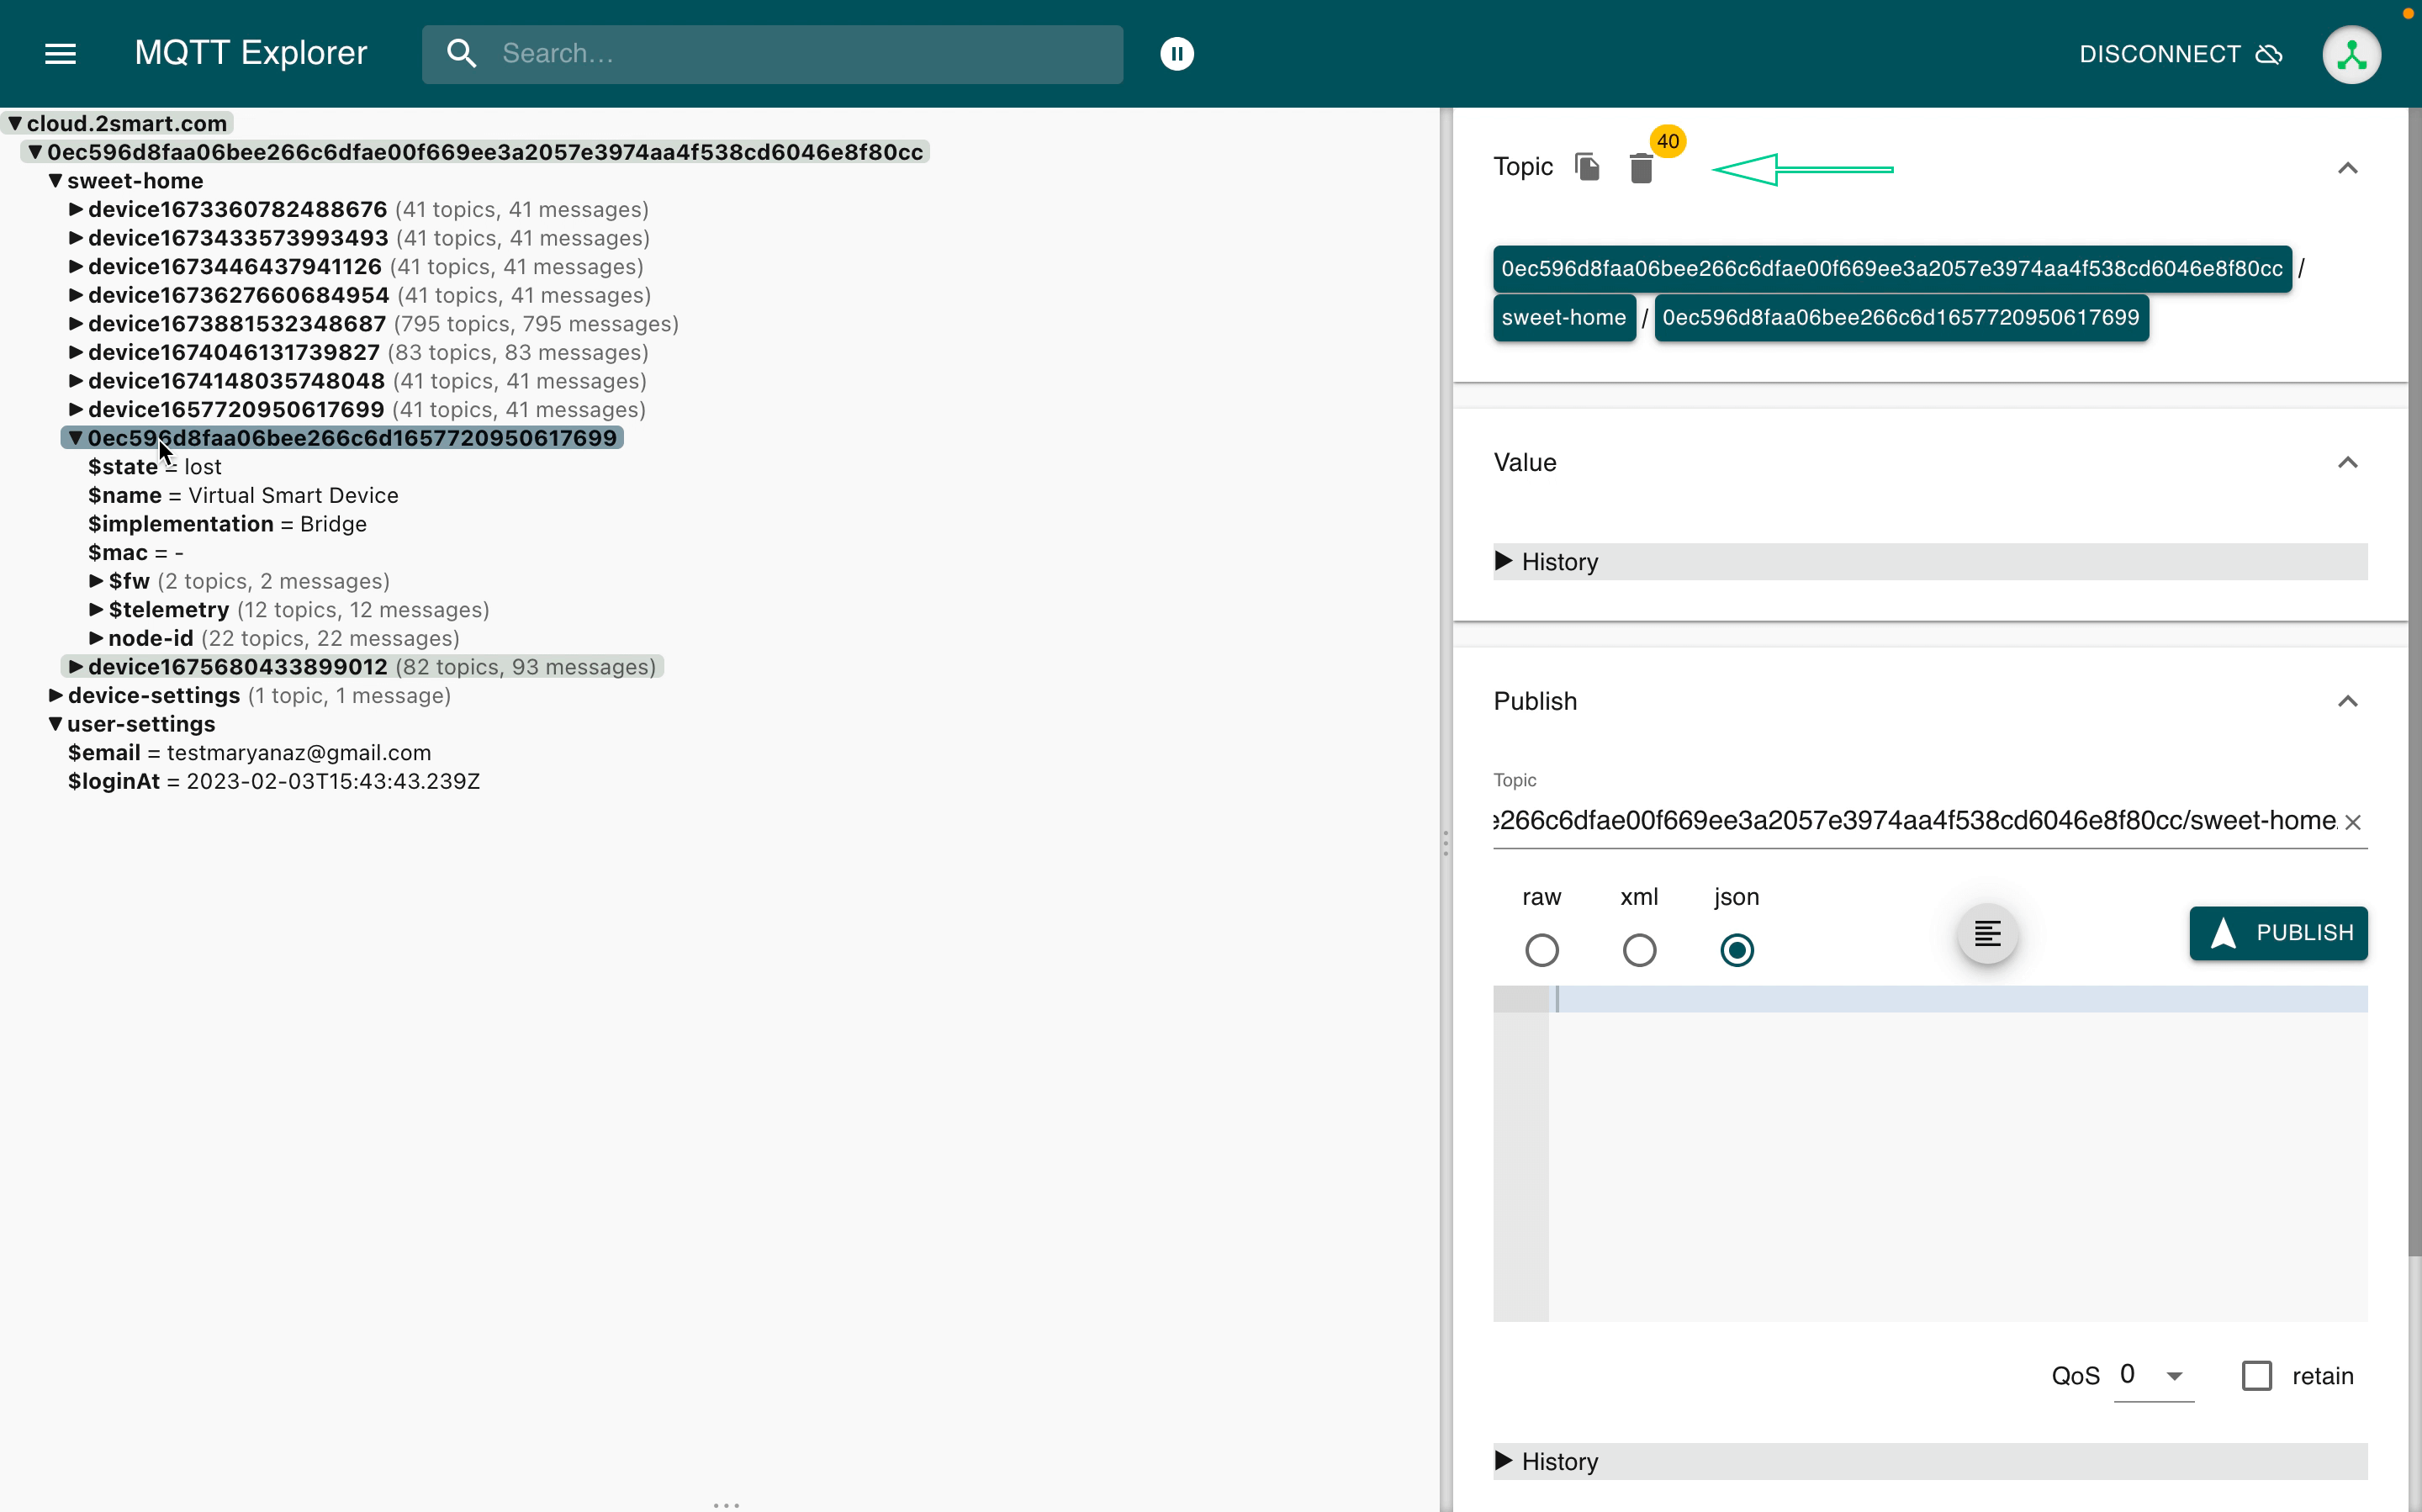
MQTT Explorer allows you to recursively delete the topic itself and all the child topics included in it in two clicks. For example, you can remove your device from the broker entirely.
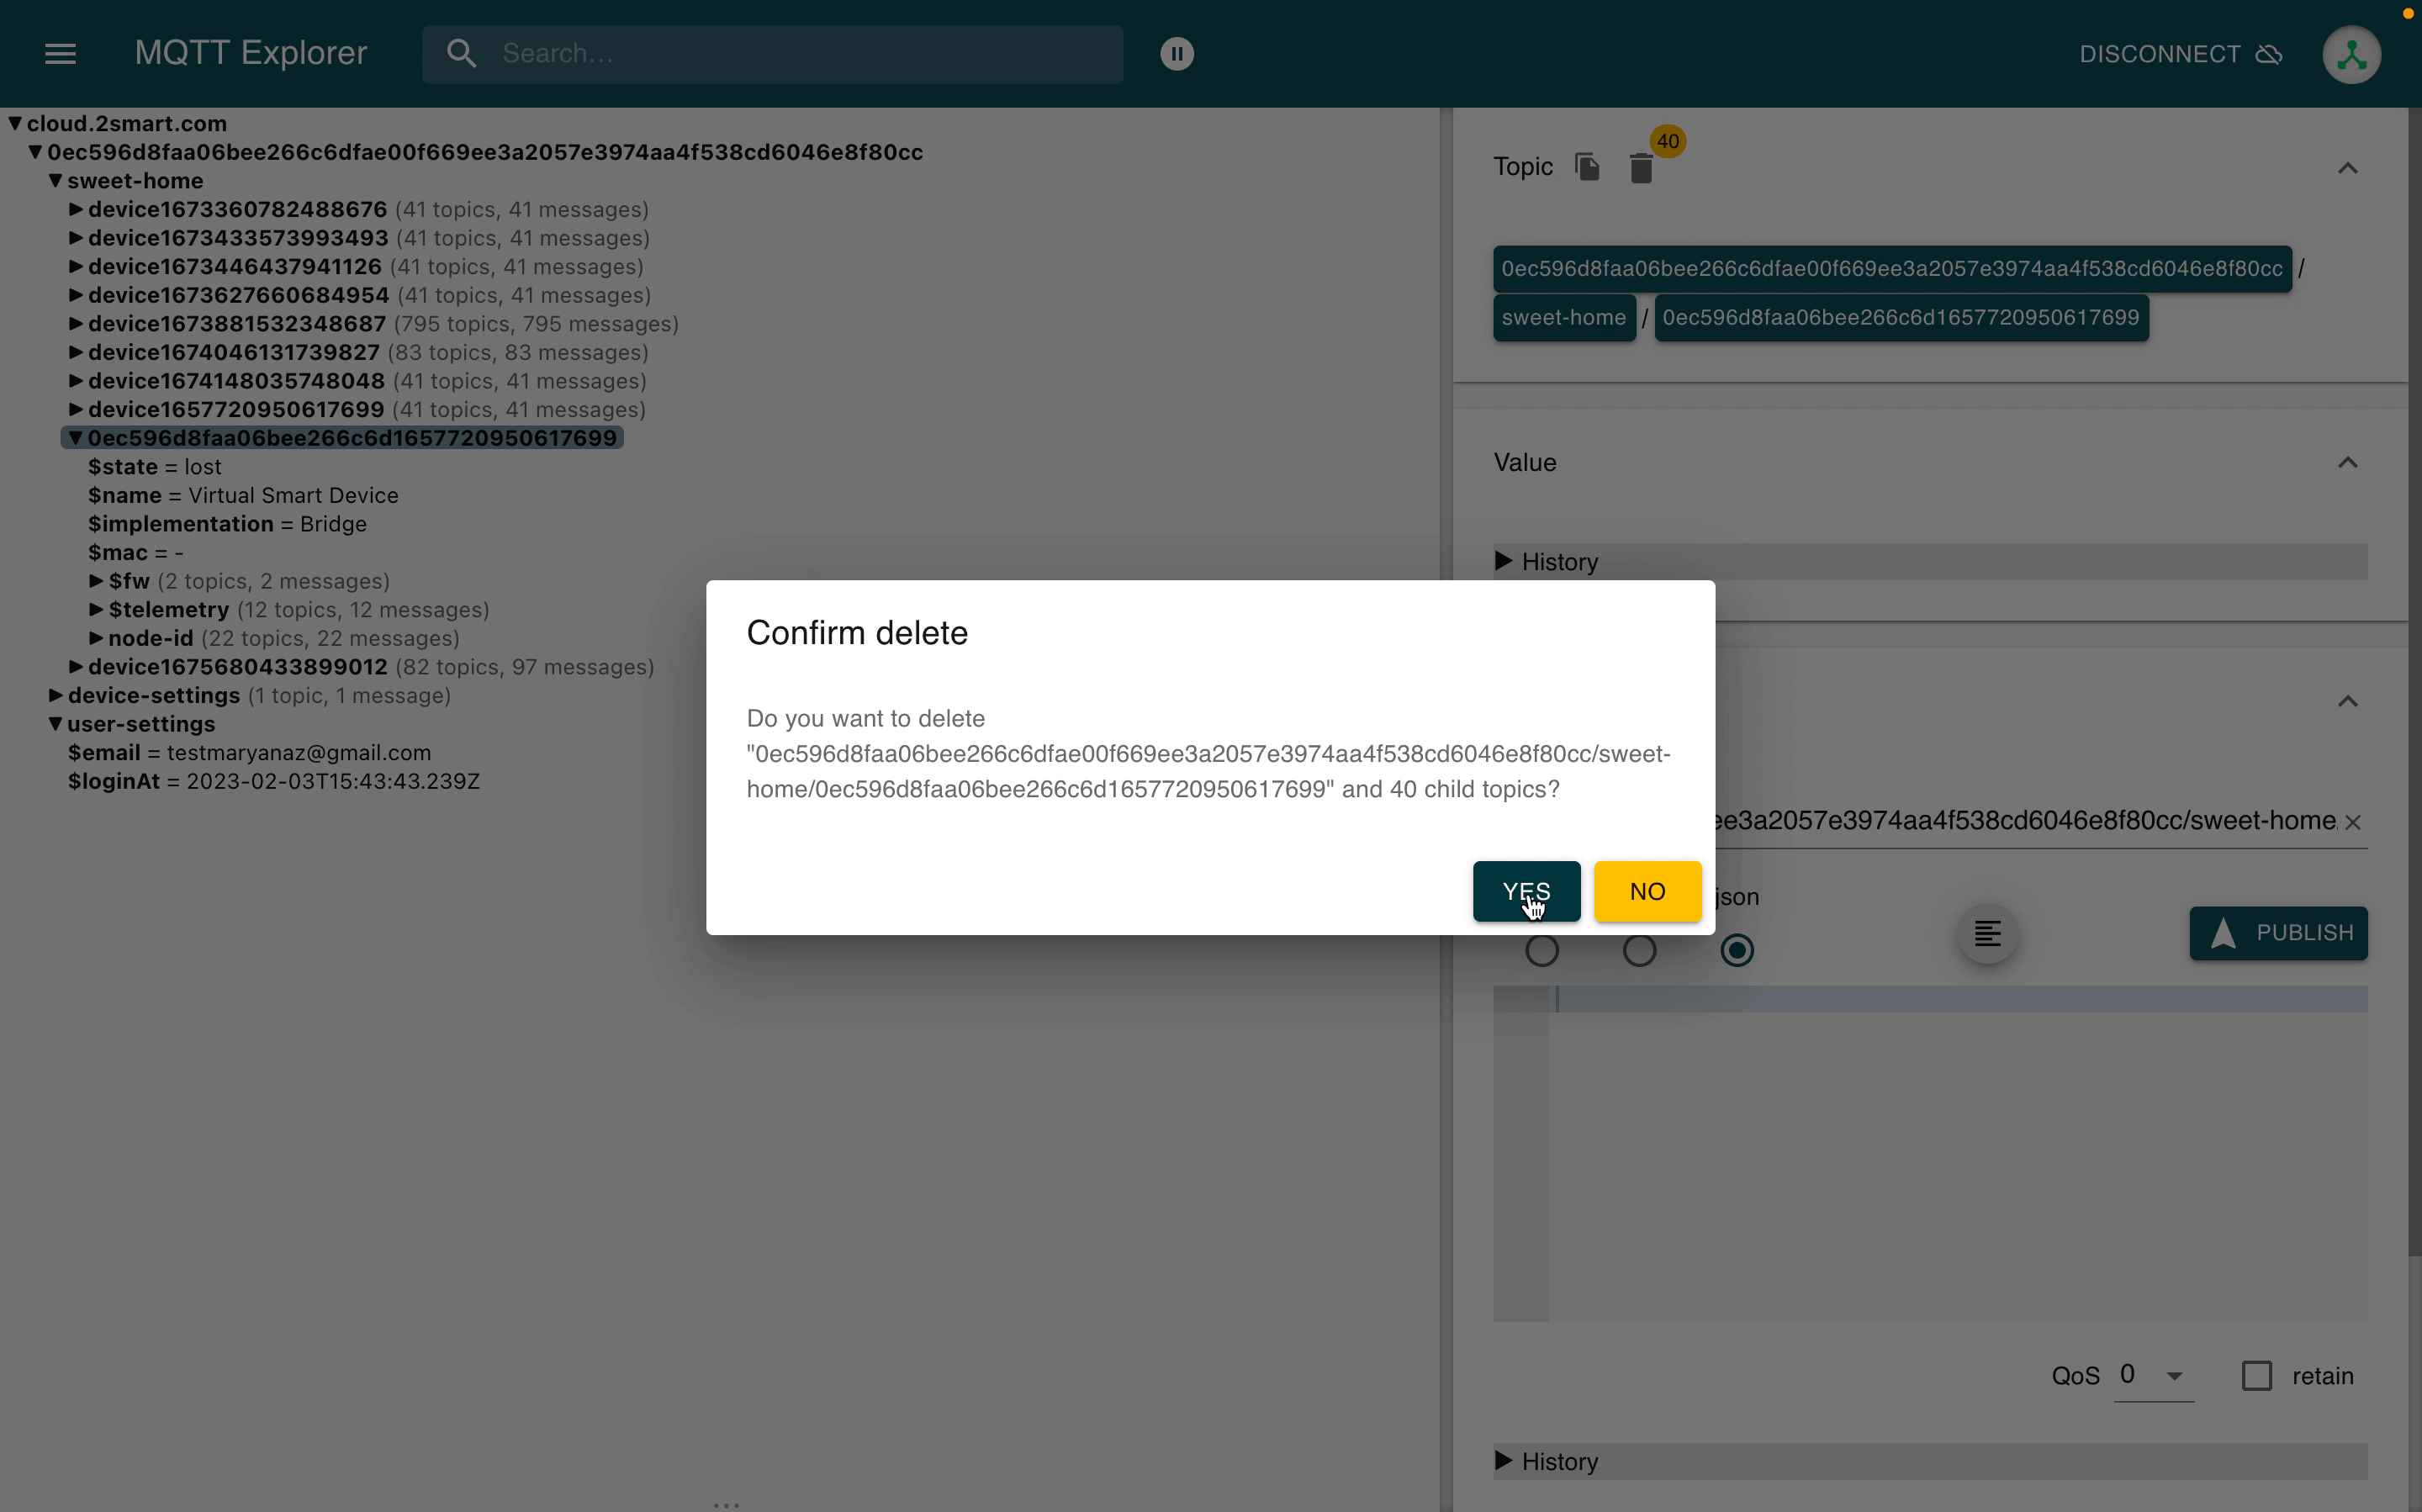
To do this, select a topic and click on the trash can icon. Next to the trash icon is the number of child topics that will be deleted. After clicking the delete button, you must confirm the action.
Thus, MQTT Explorer is a simple but powerful tool that you can use in working with the 2Smart Cloud platform and will significantly simplify your life when developing a new device.
MQTT Explorer alternatives
There is also alternative software similar in functionality to MQTT Explorer. Here are seven examples with links to their GitHub, if available:
- EasyMQTT (an MQTT client for iOS and macOS).
- MQTT Board – https://github.com/flespi-software/MQTT-Board.
- MQTTBox.
- MqttDesk by ioCtrl.
- MQTT.fx.
- MQTTX – https://github.com/emqx/mqttx.
- ZapIt – https://github.com/chocoearly44/ZapIt.
If you have questions about using MQTT Explorer or ask us to write similar instructions for one of the alternative clients, feel free to write to the 2Smart Telegram chat for developers!
Don't forget to share this post!
Read Next


Let’s dive into your case
Share with us your business idea and expectations about the software or additional services.
