
Table of contents:
Introduction
Today, Wi-Fi is the primary method for connecting most consumer smart devices. These devices range from standalone products like cameras, thermostats, and smart plugs to gateways that manage other devices and sensors using alternative communication protocols (such as Zigbee) but still rely on Wi-Fi to interact with cloud platforms and enable remote control.
The pairing process is a critical step for end users when setting up a device. This process involves connecting the device to a Wi-Fi network, enabling it to function with cloud services. While it may seem straightforward, pairing can be challenging for users, especially those without technical expertise, particularly if developers have not carefully designed the pairing UX. Missteps at this stage can lead to frustration and hinder the overall user experience.
In this article, the 2Smart team shares its best practices for organizing the Wi-Fi pairing process for smart devices. We’ll highlight key considerations when designing the pairing flow and propose solutions to avoid common issues, making the process smoother and more intuitive for users.
How Wi-Fi Device Pairing Works
Pairing involves connecting a mobile device, such as a smartphone running a companion app, to a smart device. This connection can use any communication protocol supported by both the smartphone and the smart device. For instance, pairing may sometimes rely on Bluetooth if the device is equipped with the necessary module. However, not all IoT devices include Bluetooth functionality, and adding it solely for pairing is often impractical. As a result, Wi-Fi remains the most common method for establishing this connection during pairing.
Wi-Fi modules integrated into the microcontrollers of smart devices can operate in different modes depending on how they interact with networks and other devices. To understand the pairing process, it’s crucial to examine the two main operational modes of Wi-Fi modules: Access Point (AP) mode and Station (STA) mode.
Access Point (AP) Mode
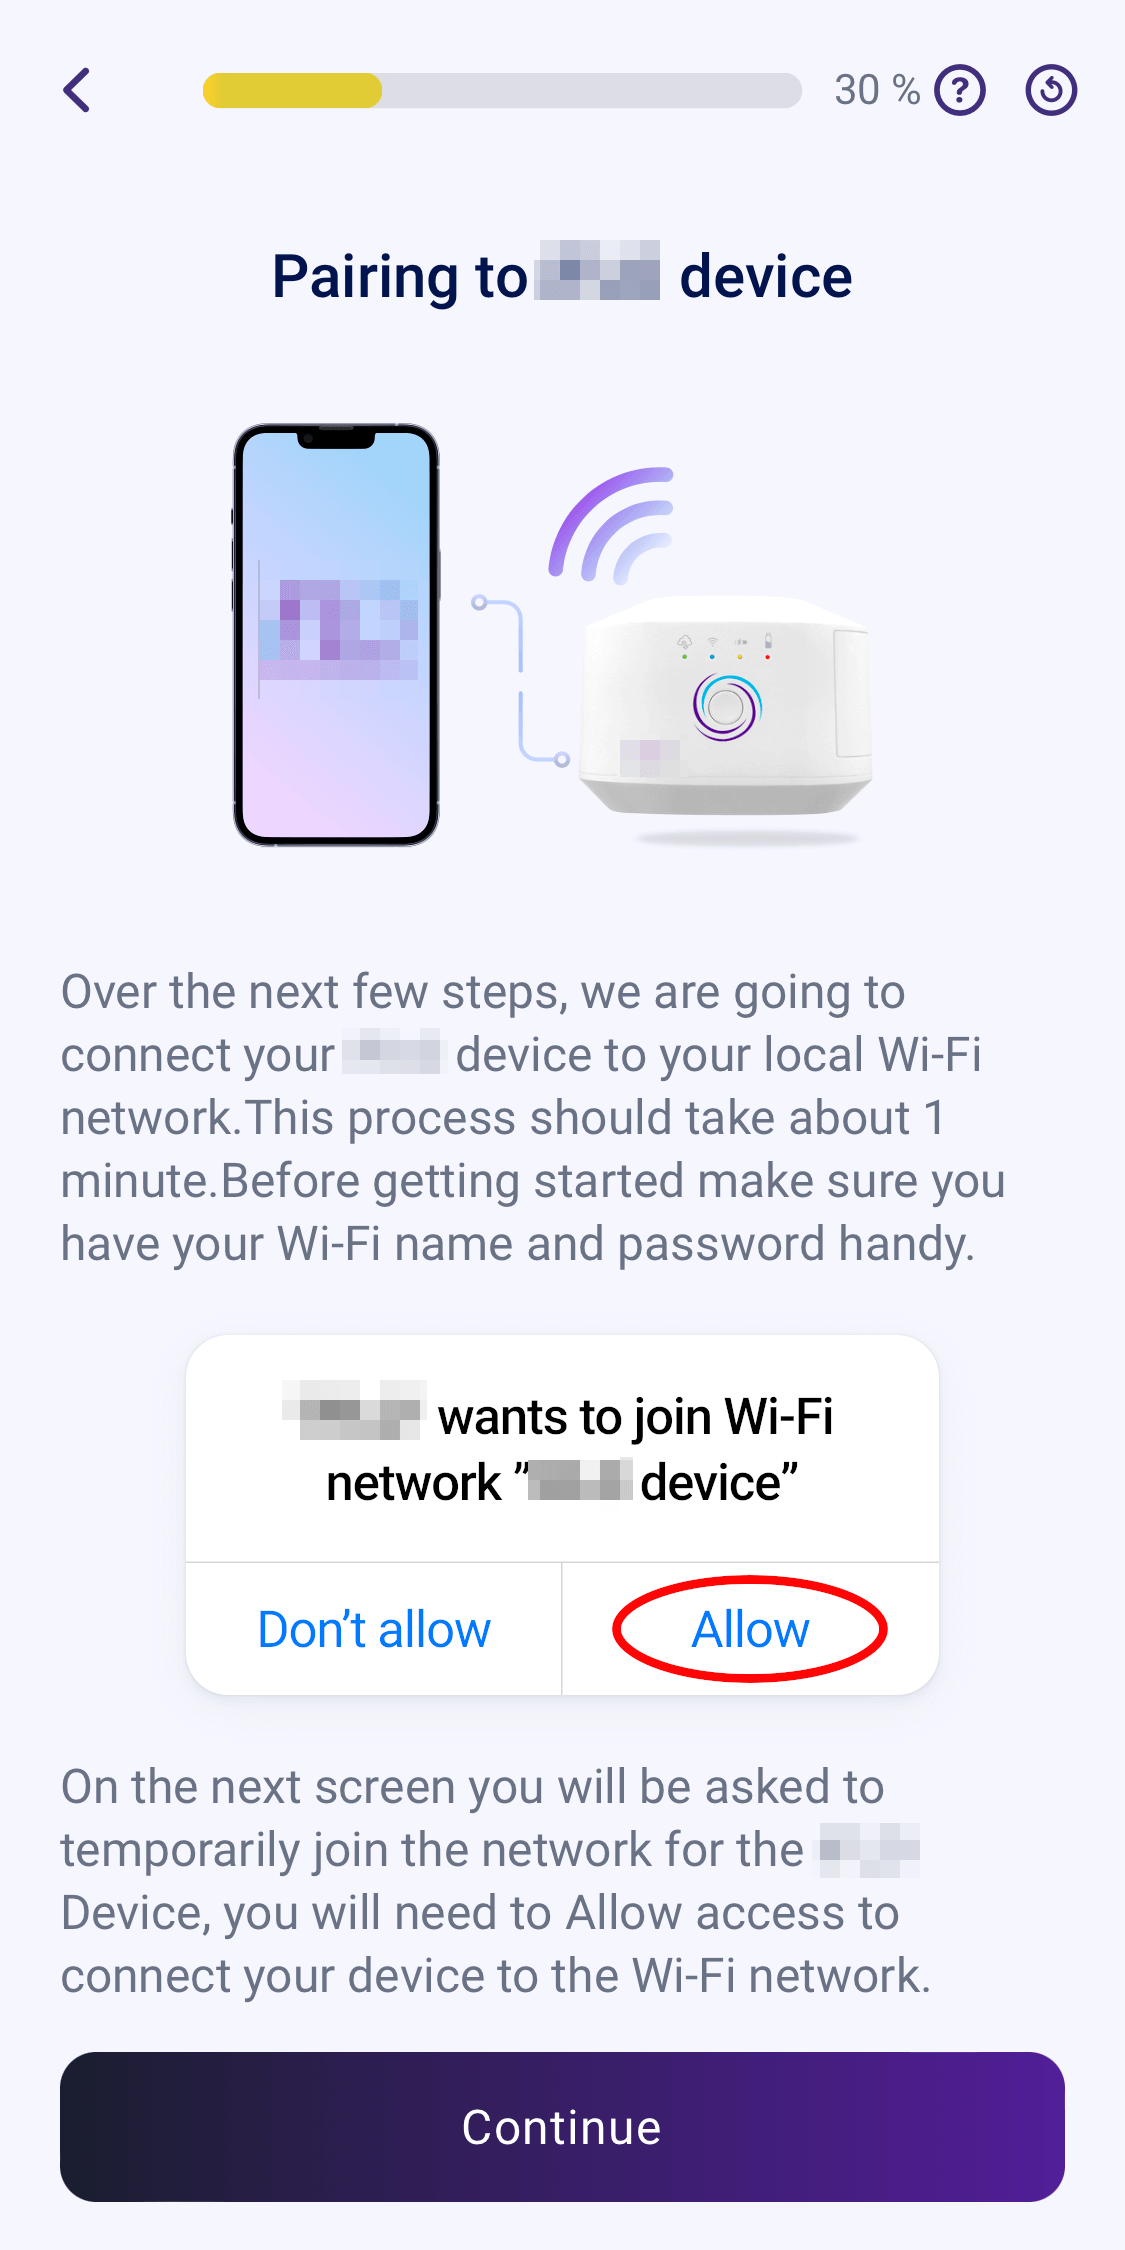
In Access Point mode, the device creates its own Wi-Fi network, allowing other devices, such as smartphones, to connect to it. This mode is used for initial setup: the device acts as a temporary router, and the user connects to its network via a mobile app. This setup enables the user to provide the device with the credentials for the primary Wi-Fi network, which are then sent to a web server running on the device to facilitate its connection to the internet.
Station (STA) Mode
In Station mode, the device connects to an existing Wi-Fi network as a client. This mode is activated after the device receives the network credentials during the pairing process. Through the router, the device connects to the internet and cloud services, enabling access to its features.
Combined Mode (AP + STA)
Some modules, like the ESP32, support simultaneous operation in both modes. This allows the device to remain connected to the smartphone through its own network while also attempting to establish a connection with an external network. This approach provides greater flexibility during setup and troubleshooting.
Transmitting Wi-Fi Credentials
The primary goal of pairing is to provide the device with the Wi-Fi network parameters needed to connect to the internet and the IoT platform. The process typically works as follows:
- The device launches its own Wi-Fi network in Access Point mode.
- The user connects to this network using a mobile app.
- The app sends the network credentials, such as the SSID and password, to the device.
- The device switches to Station mode and connects to the primary network.
At 2Smart, devices always use Wi-Fi pairing via Access Point mode, simplifying the setup process. The user easily connects to the device, enters the credentials, and the device transitions to Station mode for full functionality.
To further streamline the process, a combined AP + STA mode is employed. This ensures the connection with the smartphone remains active until the pairing process is fully complete. The device can simultaneously connect to the primary network while maintaining a local connection with the user via its own network. This approach enhances transparency: users receive real-time notifications about the connection status and are promptly informed of any issues, making the setup more user-friendly and informative.
2Smart’s Best Practices for Pairing
For successful device pairing, it’s essential to not only configure the connection process correctly but also consider several factors that ensure user convenience and connection stability. At 2Smart, we’ve developed a set of best practices to minimize issues during pairing and optimize the connection process.
Pairing Instructions for Enhanced UX
At 2Smart, we prioritize user convenience by providing informative screens with step-by-step instructions before starting the pairing process. These instructions include detailed guidance on what’s needed to connect the device and the actions users must take. Upon client request, we can also integrate additional features into the app to further enhance the user experience.
For example, in the drain line cleaning solution app, the initial screens combine instructions with marketing elements, such as a questionnaire with questions relevant to the manufacturer. The instructions also include tips for preparing the device, starting with inserting batteries. Users are prompted to select the current LED indication displayed on the device to confirm it’s ready for pairing. Once all conditions are met, the user can proceed with the setup.
This approach not only makes the pairing process more intuitive but also allows the app to be tailored to the specific needs of the manufacturer, delivering an improved and more personalized user experience.
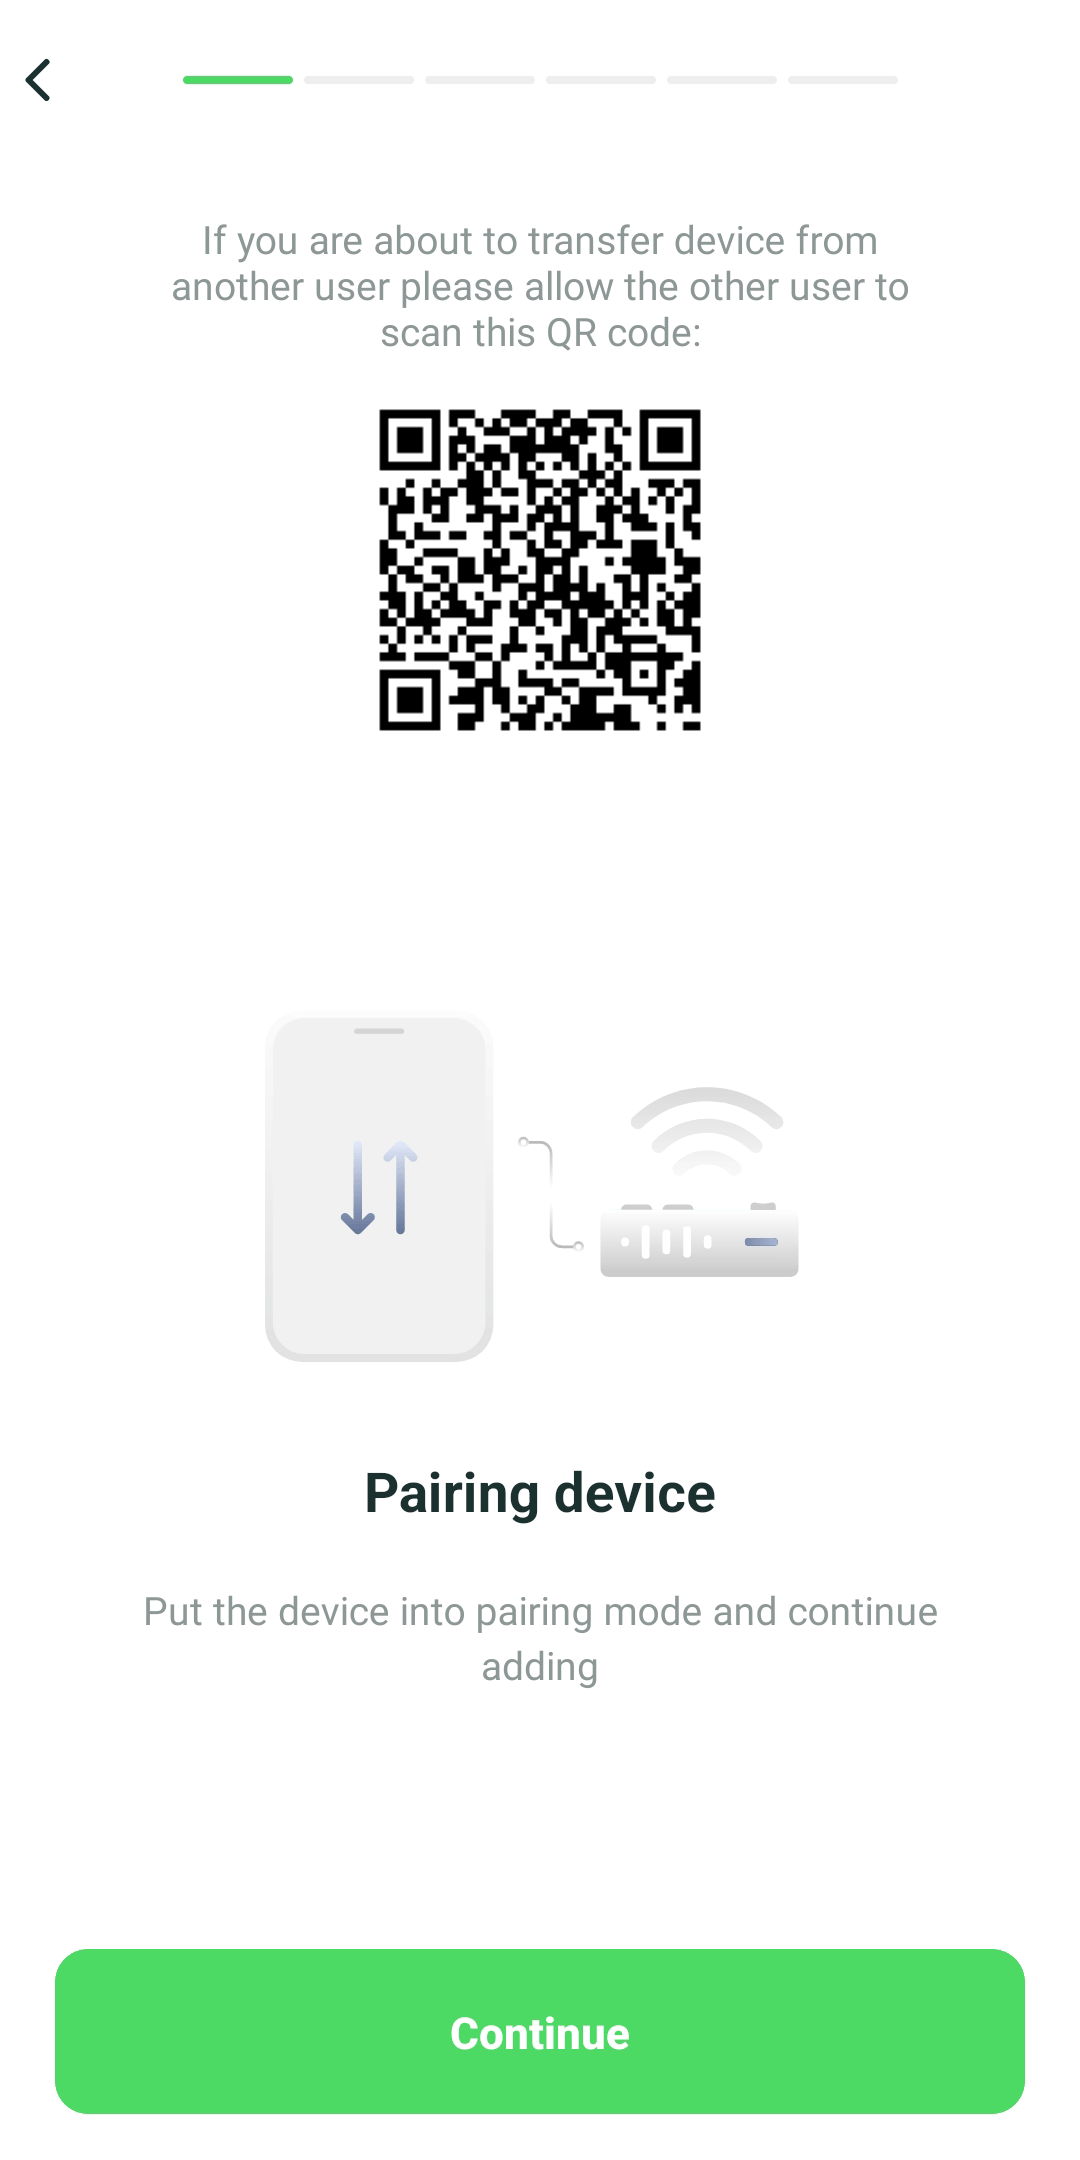
QR Codes to Simplify Access Point Connection
When a device powers on and starts broadcasting a Wi-Fi access point, the user needs to connect to this network via a mobile app, marking the beginning of the technical Wi-Fi pairing process. The access point’s name and password are embedded in the firmware, simplifying the connection. These credentials are typically printed on the packaging or in the instructions. At 2Smart, we streamline this further by naming the access point after the device itself and often using an open network (no password) unless enhanced security is required.
However, manually connecting to a new Wi-Fi network involves extra steps. The user must navigate to their smartphone’s settings, find the device’s network in the list, connect to it, and then return to the app to continue the pairing process. This can be cumbersome, time-consuming, and detracts from the user experience. Modern UX principles aim to reduce the number of steps users must take to complete any task.
To simplify this process, we provide users with a QR code containing the Wi-Fi network credentials. The QR code can be placed on the device’s packaging, in the instructions, or directly on the device itself. Scanning the code with the mobile app automatically transfers the required data, leaving the user to simply confirm the connection to the device’s network.
We also focus on usability in various conditions. For example, the app includes a flashlight feature, allowing users to scan the QR code easily even in low-light environments.
This approach minimizes user effort, making the pairing process faster and more convenient, significantly enhancing the overall experience.
An Even Smoother Connection Without QR Codes
While QR codes offer convenience, the connection process can be simplified further by eliminating them entirely. During the pairing process, our app can automatically connect to the device using pre-configured credentials that are standard across all devices in the series. As mentioned earlier, these credentials are embedded in the firmware and can also be pre-programmed into the mobile app.
This approach removes the need for users to manually enter credentials, switch between smartphone settings and the app, or scan a QR code. The process becomes seamless, requiring no input or effort from the user.
If any unexpected issues arise, the app will prompt the user to connect manually, providing clear and detailed instructions to guide them through the process. By replacing QR codes with automatic connection, we maximize ease of use, making the interaction with the device as effortless and intuitive as possible.
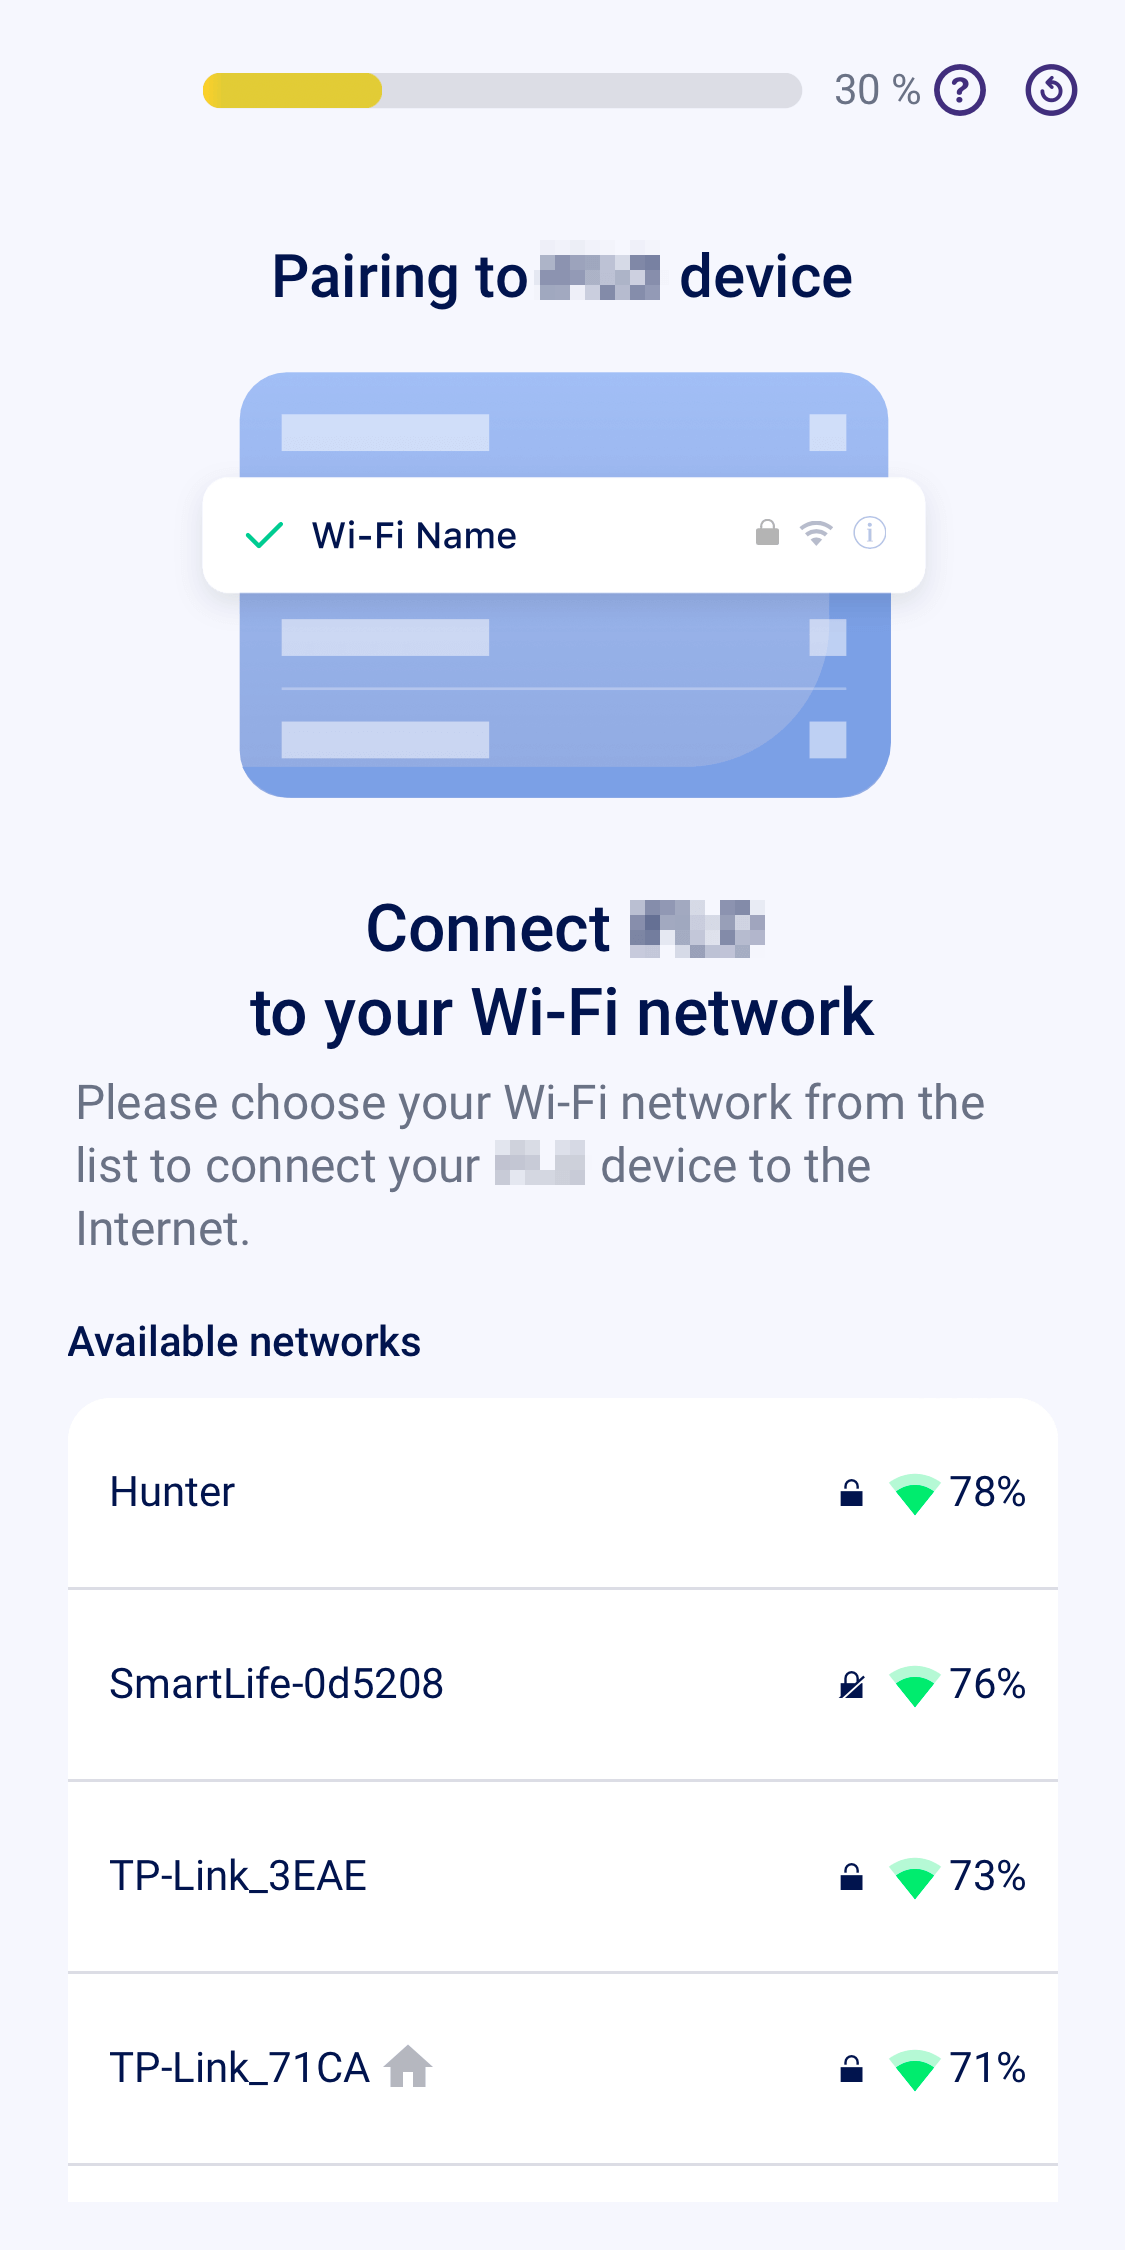
Filtering Available Networks for Optimal Device Connection
Once the mobile app connects to the device’s access point, the next step for the user is to select the Wi-Fi network the IoT device will use to access the internet. The app displays a list of currently available networks, allowing users to pick theirs without the need to manually type the network name, which can often be long or complex, minimizing input errors.
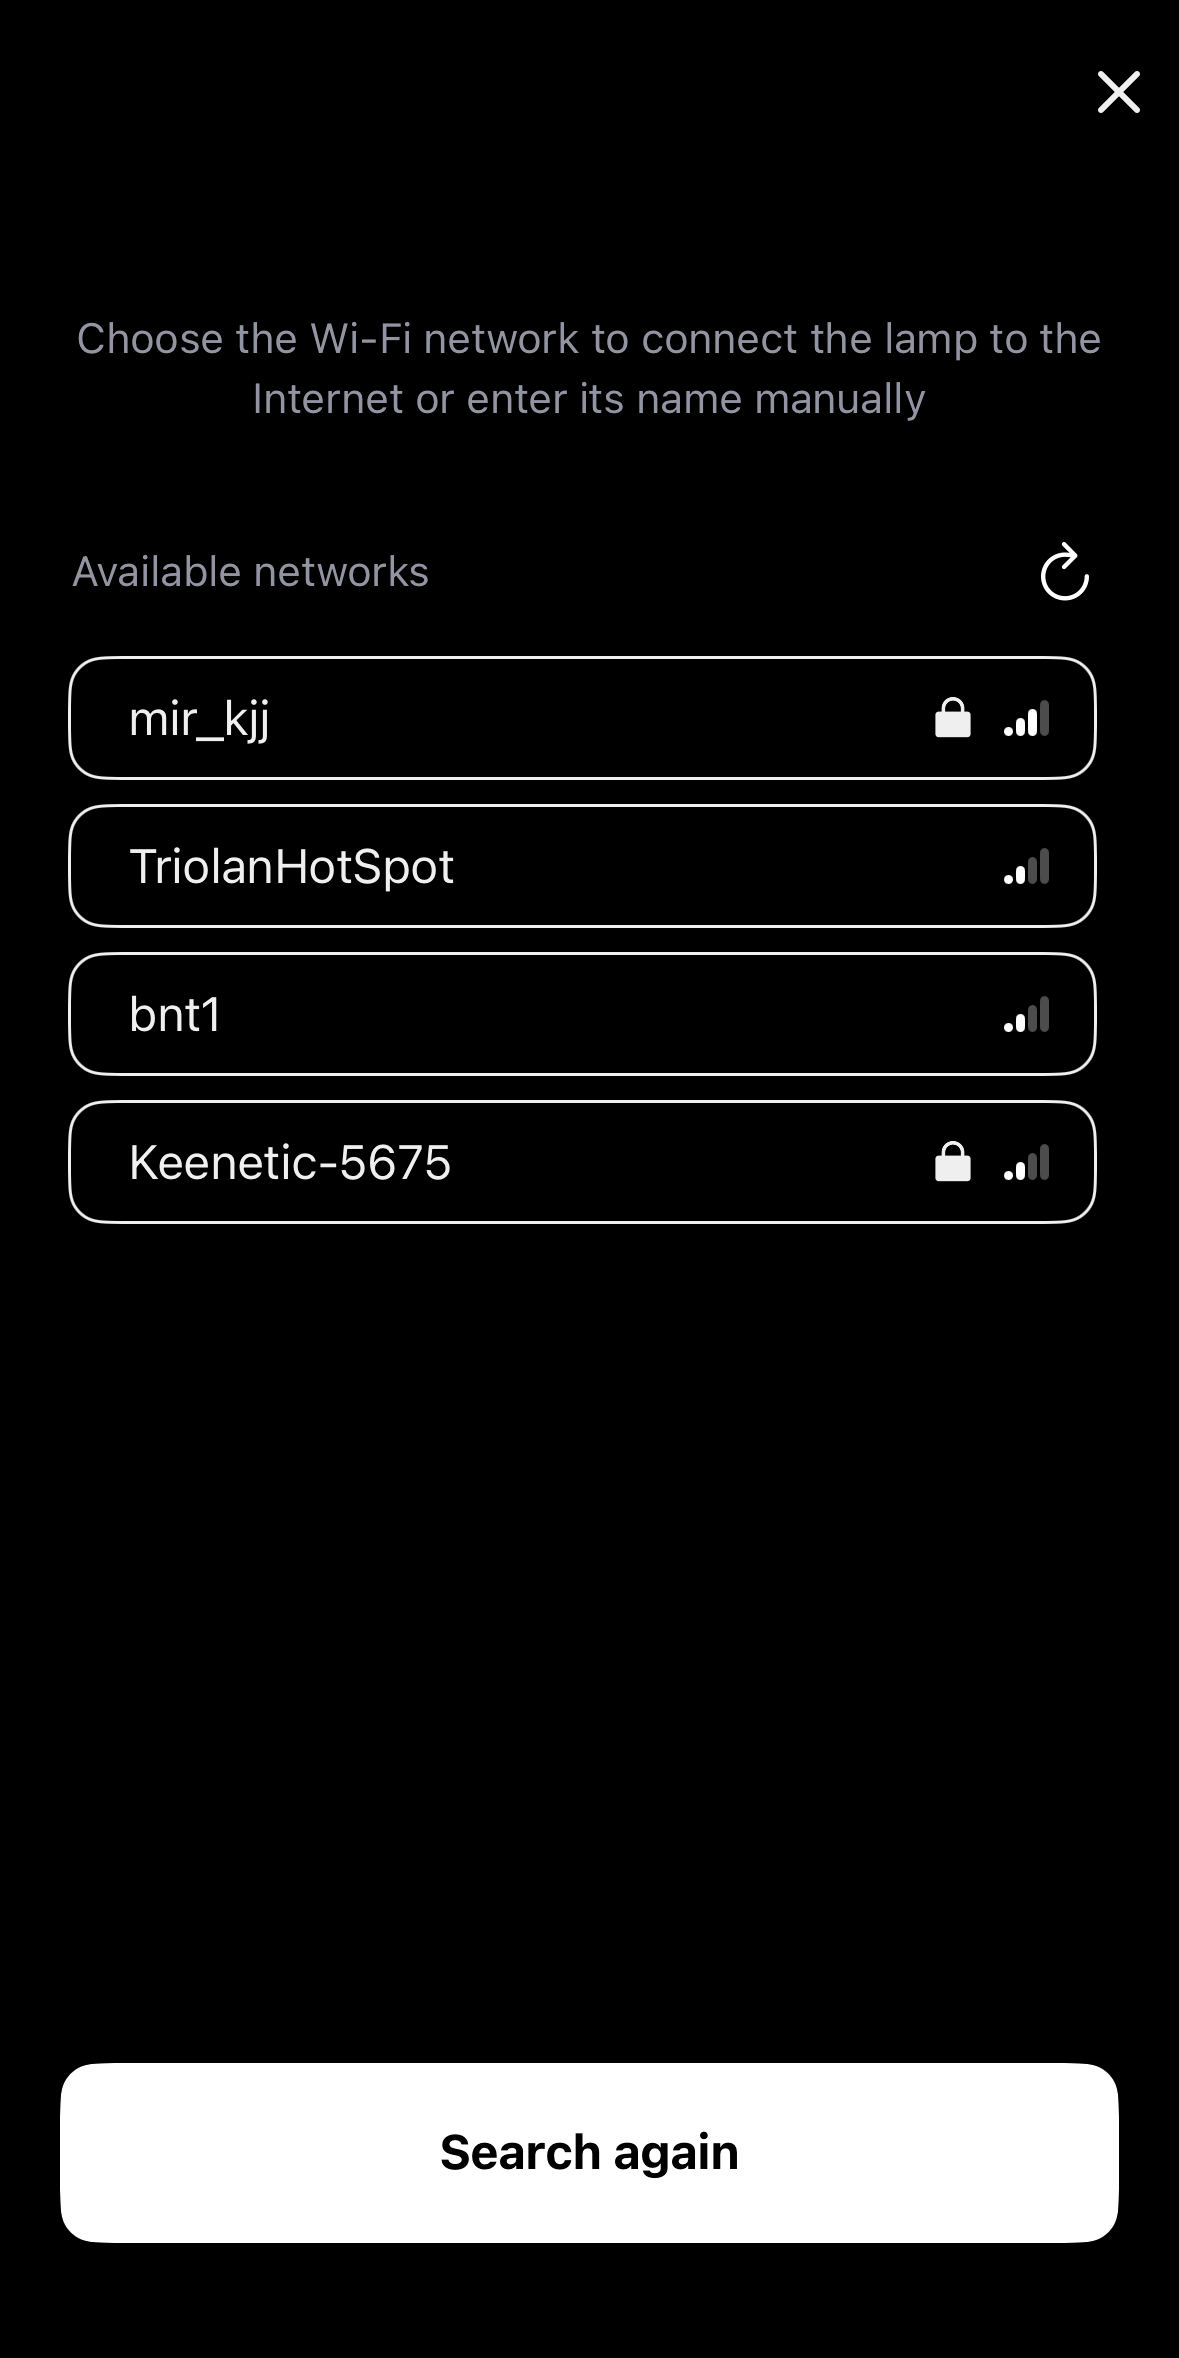
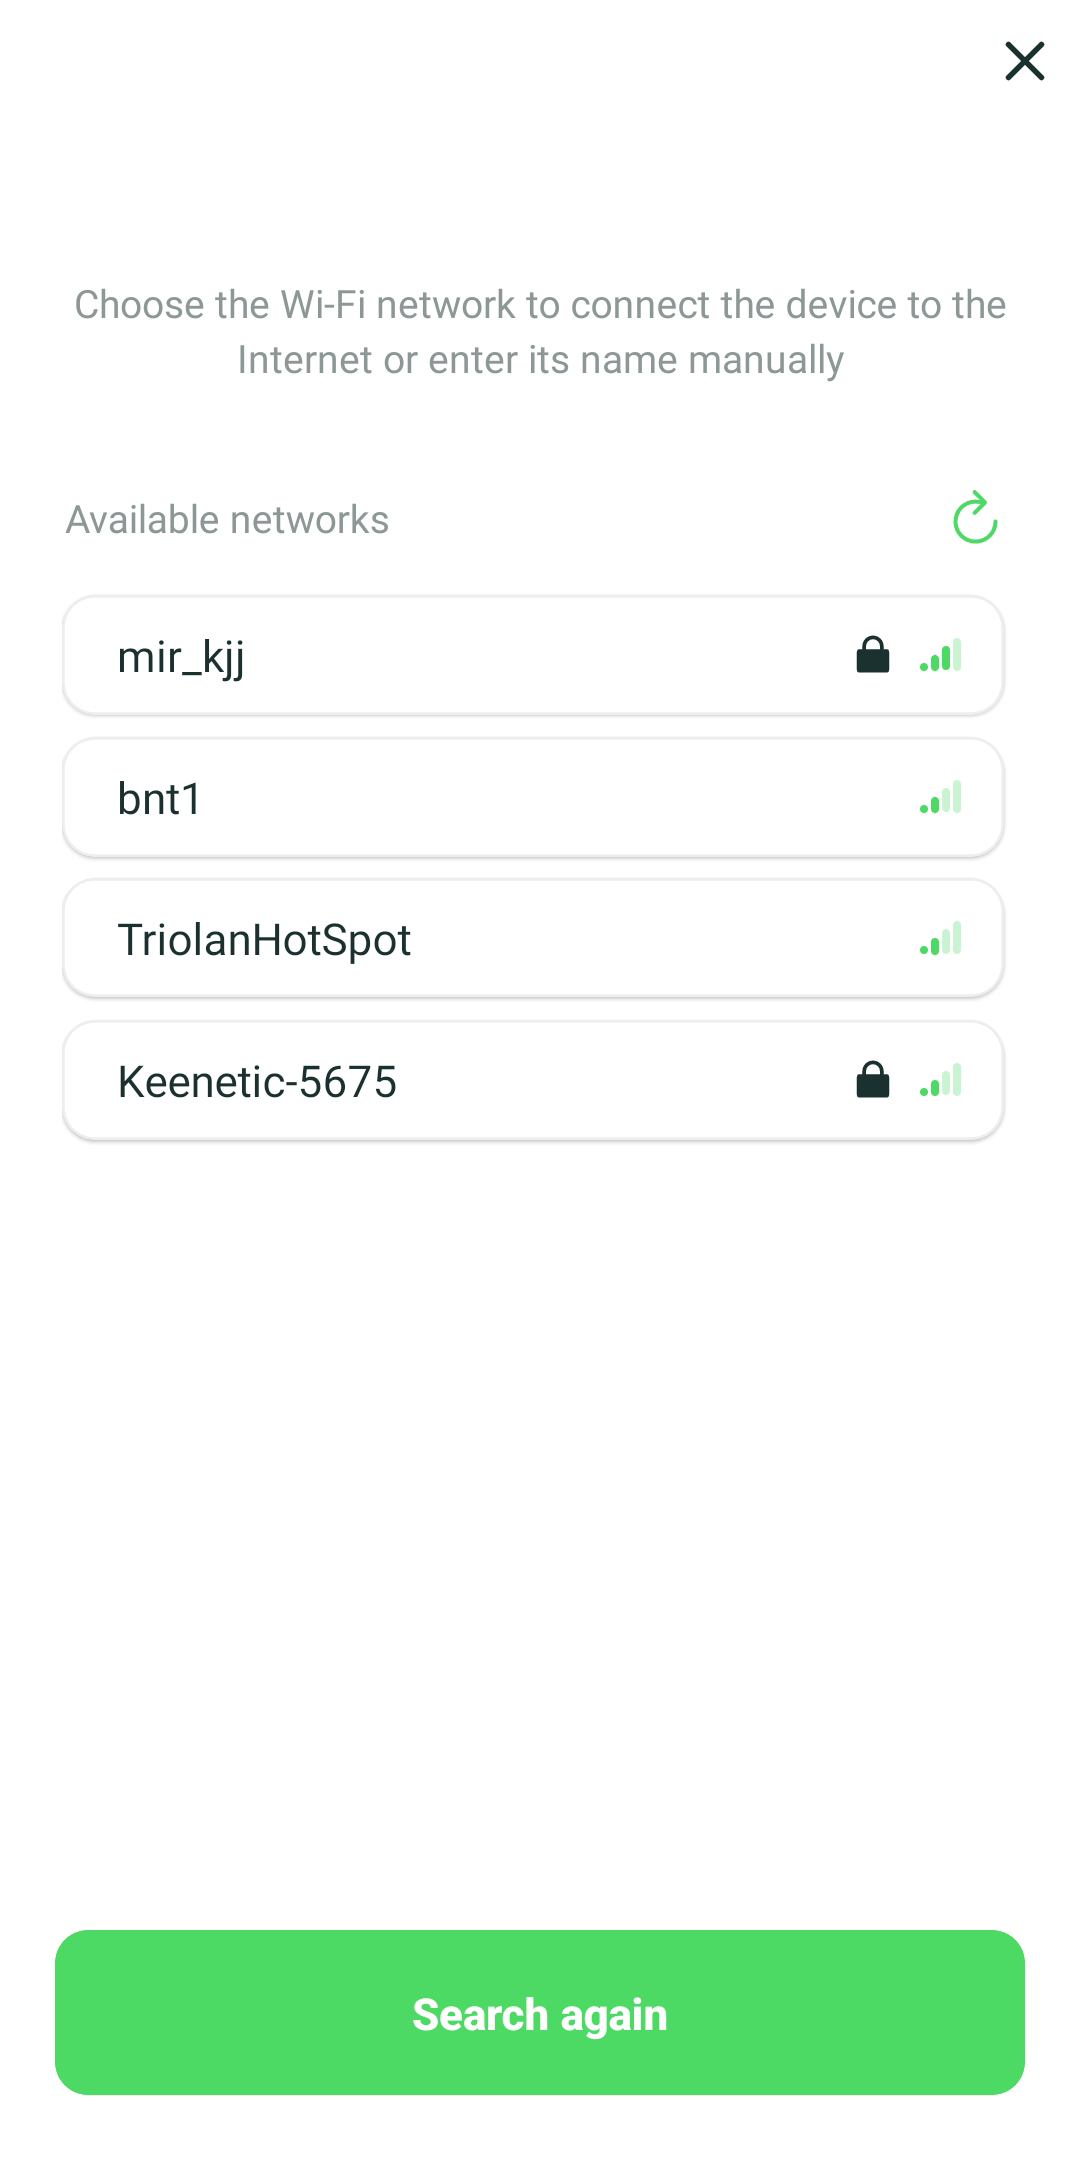
However, compatibility issues can arise. For example, while modern smartphones support both 2.4 GHz and 5 GHz networks, IoT devices with controllers like ESP32 often support only the 2.4 GHz band.
To avoid mismatches, we don’t rely on the smartphone’s network data. Instead, the device itself scans for networks and sends a list of compatible options to the app. This ensures the user sees only networks that the device can connect to.
Additionally, the device provides the app with signal strength details for each network, measured directly by the device. This allows the user to assess signal quality and reposition the device if necessary to improve connectivity.
In some apps, we highlight the network the smartphone was recently connected to, helping users quickly identify their home network. This small enhancement speeds up the setup process.
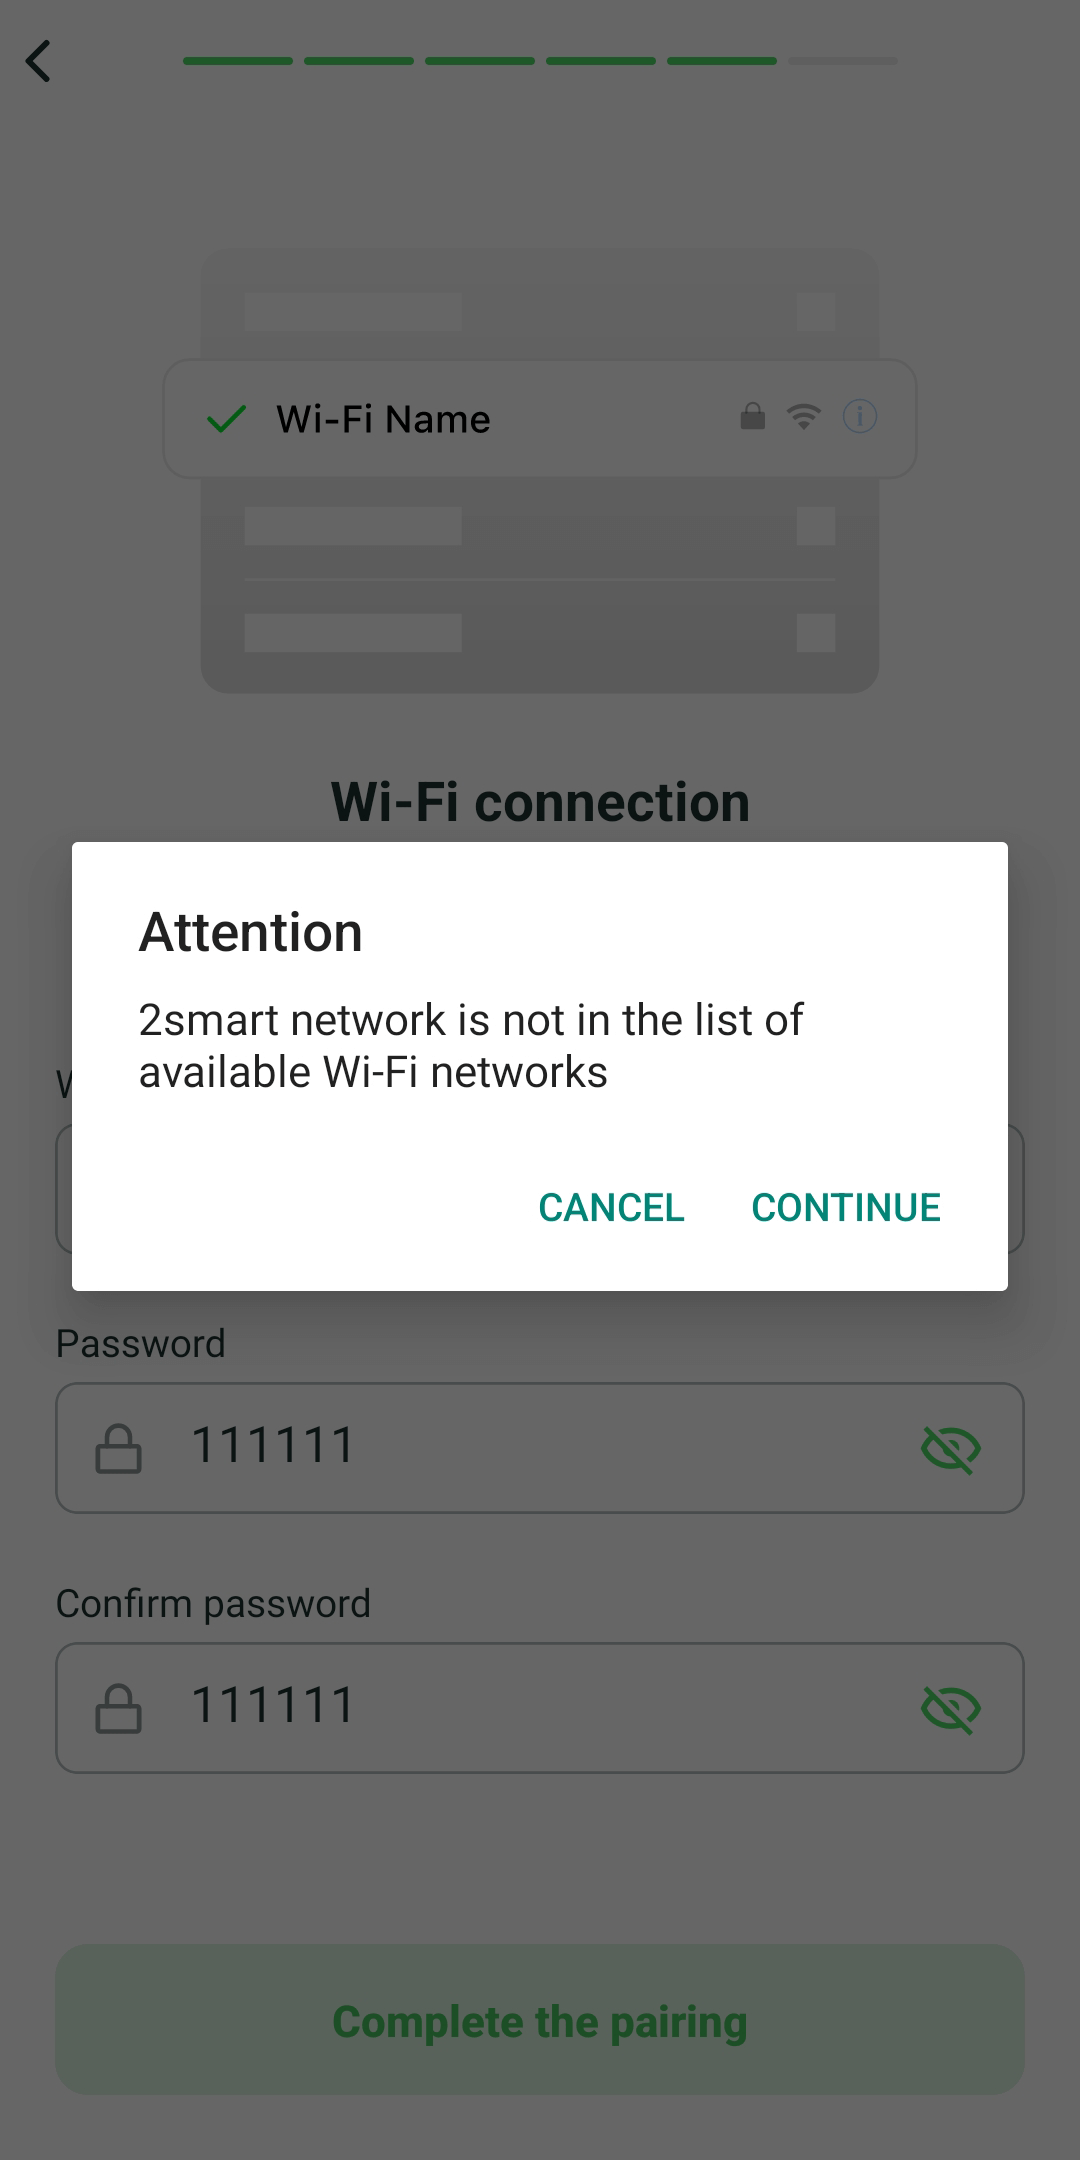
Once the list is displayed, users select a network, and its name is automatically populated in the input field. However, users can edit this field if needed. If the entered name doesn’t match any visible network, the app alerts the user with a modal window suggesting corrections. Users can still choose “Yes, continue” if they are confident they are connecting to a hidden network with the correct name and password.

This approach reduces potential errors during setup and ensures a smooth connection process, offering users a reliable and frustration-free experience.
Password Input
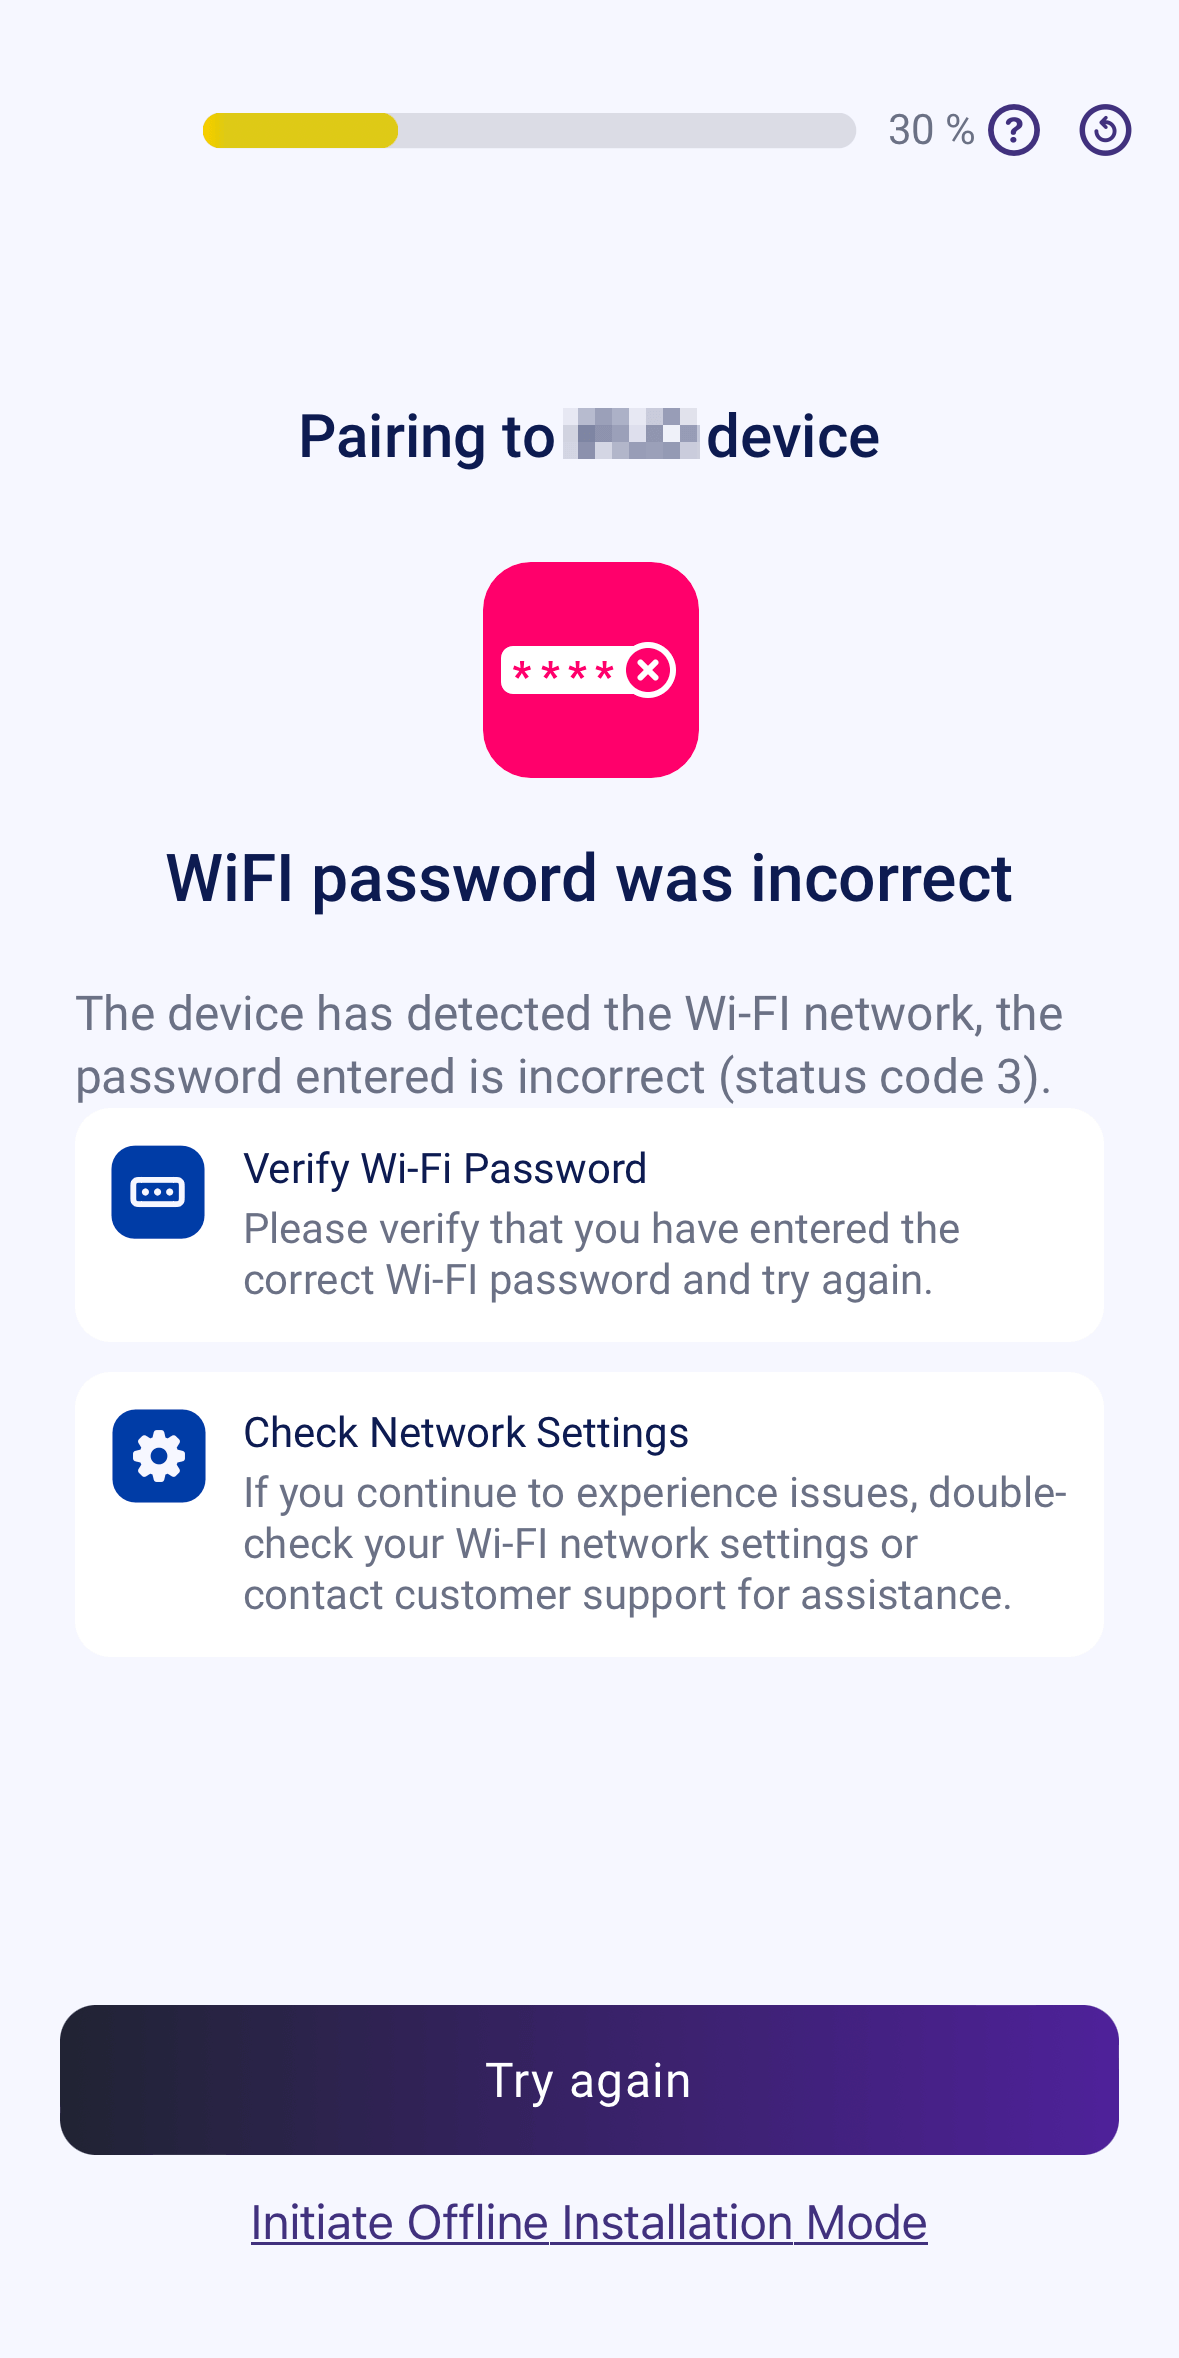
After selecting the Wi-Fi network, the user is prompted to enter the password, sometimes with an additional confirmation field to minimize input errors like typos. This step is critical, as entering the wrong Wi-Fi password is the most common mistake users make during pairing.
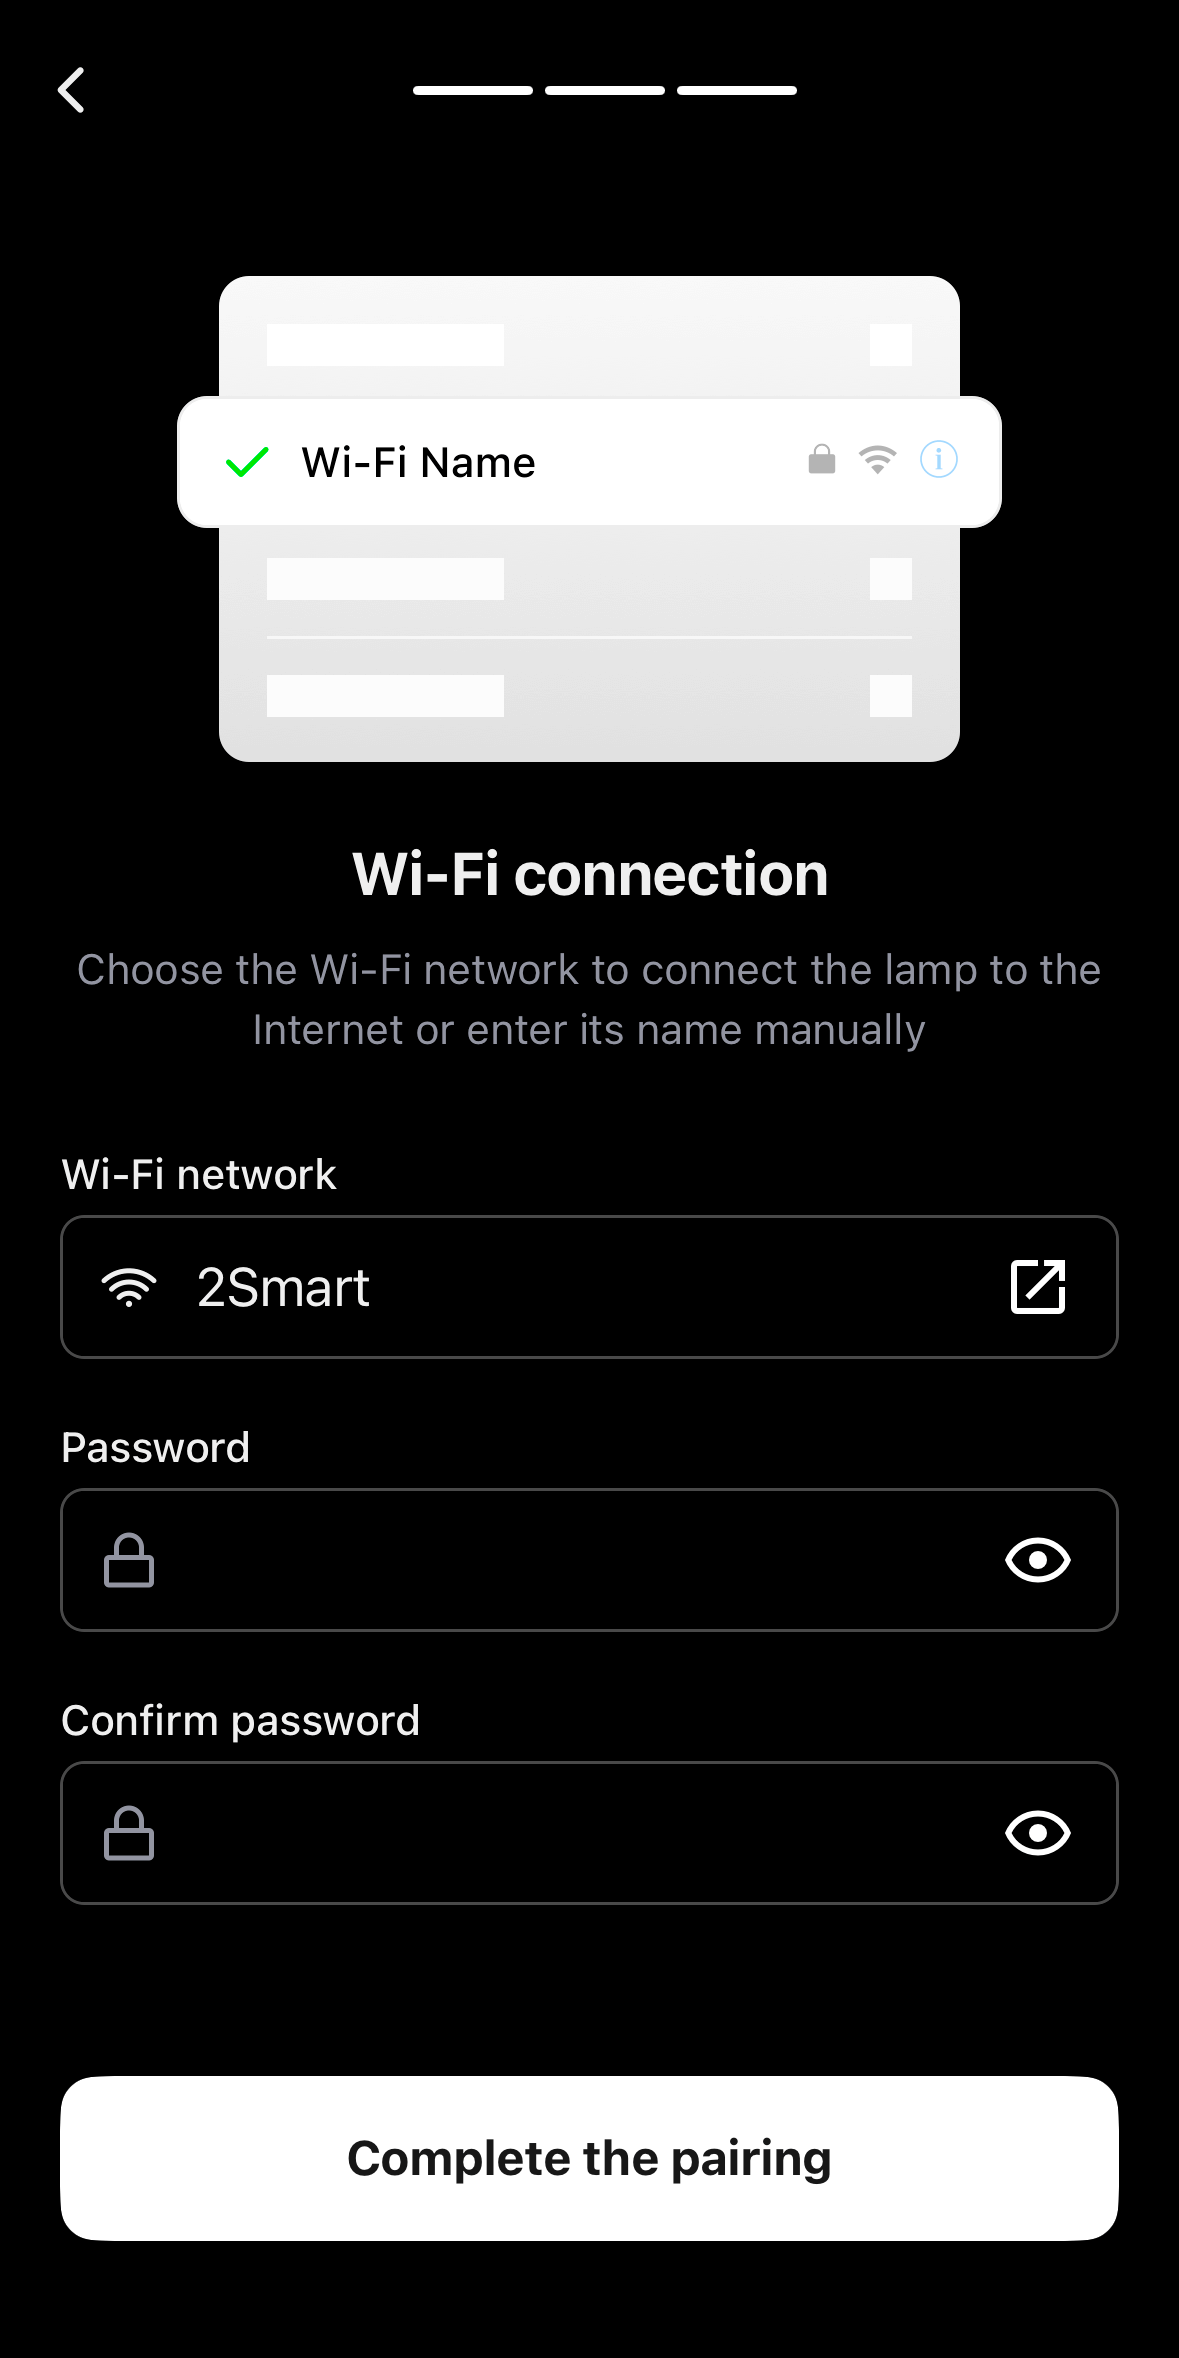
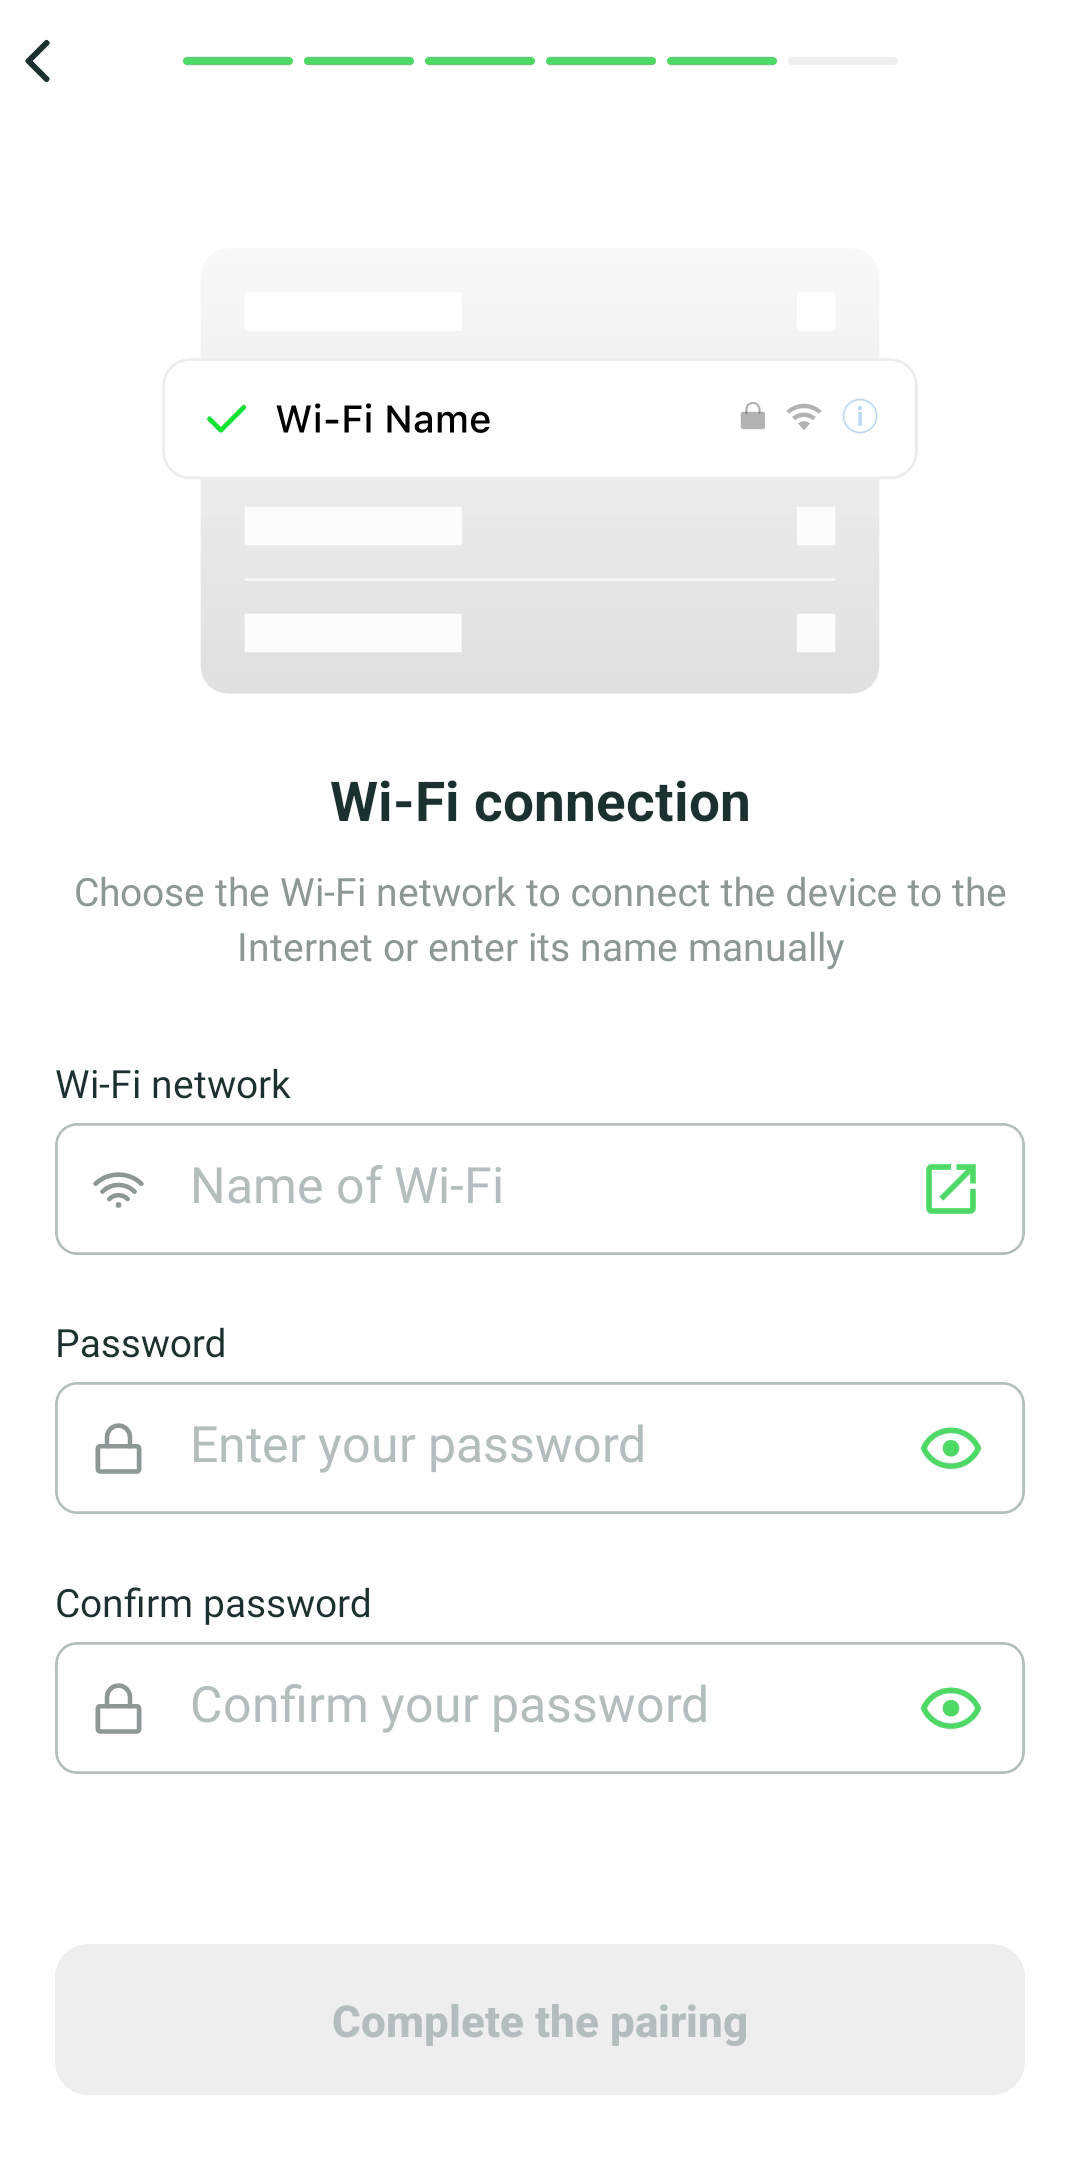
To enhance accuracy, the mobile app displays the entered password in a modal window on the next step, allowing users to review and verify it before proceeding.

If the password is still incorrect, the app provides a detailed error window explaining the issue. The error message clearly states that the password is invalid and suggests specific actions to resolve the problem, such as rechecking the password or verifying network settings.
This process not only reduces the likelihood of errors but also ensures users have clear guidance to quickly address and resolve any issues.
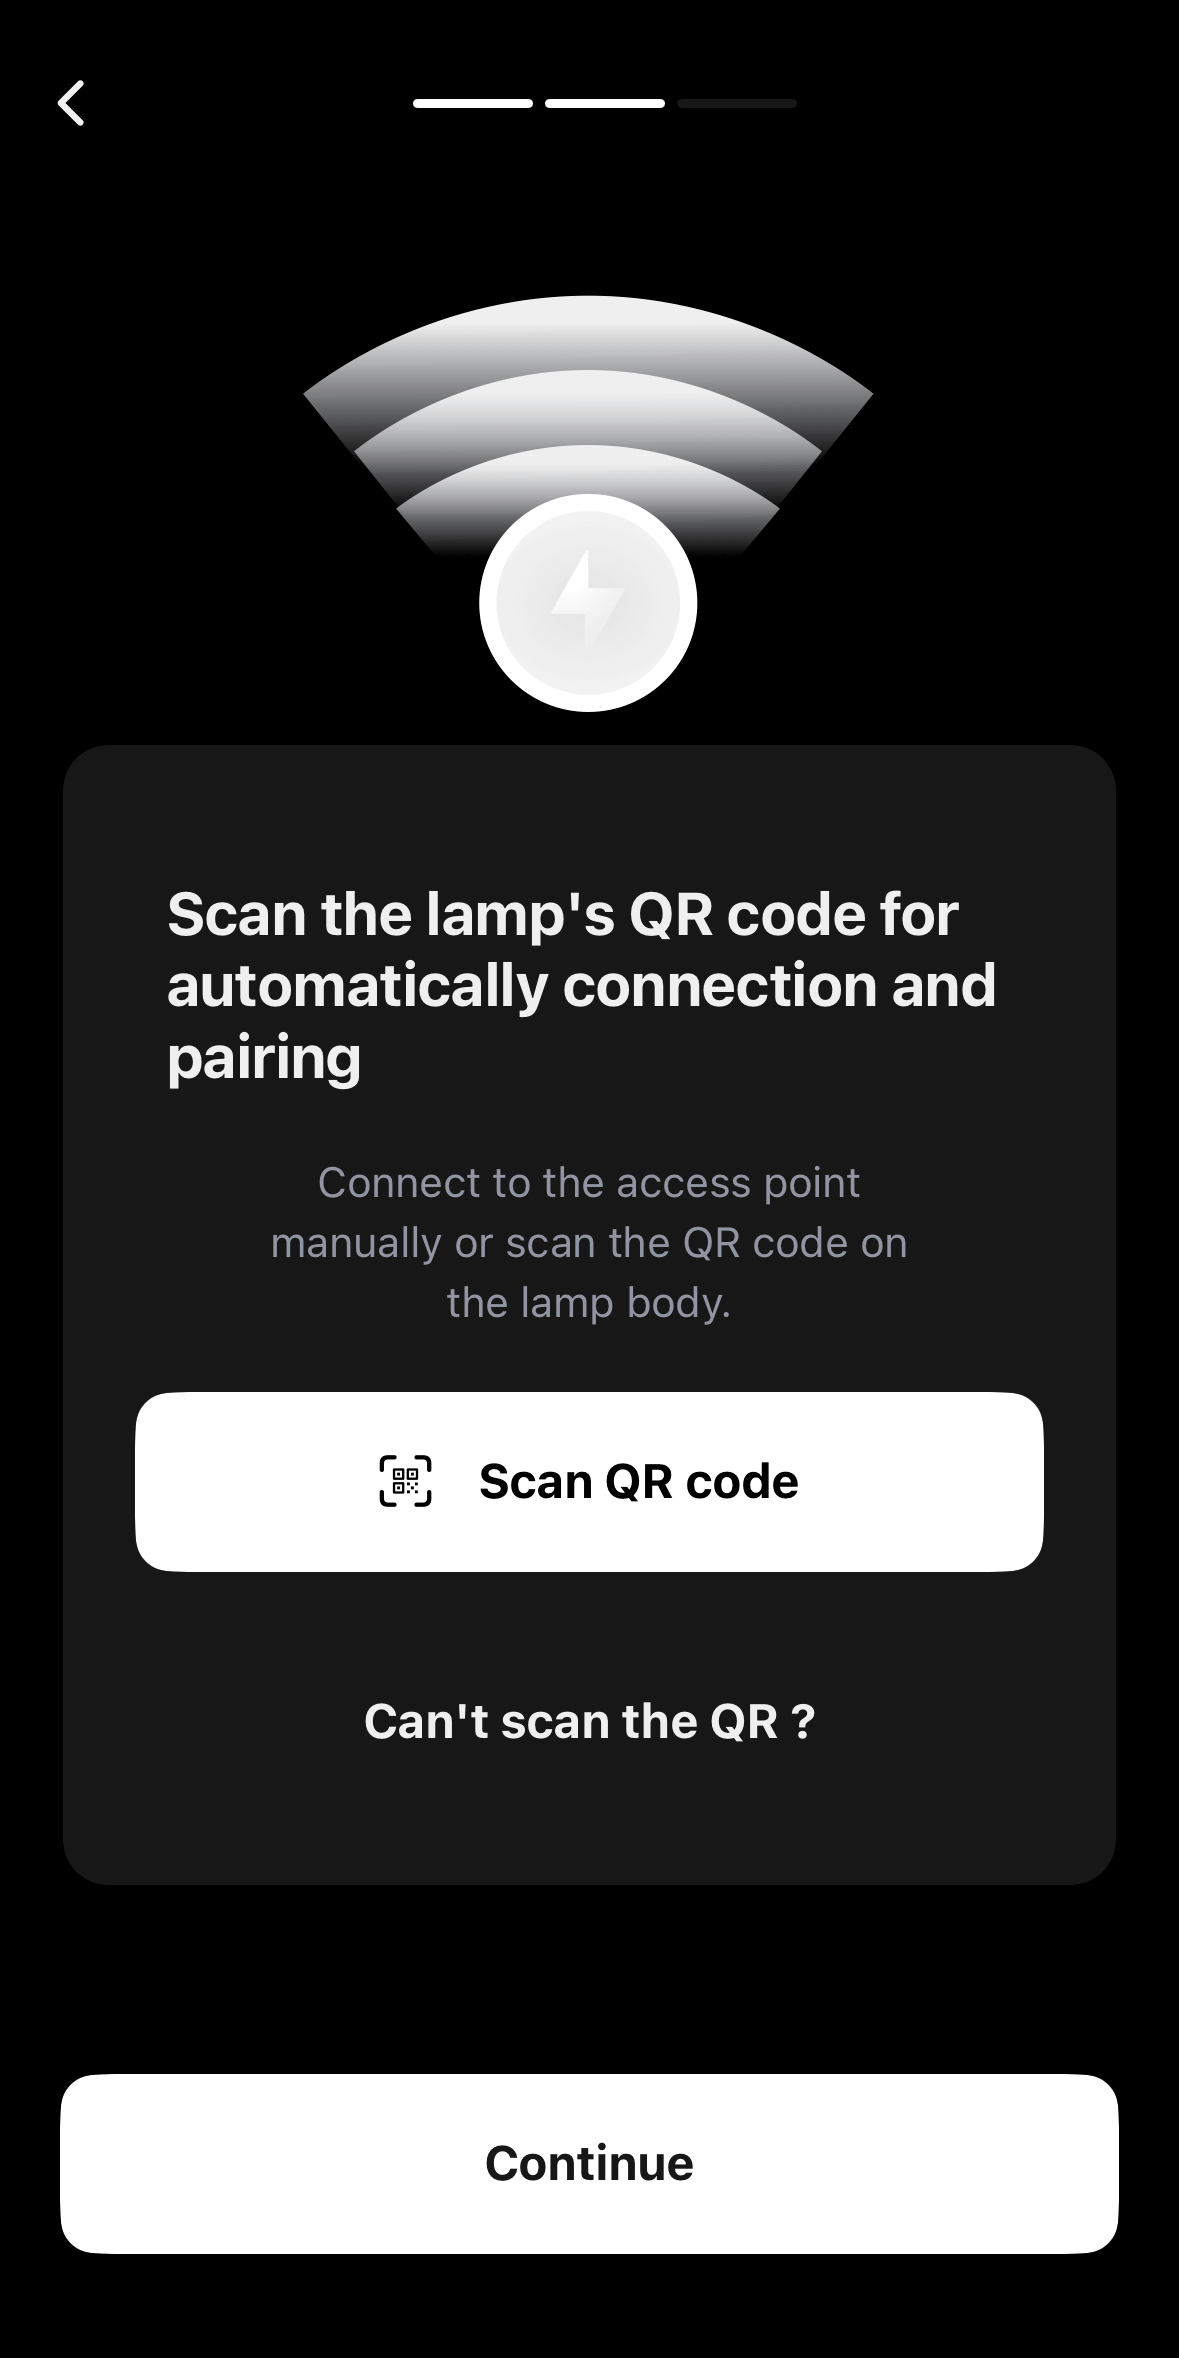
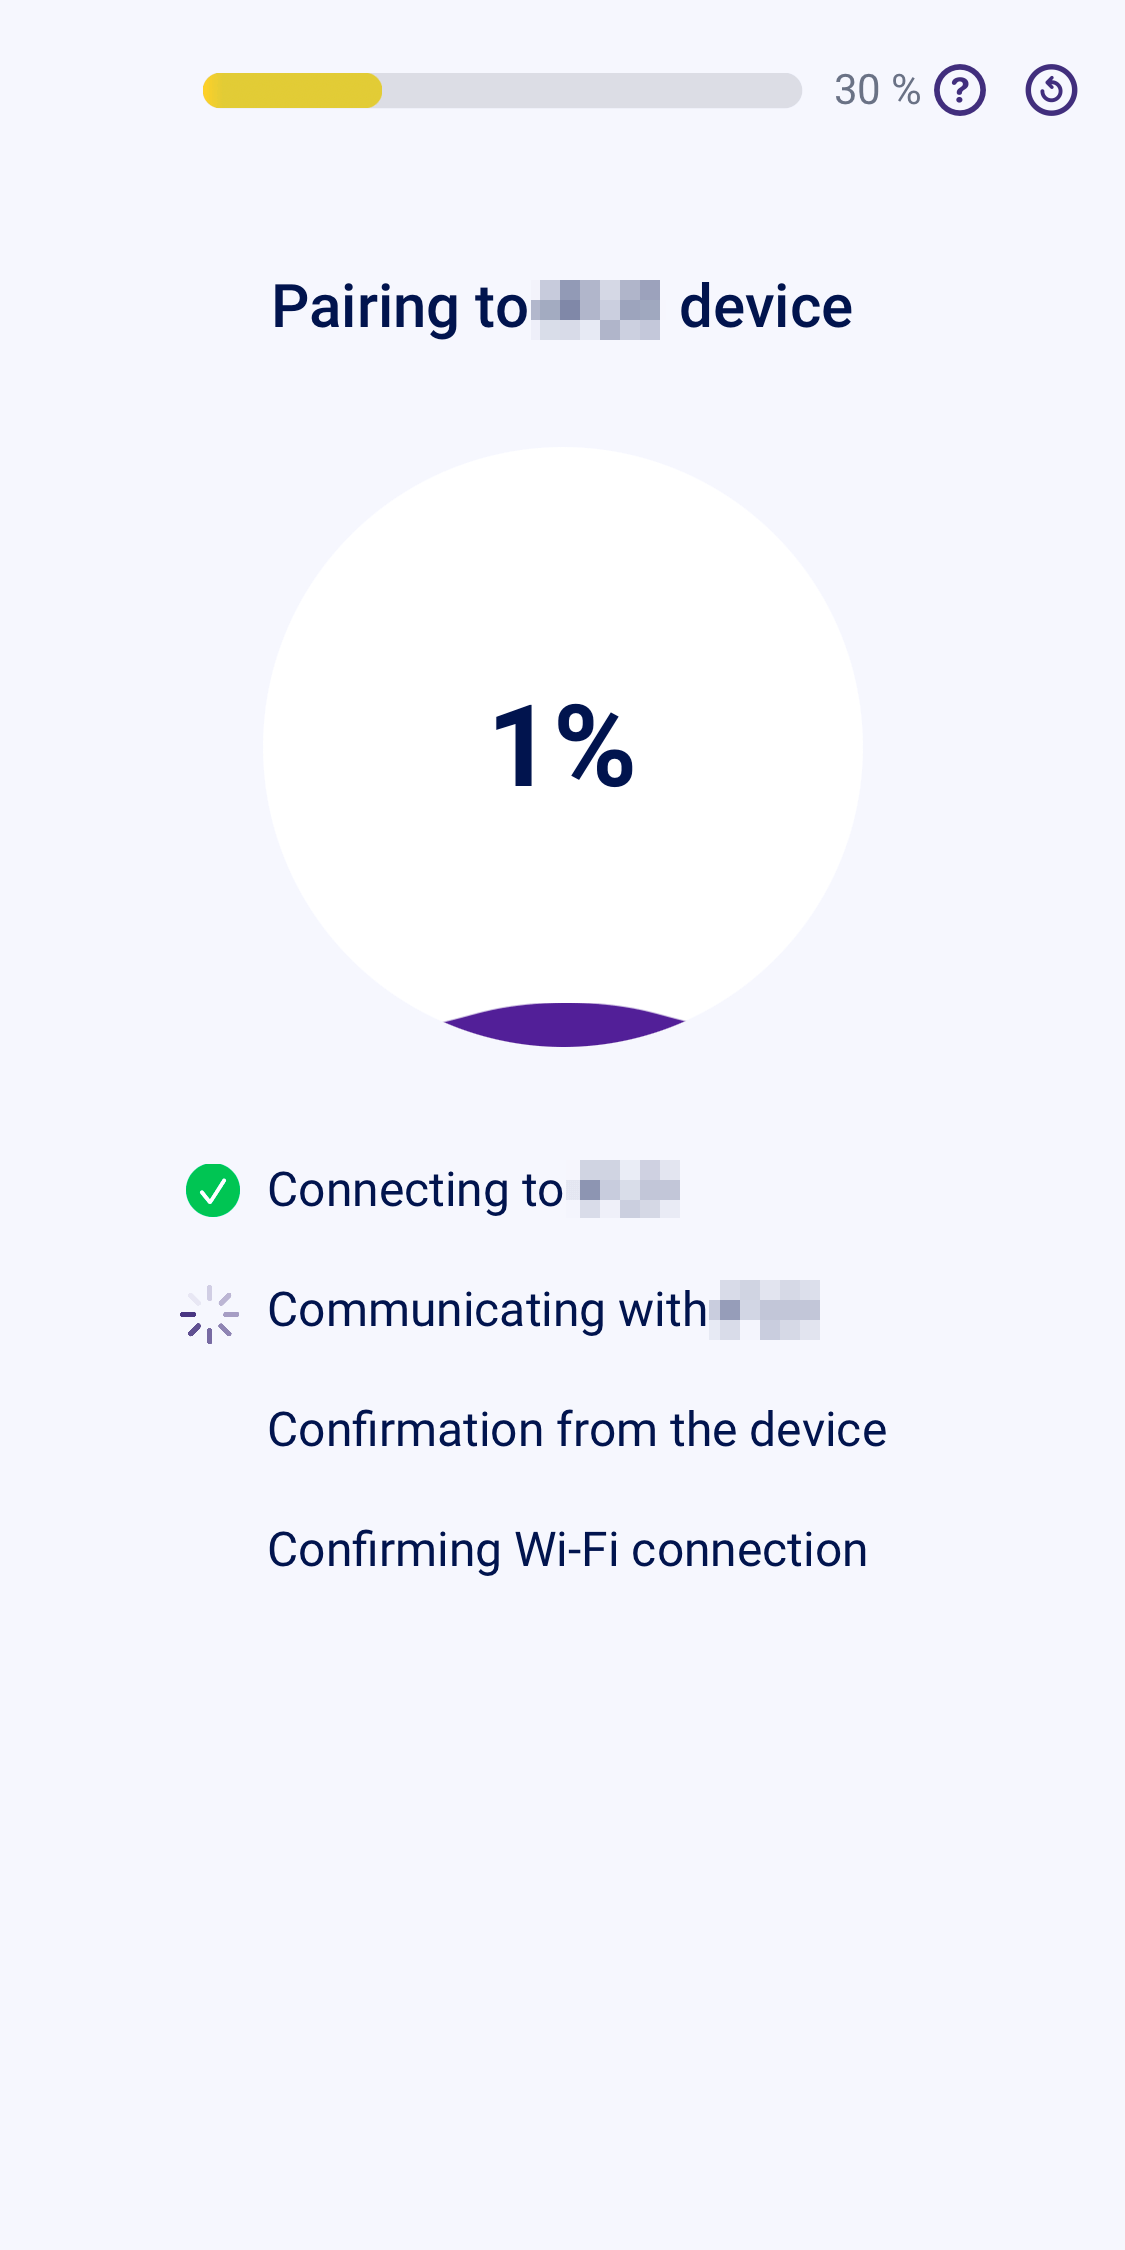
Pairing Progress Updates and Visual Feedback
Once the user provides Wi-Fi credentials, the pairing process runs in the background without their input. However, it’s crucial to keep the user informed. The mobile app consistently displays the current status of the process, showing each step clearly. A progress bar on the app’s screen fills gradually, visually marking the completion of each stage. This approach prevents users from feeling the process has stalled, especially since background tasks can take anywhere from a few seconds to a couple of minutes.

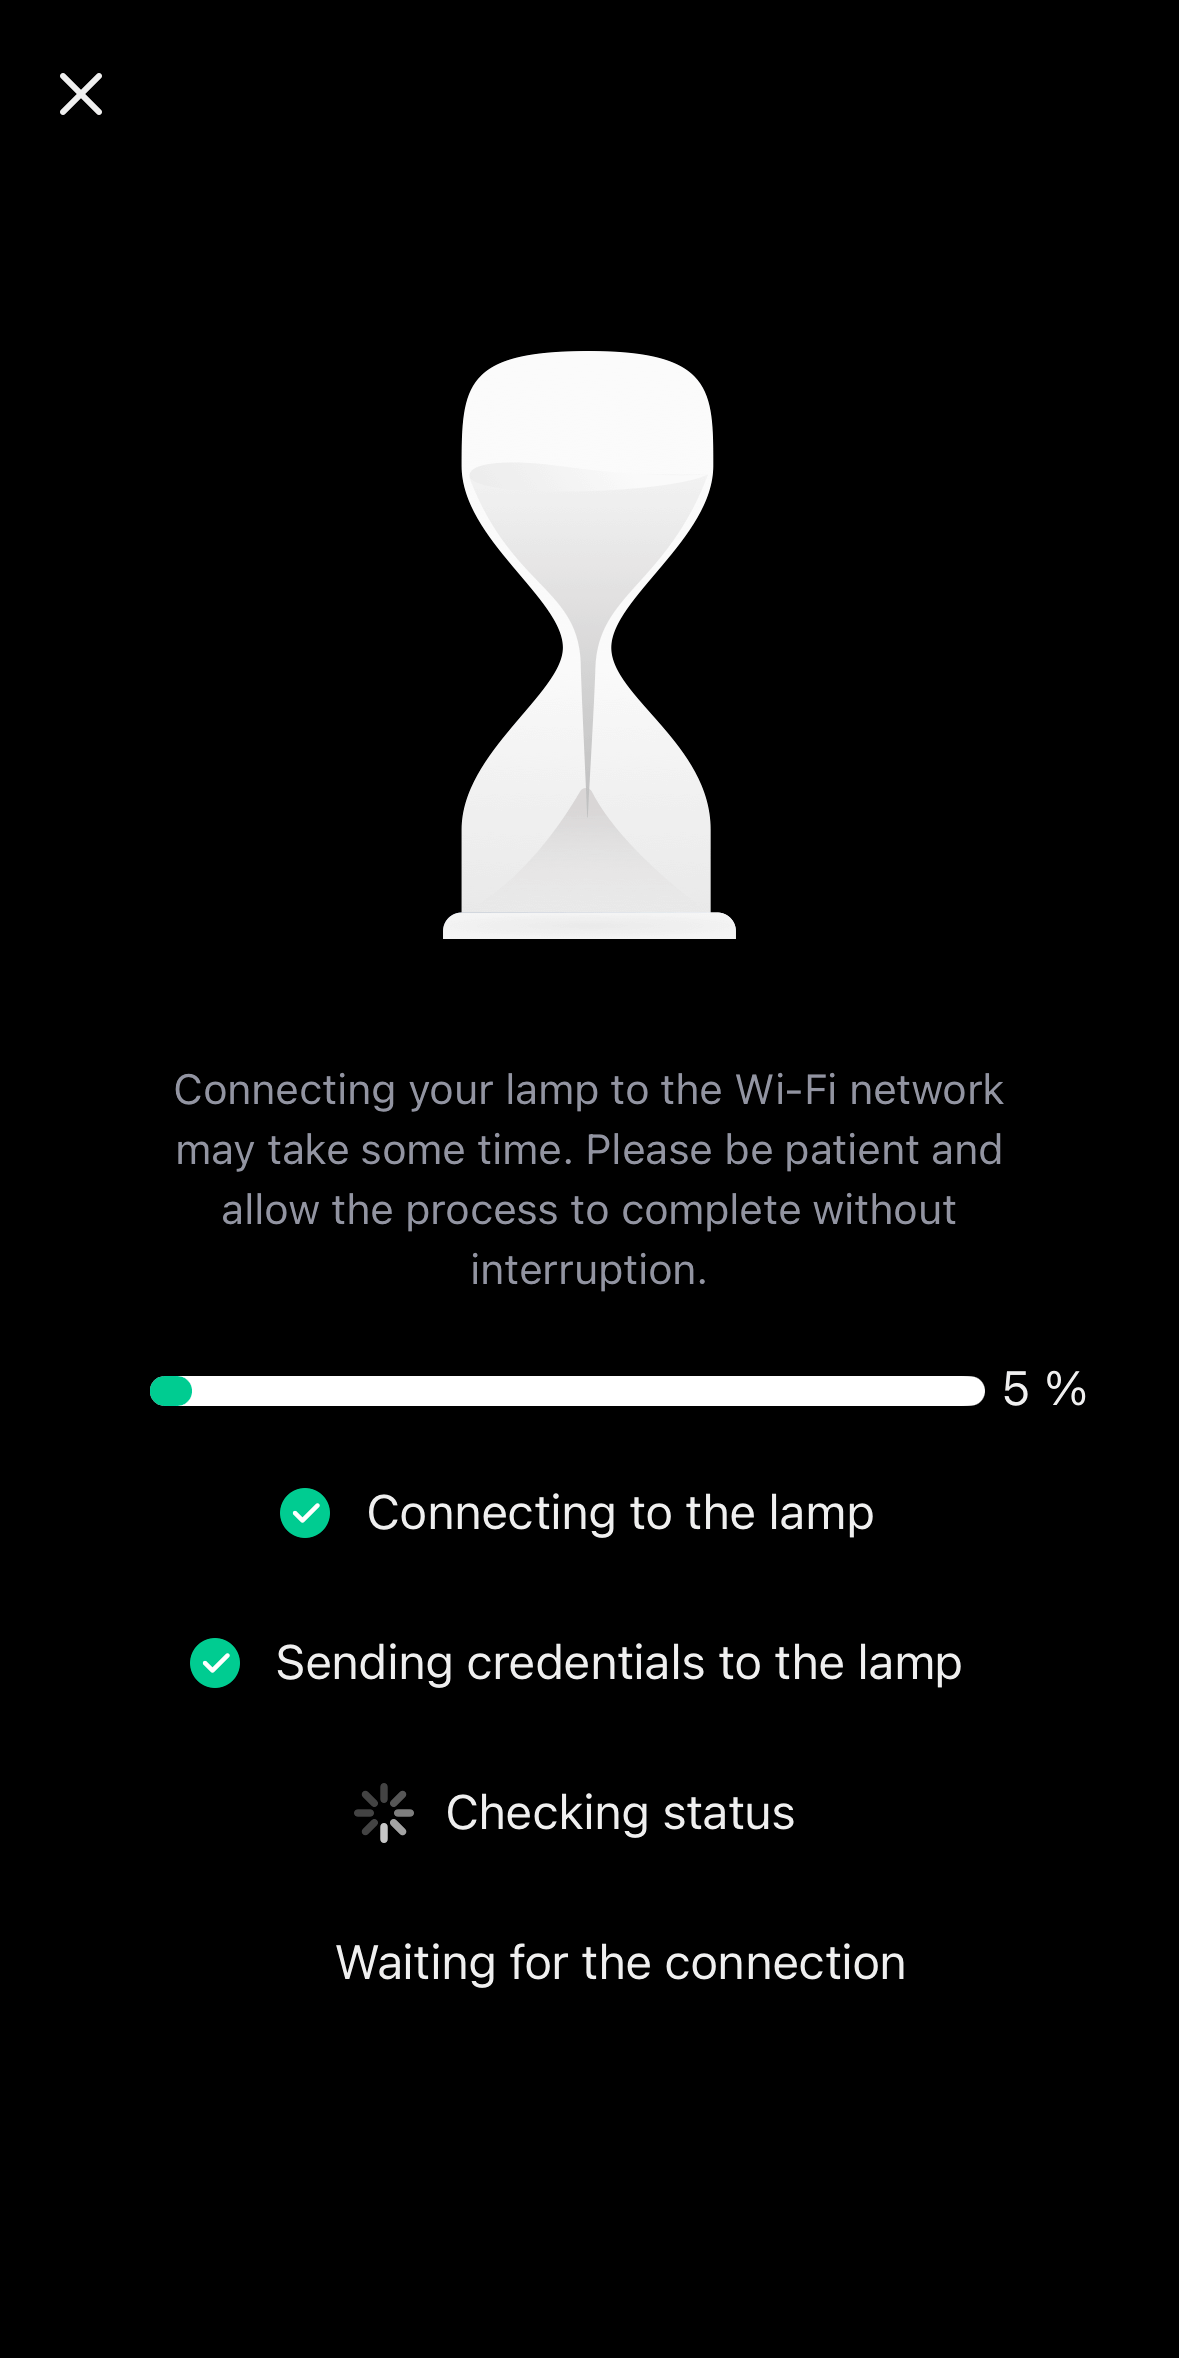
For devices capable of providing feedback, visual cues like light indicators enhance the experience. For instance, smart devices such as Intellect lamps use color or brightness changes to signify the pairing stage.
During access point mode, the lamp displays one type of light. When transitioning to network connection, the light changes again. Throughout pairing, the lamp progressively illuminates in sync with the process, mirroring the app’s progress bar.
This dual-layered feedback — on the app and the device itself — creates a more intuitive, multi-sensory connection between the user and the device, ensuring clarity and reducing confusion.
Preventing Issues with Outdated Firmware
Ensuring firmware compatibility is critical for successful device pairing. At 2Smart, we focus on preventing scenarios where outdated firmware renders a device unusable.
A common issue arises when a device operates on an old firmware version incompatible with the current app version. Without a firmware update, the device may fail to connect and become effectively useless. To address this, we’ve implemented firmware version checks directly into the pairing process.
When a connection attempt is made, the app automatically verifies the device’s firmware version. If a newer version is available, the firmware is updated before proceeding. This ensures the device operates correctly and grants access to all the latest app features.
This approach eliminates the need for users to perform manual updates through admin panels or other complex methods. The result is a ready-to-use device with up-to-date firmware, making the pairing process seamless and user-friendly.
Simple Wi-Fi Settings Update via the App
When users change their router or relocate a smart device to a new network, re-pairing can be inconvenient. To address this, we’ve provided a seamless way to update Wi-Fi credentials without the need for full re-pairing.
Through the app’s settings, users can easily input new network details while preserving all other device configurations and usage data. This ensures a smooth transition to the new network with minimal disruption.
Factory Reset Functionality
A factory reset option provides users with added flexibility. Whether transferring the device to a new owner or recovering from extensive modifications, a quick reset allows users to start fresh effortlessly, eliminating unnecessary complications.
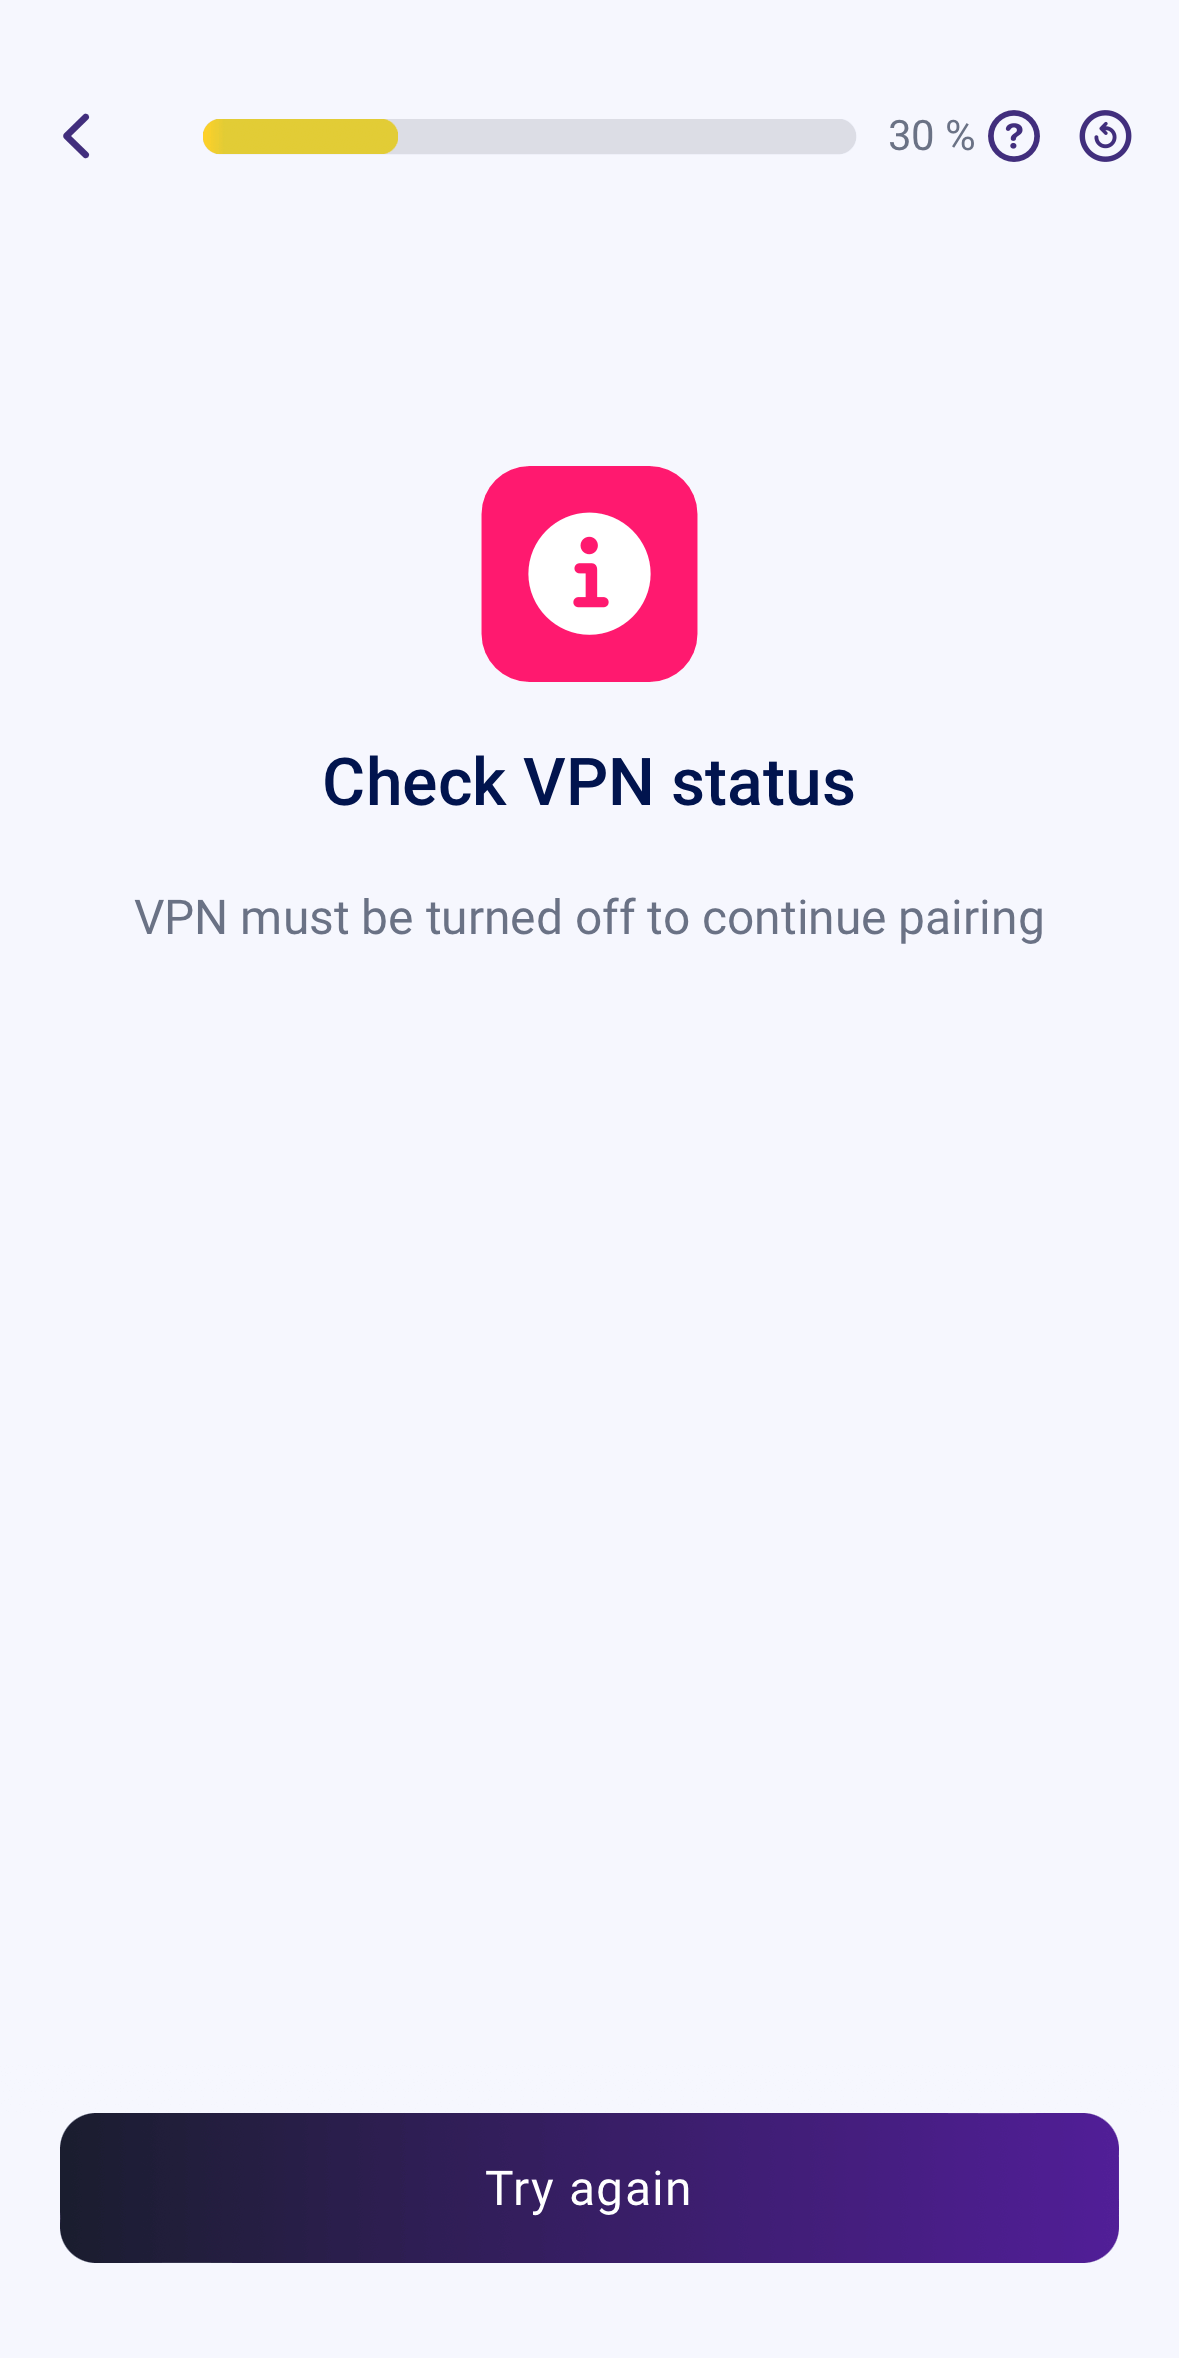
Error Handling During Pairing
The ESP32 microcontroller’s Wi-Fi module, which operates in both access point and station modes, ensures seamless communication with the mobile app throughout the pairing process. This capability enables the app to detect issues in real time and display detailed error messages explaining what went wrong.
In 2Smart applications, every potential pairing error has a pre-prepared error message window with clear explanations. This prevents user confusion caused by generic or vague error notifications. Instead, users receive precise information about the issue and recommendations for resolving it. This approach enhances the user experience by making the pairing process more predictable and less stressful.
Here are the most common pairing errors:
- Incorrect Wi-Fi credentials.
- Network out of range.
- Unsupported frequency (e.g., 5 GHz when only 2.4 GHz is supported).
- The network does not provide device access to the cloud platform.
- Issues connecting to the access point.
- Incompatible or outdated firmware versions.
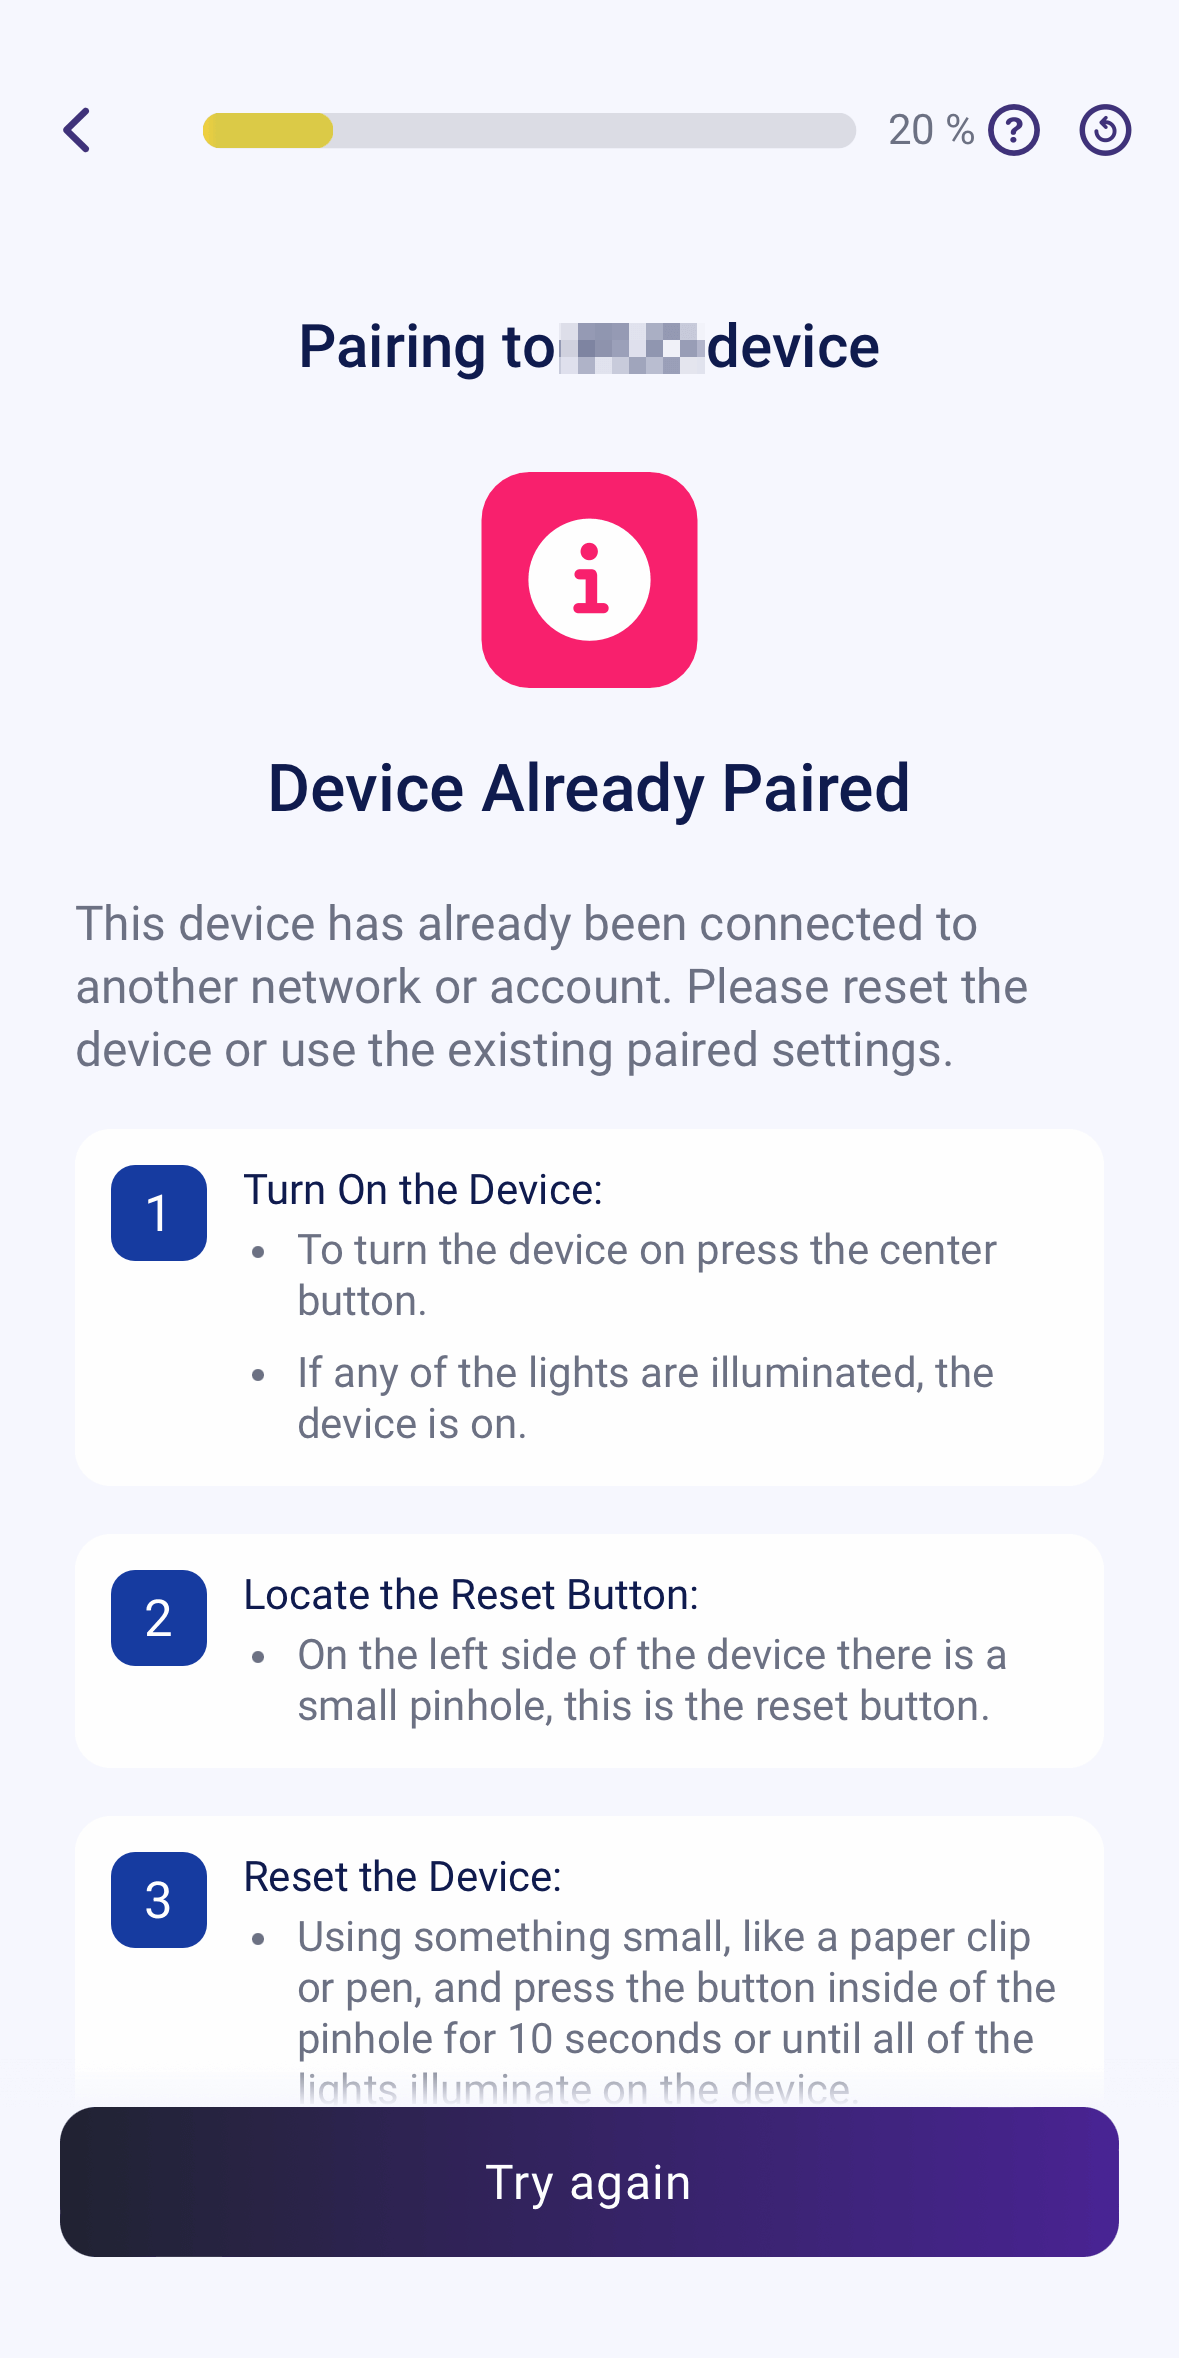
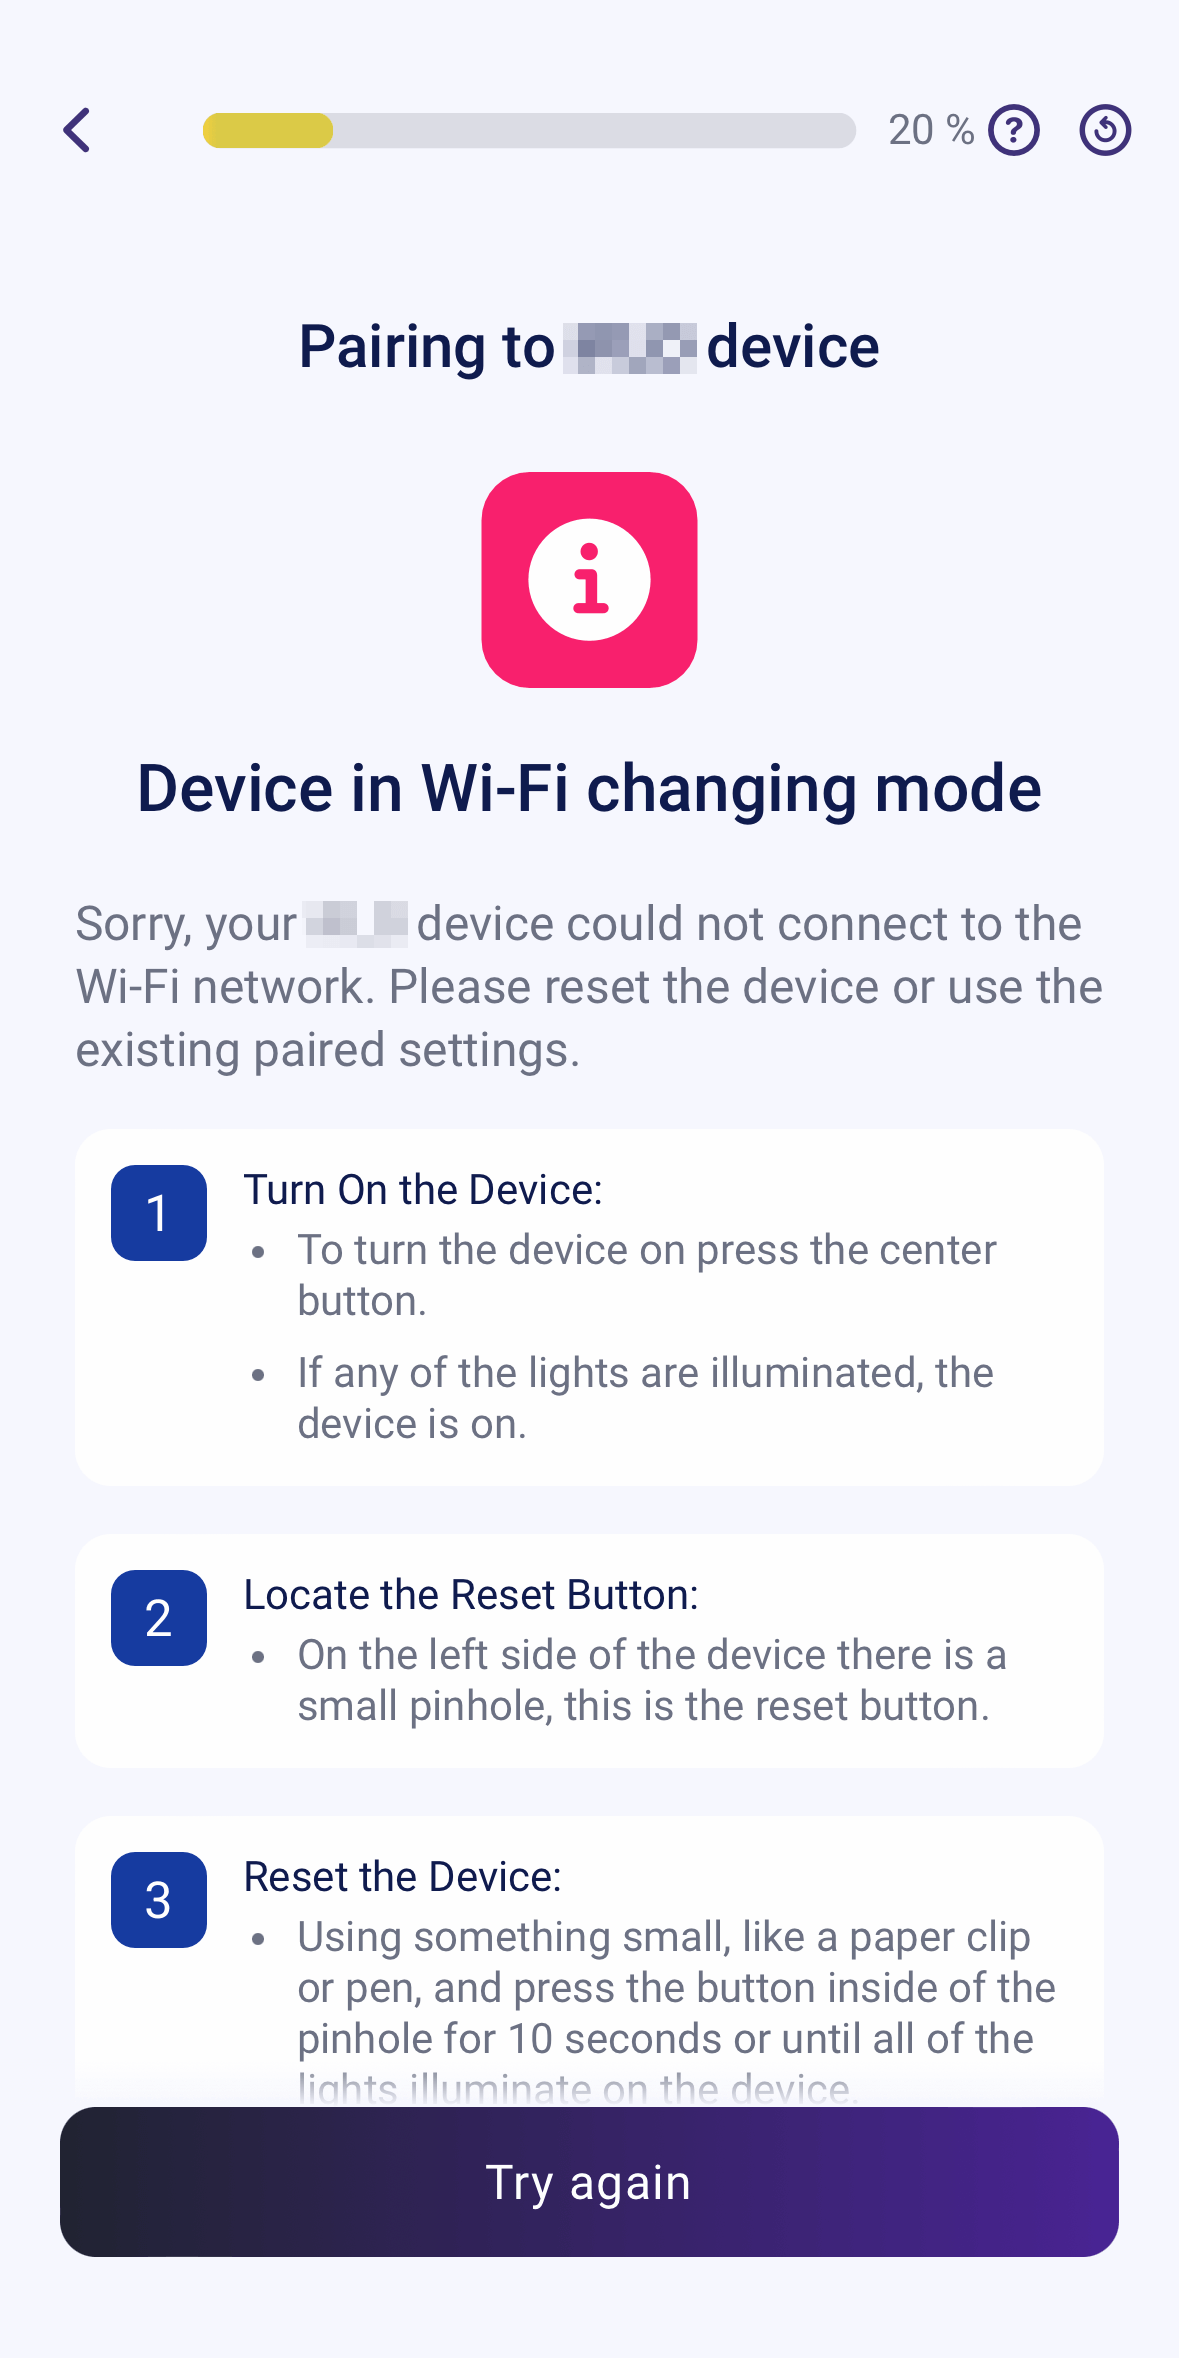
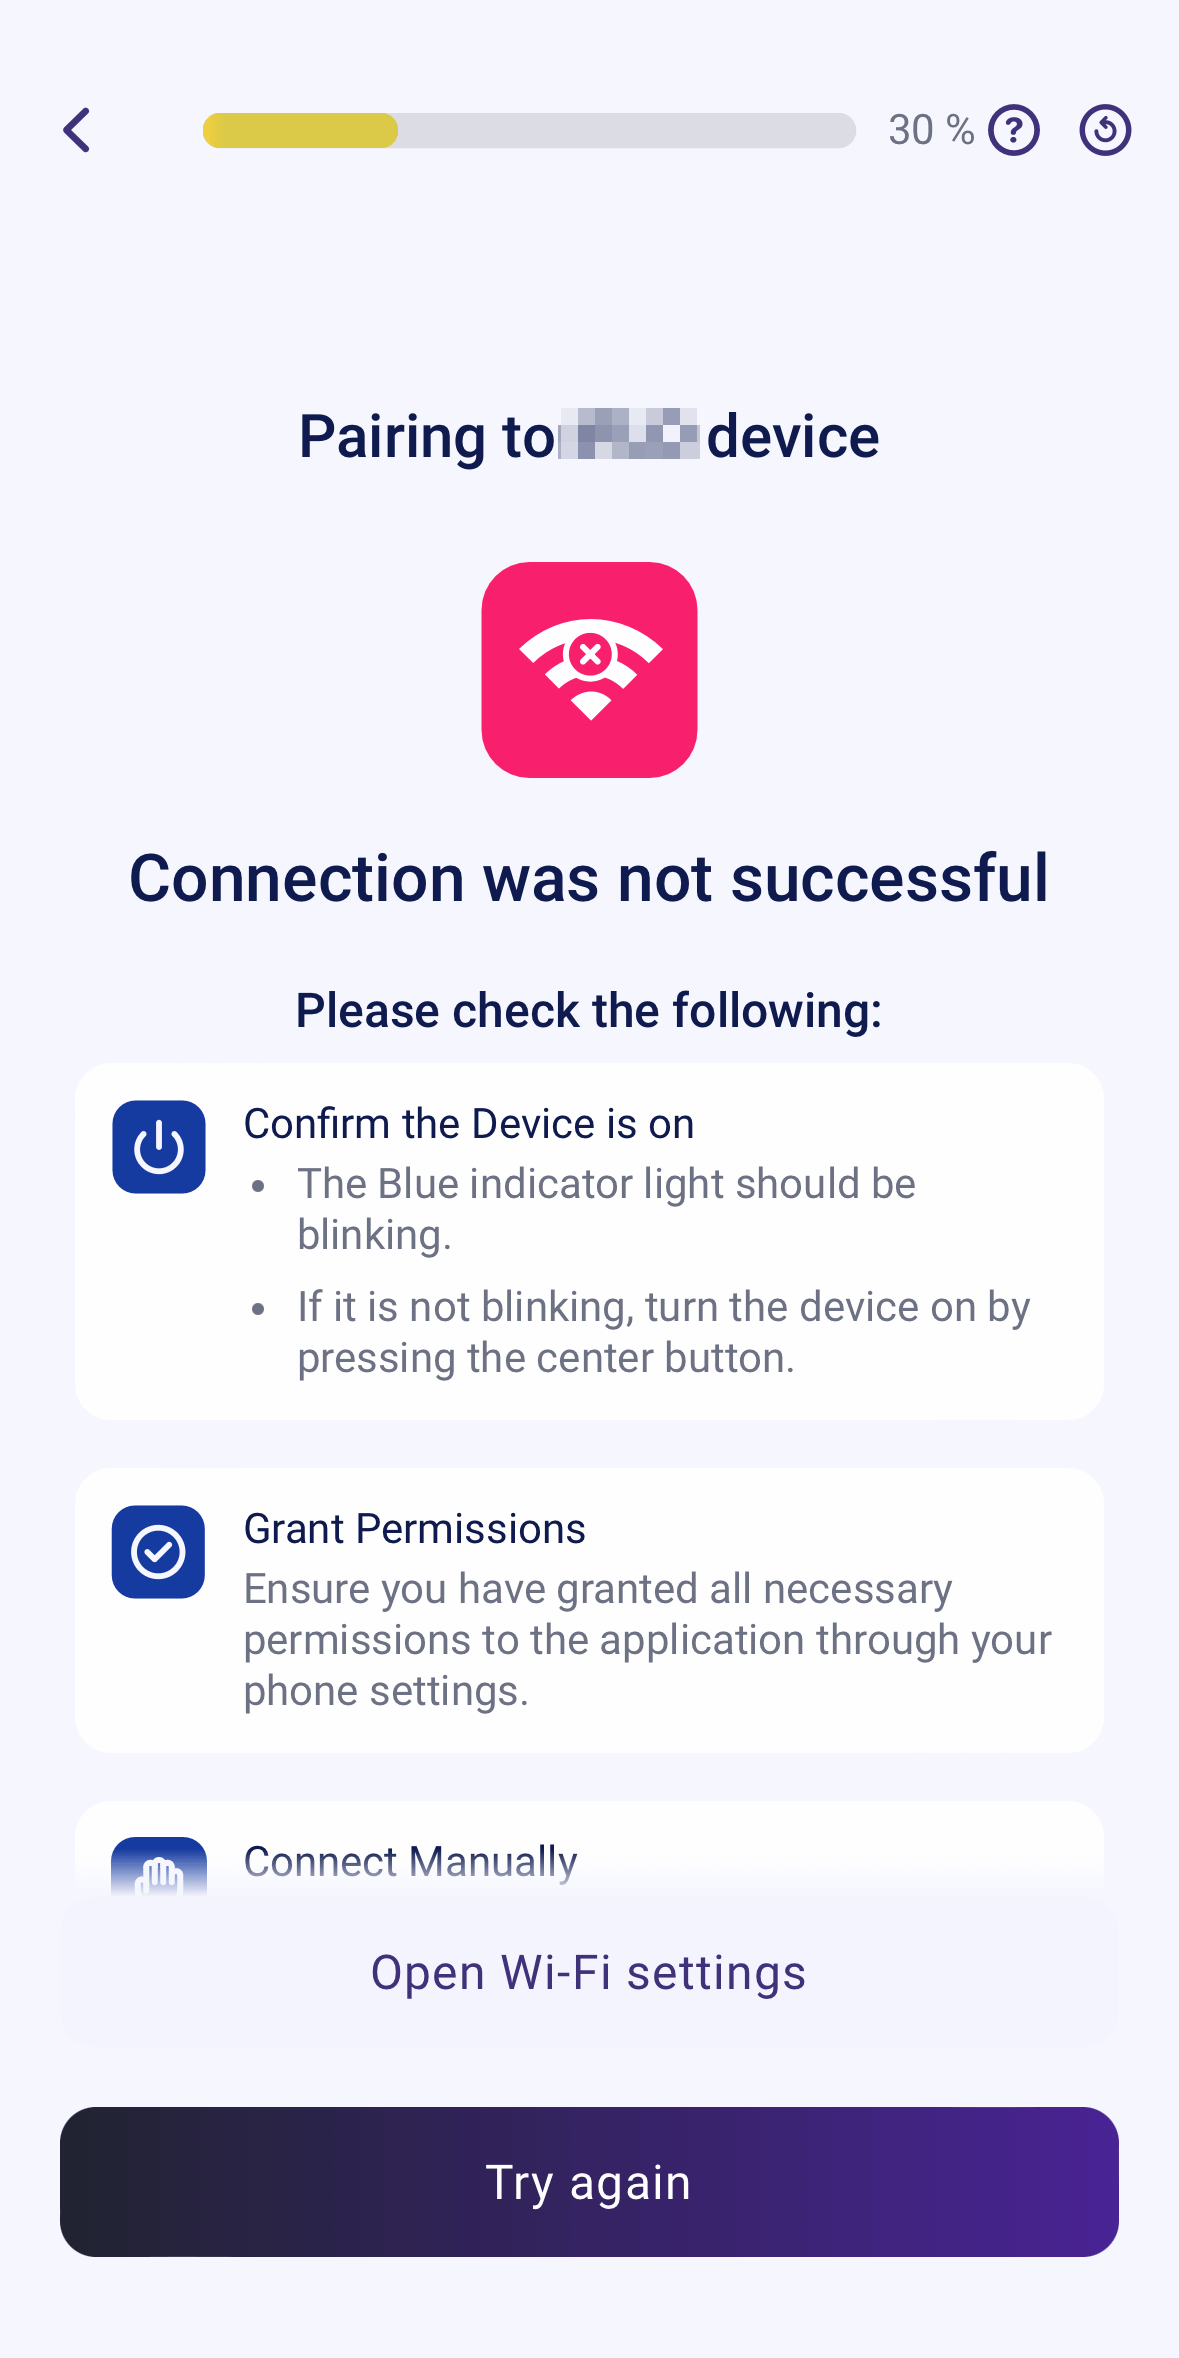

When an error is detected, the device resets to its initial state, ready for a new pairing attempt. The app retains the last selected network in the phone’s local storage, so the user only needs to re-enter the password instead of reselecting the network. This approach simplifies retries while respecting user privacy, as no data is transmitted to external resources.
Conclusion
Wi-Fi device pairing is a critical process that directly impacts user experience and the successful adoption of smart solutions. In this article, we explored key aspects of organizing the pairing process and shared 2Smart’s best practices to simplify it and minimize potential challenges.
We outlined our approach to pairing through various practical cases. The same scenario may have different solutions depending on client preferences. For instance, some clients prefer the convenience of scanning a QR code with embedded access point credentials, while others favor a more automated flow where the mobile app connects to the device without user intervention. Ultimately, the choice of pairing flow lies with the client.
Of course, successful pairing is just one element of a comprehensive approach to building smart devices. If you’re looking for a reliable IoT platform that ensures stable connectivity, efficient device management, and scalable features, 2Smart offers a robust solution. Contact us to learn how our platform can help bring your project to life and elevate user experience to the next level.
Frequently Asked Questions
What development mistakes can complicate the pairing process for users?
Some common issues caused by poor development practices include:
- Lack of device indicators: users are left in the dark during the pairing process if the device does not provide visual or audio signals.
- Generic and inaccurate error messages: messages like “Something went wrong” don’t provide clear information about the problem or how to resolve it.
- Complicated recovery and retry process: if pairing fails and users must reset the device completely or redo every step, it significantly reduces convenience.
- Poor user interface (UI): for example, having too many steps in the app or unclear instructions can frustrate users.
- No automatic device detection: requiring users to manually input details increases the chance of errors.
- Lengthy or opaque pairing process: without a progress bar or clear step indicators, users may assume the device has “frozen”.
A well-thought-out development approach eliminates such flaws, ensuring an intuitive and user-friendly pairing process.
How does 2Smart ensure a smooth pairing experience for IoT devices?
2Smart’s platform integrates advanced pairing workflows that simplify the process for end users. These include automatic Wi-Fi network scanning, real-time feedback on progress, and detailed error messages to resolve issues quickly. We focus on providing a seamless experience that reduces user frustration and increases customer satisfaction with your device.
Can the pairing process be customized to match the needs of my device?
Yes, 2Smart offers flexible pairing flows that can be tailored to your device. Whether you prefer QR code-based pairing, preconfigured access point credentials, or a step-by-step process, we work with you to implement the approach that best fits your product and target audience.
How does 2Smart handle firmware compatibility during pairing?
Our platform automatically checks the device’s firmware version during pairing and updates it if needed. This ensures your devices are always running the latest software, eliminating compatibility issues and allowing users to access new features immediately.
What tools does 2Smart provide for troubleshooting pairing issues?
We offer comprehensive error reporting, with detailed messages that identify specific problems, such as incorrect Wi-Fi credentials or unsupported networks. The platform also enables quick recovery, allowing users to retry the process without resetting the entire device, which minimizes frustration.
How does 2Smart improve the user experience during pairing?
We enhance the user experience by providing visual feedback through progress bars in the app and optional device indicators, such as LEDs or sounds. This keeps users informed of each step, reducing uncertainty and creating a smoother setup process.
Does 2Smart support devices with limited connectivity capabilities?
Yes, 2Smart is designed to work seamlessly with devices that operate on specific frequencies, such as 2.4 GHz-only networks. Our platform ensures that only compatible networks are displayed to users, preventing failed connections and simplifying the setup process.
How can 2Smart help differentiate my IoT product from competitors?
2Smart’s platform is built to deliver a premium user experience, from intuitive pairing flows to robust cloud integration and device management. By using 2Smart, you ensure your product stands out with seamless onboarding, reliable connectivity, and features that enhance long-term customer satisfaction.
Don't forget to share this post!
Read Next


Let’s dive into your case
Share with us your business idea and expectations about the software or additional services.
