Table of contents:
2Smart Cloud is a powerful IoT platform offering ready-made infrastructure and mobile solutions for a range of developers. With this platform, you can not only build comprehensive IoT products but also test startup ideas or integrate a mobile interface with existing systems. In this guide, we’ll walk through an OpenWeather integration as an example to show how 2Smart Cloud enables developers to easily connect external APIs and manage data via the cloud and mobile app, inspiring the creation of custom IoT solutions.
Who Will Benefit from This Article
2Smart Cloud provides tools that significantly streamline the development and deployment of IoT solutions across different use cases. This article explores how 2Smart Cloud’s features can support a variety of scenarios:
- Software Developers Needing a Mobile Interface: Many startups or independent developers already have a working system, API, or platform but lack a user-friendly mobile app for data visualization and management. With 2Smart Cloud, they can easily set up a mobile interface without building an app from scratch.
- Creators or Users of Local Automation Systems: If you have a local IoT system, such as one for home automation, but no centralized cloud platform, 2Smart Cloud offers a ready-to-use cloud solution. This simplifies data management and adds remote control features via cloud and app access.
- Those Working with External Data APIs: Developers who use third-party APIs to access data like metrics or telemetry but lack an interface for analysis or historical data access can use 2Smart Cloud to quickly set up a data management and visualization interface. For instance, the OpenWeatherBridge project (covered in this article) demonstrates how API integration can power new solutions on a cloud platform.
- Developers Testing IoT Startup Ideas: For those just entering IoT and seeking a way to quickly test concepts, 2Smart Cloud allows the creation of a device prototype, setup of a mobile interface, and even a launch of the product for initial users without building custom infrastructure.
Let’s collaborate
We’re empower your business with our technology expertise
2Smart’s Example Solution: OpenWeatherBridge
OpenWeatherBridge is a demo solution developed on the 2Smart Cloud platform, showcasing how external APIs can enrich IoT projects with data from third-party sources. Using the OpenWeather API, OpenWeatherBridge fetches weather data and sends it to 2Smart Cloud, where it is made accessible for visualization through a mobile app. This example highlights how developers can leverage 2Smart Cloud to rapidly create IoT products that integrate with external services.
The OpenWeatherBridge project demonstrates how seamlessly the platform connects to any external API for automatic data retrieval, processing, and display in a user-friendly interface. This capability is invaluable for startups looking to quickly test ideas and develop a basic product version without building their own infrastructure. Additionally, OpenWeatherBridge showcases the versatility of 2Smart Cloud by illustrating its support for virtual devices, such as digital twins, that interact with real-time data.
This example can inspire developers working with diverse datasets to create their own projects integrating APIs into IoT solutions. Whether for monitoring systems, analytics applications, or integrations with weather and other informational services, 2Smart Cloud reduces implementation complexity and significantly accelerates product market entry.
Steps to Create Your Own Product Based on OpenWeatherBridge
In this section, we’ll walk through the process of creating your own product using OpenWeatherBridge on the 2Smart Cloud platform. We’ll cover setting up the environment, configuring the product, integrating with the OpenWeather API, and running the container.
1. Preparing the Environment: Installing Docker and Configuring the System
For local testing and development, Docker is required to deploy OpenWeatherBridge in a container. If Docker is not already installed on your system, follow the official installation guide to set it up.
After installation, verify Docker is running by executing:
docker --version
2. Creating a Product in 2Smart Cloud
Let’s set up your product in 2Smart Cloud:
- Sign Up or Log In: Register on the platform if you don’t have an account already.
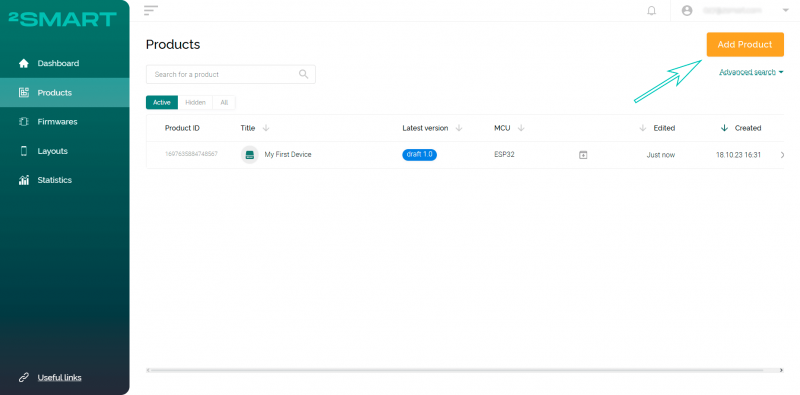
- Create a Product: Navigate to the Products section and click Add Product.
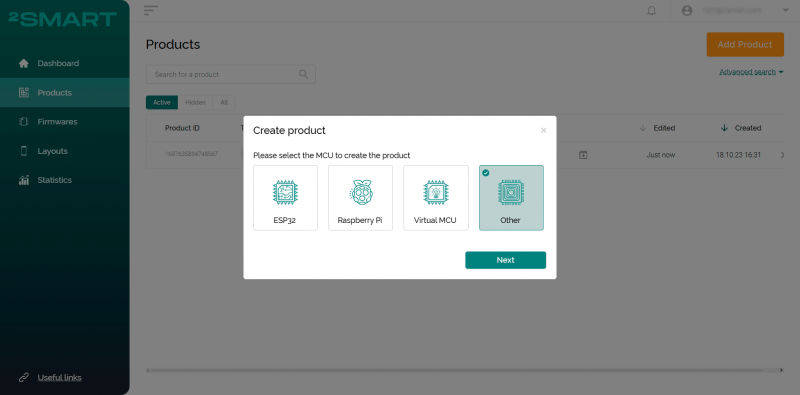
- Select MCU Type: In the modal window that appears, set the MCU type to “Other”.
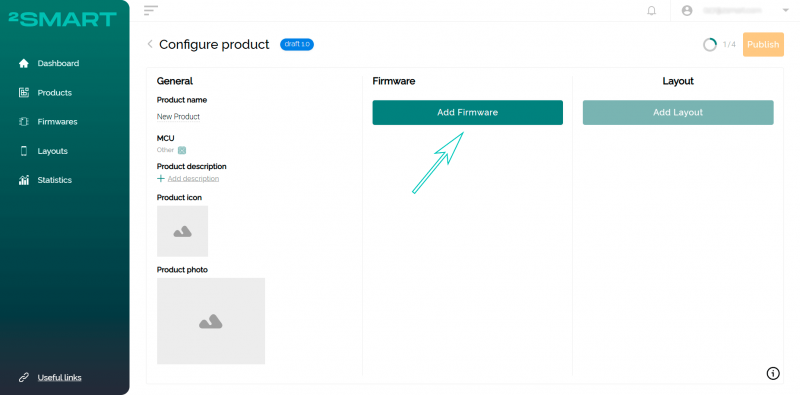
- Add Firmware: In the product configuration window, click Add Firmware.
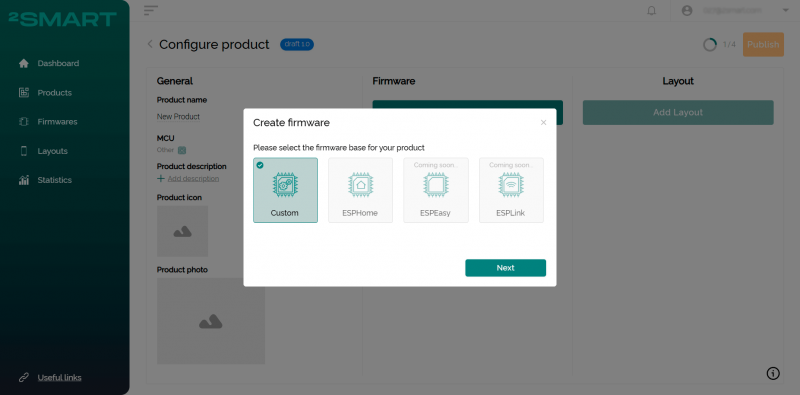
- Select Base Firmware: In the modal that appears, confirm Custom firmware is selected by default (the only available option for this MCU) by clicking Next.
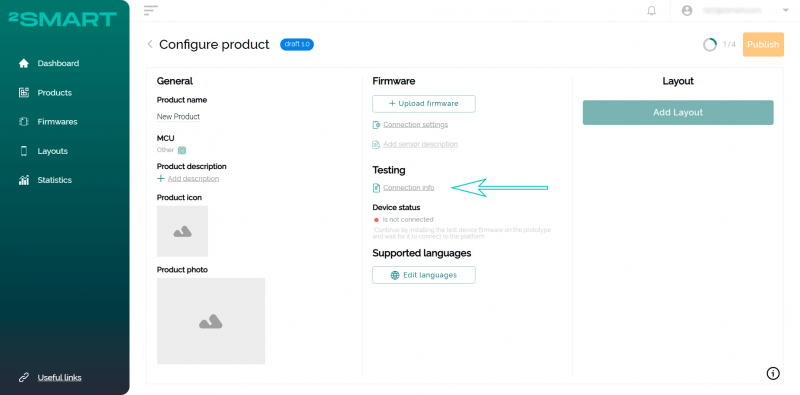
- Download Connection Info: On the product configuration page, click Connection info.
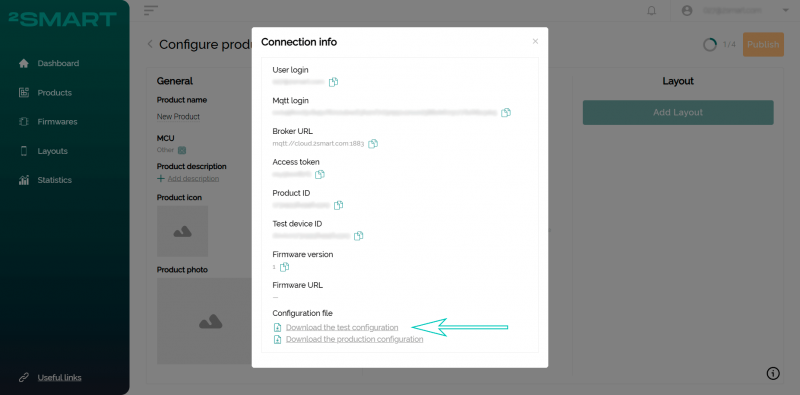
- Download Test Configuration: In the modal window, click Download the test configuration. Save this file for configuring the bridge later.
Finally, create a folder on your computer for this configuration and add the downloaded config.json file to it. You’ll use this file in the next steps to link your OpenWeatherBridge to 2Smart Cloud.
3. Integrating with the OpenWeather API
To retrieve weather data, follow these steps to register with OpenWeather and set up your API key:
- Register on OpenWeather: Visit the OpenWeather website and sign up for an account.
- Generate an API Key: Navigate to the API keys section in your account dashboard and create a new API key. Save this key for later use.
- Copying API Key to Config: Open the
config.jsonfile you downloaded earlier. Insert your API key into the AppId field. Your configuration should look like this:
4. Starting the Container
With the configuration complete, it’s time to launch the Docker container for OpenWeatherBridge. Run the following command in your terminal to start the container:
docker run --name weather-station --restart always -d -v "${PWD}:/config" 2smartdev/openweathermap:cloud
Ensure you execute this command in the same directory as the config.json file so that the container can correctly connect to your configuration. This command will automatically pull the OpenWeatherBridge container image and connect it to your 2Smart Cloud instance.
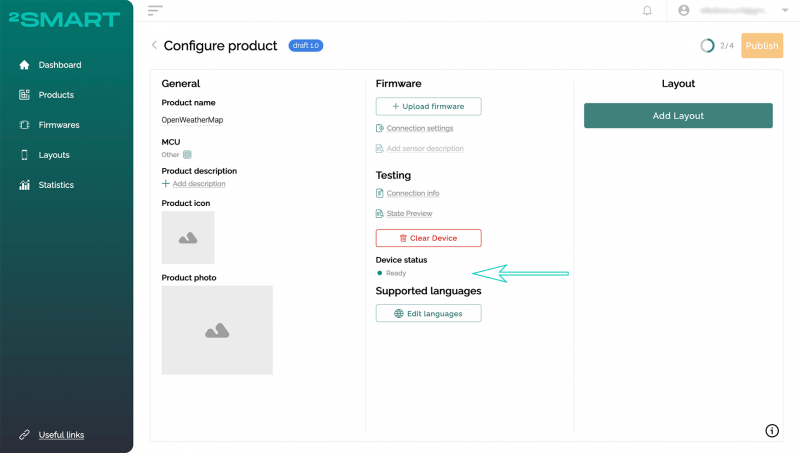
Once the container starts successfully, your device should connect to the 2Smart Cloud platform, indicated by a green “Ready” status on the product configuration screen. You can now proceed to configure the mobile application layout and start working with data from OpenWeather.
Let’s collaborate
We’re empower your business with our technology expertise
Interface Setup and Device Testing
After configuring and deploying OpenWeatherBridge, the next step is to create an interface for interacting with your device and testing it through the mobile app. In this section, we will walk you through the process of creating a mobile app layout for your device and testing its functionality.
1. Creating Layout and Uploading Test Firmware
Once the device connects to 2Smart Cloud, the next step is creating the interface for displaying the data received from your device.
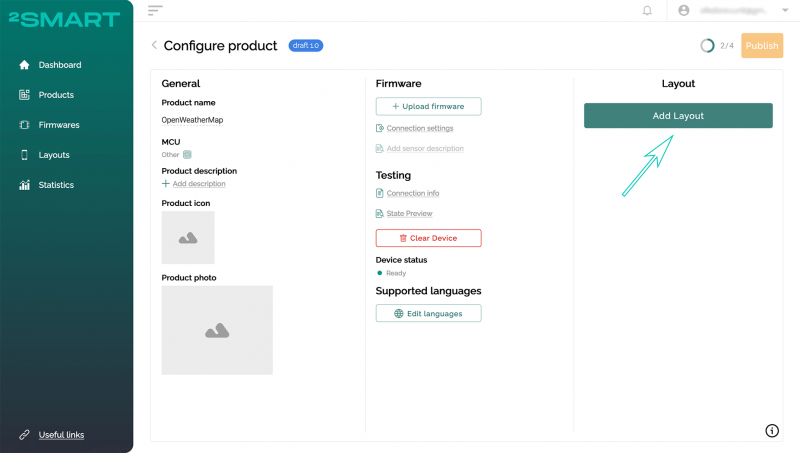
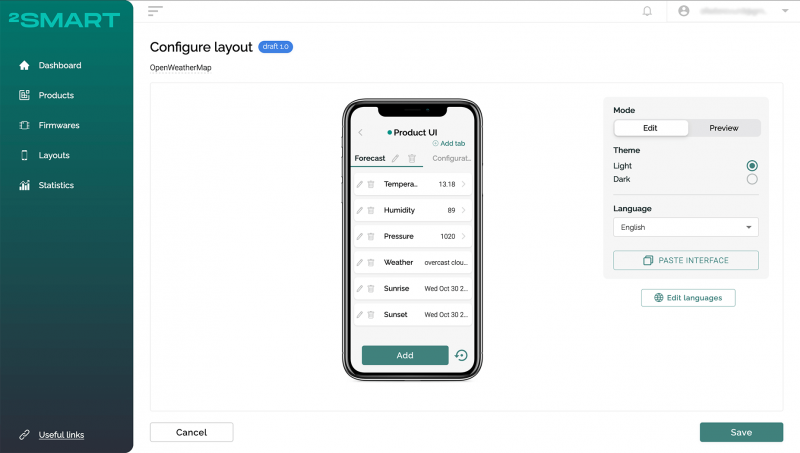
- Click on the Add Layout button to start the layout creation process.
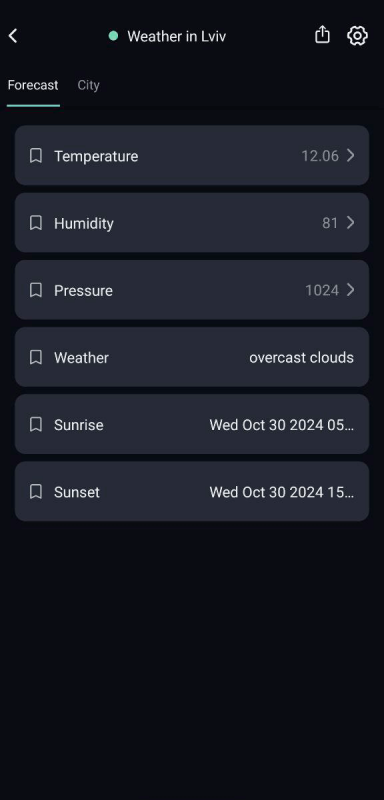
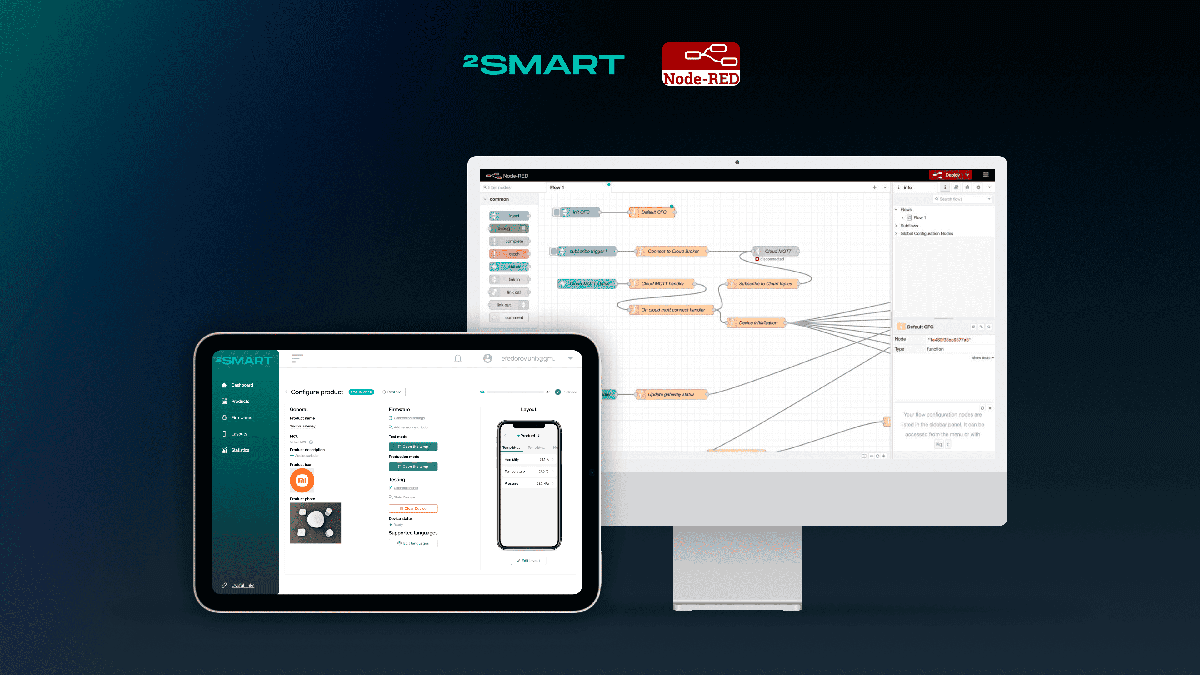
- In the mobile app emulator that appears, you’ll see a default interface that has already been configured based on the sensor data from your new device. The interface can display information like temperature, humidity, pressure, and other parameters from OpenWeatherBridge. You can further customize the interface by redefining widgets to display specific data points, such as temperature and humidity. Organize the information logically by grouping sensors on different tabs within the app, making the data easier to navigate.
For more details on Layout setup in 2Smart Cloud, visit 2Smart Cloud Layout Setup.
For more details about available widgets, check 2Smart Cloud Widgets. - After customizing the layout, click Upload Firmware to proceed. Upload any
.binfile to satisfy the firmware versioning requirement. This step is necessary to continue with the configuration process, though it can be any file for simplicity.
2. Testing the Virtual Device in the Mobile App
Once the layout is configured, you can verify how your virtual device appears and functions on a mobile device.
- Install the 2Smart Cloud App:
- Log In:
- Open the app and log in using the same credentials as your 2Smart Cloud account.
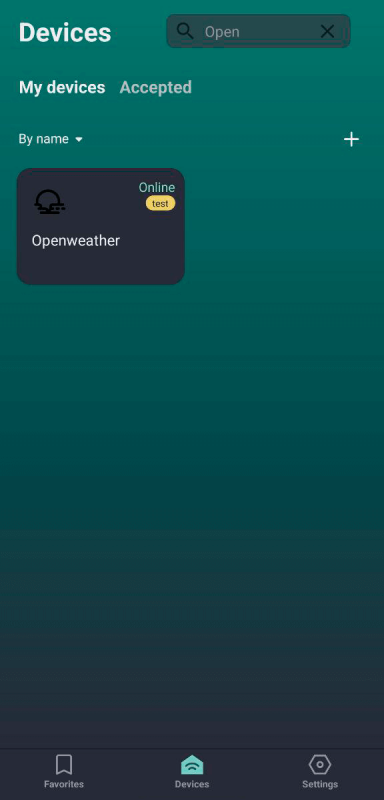
- Locate Your Device:
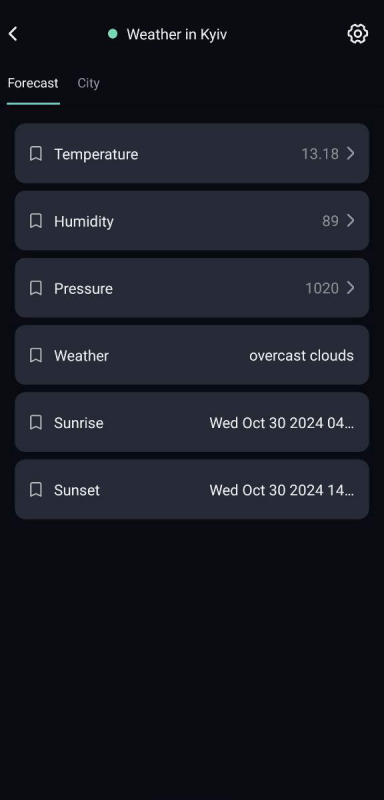
- Validate Data Display:
- Check Widget Updates:
- Confirm that the widgets update in real time, accurately reflecting the API data.
Your virtual device is now fully functional, providing a seamless interface for monitoring and interacting with OpenWeather API data. Use the platform to refine the product further or test additional integrations.
Sharing Your Product with End Users: Deploying Personalized Services
Once your product is ready, you can share it with others by deploying a personalized service for each user. Unlike traditional IoT devices, virtual products described in this article cannot be published for general public access via the 2Smart Cloud platform. Instead, the developer has two options: they can either deploy a separate Docker container for each user on their own infrastructure or provide users with instructions to launch the Docker container on their own systems. In the second case, the end user would follow the same steps as the developer would to deploy the container on their own infrastructure. This means that no complex additional instructions are required, as the process remains the same. However, the approach where the developer manages the deployment ensures more control over the environment and a smoother experience for the user. This method is particularly suited for offering subscription-based solutions or other customized IoT services. The following sections will focus on the method where the developer manages the service deployment on their side, ensuring a seamless experience for the user.
How End Users Access Your Service
1. User Account Setup
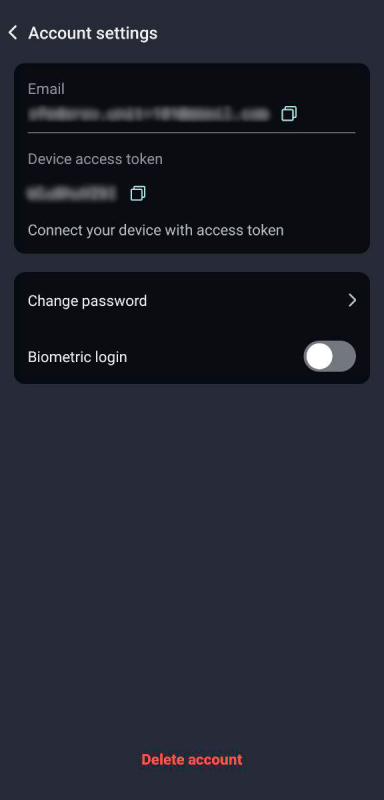
Each end user must create an account in the 2Smart Cloud mobile app. Once registered, they can access their unique credentials: an email and a device access token.
2. Sharing Credentials with the Developer
Users send their email and token to the developer, enabling the configuration of a personalized instance of the service. For example:
- One user might request weather updates for Kyiv.
- Another might want data for Warsaw.
- A third might need it for Berlin.
3. Launching a Personalized Docker Container
For each user, the developer deploys an individual Docker container configured to provide customized data or services. These containers ensure isolated environments for personalized functionality, such as:
- Tailored weather data using unique location settings.
- Subscription-based IoT services running as standalone instances.
To do this, the developer needs to follow these steps:
- Open the
config.jsonfile for the new device. - Replace the current credentials with the Email and Token of the user’s account.
- Remove the
deviceIdfield to let the system assign a unique identifier for this public instance.
- Apply the changes and restart the container using:
docker restart [container_name]
4. Verifying User Access
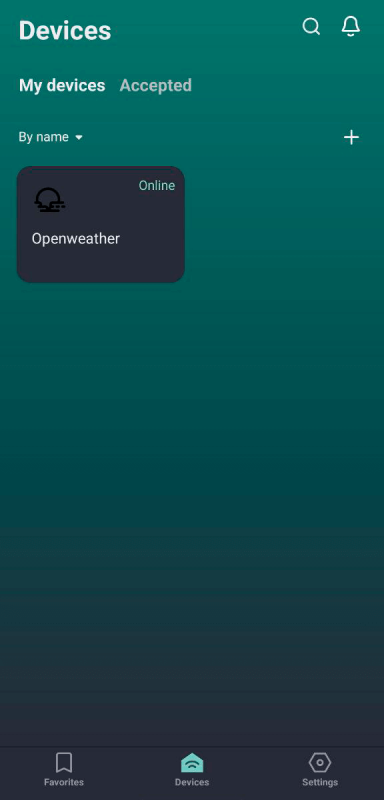
User needs to log into their account in the 2Smart Cloud mobile app. They should see the deployed device listed in the Devices section and be able to interact with the service.
This process ensures the device is correctly configured for each user’s personalized deployment.
Monitoring Statistics with the 2Smart Cloud Vendor Dashboard
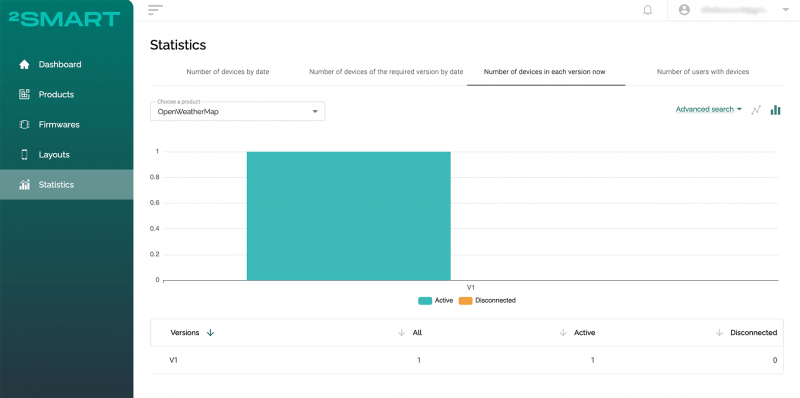
Once your product is live, the Vendor Dashboard in 2Smart Cloud provides comprehensive insights into its performance and user interactions. Key metrics include:
- Number of devices by date: Track how many of your devices are connected to the platform on any given day. This helps you assess usage patterns and ensure consistent uptime.
- Number of devices of the required version by date: Monitor the number of devices running specific firmware versions over time to identify adoption rates for updates.
- Number of devices in each version now: See real-time data on how many devices are active or disconnected across firmware versions.
- Number of users with devices: Analyze the number of unique users interacting with your devices daily. This data helps gauge product popularity and identify active user bases.
These metrics help optimize device performance, improve firmware updates, and enhance user satisfaction by tailoring services to user needs. Use this data strategically to refine your product and expand its reach.
Monetizing Through Personalized Deployments
This approach is not limited to weather data but can be extended to more complex services, such as subscription-based IoT systems or proprietary applications. By providing unique deployments for each client, developers can offer highly tailored solutions that cater to specific user needs, opening opportunities for monetization.
Encourage users to test the service and explore its features, and consider integrating billing models if scaling this approach for a broader user base.
Let’s collaborate
We’re empower your business with our technology expertise
How to Start Custom Integrations with the 2Smart JS Library
Simplify the integration of your system with 2Smart Cloud using the 2Smart Cloud SDK JavaScript library. It provides convenient tools for platform interaction, speeding up your project development.
Key features of the library:
- Integration of 2Smart Cloud with web applications;
- Accessing and managing device data;
- Facilitating data exchange between your server and the cloud.
The library can be installed via npm and easily integrated into your project. Comprehensive documentation with examples and usage instructions is available in the 2smart-cloud-js-sdk repository.
For a deeper exploration of the library’s features and platform API, refer to 2smart-cloud-docs. The documentation includes:
- Setup guides;
- Code examples;
- Detailed descriptions of API functionalities for building custom solutions.
This makes it straightforward to leverage 2Smart Cloud for a wide range of use cases.
Conclusion
2Smart Cloud offers a robust platform for developing Internet of Things solutions, catering to both firmware developers and those working with web technologies and APIs. The platform enables rapid and efficient creation of solutions for device management, integration with external services, and mobile application development — without the hassle of setting up complex infrastructure or building everything from scratch.
With the flexibility to deploy personalized services for end users, such as tailored IoT solutions or subscription-based offerings, 2Smart Cloud extends its use cases beyond traditional device management. Developers can quickly test ideas, create unique virtual products, and manage deployments efficiently through the platform’s intuitive tools.
Whether you’re a startup founder exploring an innovative service model or a developer looking to integrate your solutions with IoT, 2Smart Cloud equips you with all the resources needed for a quick start and scalable growth.
We invite developers to explore the platform’s potential and build their own integrations using our tools. For questions or support, join the 2Smart Cloud Discussion Telegram chat, where our team is ready to assist you in turning your ideas into reality.
Don't forget to share this post!
Read Next
Let’s dive into your case
Share with us your business idea and expectations about the software or additional services.

