
Table of contents:
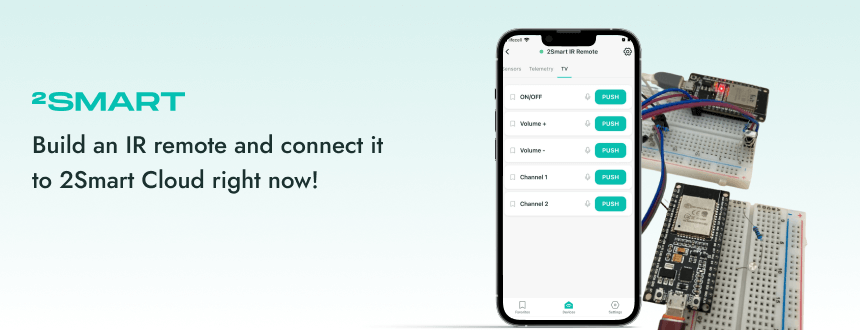
The universal infrared remote control is an example of a helpful device for daily use. You can remotely control household appliances from the smartphone screen by turning such a remote control into an Internet of Things device. For example, turn on the air conditioner in advance when returning home on a hot summer day.
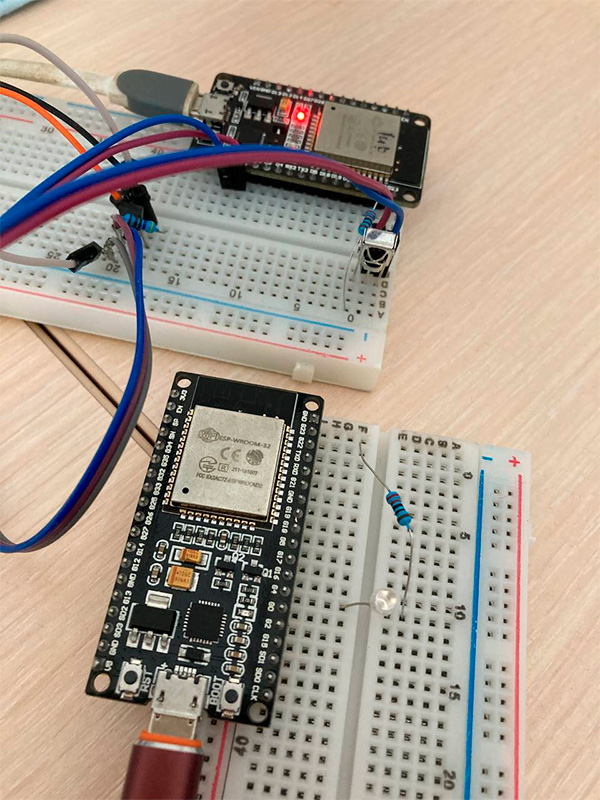
Device assembly
The ESP32-based IR remote control is a simple device, examples of which are easy to find on the Internet. We used this scheme from the instructables.com website, making minimal edits to it (in our case, a transistor on a transmitter diode is not used).
The advantage of the scheme is that it contains a pinout for the ESP32 microcontroller. You can assemble such a device using a breadboard.
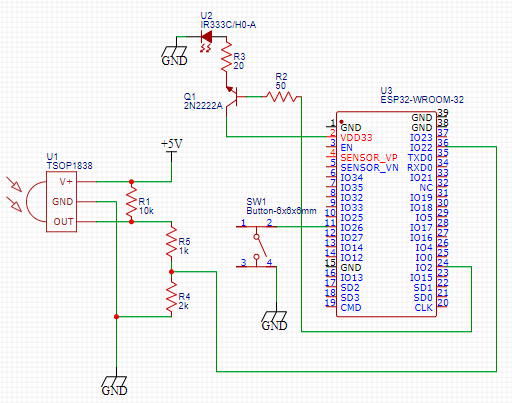
The VS1838b receiver is used to read the IR signal. The transmitter is a simple IR diode, the same as in conventional remote controls for any TV, air conditioner, stereo, humidifier, and even curtains.
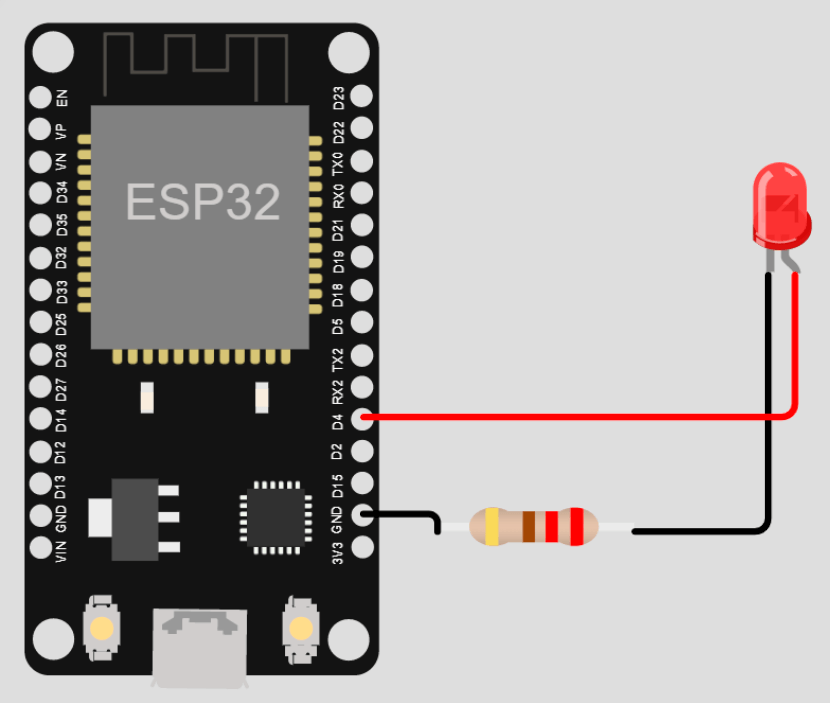
IR Transmitter
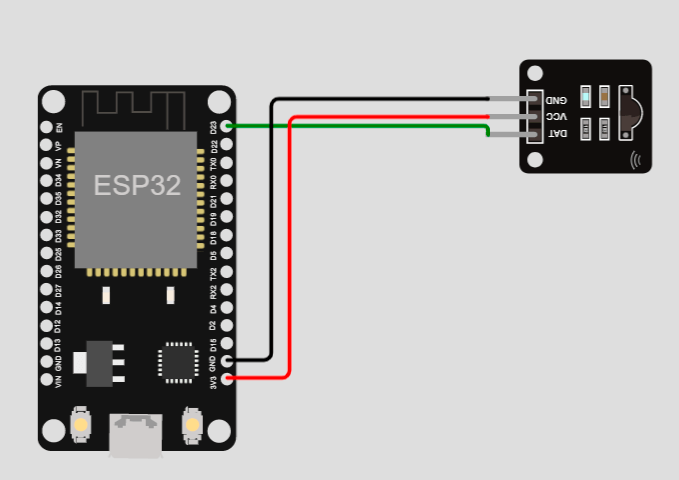
IR Receiver
Firmware writing
Since the ESP32-based IR remote control was created as a 2Smart Cloud Internet of Things device, the platform’s SDK was used when writing the firmware. The SDK has already described the logic of interaction of any ESP32-based device with the cloud IoT platform. For the device to start working, it is enough to describe the logic of its operation in the firmware.
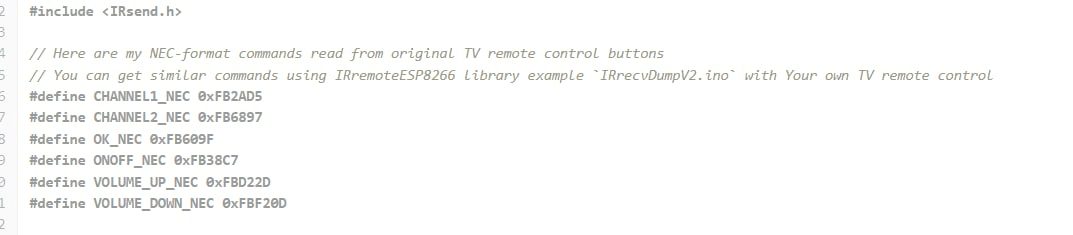
When writing the firmware, we used the IRremoteESP8266 library for Arduino. Namely, a sketch for reading the IR signal. The sketch allows you to read raw-data and NEC signal format. There is no difference between which of these to use; for us, it was more convenient to work with the NEC format.
We didn’t use ready-made IR signal bases for remotes from different manufacturers designed to control household appliances. Initially, we decided to manually copy the commands of a specific remote using an IR receiver installed on the board. This experience makes it possible to clone any remote control, even from an old device of a little-known manufacturer.
First, we considered the commands of the five main buttons on the TV remote control:
- On/Off,
- Volume +,
- Volume -,
- Channel +,
- Channel -.
Having received an array of values in the NEC format, we created a custom IRControl node, where we tied these values to the corresponding topics.
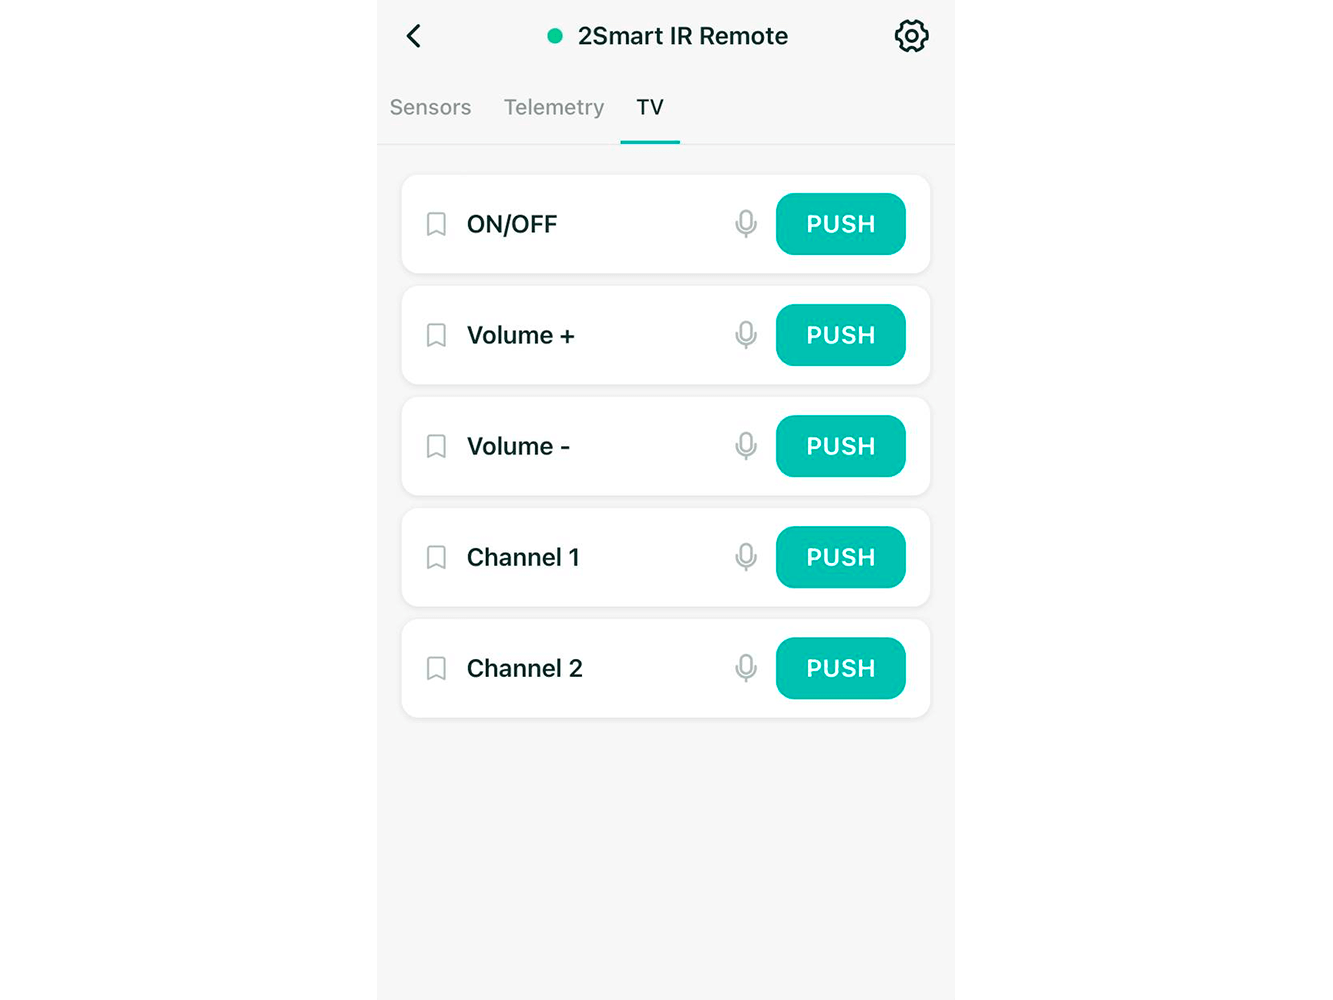
Then we added the related properties to the main file. These properties are displayed in the 2Smart Cloud mobile application with Push buttons.
Connecting to the free IoT cloud platform
But we are getting ahead of ourselves a bit. To link a remote control to a mobile app for the ESPHome devices, you first need to connect it to the IoT cloud platform. In addition to remote control of the device, such a platform provides monitoring of its status (learn more about the importance of IoT monitoring system) and other valuable features.
It’s easy, and in 2Smart Cloud, you can use the free plan for DIY developers. So let’s get started:
- Register on the platform: https://cloud.2smart.com/register.
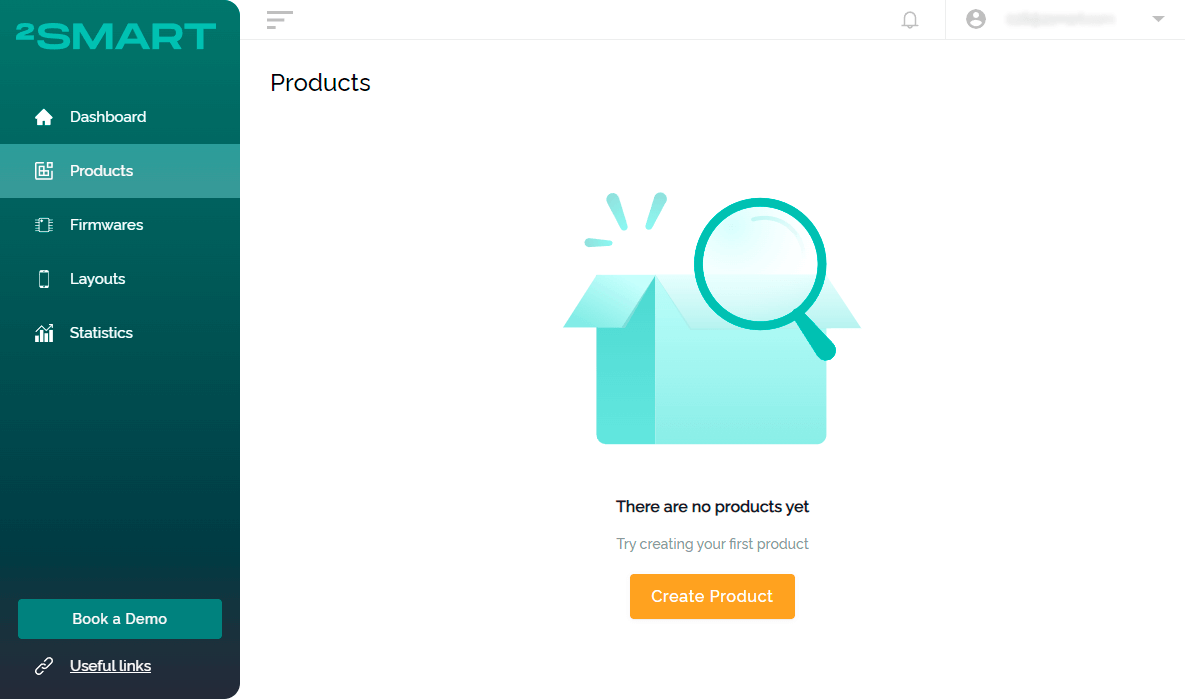
- Go to the “Products” tab and click “Create Product”.

- Select the microcontroller – ESP32.
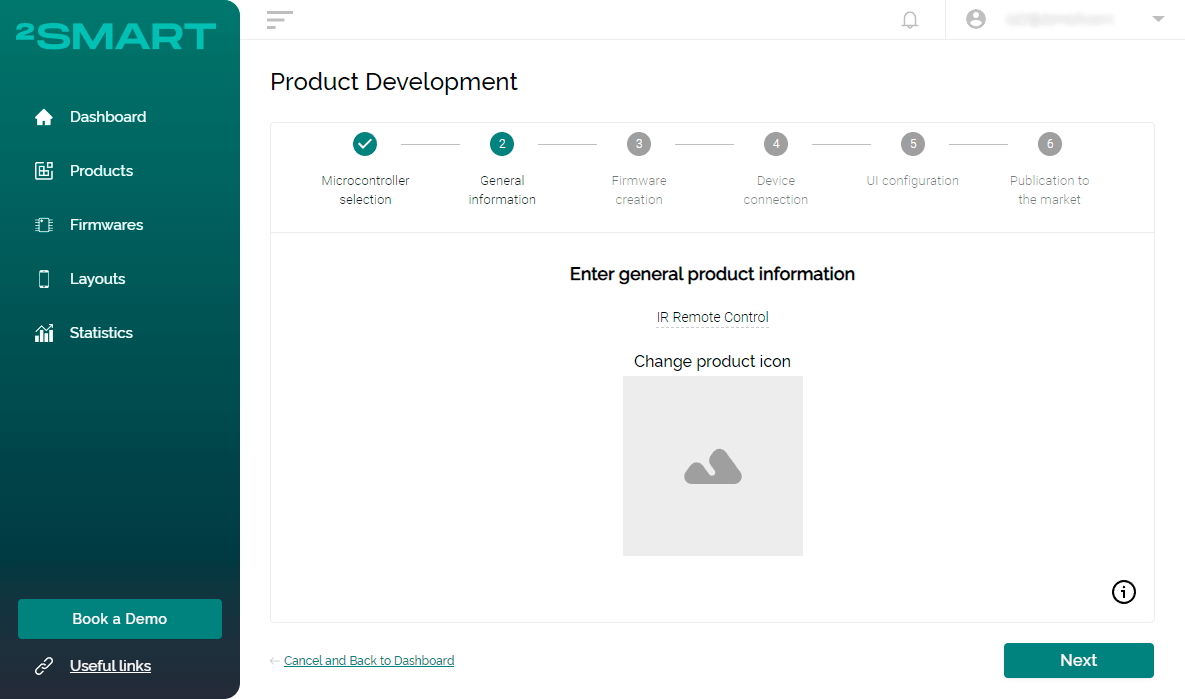
- Enter your device’s name. If desired, upload its icon to display in the mobile application.
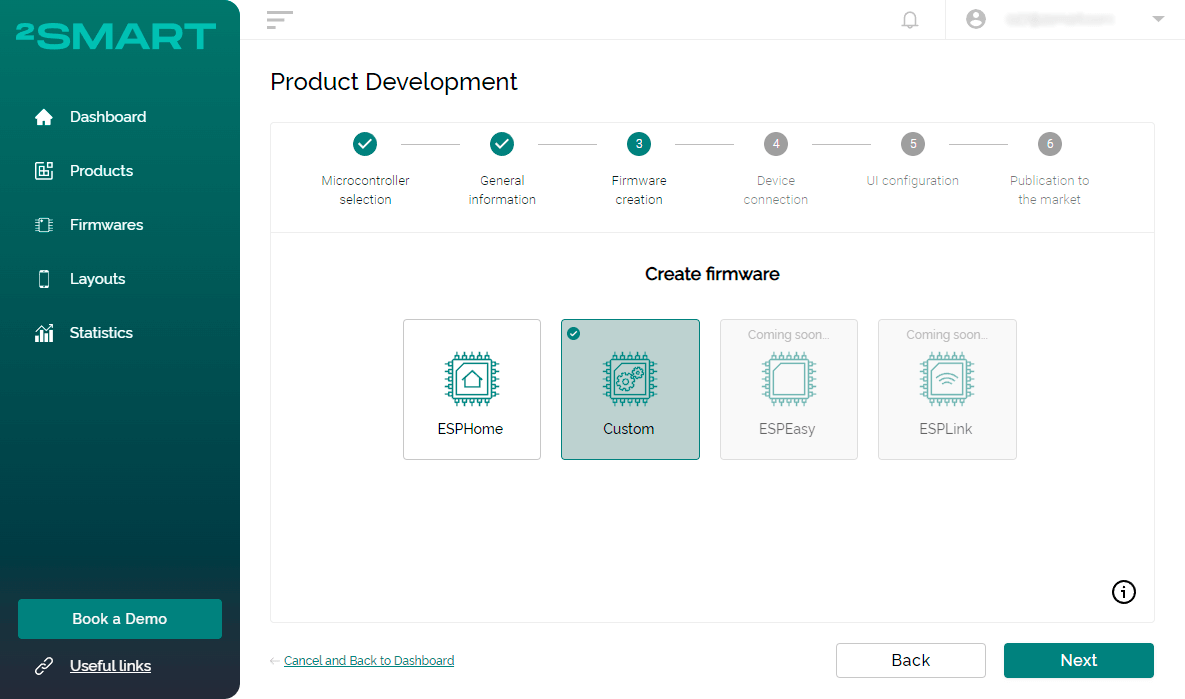
- Select the Custom option for the firmware creation.
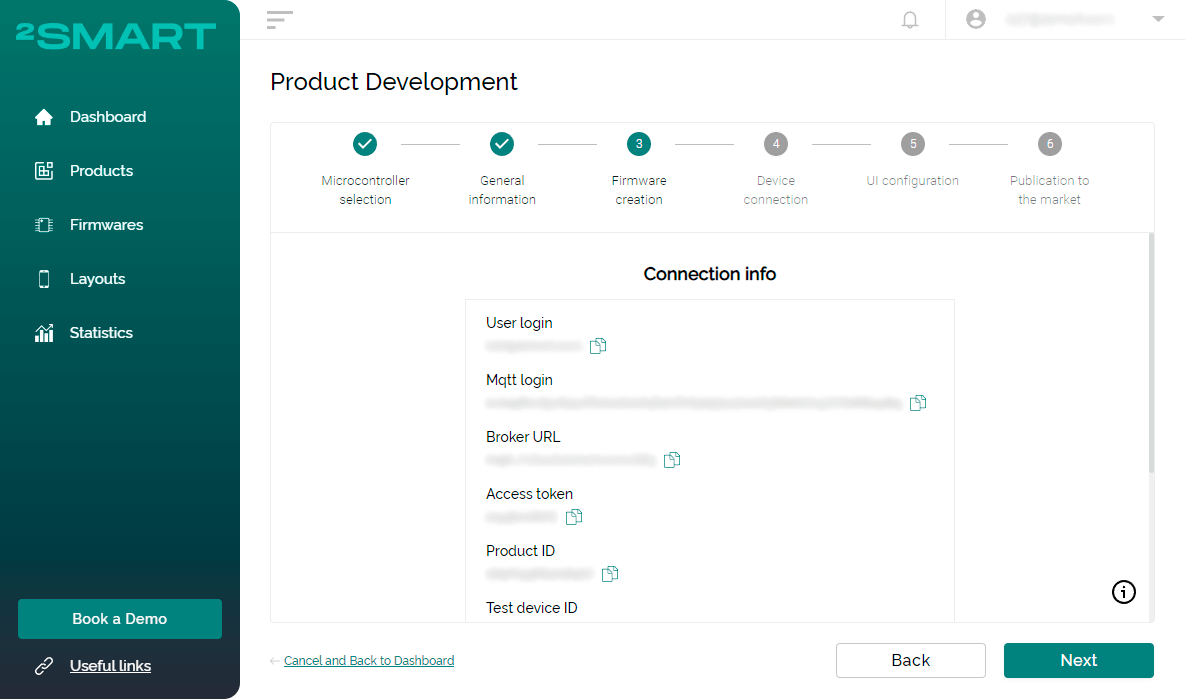
- Leave the modal window “Connection Info” with the product connection parameters open.
- Download the 2Smart TV Control project from the repository. Open it in the terminal, and make the necessary changes in a text editor.
- Replace product_id in src/main.h file with your own Product ID from the “Connection info” modal.
- in the IRControl node, specify the topics and their values for your managed household appliances.
- Connect the remote control to the computer with a USB cable and flash it.
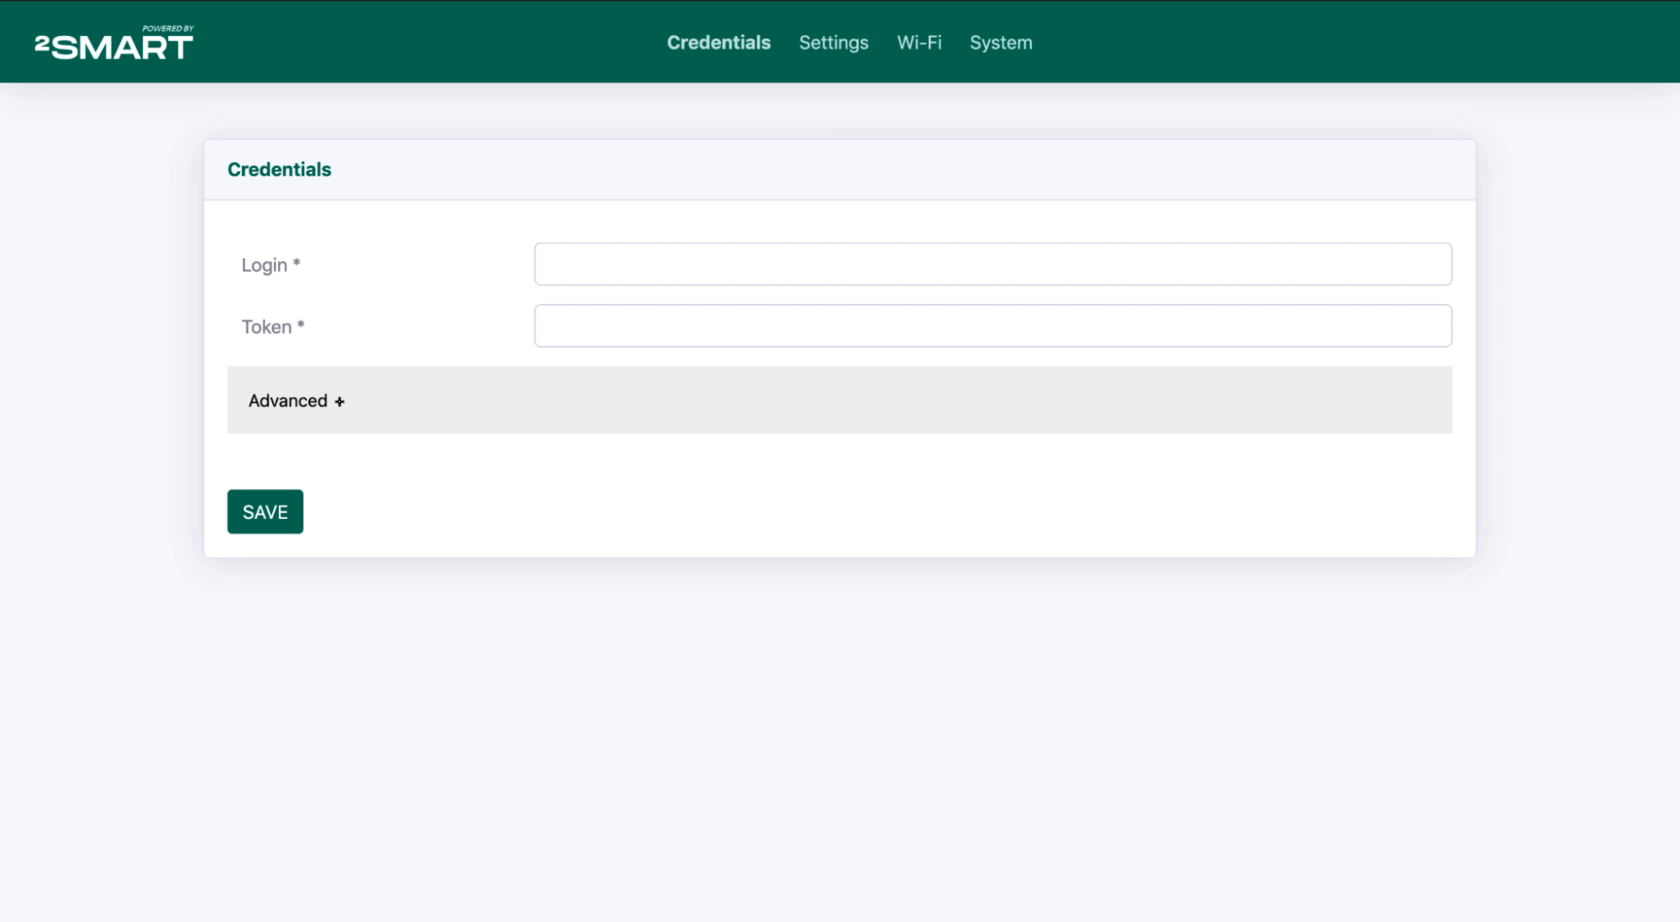
- Connect to the device’s hotspot – “2Smart IR Remote”. Log in to the web interface by following the link: http://192.168.4.1/.

- Go to the Wi-Fi tab and click Scan. Then select your Wi-Fi network from the list and enter a password to access it. This is required for your device to connect to the platform.
- If all the settings are correct, the device will connect to the platform, and its status will change to Ready.
- Customize the mobile app interface for IR remote control.
- Publish the product on the platform.
- Install the 2Smart Cloud mobile application on your smartphone and pair the device to it.
- Control your home appliances from your smartphone using the ESP32-based IR remote control.

Read more about connecting a device to the 2Smart Cloud platform in the following illustrated article: Connecting an IoT device to the platform: step-by-step instructions.
Let’s collaborate
We’re empower your business with our technology expertise
Testing
To make sure that the device with the firmware we wrote works correctly, we decided to check it objectively. Another similar device was assembled, and its microcontroller was flashed with a sketch of receiving a signal from the IRremoteESP8266 library. By sending commands from the first device via the mobile application, we ensured that the second device received the same NEC signal that we sent.
Testing in actual conditions confirmed that the TV is correctly controlled using an IR remote control on the breadboard. It responds to commands from the mobile application instantly – the delay is no longer than when using a conventional remote control.
Using all available device control methods
The mobile application is just one of the methods to control devices in 2Smart Cloud. To get the most out of the universal IR remote, we have used the following features:
- set up “turn on the TV” and “change the channel” voice commands in Google Assistant to control the TV hands-free;
- shared access to the device with family members who use iPhones, and they also set up Siri voice commands;
- shared access to the device via the URL link and pinned it to the favorites of the home tablet’s browser; now, all family members can control the TV from the tablet, even without installing a mobile application on it;
- tested device control using Telegram bot.
This set of free methods to control the device is an excellent feature of 2Smart Cloud. A DIY device turns into a fabulous modern product.
After adding a few more TV remote control buttons to the firmware and mobile application, we ensured that over-the-air updates worked correctly. The device flashed imperceptibly for us, and the application interface was updated after restarting.
What’s next
Having received a working device, it remains to scale it to personal needs.
Firstly, we can add all the commands of all the IR remotes in the house to the firmware. In this case, the IoT remote control will become a universal device for controlling any household appliances for which remote control is provided. For example, we can turn on the air conditioner remotely to purify the air if we receive a notification of a decrease in air quality from the indoor air quality monitor.
Secondly, it makes sense to modify the scheme slightly and add additional IR diodes. If we tie two or three diodes to one ESP32 output and direct them in different directions, this will help increase the signal coverage of the room so that it reaches all devices controlled from the universal remote control.
Moreover, we can hide several diodes in different places in the room. In this case, a do-it-yourself universal remote control outperforms ready-made solutions.
Аnother direction for developing the idea of a universal remote control is the use of a Bluetooth module. Remotes of modern household devices combine IR and Bluetooth, and it would be helpful to add this feature to a universal remote control.
Also, if we want to scale this idea into something more than just DIY, we can design an ergonomic case for the device, apply for the services of custom software development for IoT, and arrange mass production.
Finally, we can deploy an automation system and use the IR remote control as one of the devices in a full-fledged smart home!
Using an IR remote in an open-source home automation system
An IR remote control is also an easy way to transform ordinary household appliances into smart devices. Even if the TV, air conditioner, music system, or anything else in your home was created before humanity even came up with the Internet of Things, you can include them in your IoT ecosystem.
The open-source home automation software 2Smart Standalone supports integrating cloud devices connected to 2Smart Cloud. Having configured this integration, you can use the IR remote control, assembled according to the instructions above, in your automation scenarios.
Here are sample scenarios you can easily configure:
- Automatic switching on/off of the air conditioner based on the temperature and humidity sensor readings. You can flexibly set the thresholds for triggers so that the combination of temperature and humidity in your room is always comfortable. Use ready-made devices or build your own temperature and humidity sensor.
- Automatically turns on a TV or stereo system in a room based on a motion sensor or other controller. You can configure the automatic launch of several devices at once using this trigger – for example, make sure that the lights turn on in addition to the TV.
- Turn on the TV or stereo system by clapping. This interesting automation is possible if you install a clap detector.
Since the IR remote control is based on ESP32, you can connect a temperature/humidity sensor and other sensors to the same microcontroller and also use it as a device for remotely monitoring the presence of electricity at home. Thus, you can get a useful multifunctional smart home device.
You can ask your questions to 2Smart specialists or share your examples of customized automation scenarios in the 2Smart Cloud Discussion Telegram chat. We are looking forward to your feedback!
Don't forget to share this post!
Read Next


Let’s dive into your case
Share with us your business idea and expectations about the software or additional services.
