
Table of contents:
Great news for developers using ESPHome to create ESP32 microcontroller firmware. Now you can install the firmware on the MCU through the web interface of the 2Smart Cloud platform. The bonus of the new feature is the ability to view logs from the microcontroller using a browser. Let’s take a closer look at the latest platform updates below.
Work with ESPHome-based firmware easily!
We have always believed that ESPHome is the best base for enthusiast developers to create firmware for the ESP32 microcontroller. Therefore, we challenged ourselves to make working on a product based on such firmware as easy as possible. The latest platform update has made much more comfortable such an essential stage of working on the device as installing the firmware on the microcontroller.
Now you do not need to follow the microcontroller flashing instructions for the OS installed on your computer. And you do not need to enter commands into the terminal with the risk of making any mistake.
Now you only need two clicks to install ESPHome-based firmware on your microcontroller!
The new feature is implemented using the ESP Web Tools library. Special thanks to its developers for such incredible functionality!
Recall that we have already implemented the firmware assembly on our servers – you do not need to use the assembly programs on your computer. The 2Smart Cloud platform also makes it possible to create ESPHome-based production firmware without specifying Wi-Fi credentials – the device receives them during pairing with a mobile application.
How to install the ESPHome-based firmware on the microcontroller using a browser
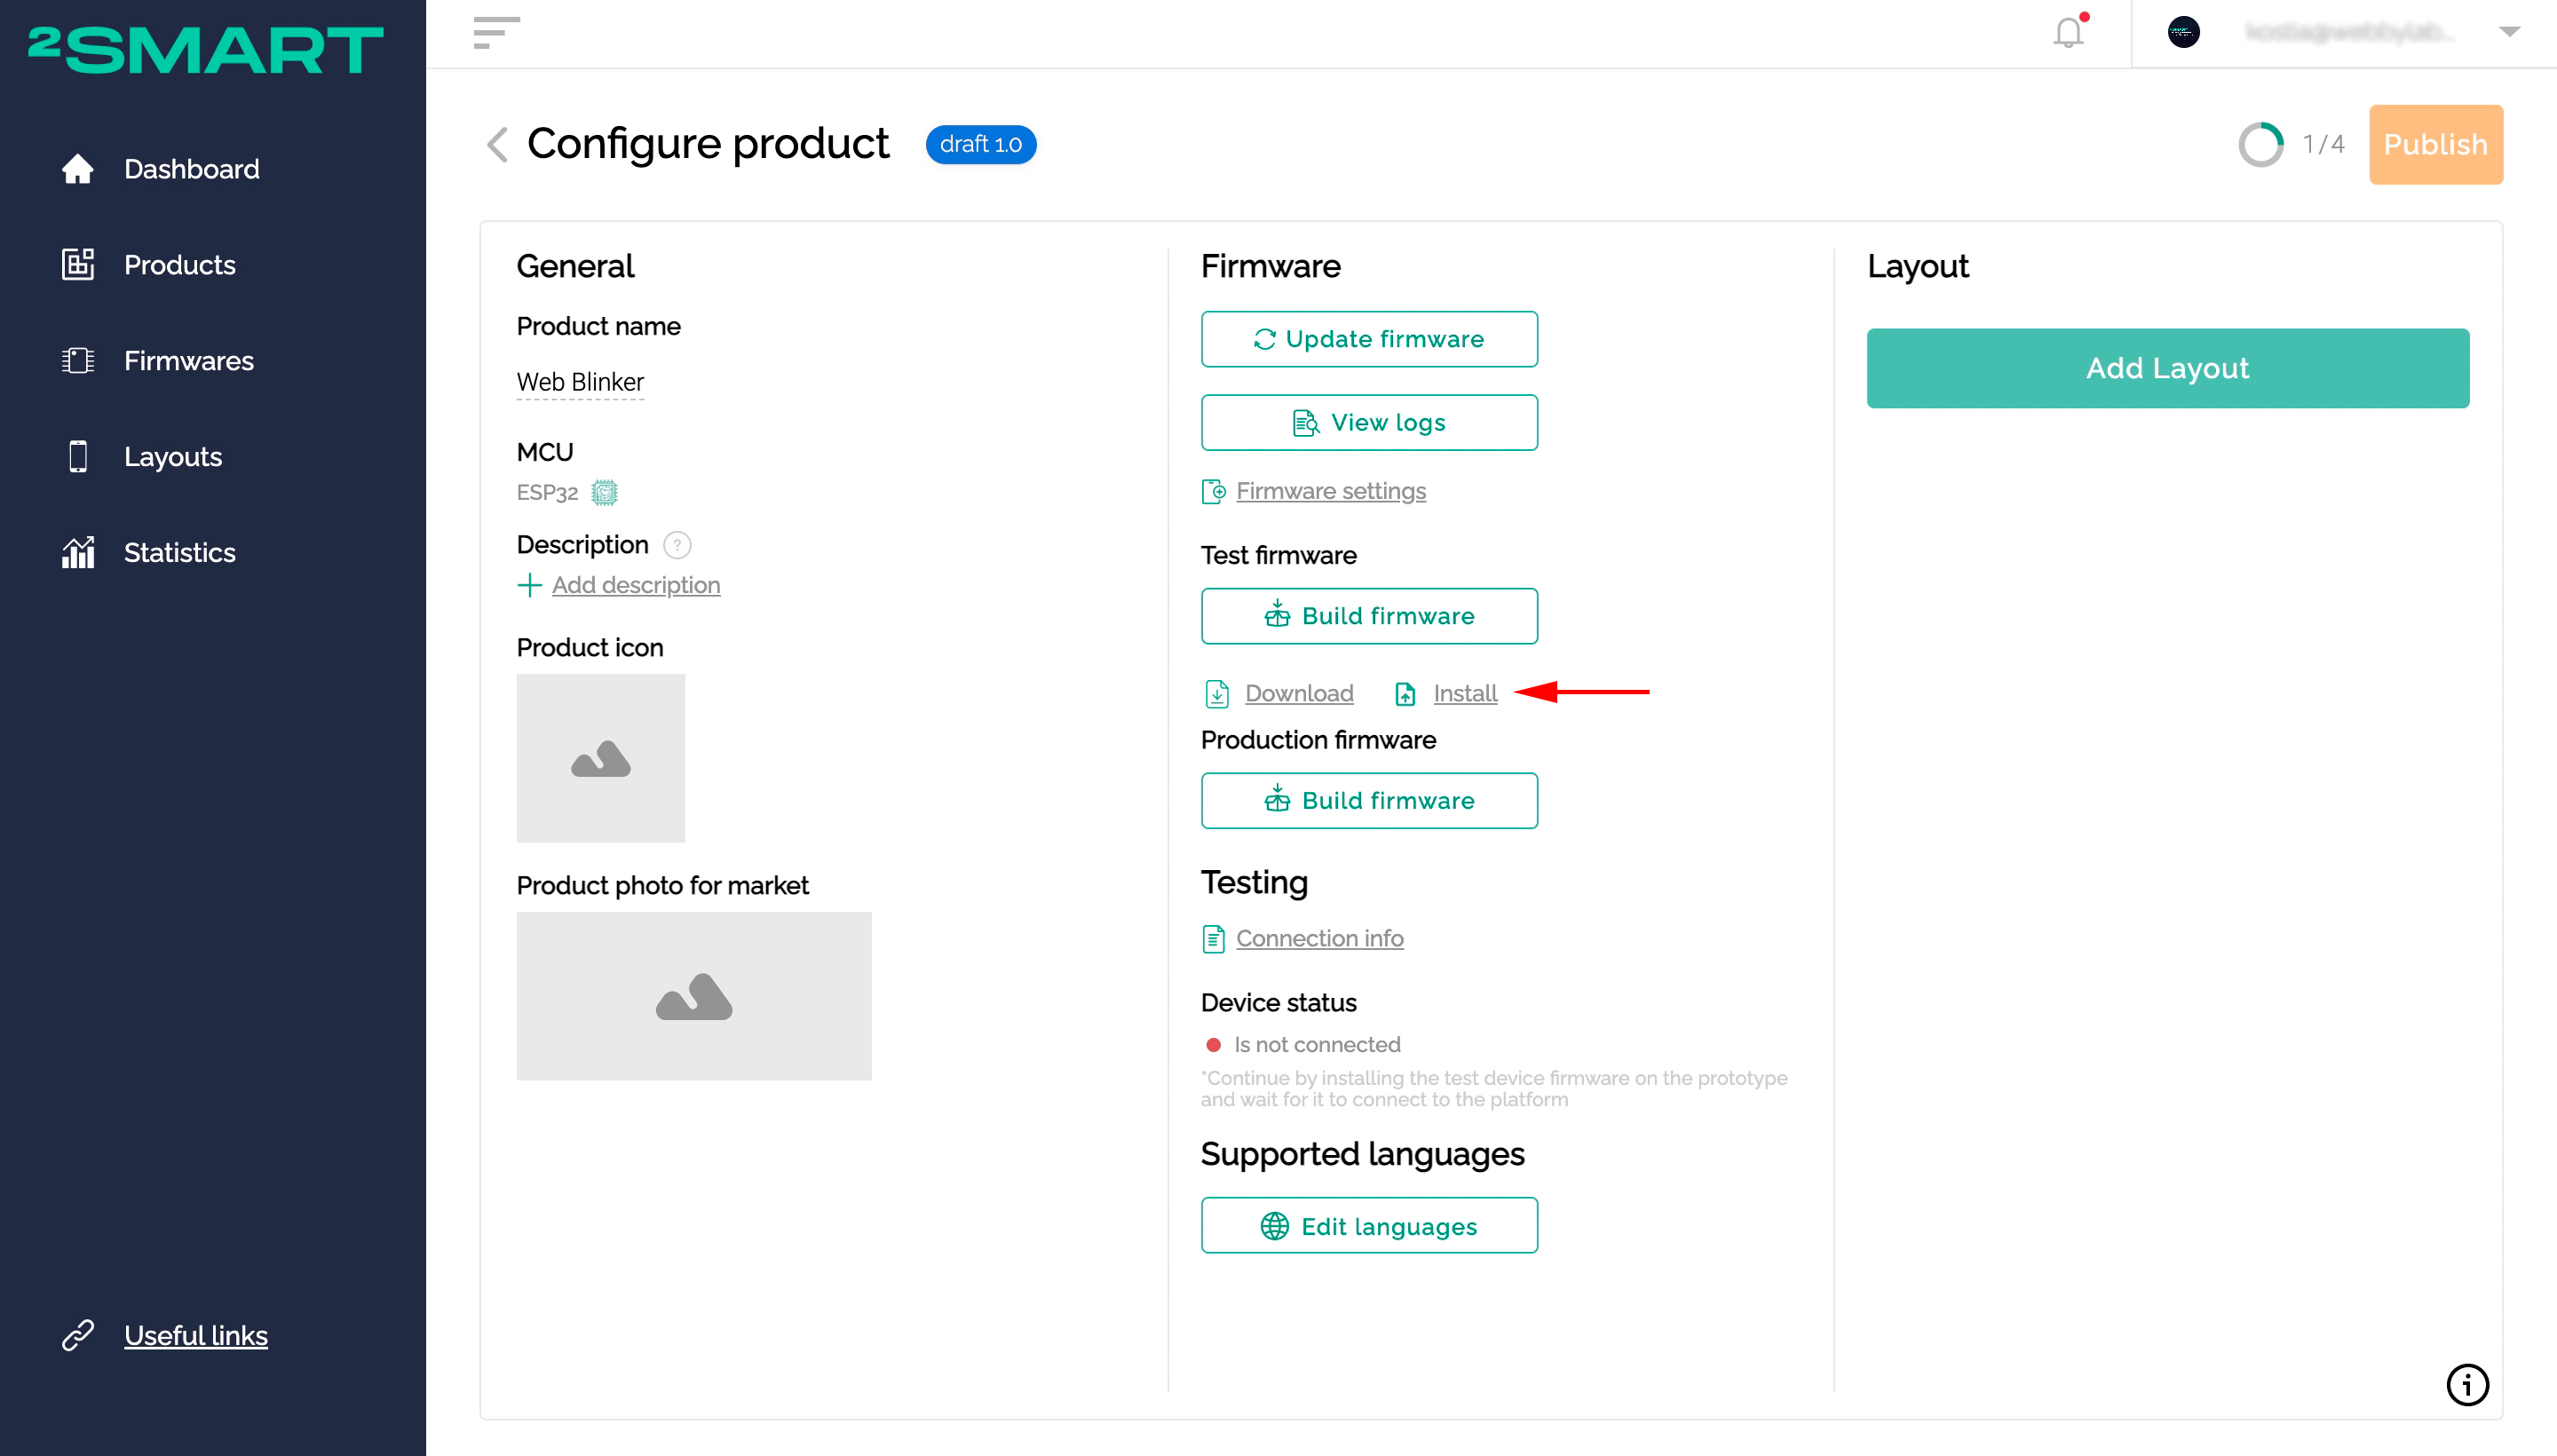
- Work on your new product as usual. Create an ESPHome configuration for the device, paste it into the code editor window, and save the changes. Click the “Build firmware” button for a test firmware, specify your Wi-Fi network credentials and wait until your firmware archive is built on the server.
- After the firmware is built, you will see a new link – Install.

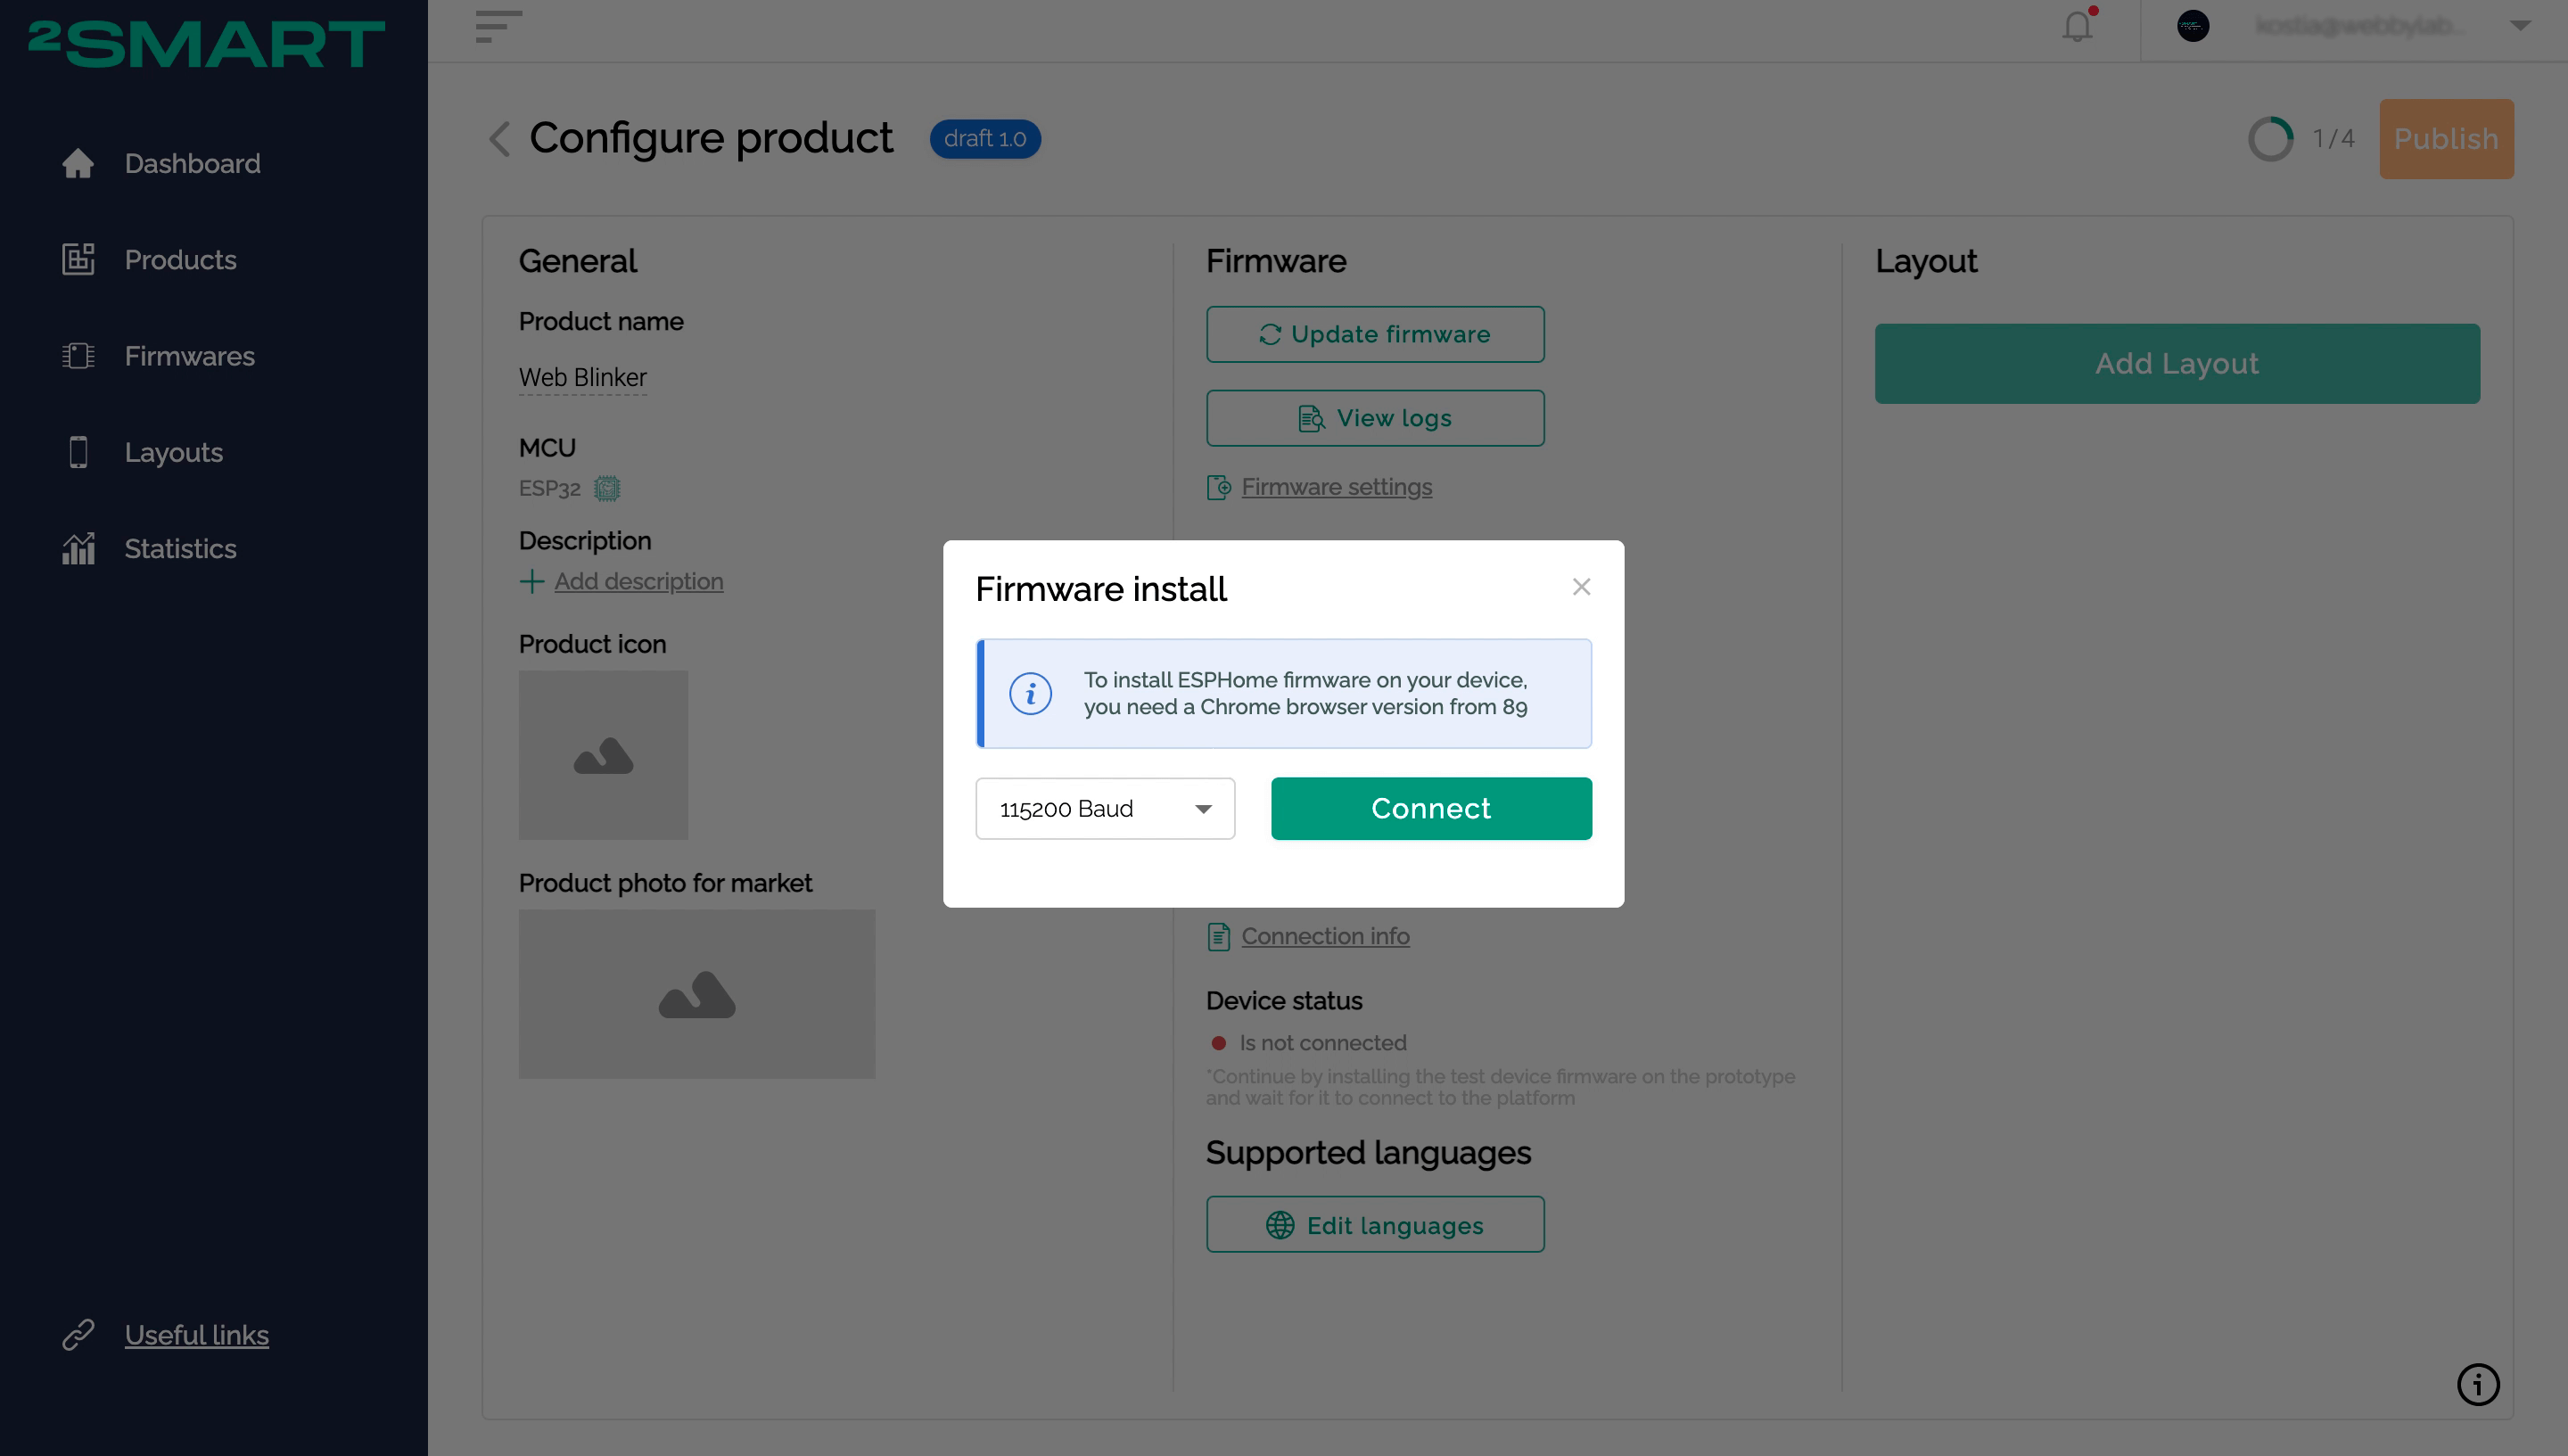
- Connect the microcontroller to your computer using the USB cable. Click on the “Install” link to install the firmware on the microcontroller using the platform web interface. In the modal window that appears, click the “Connect” button.

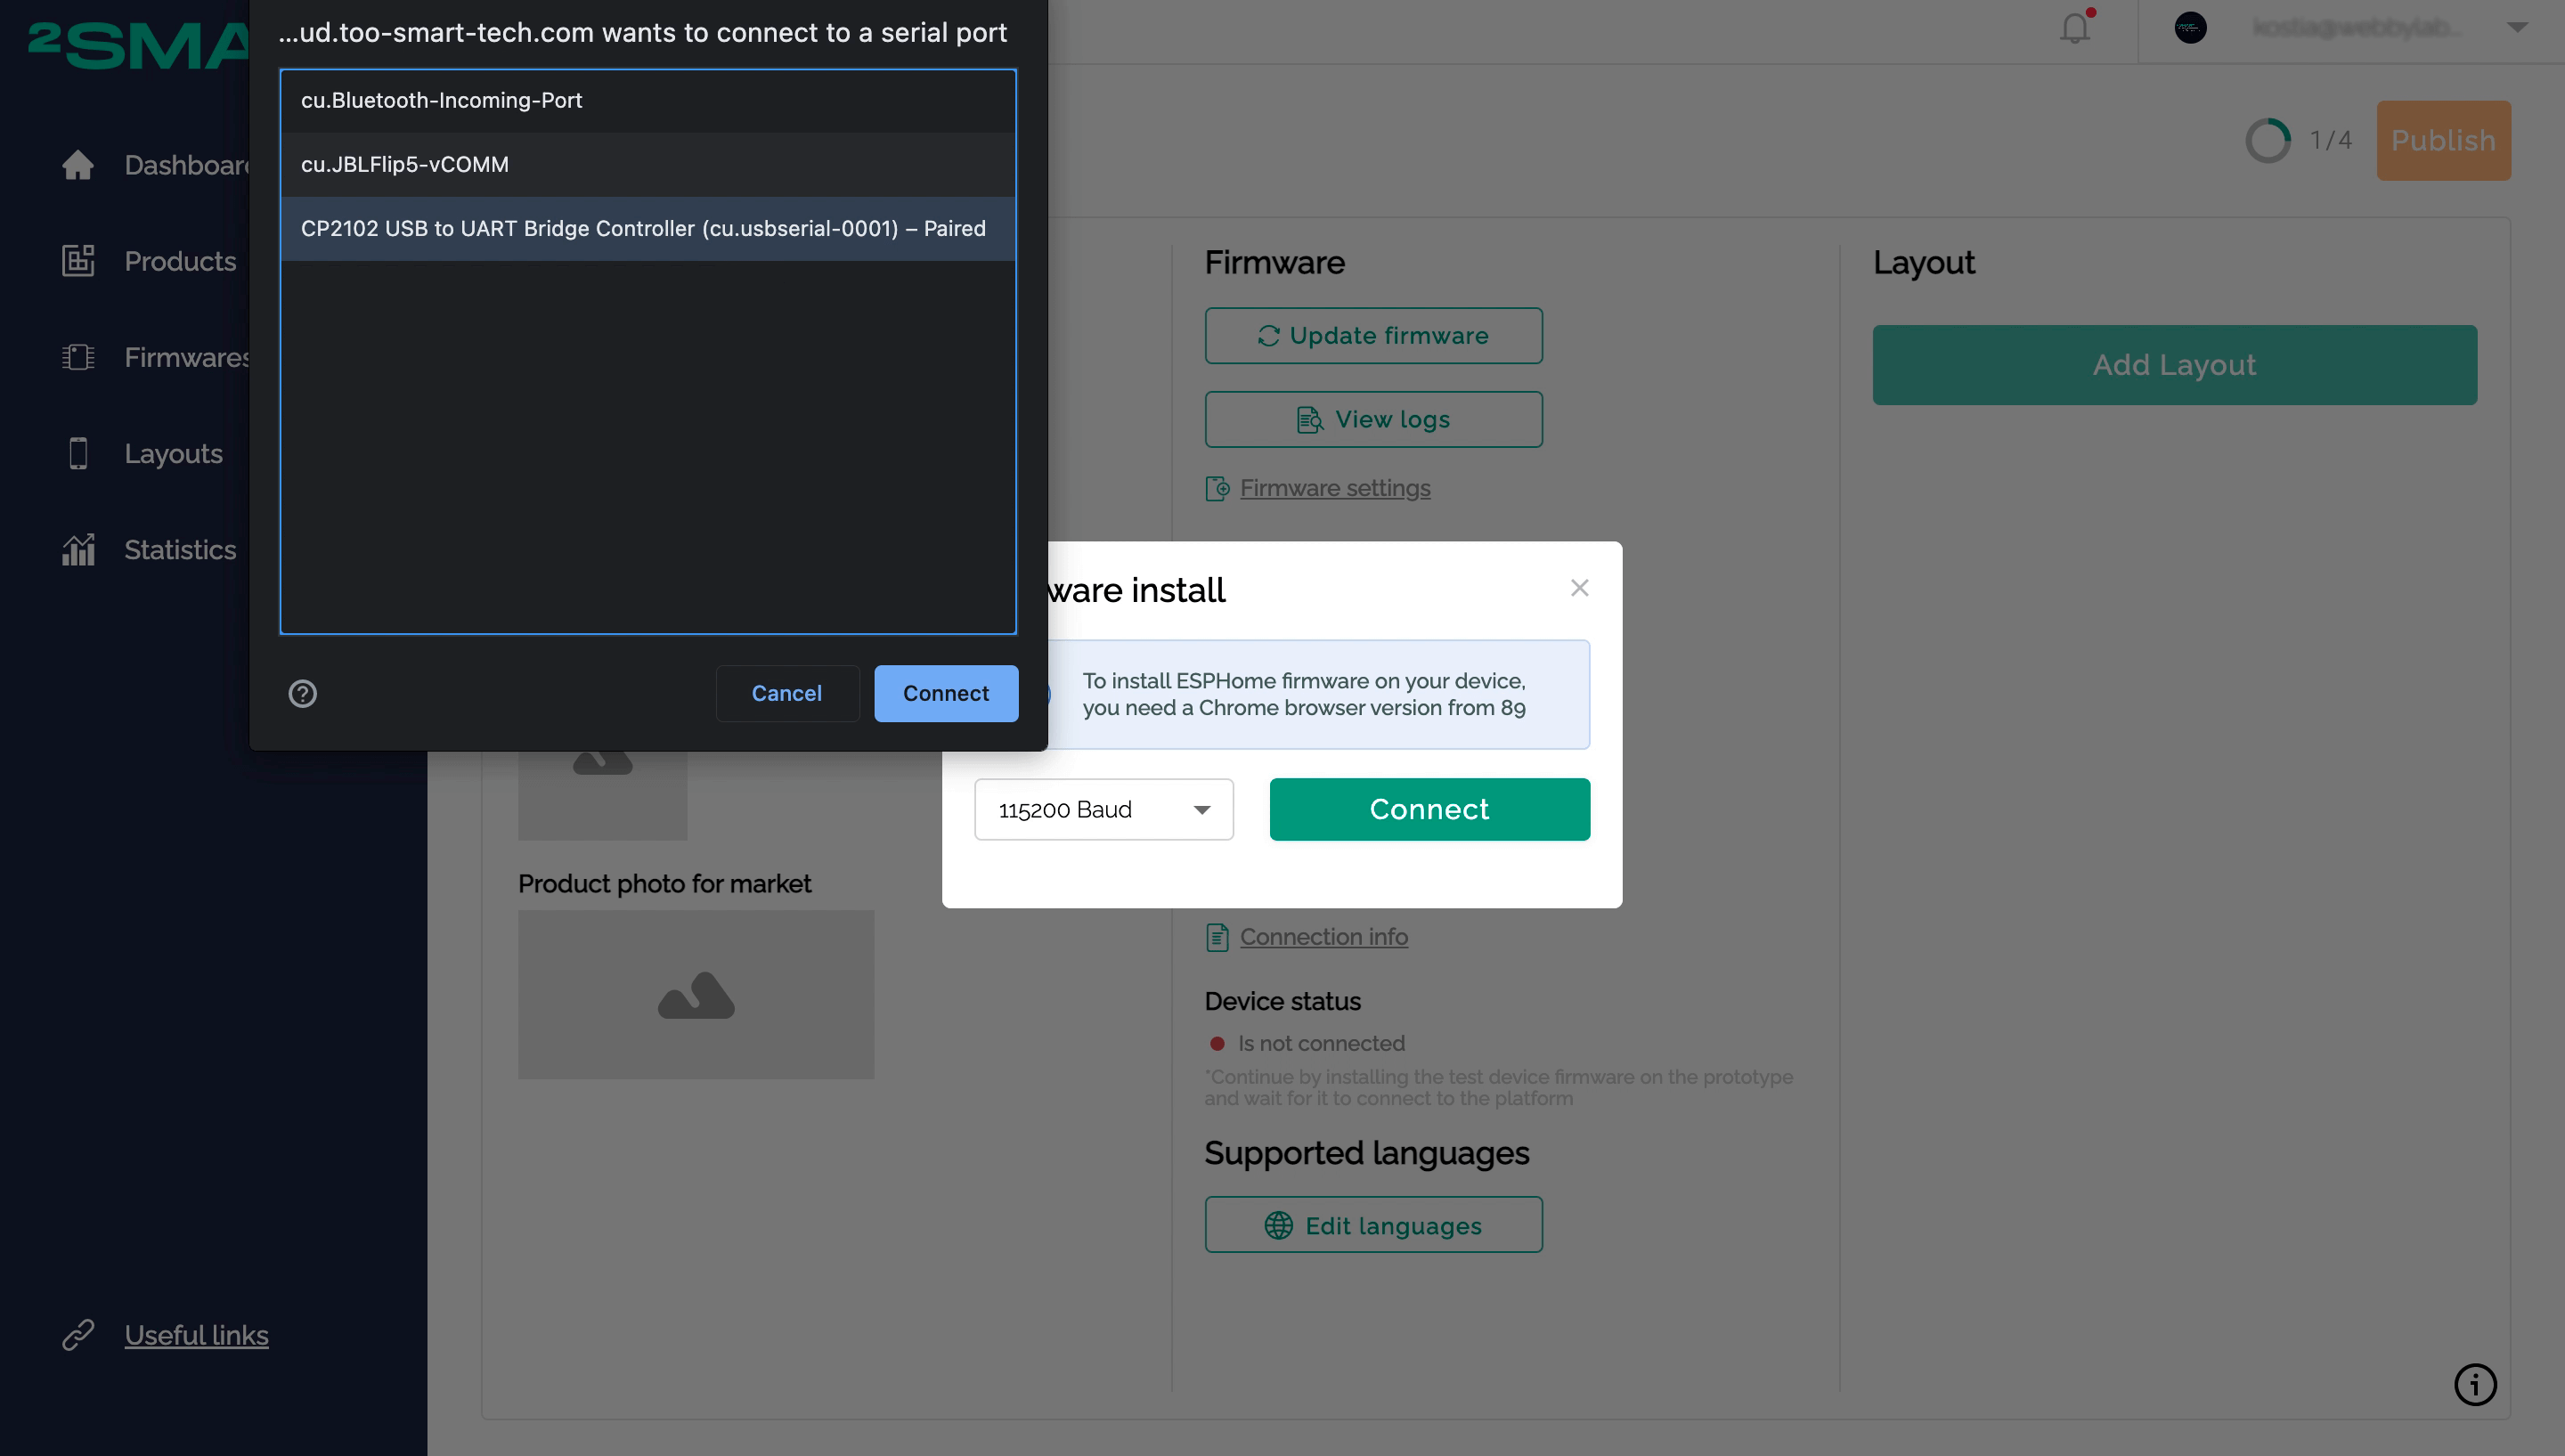
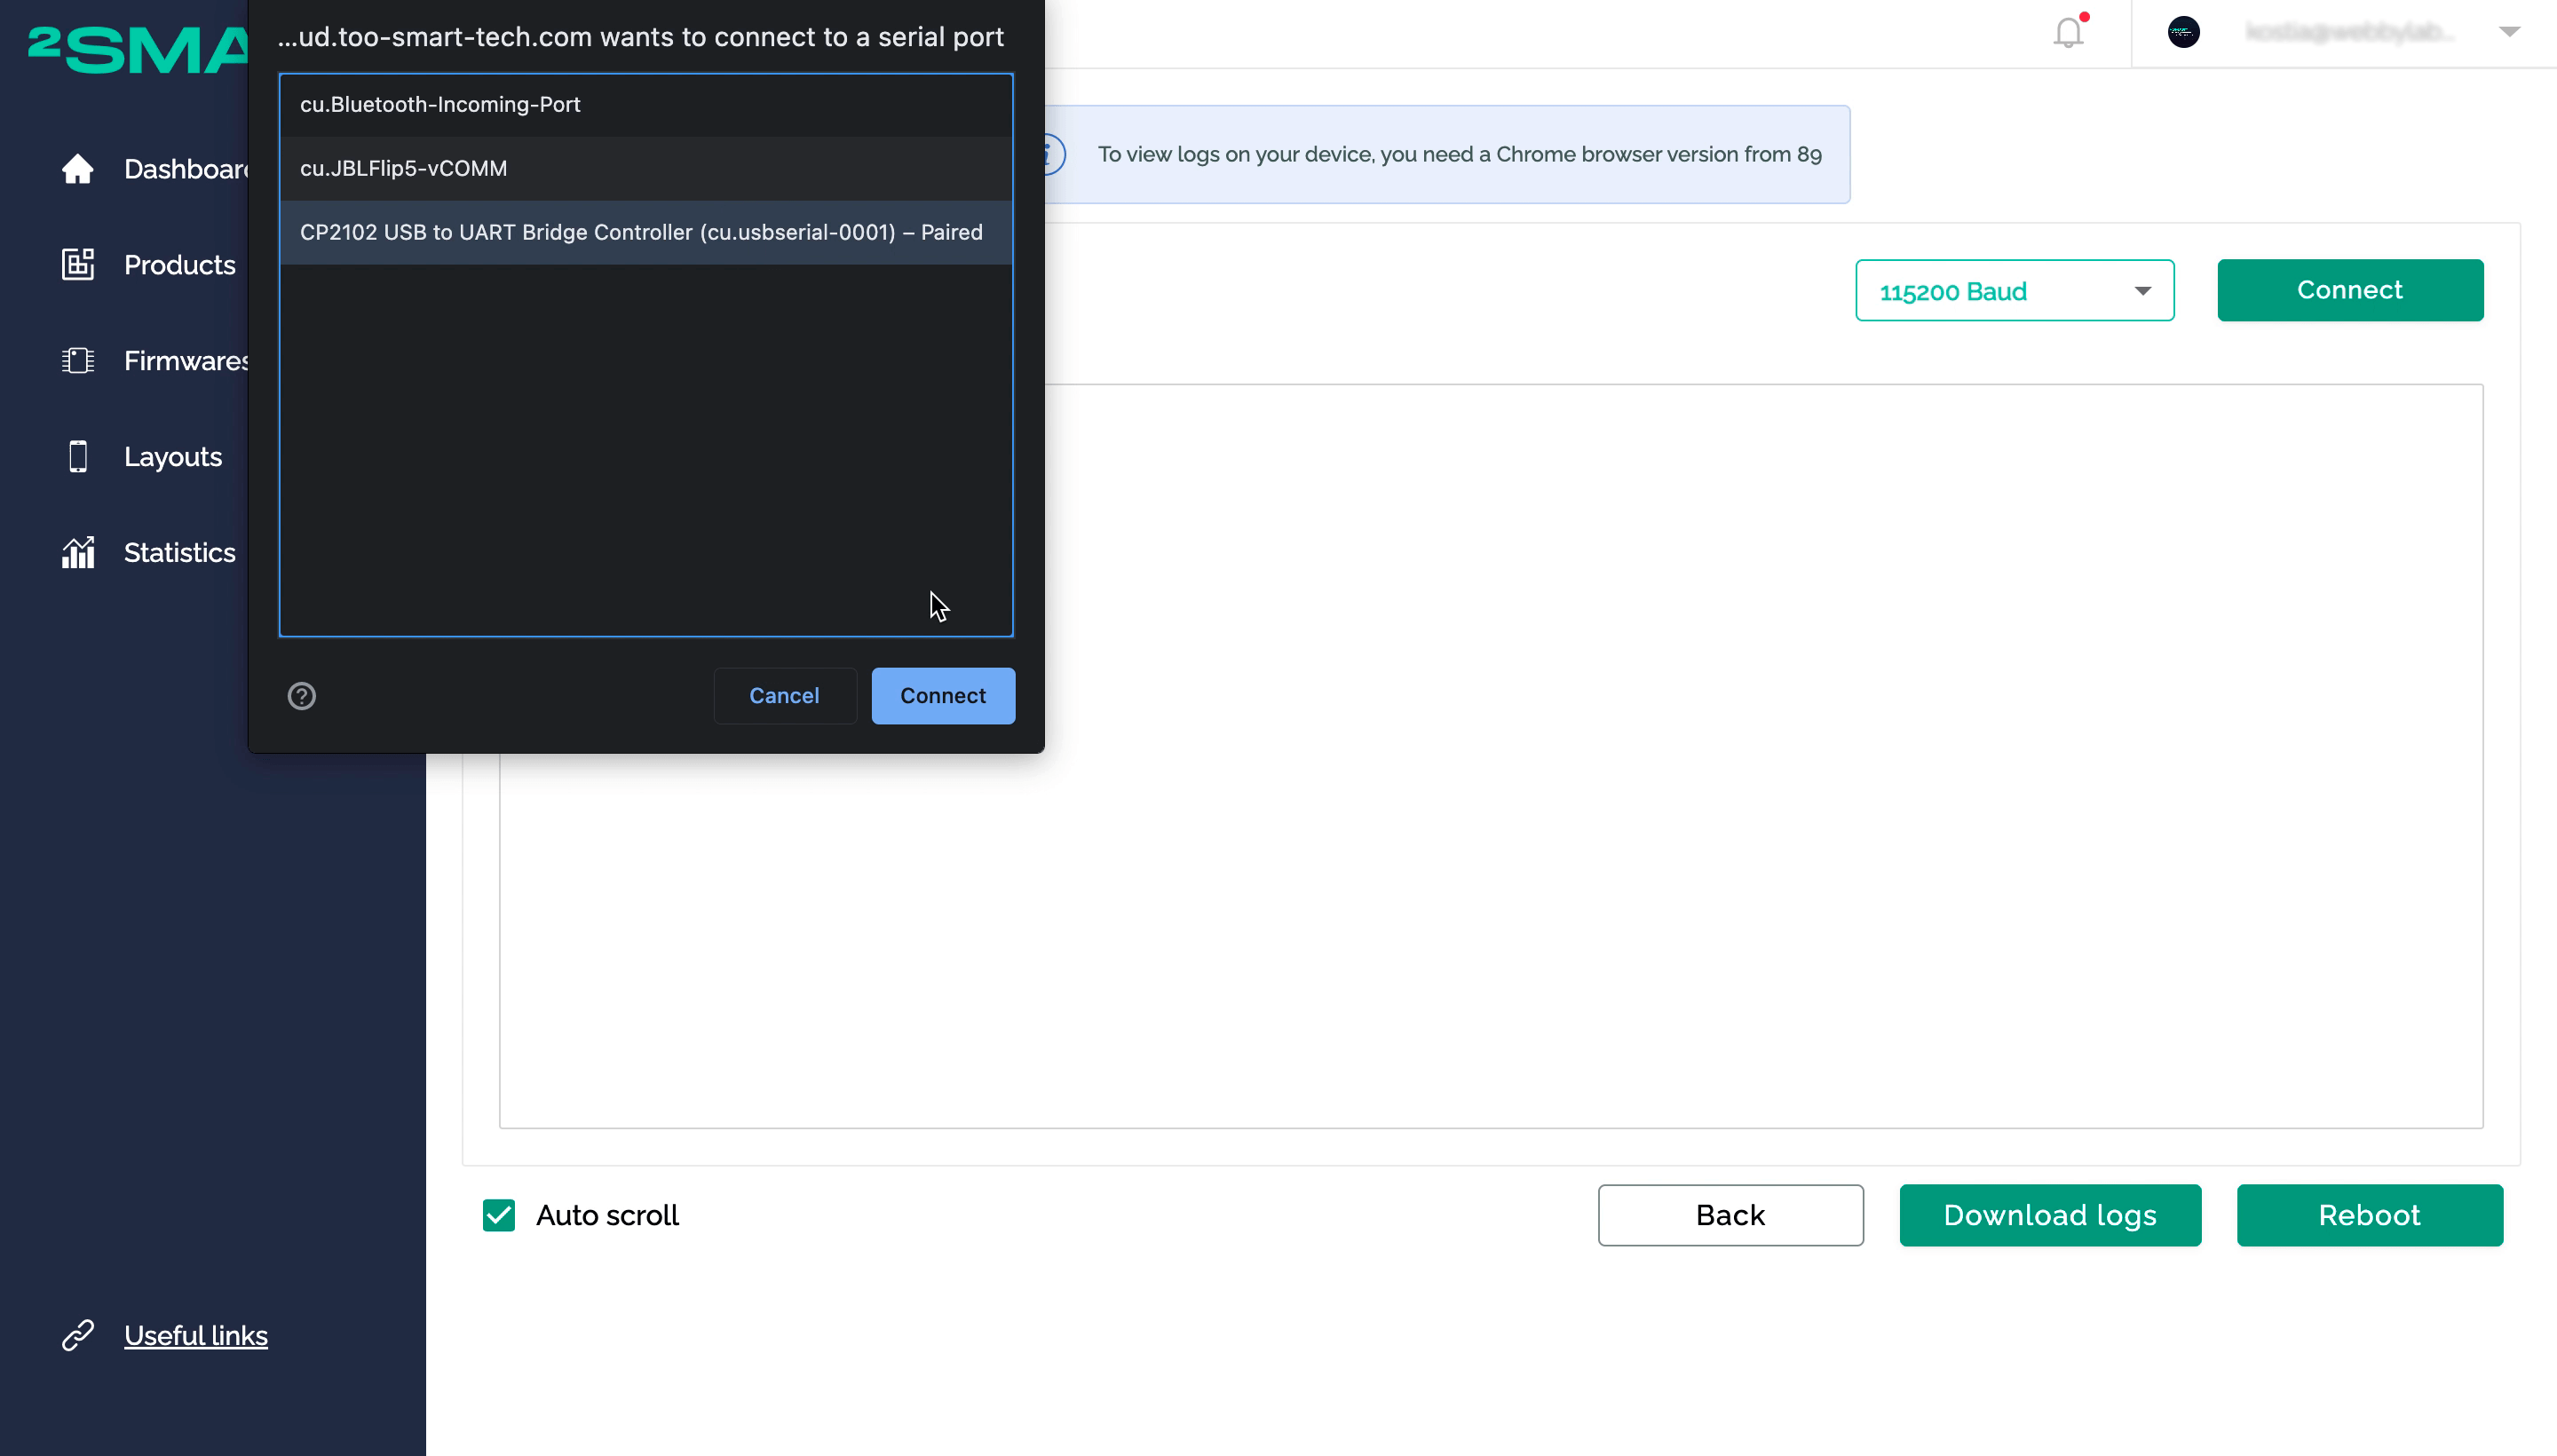
- Select the computer’s serial port to which your microcontroller is connected. Click the “Connect” button.
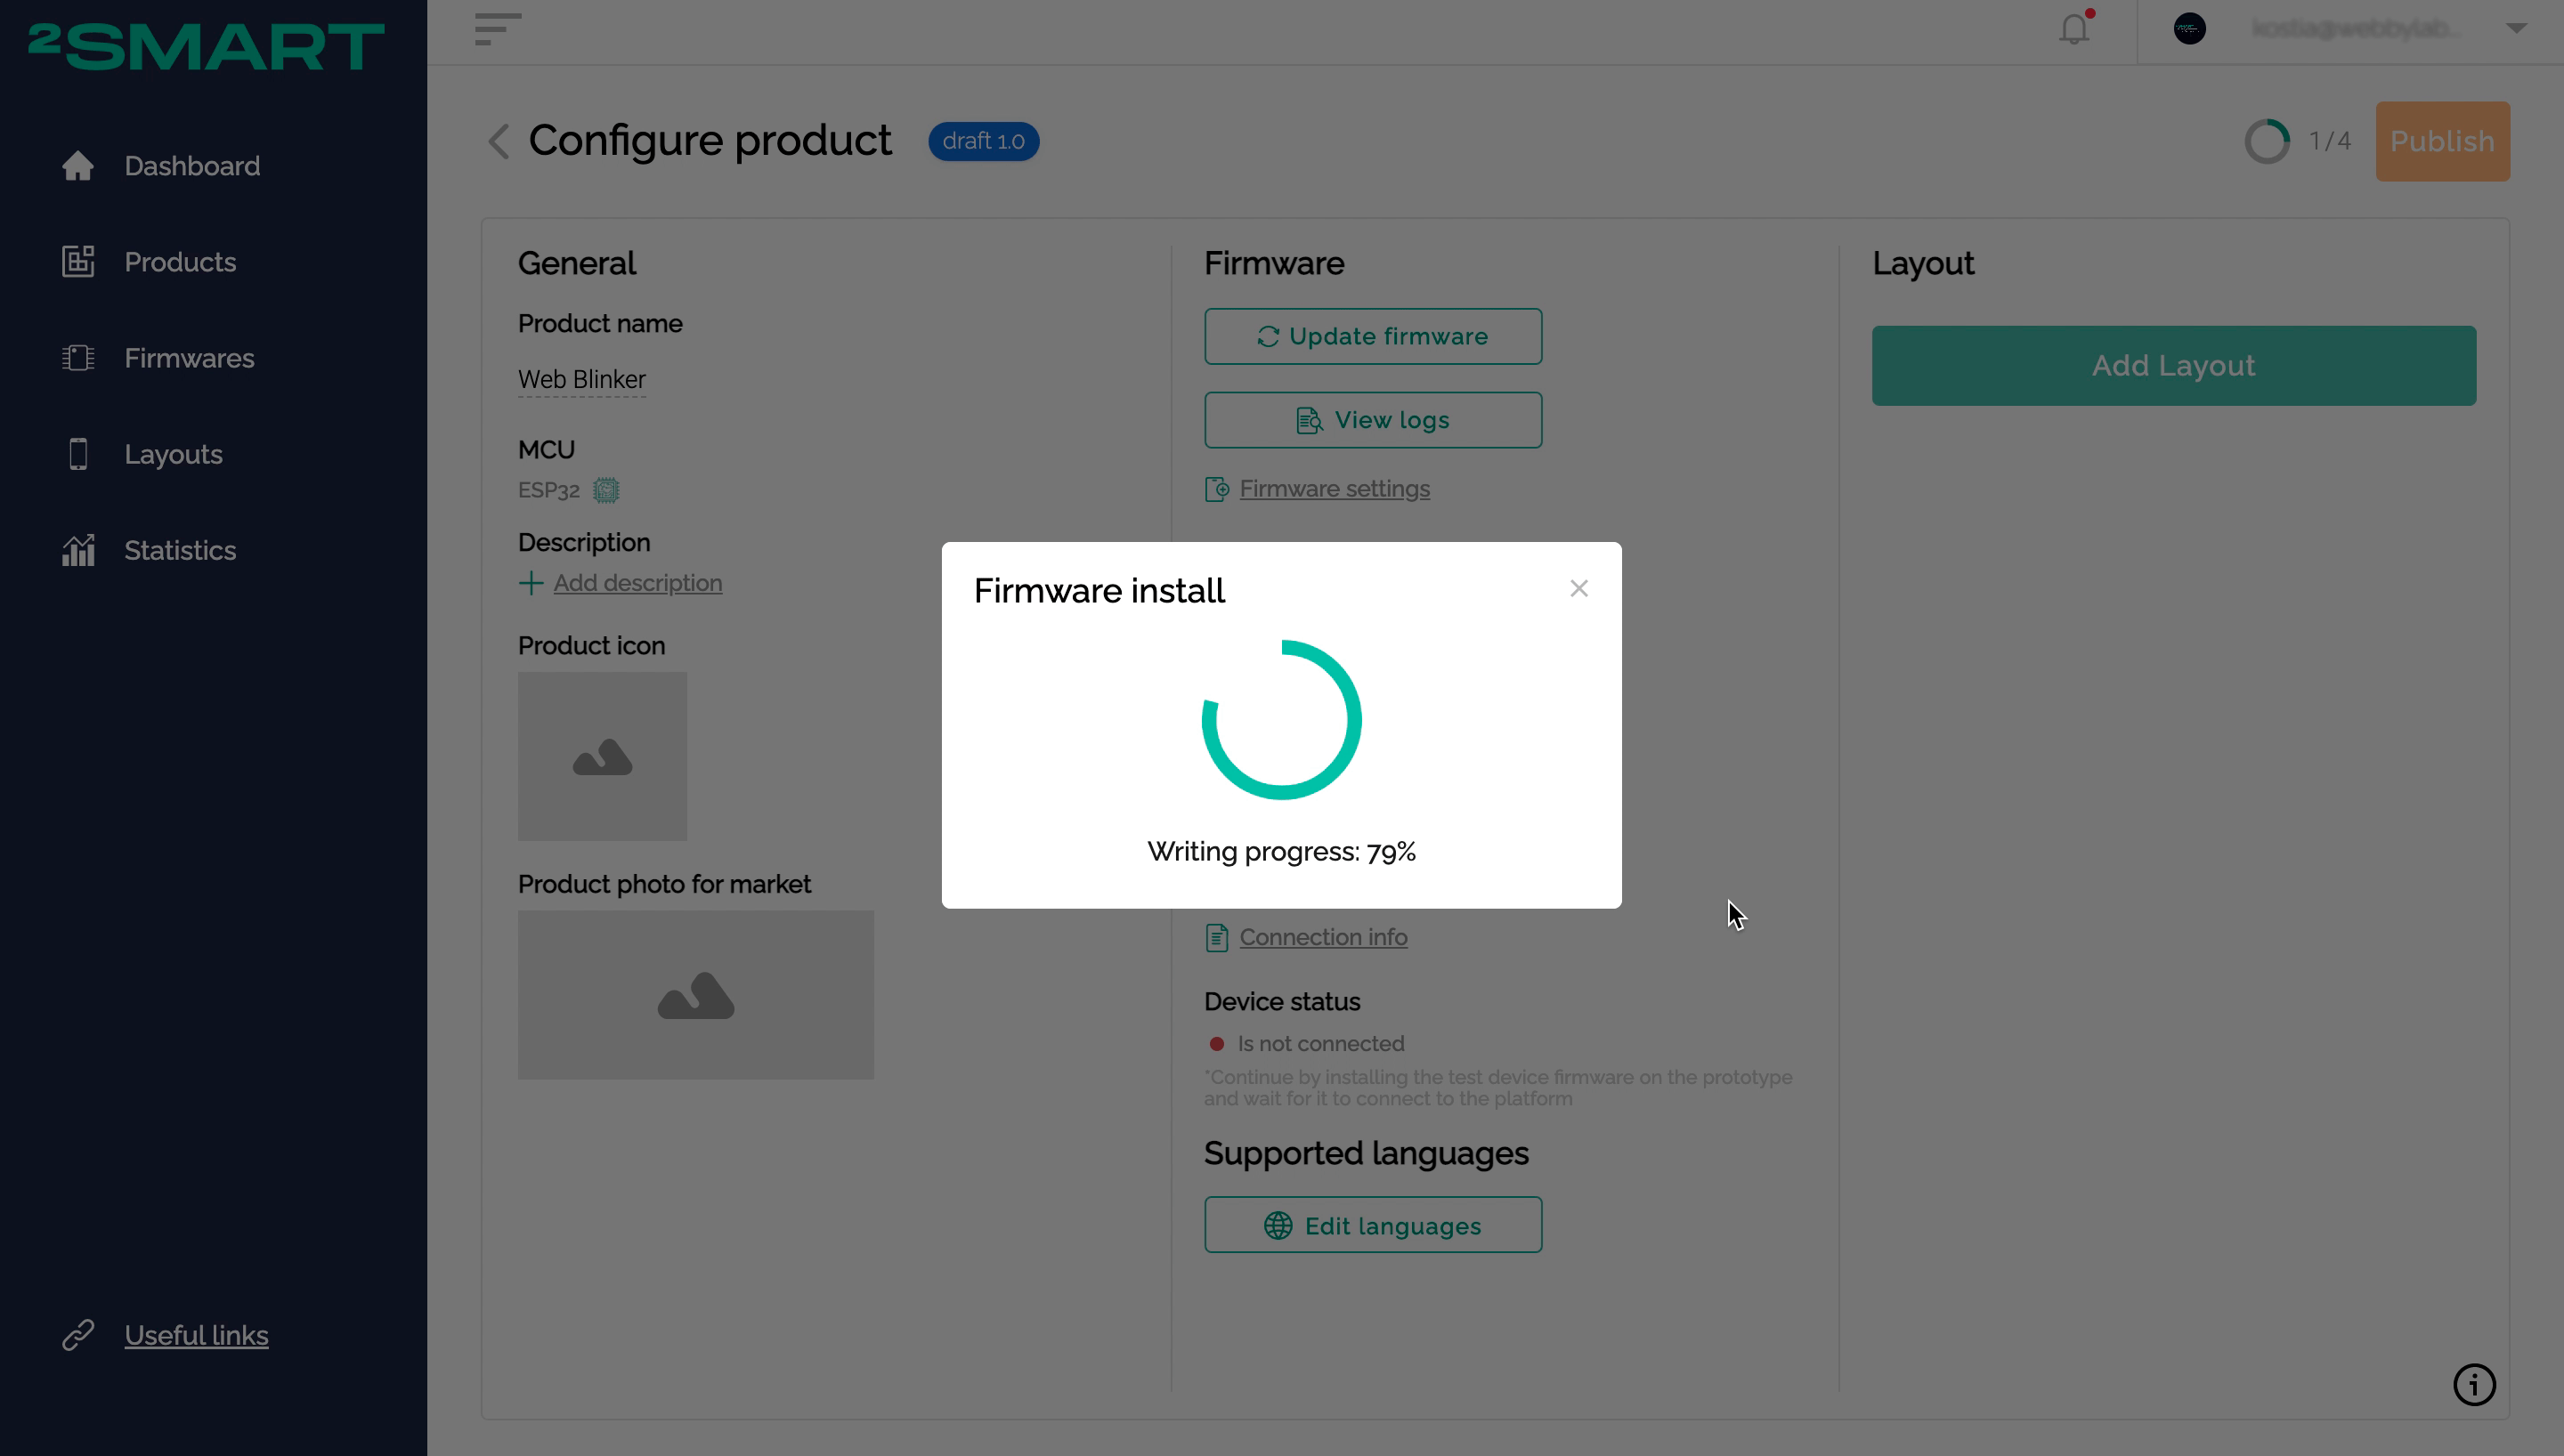
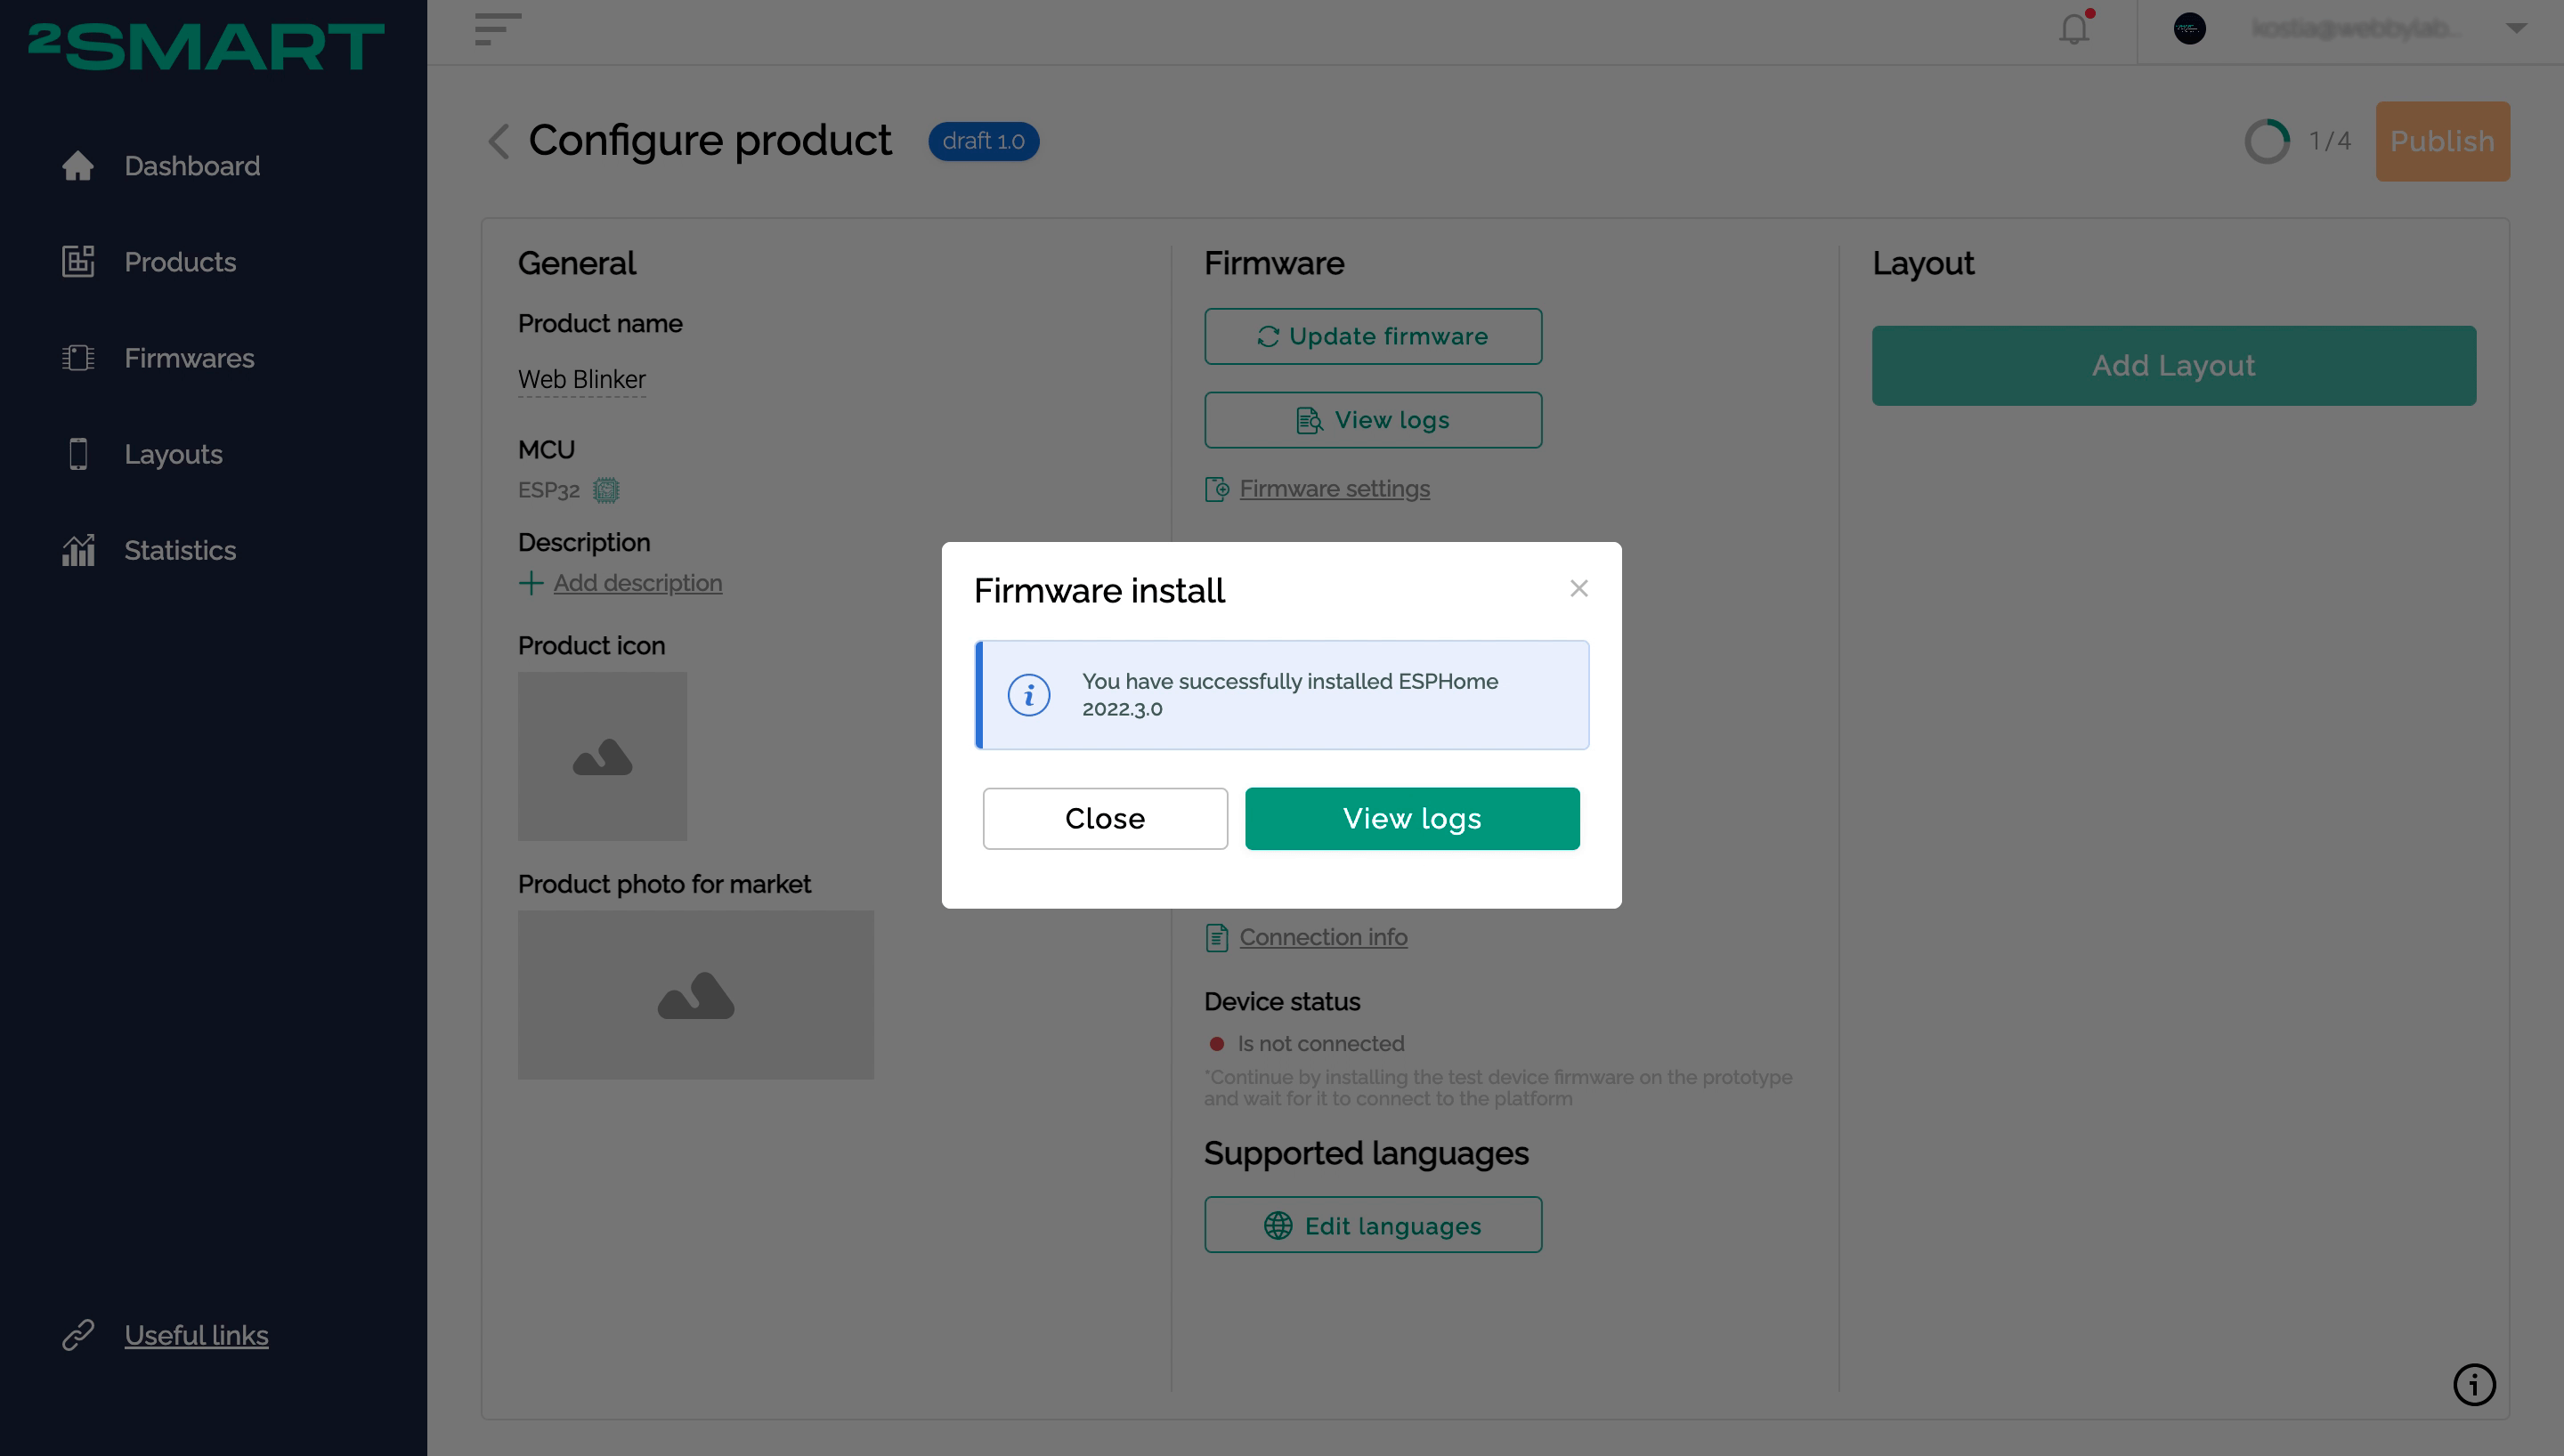
- Wait until the firmware is installed on the device.
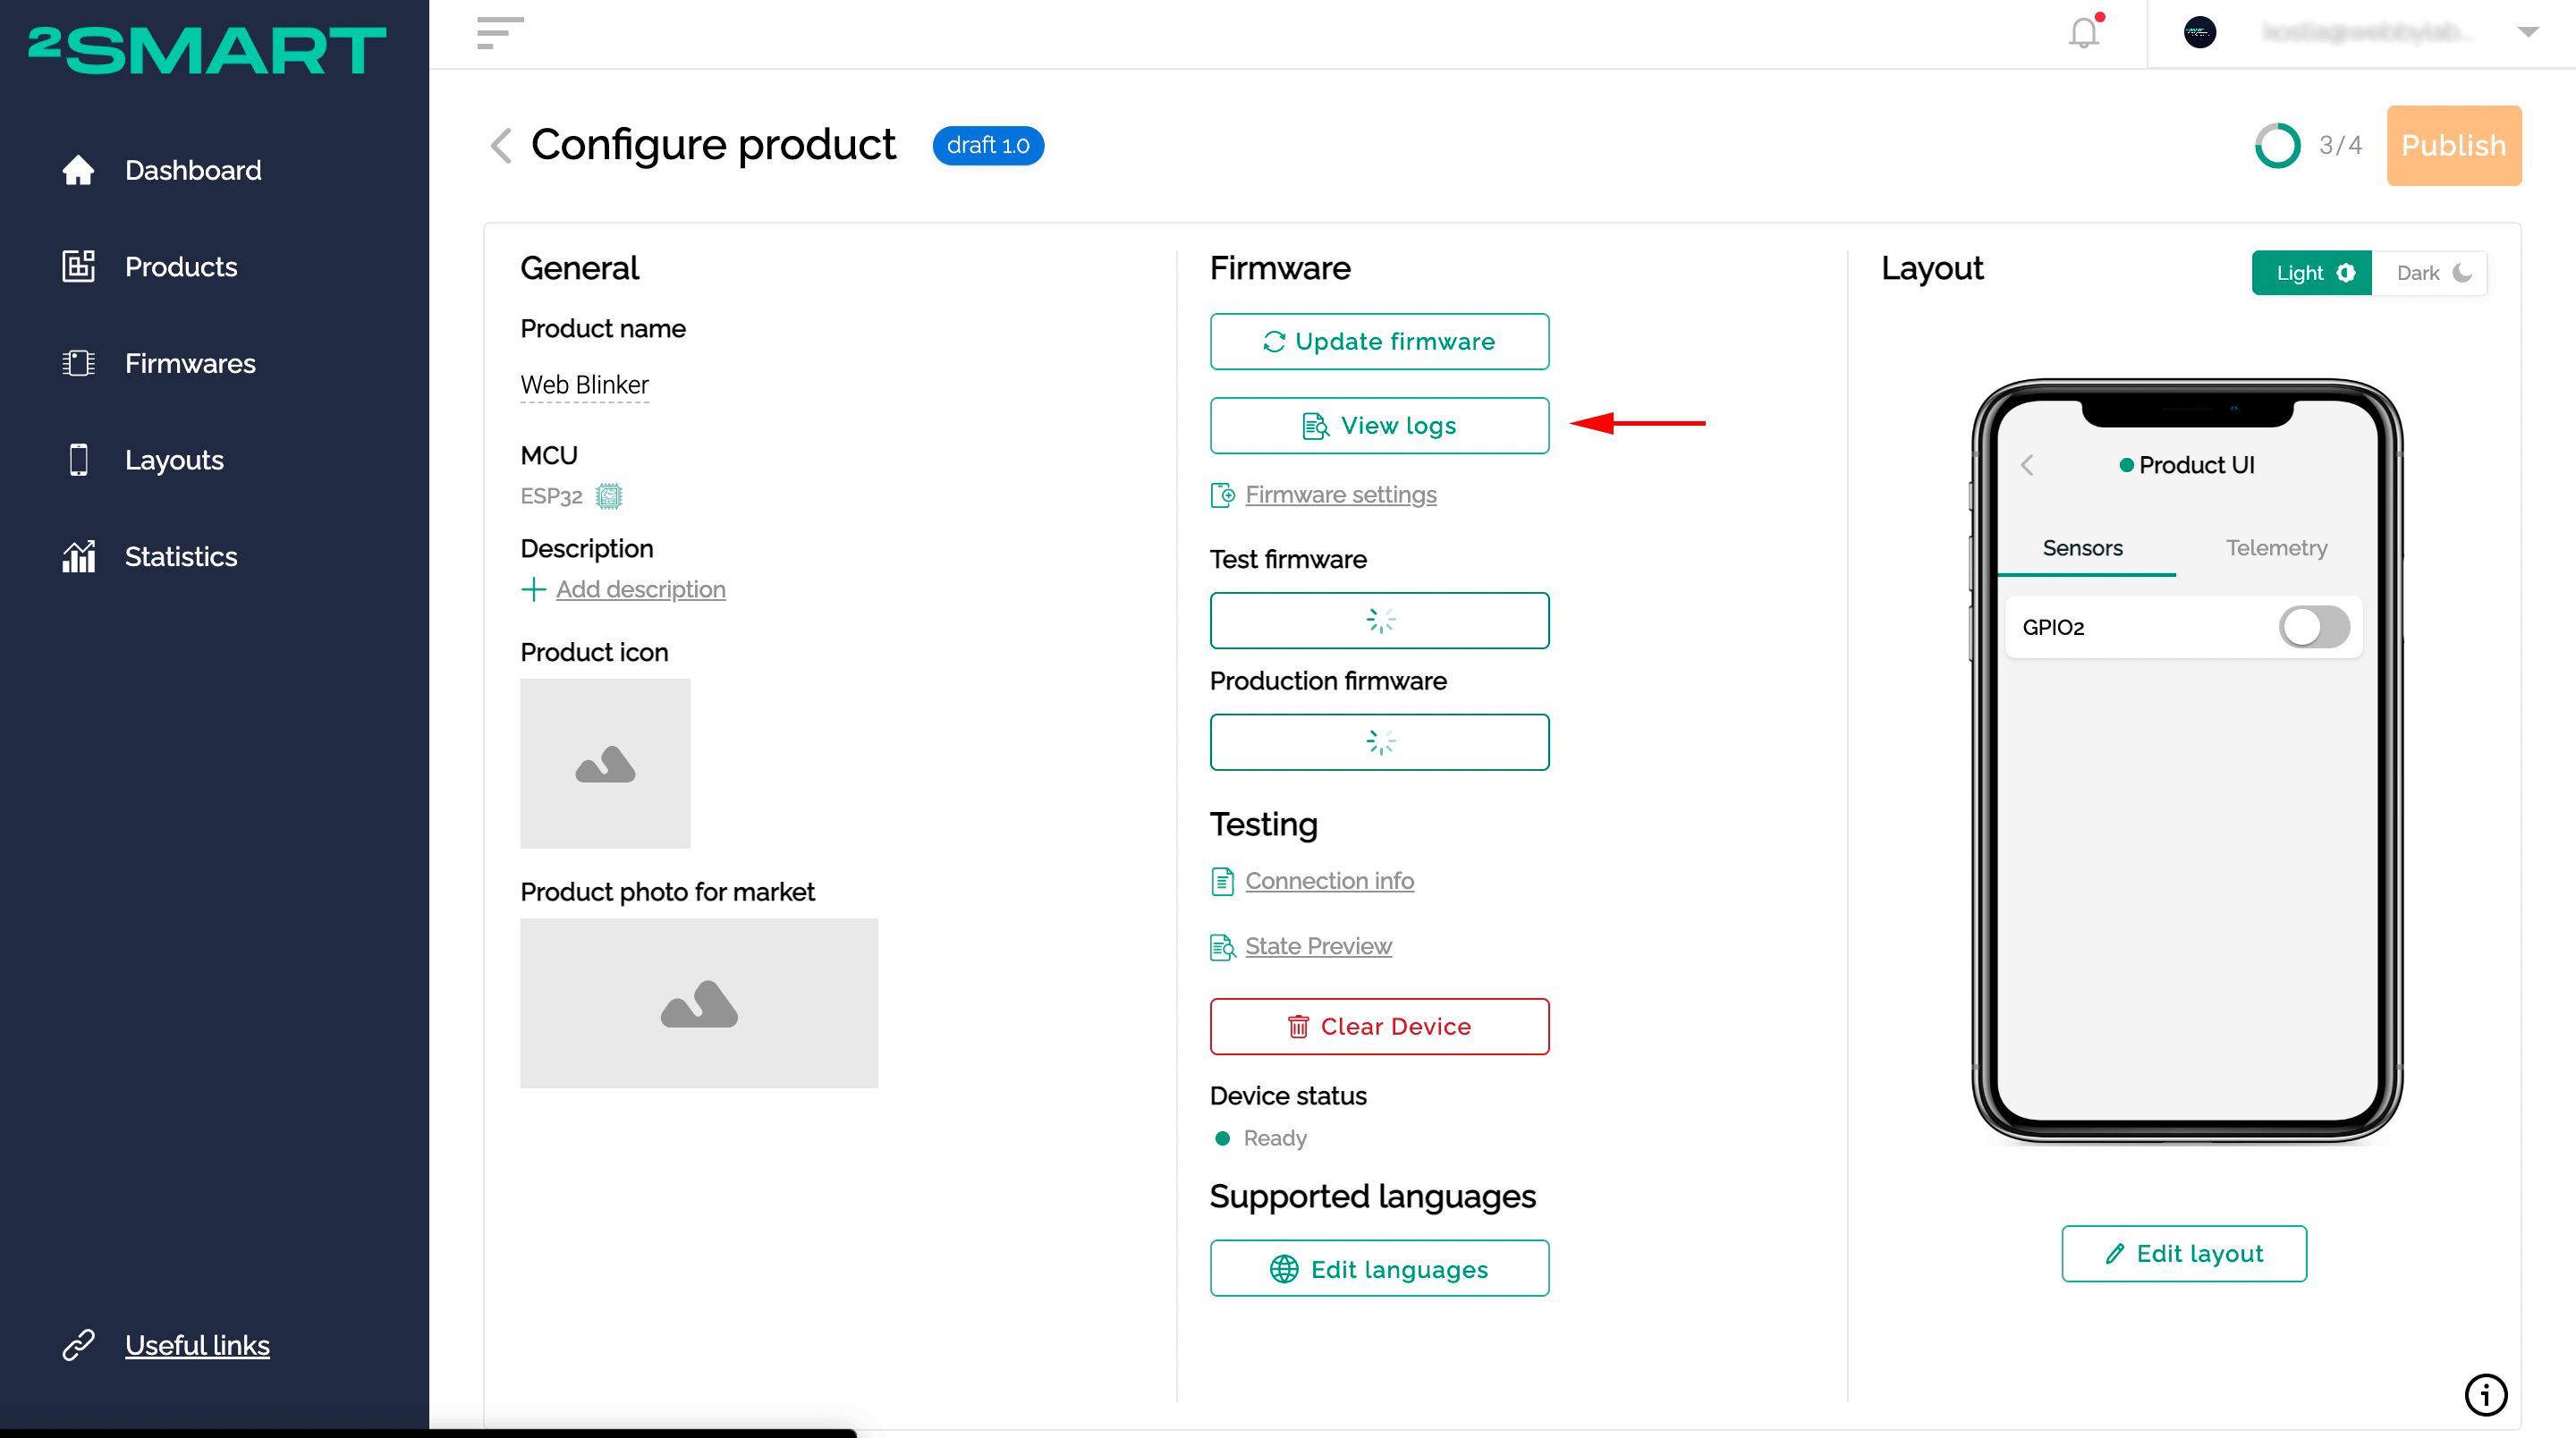
- Done! After a few seconds, the device status on the platform will change to “Ready”, and you can continue working by going to the mobile application interface settings.
- Install the production firmware for the device the same way when you are finished with the product.
Please note! This feature is available if you are working on your product using the product page. The step-by-step assistant does not yet support it.
Let’s collaborate
We’re empower your business with our technology expertise
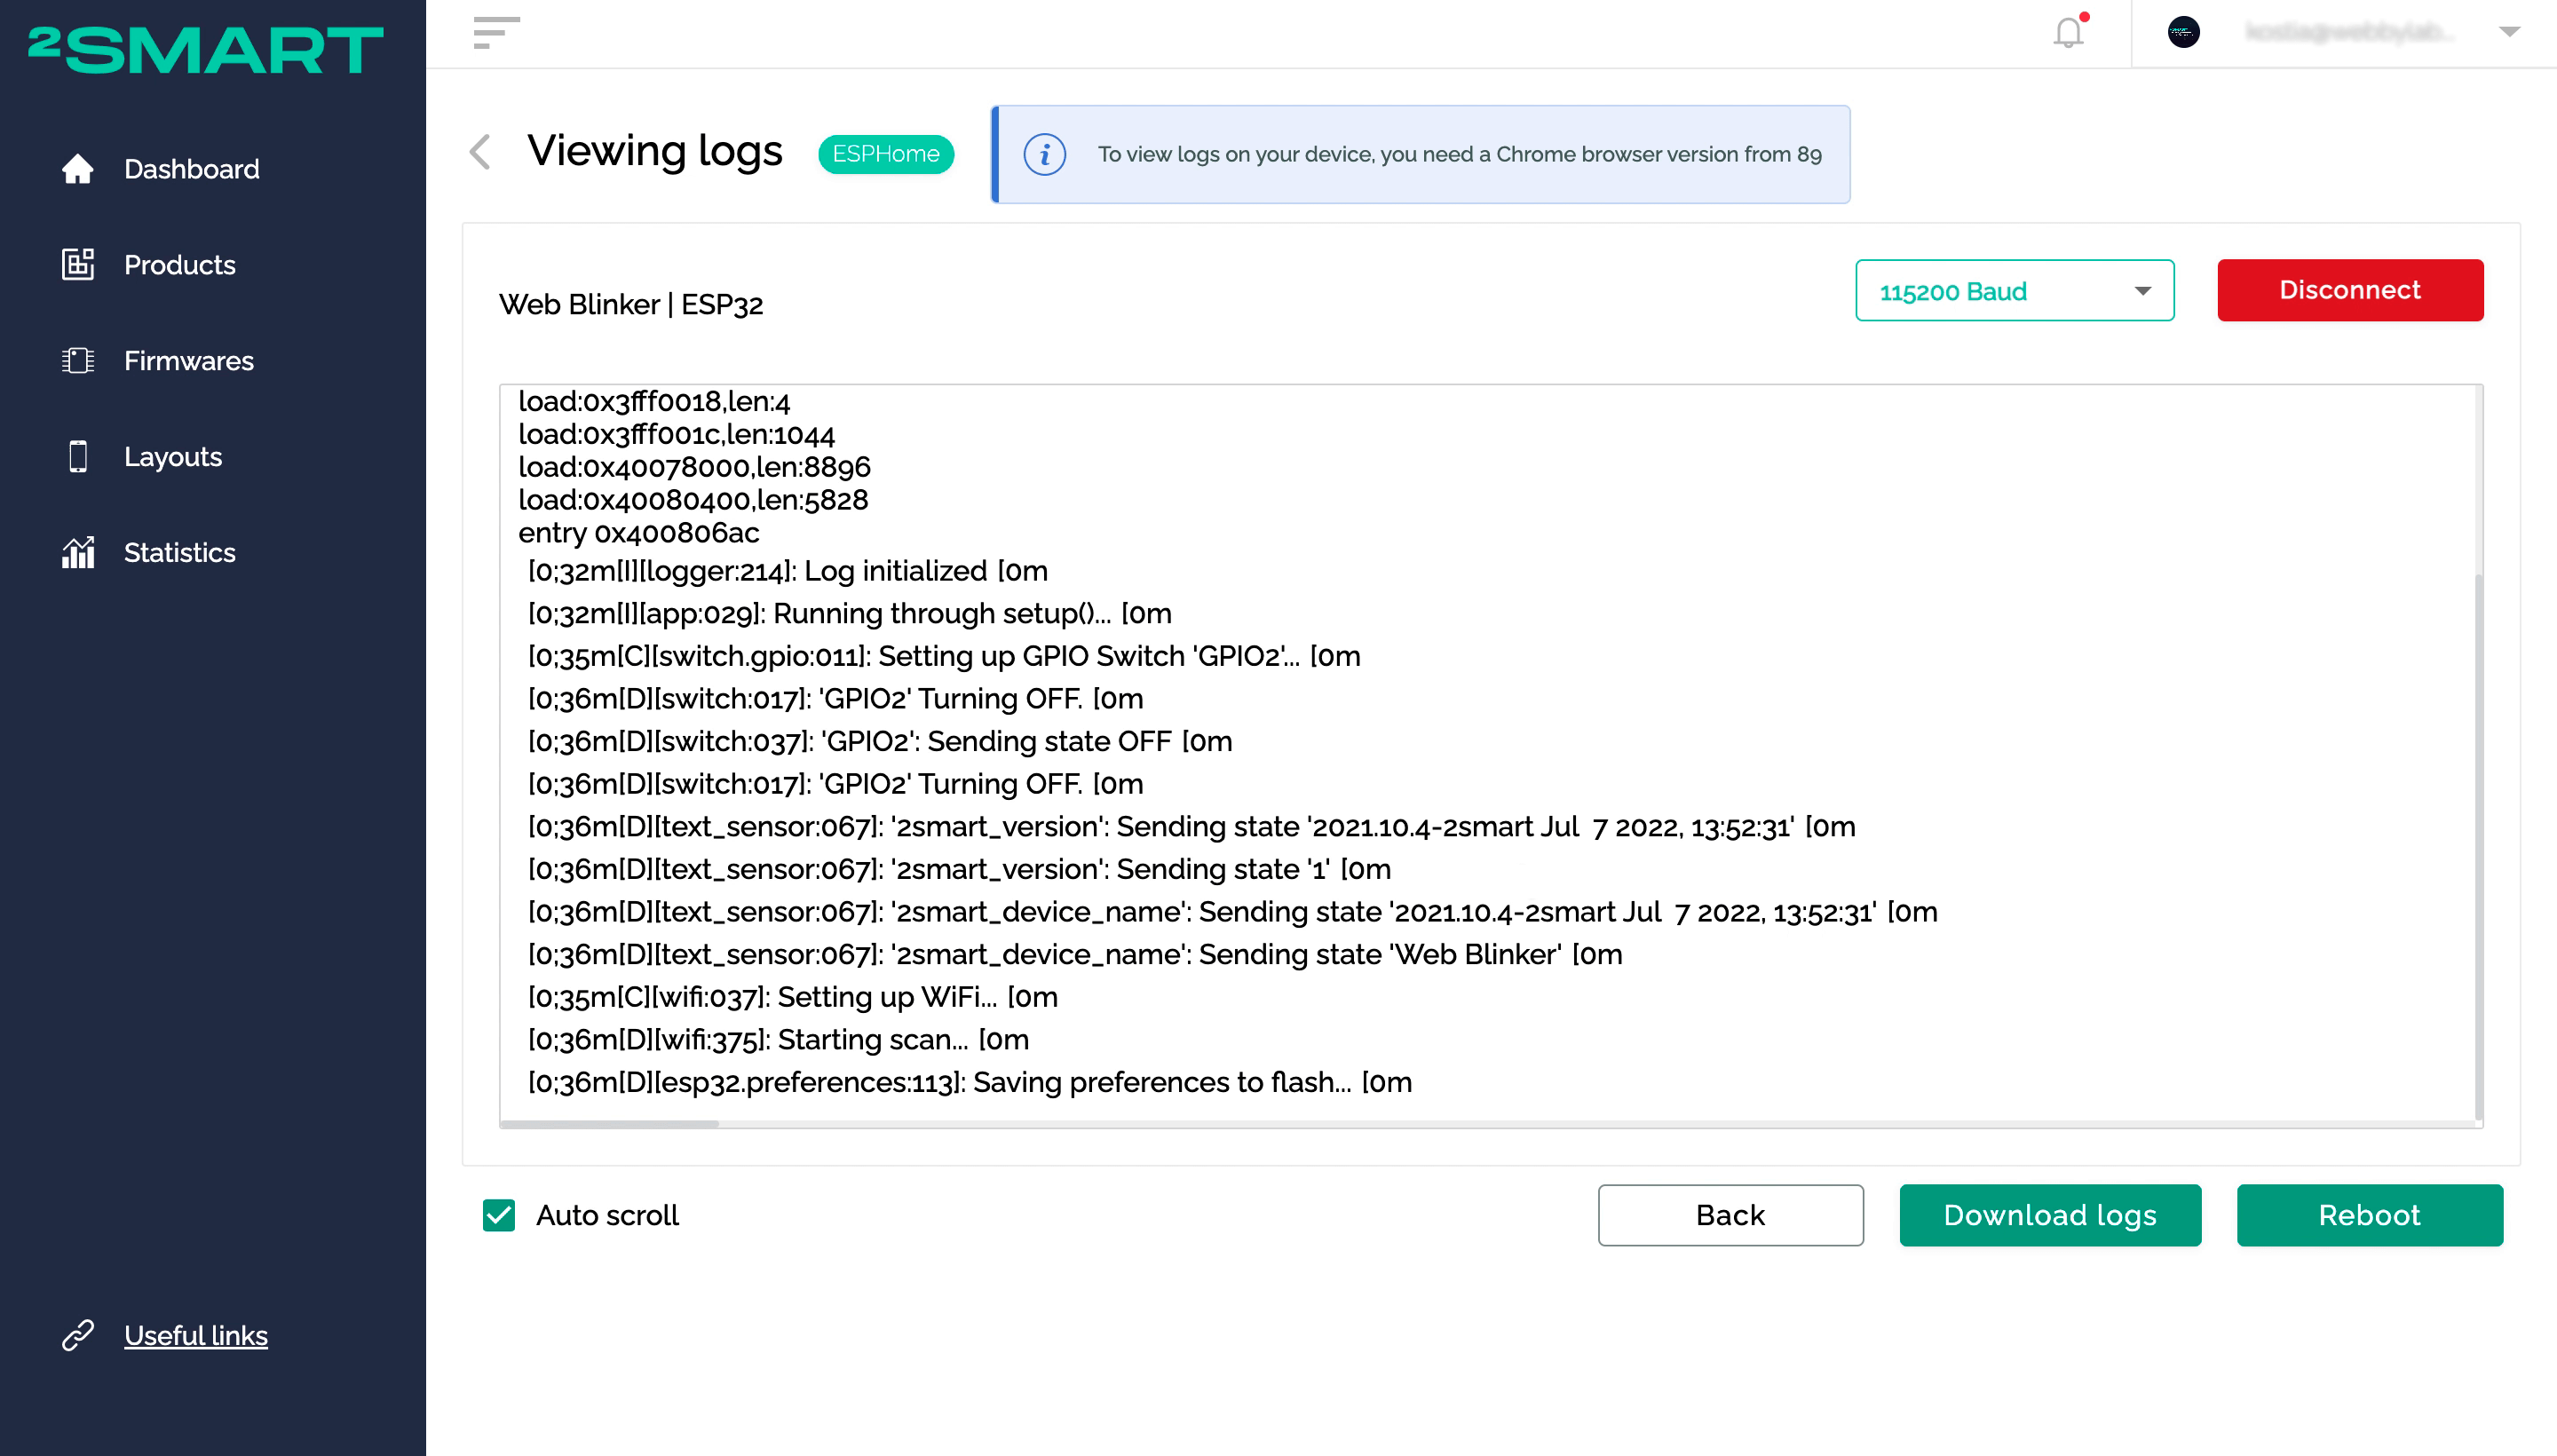
Viewing microcontroller logs via the platform web interface
An additional feature that is now available for any ESP32-based product is viewing logs on the microcontroller through the web interface of the 2Smart Cloud platform. It doesn’t matter what base the firmware for the device is written on – ESPHome or custom. The mechanics, in this case, are similar:
- Click the “View logs” button on the successful device flashing notification or the product page window.

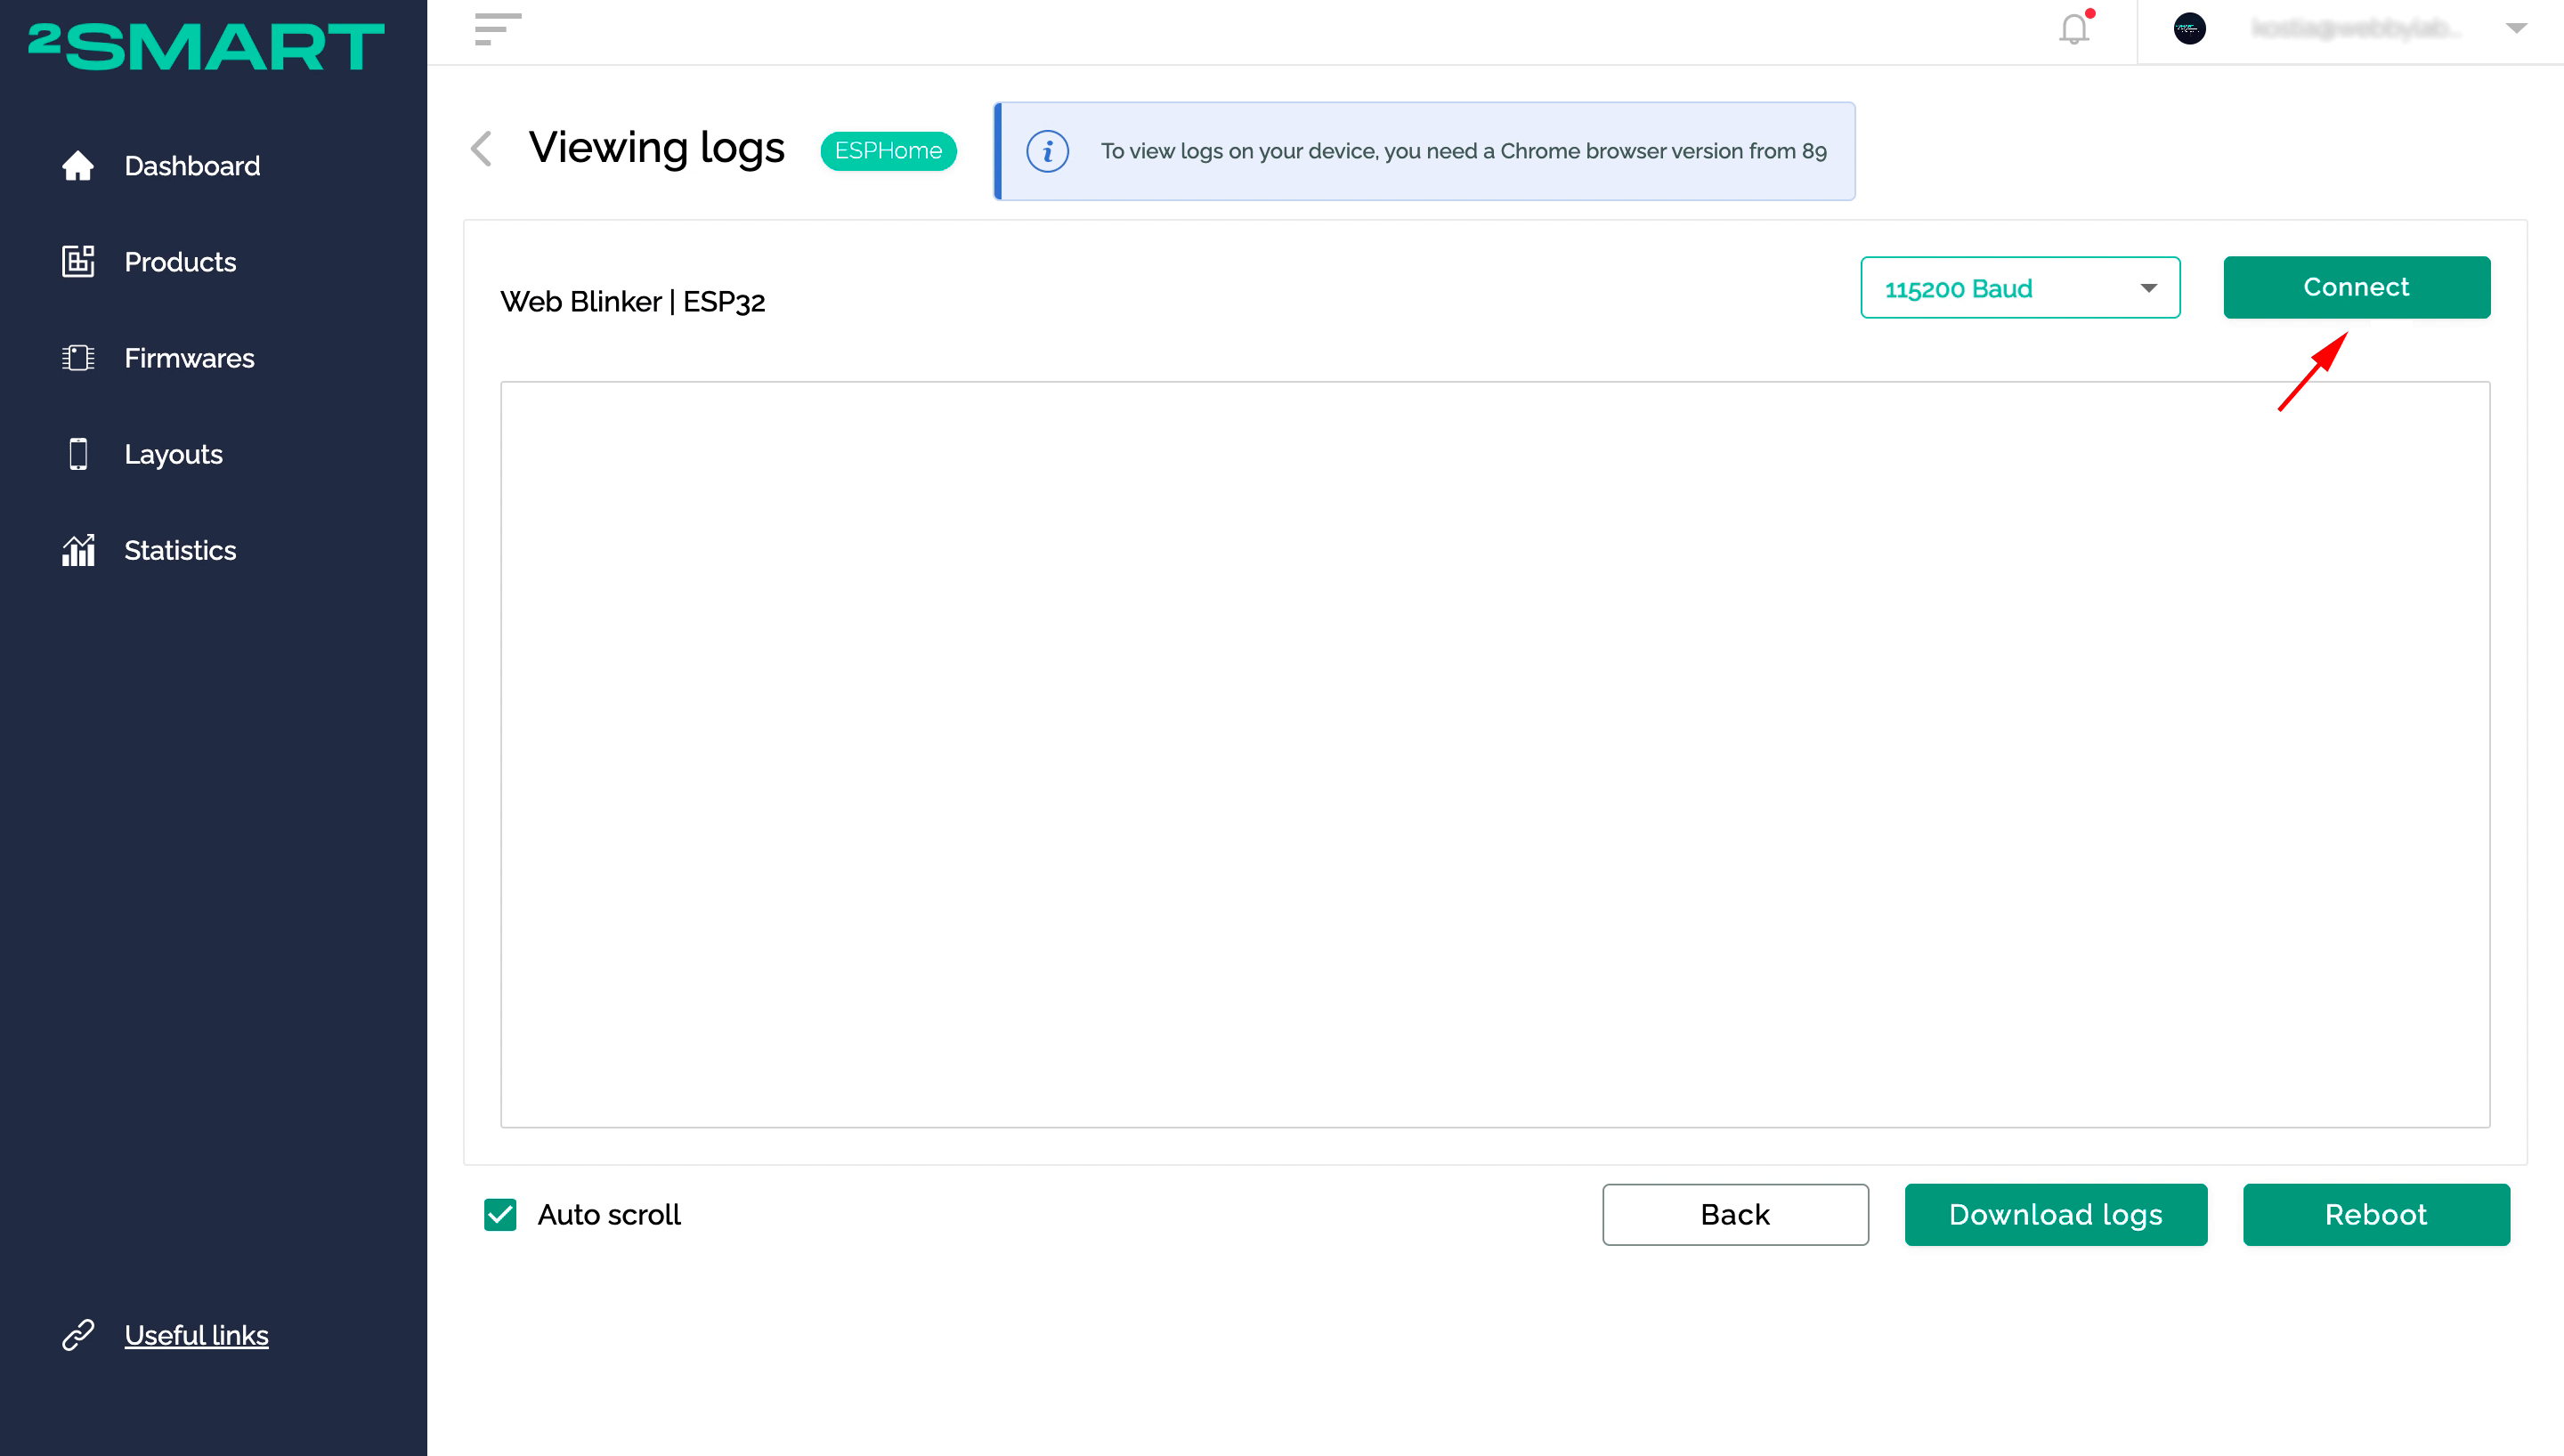
- Click the “Connect” button.
- Select the computer’s serial port to which your microcontroller is connected. Click the “Connect” button.
- The microcontroller logs will appear on the screen.
- Use the “Download logs” button to save them to your PC.

As a reminder, you can also use the feature of managing cloud devices using a browser later on.
What you need to make new features work
Supported browsers:
- Google Chrome from version 89.
- Microsoft Edge from version 89.
- Opera from version 75 to 87 (could be not working some versions, better user previous browsers).
Baud rate:
ESP32 doesn’t support any but 115200 (default value).
Ubuntu:
Need to give access to the serial ports.
Just add your user to the dialout group by command: “sudo usermod -a -G dialout <user>” and restart the system.
macOS:
No need to do anything but If there are no displayed serial ports in the browser, install drivers by this guide.
Windows:
Need to install Drivers. You could choose CP210x Universal Windows Driver.
Don't forget to share this post!
Read Next


 2Smart Cloud for ESP32 microcontroller: functionality and operating instructions")


")


Let’s dive into your case
Share with us your business idea and expectations about the software or additional services.
