
Table of contents:
Highlights at a glance
Editing and Creating Dashboards from the Device Page
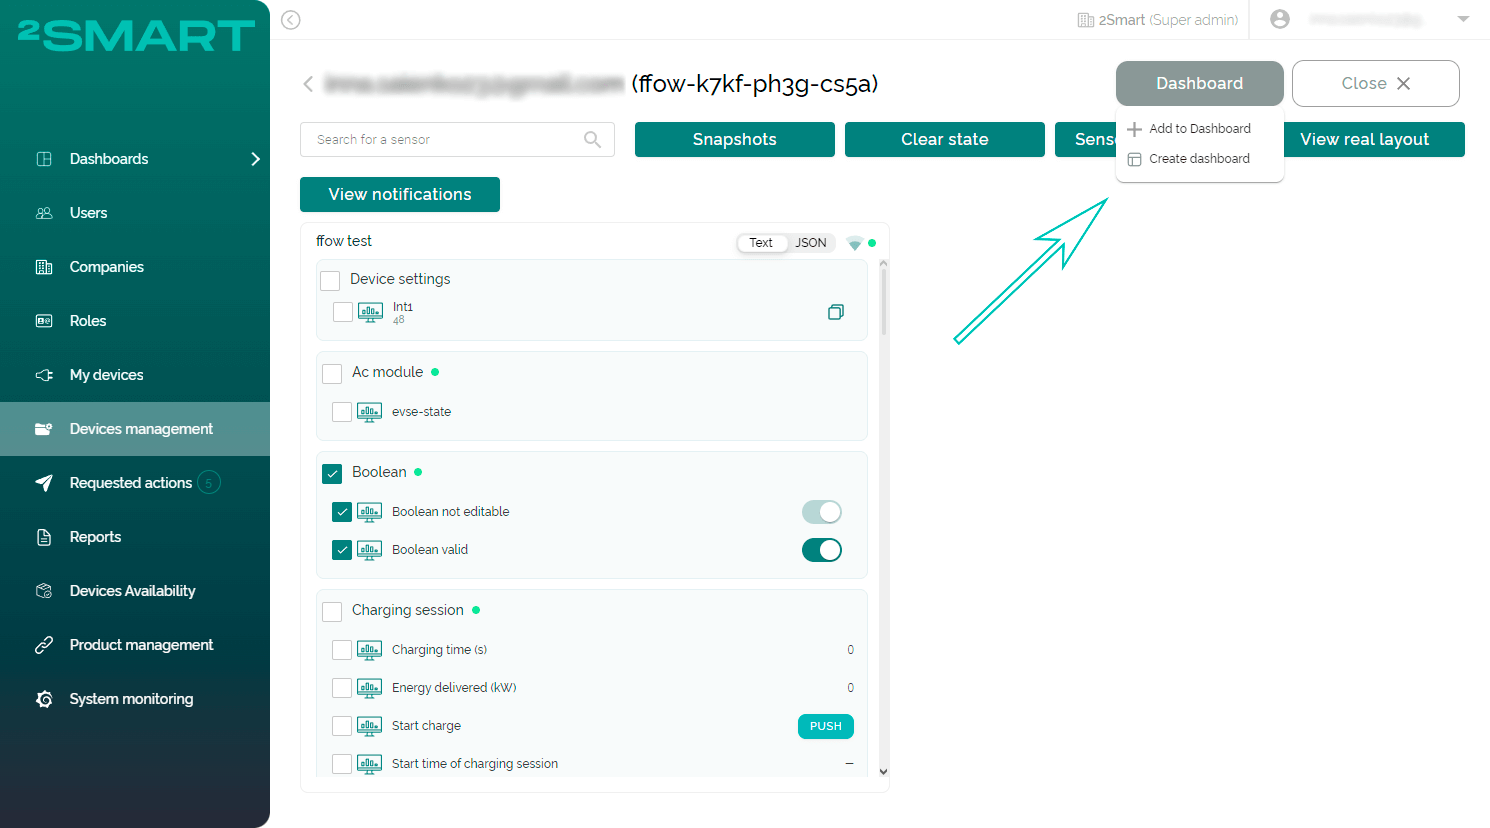
Dashboards in the Business Platform interface are designed for monitoring and managing selected devices. Administrators or users can configure them as they see fit. The latest platform update makes the process of setting up and editing dashboards even easier. While previously creating or editing a dashboard could only be done in the Dashboards section, now it is also possible to do so from the page of a specific device.
Devices with a Paired status in the Devices management section have an Open button. Clicking on it takes the user to a page with a web interface for monitoring and controlling the device. By clicking on the new Dashboard button in the top right corner of the screen, users can use checkboxes to select the sensors of the device they want to add to an existing or new dashboard. Then, they just need to choose one of the two options – Add to a dashboard or Create a dashboard.
Viewing Sensor Value History in the JSON Editor
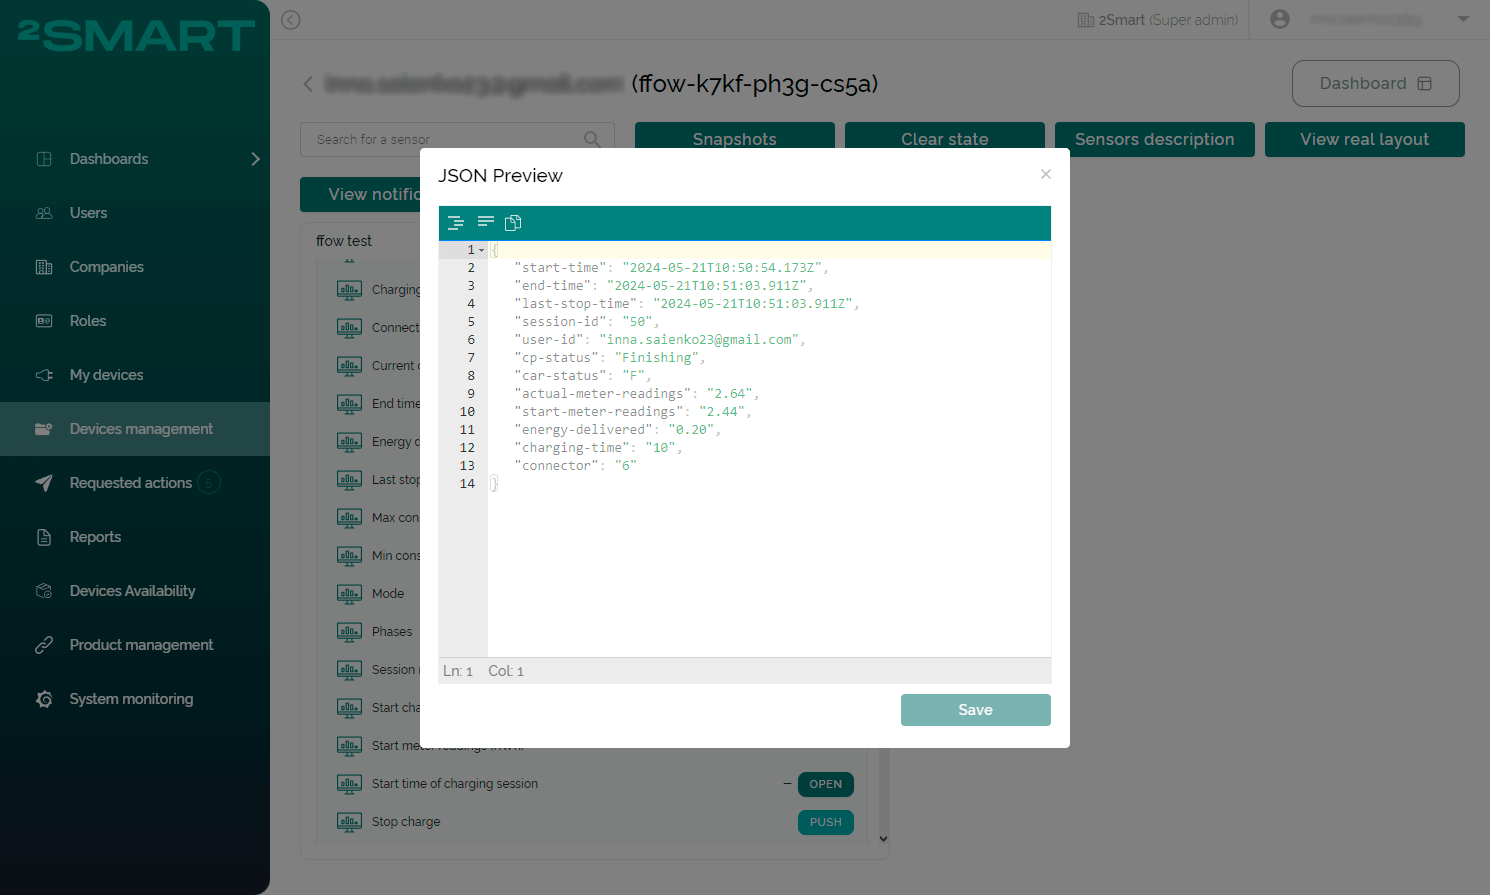
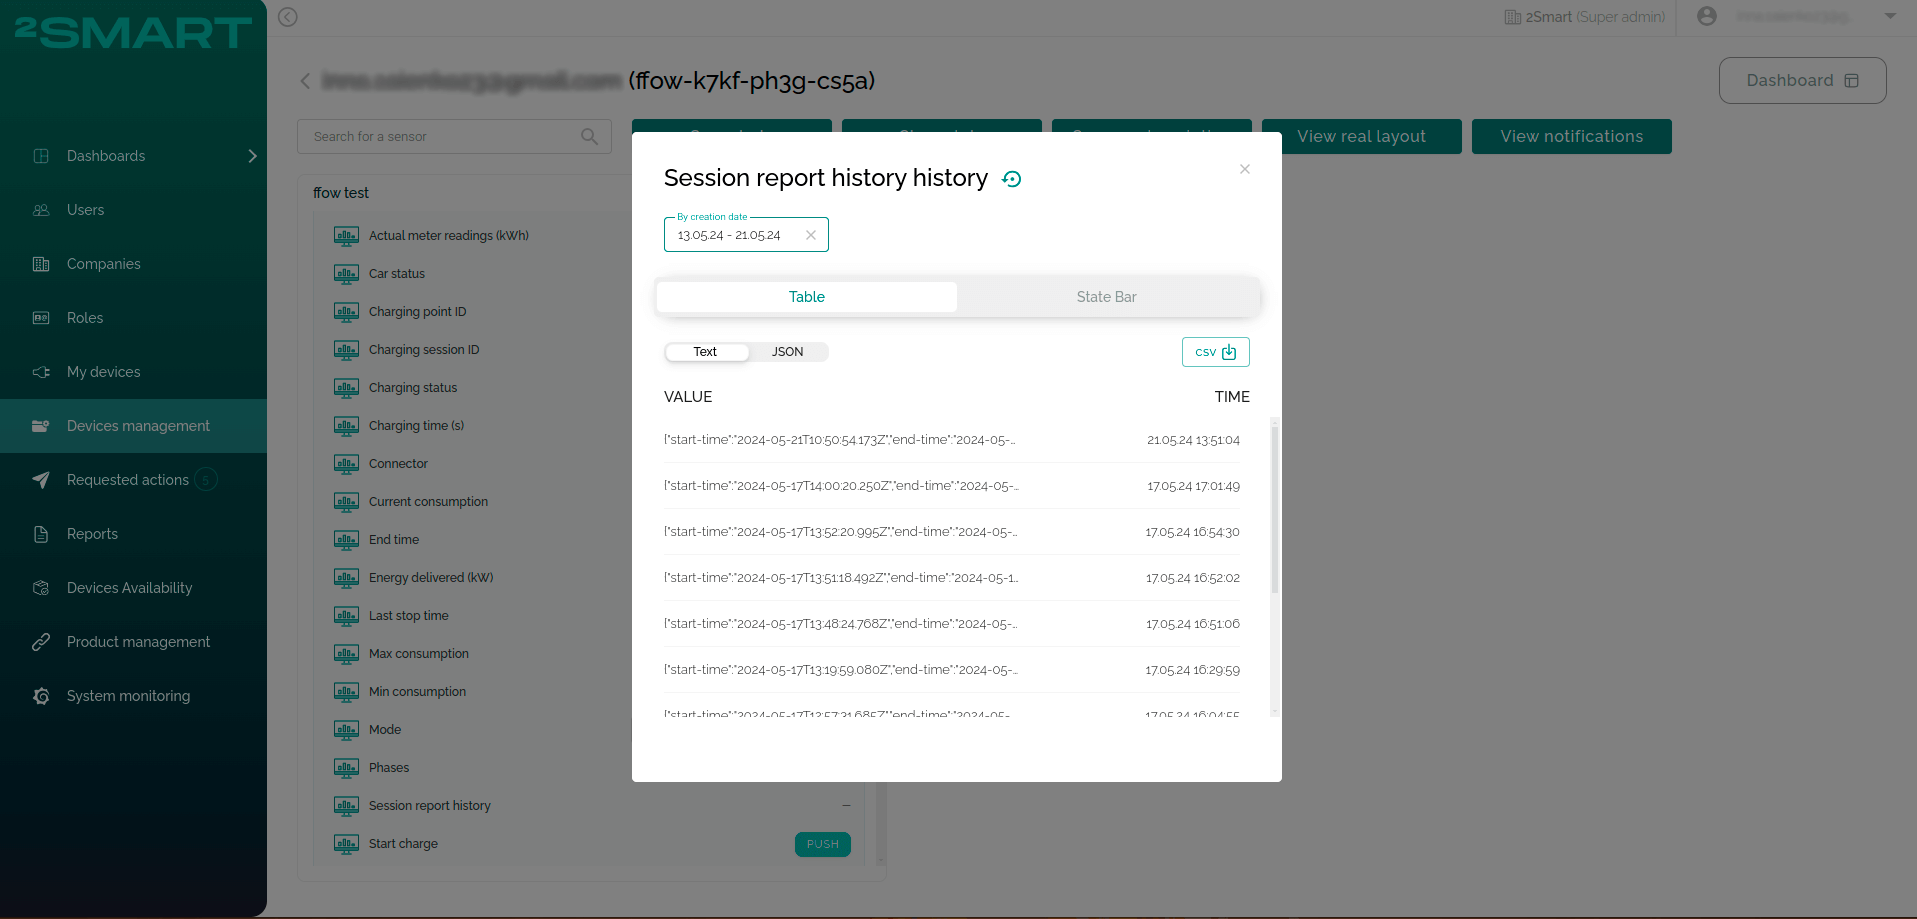
Our device management and monitoring web interface now features a Text/JSON toggle switch. When you activate the JSON option, an Open button appears next to the values of some types of sensors. By clicking this button, you can view the sensor’s historical data in the JSON editor. This makes it easier to review information, especially when the values include multiple lines.
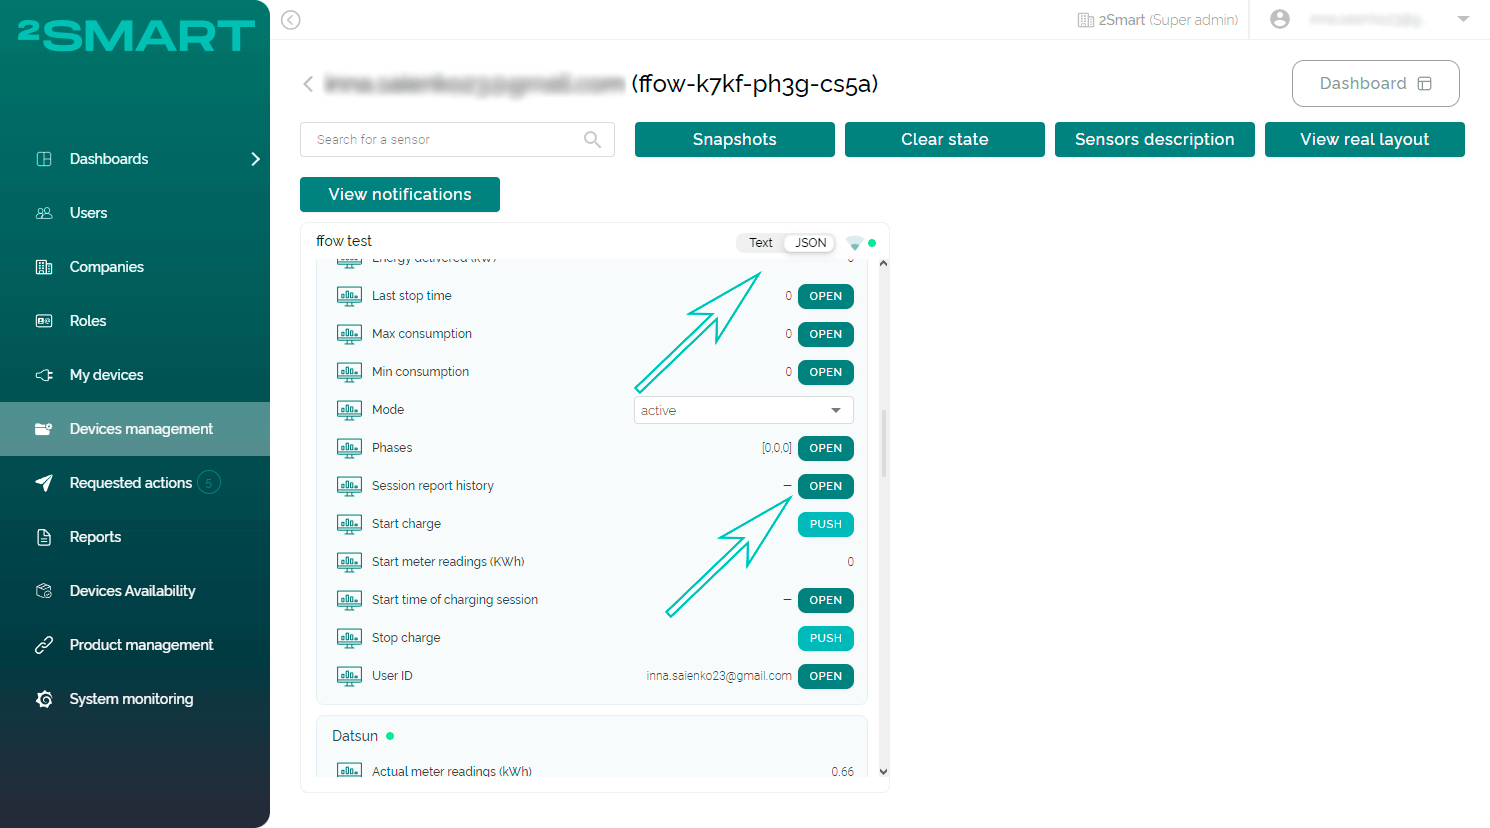
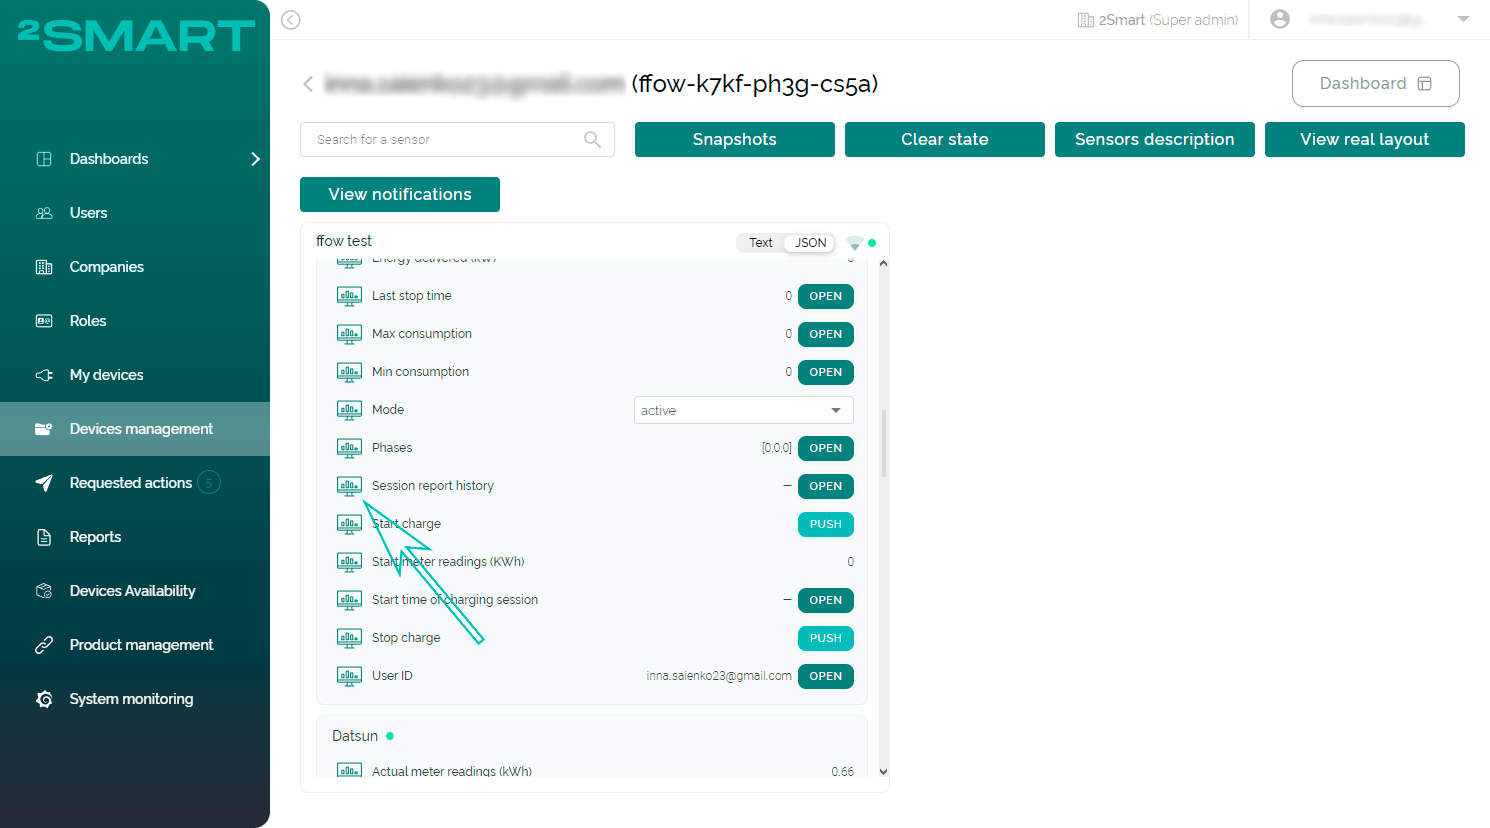
A similar toggle switch is now also available in the modal window for sensor historical values, which can be accessed by clicking the “Open historical data” icon to the left of the sensor name.
Device Transfer via QR Code
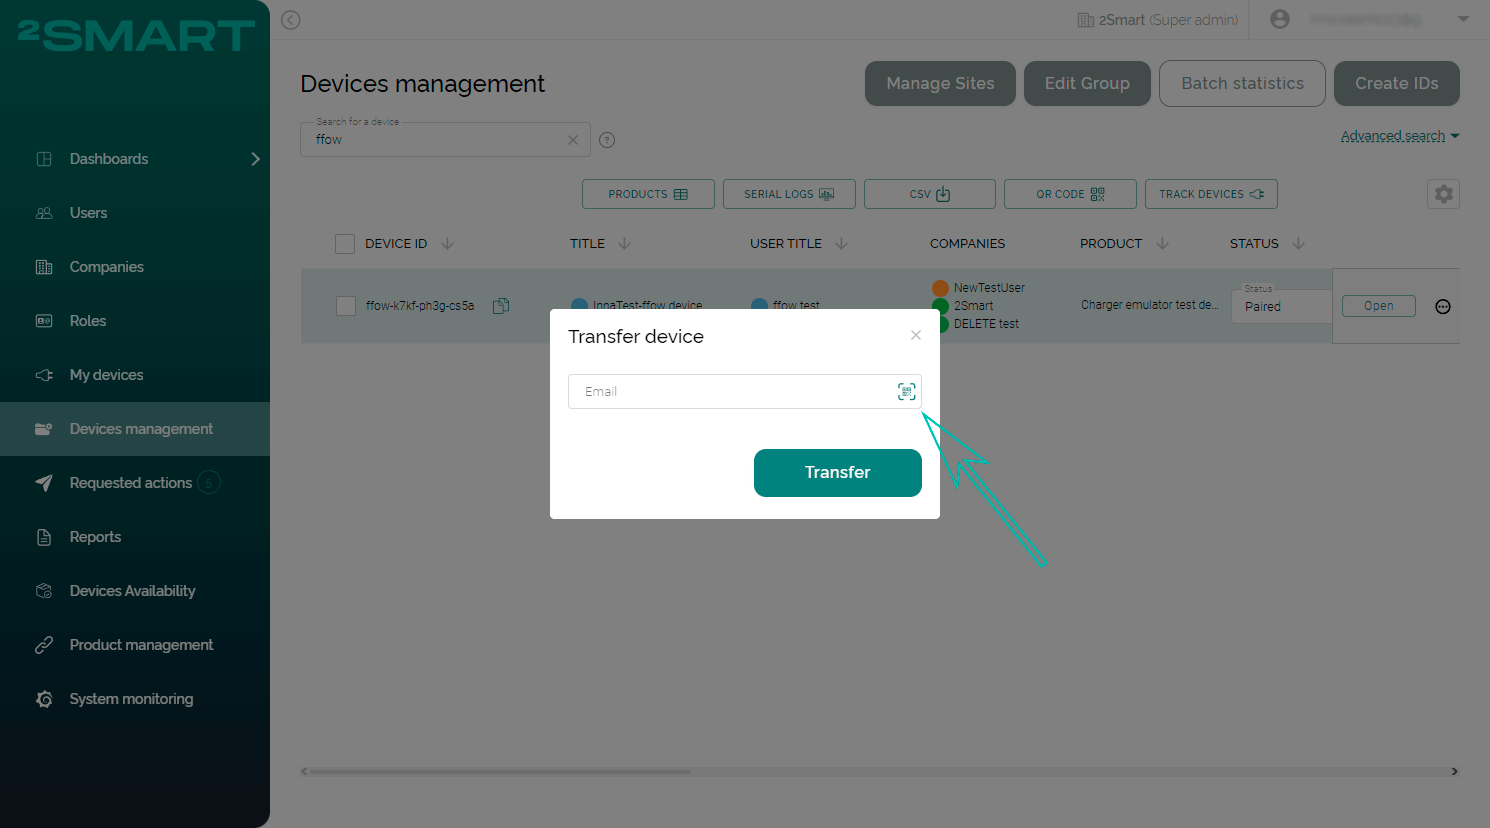
The transfer mechanism allows administrators to assign a specific device to a particular user, making them its owner within the system. Both the device and the user must be associated with the same company. Additionally, the device firmware must support this mechanism, and the device must be in Paired or Restricted status.
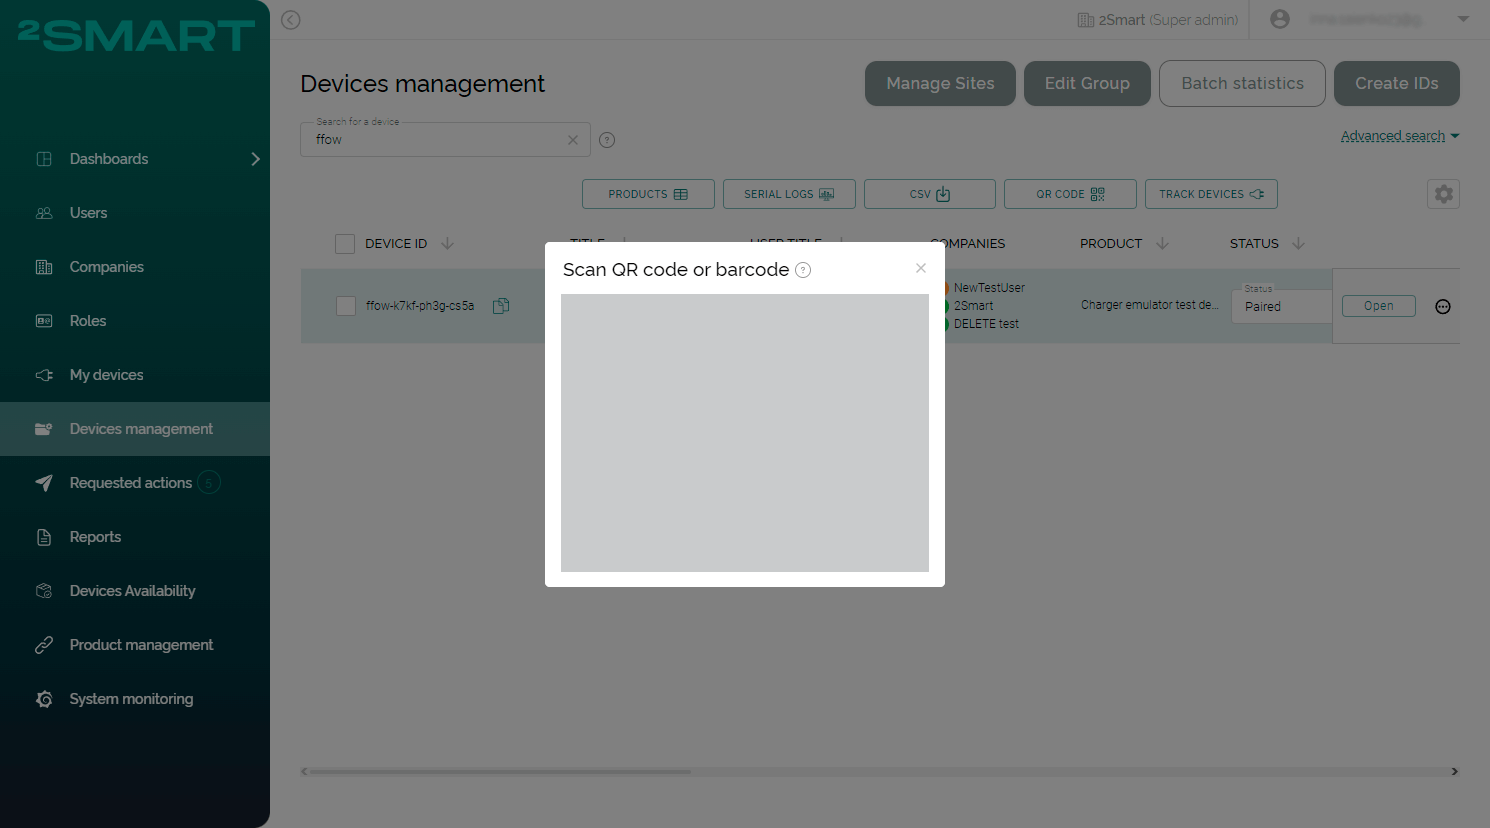
To transfer a device, the administrator needs to select “Transfer device” from the device menu and enter the user’s email address who will become the owner. Now, instead of manually entering the email, administrators can scan a QR code that contains the encrypted email address. Use the icon in the Email field of the transfer modal window for this purpose.
Let’s collaborate
We’re empower your business with our technology expertise
Complete list of updates from January 8, 2024
Features:
- The ability to view historical data in the JSON editor was added.
- The ability to add sensors from the device page to the created widgets on existing dashboards was added.
- The ability to scan QR codes during device transfer in the admin panel was added.
Fixed bugs:
- Tags are cleared and totally re-written on the admin panel after filtering by tag and adding a new one.
- The device is offline on the admin panel dashboard after transferring.
Don't forget to share this post!
Read Next


Let’s dive into your case
Share with us your business idea and expectations about the software or additional services.
